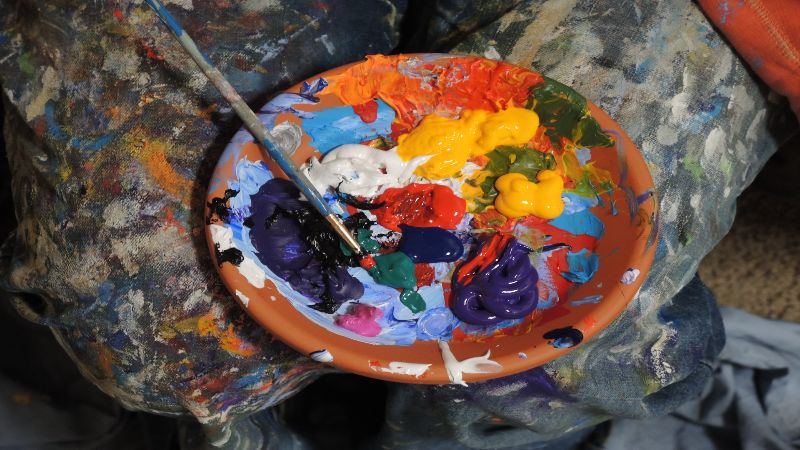
Acrylic paint on leather is a game changer as it offers so much versatility in terms of customization. But How much do you know about this paint when it comes to using it alongside leather?
As I have said, acrylic paints are the most versatile coating products on the market today because they can stick to almost all surfaces. Moreover, they are very adaptable.
You can dilute them with water or modify them with other acrylic gels and pastes to create special effects such as watercolor, gouache, or oil-like paintings. You may not attain these unique characteristics easily with other surface coating media.
The primary focus of this article will be using Acrylic Paint On Leather. I’ll discuss whether or not acrylic paint works on leather and why.
I’ll also explain how to paint and seal acrylic paint on different leather items and the best acrylic paint products for each project.
Can You Use Acrylic Paint On Leather?
 You can use acrylic paint on leather; however, I recommend using products designed specifically for leather items. Acrylic leather paints are water-based, making them safe and suitable to use on leather, unlike oil products that could damage the surface over time.
They are hard-wearing and durable: therefore, they are less likely to chip or crack as long as you prepare the material correctly.
You can also use your regular artist’s acrylic paints on leather if you’re looking for a more affordable option. However, those products will require more preparation and work for you to get the best possible results.
You see, painting leather items is more like staining the material; therefore, you want the paint to absorb into the fabric instead of sitting on top of it.
Regular artists’ acrylics are thick; thus, you must first dilute them to make it easy for the leather to absorb them. Without thinning, the paint will sit on top of the material, where it is easy to scratch off.
Furthermore, regular acrylic paint dries hard, so if it sits on the surface, there is a higher chance of cracking, especially when you flex the material.
Even though “normal acrylic” products are an option, they don’t work well on all leather items. For instance, I don’t recommend using them on clothing items, especially those that require regular cleaning.
Cleaning clothes, especially machine cleaning, sometimes produces a lot of heat and steam, which may cause regular acrylics to degrade faster.
Therefore, if you must customize your wearables, I recommend using acrylic leather paints because manufacturers design them to withstand consistent cleaning.
If you must use the regular acrylics on clothes or any other item that requires frequent washing, I recommend that you stick to hand washing.
Hand washing will give you better control of the process because you can be gentle on the customized areas. This way, you will keep the paint intact for much longer.
Painting leather with acrylics is easy, whether it’s regular or leather acrylic paints. However, the procedures will vary based on the specific item you’re painting – there are different steps for shoes, jackets, leather seats, etc.
The only constant step is that you must seal the paint afterward to produce a seamless finish and keep the colors looking fantastic for a long time.
How to Paint Leather with Acrylic Paint
Here are some of the steps involved in the painting leather with acrylic. Follow them to the letter for the best results and an impressive project.
Step 1: Prepare Your Work Space
- Lay down a tarp. It is usual for accidents to happen when you paint. You could knock over your paint jar or spill a few drops of paint as you mix it. Since you’re using acrylic paint, such messes will be tough to clean because it becomes impervious to water as it dries.
Laying down a tarp or a drop cloth before you start working will help catch the accidental spills, thus preventing you from messing up your floor or workbench. If you’re coloring a small item like a purse or wallet, you can use newspapers instead.
- Ventilate the work area. Paint products often produce certain fumes- even if they are non-toxic paints like acrylics. These fumes could potentially harm your respiratory system, especially if you consistently work with the paint for long hours.
You can stay safe by working on all your projects outside. However, if you work in an enclosed space, you must ensure enough fresh air circulates to protect yourself. Keep all windows open, then run a fan at a slow speed to keep the air moving.
- Gather the supplies you need. It is more convenient to begin your work when everything you need is within arms reach. Therefore, ensure that you have all the paints, brushes, and rags near you so that you don’t have to walk away periodically from the workbench whenever you need something.
Step 2: Prepare the Leather
Disassemble the leather item. If your item has non-leather components that you can remove, detach them before you start to prevent paint from dripping on them.
Even if you plan on painting the removable parts, it is still better to paint them separately from the leather parts for the best results.
Clean the leather. Dirt is the most significant deterrent to paint adhesion; therefore, you must clean the leather before applying the paint. One of the best advantages of leather is that it cleans easily with regular dish soap and water, and you don’t have to use too much energy to do it.
- Combine one tablespoon of liquid dish soap with three cups of warm distilled water in a bowl. If you are painting a larger item like a sofa, you will need more soap, water, and a bigger container.
- Dip a cotton cloth in the solution, wring out excess liquid to leave the rag damp, then wipe the leather to remove grease and dirt.
- Once you’re satisfied that it’s clean, make another wiping pass with a separate clean cloth dampened with distilled water only to remove all traces of the soap solution.
- Afterward, give the leather 60-90 minutes to dry before proceeding.
Note: Don’t immerse your item in water when you clean it. Leather is a heavy material; thus, it will take ages to dry.
Wipe the leather with rubbing alcohol. Most leather items have a shiny glaze on them that would prevent acrylic paint from bonding with them properly.
Thus, you must remove the coating beforehand. Isopropyl alcohol/rubbing alcohol is the best and most preferred product for this step.
- Pour a little rubbing alcohol on a cotton ball or rag, then wipe the surface gently until you notice the leather losing its shine. Keep rubbing until the whole surface becomes dull.
- If you rub for some time and notice no change in the leather’s sheen, you may have faux leather, or the leather manufacturers may have treated your item with a silicone coating. If this is your situation, I recommend that you use a leather deglazer instead. The deglazer is a little more costly than rubbing alcohol, but it is more potent; therefore, it will remove the coating more effectively.
Sometimes, even after using a leather deglazer, you may still see some shiny patches on the surface. Do not ignore them. At this point, you will have to sand the areas to remove the coating.
- Use fine 200-grit sandpaper for this step and use light pressure to avoid making the leather “shaggy.” Scuffing the leather too hard will lift parts of it, and your final paint job may not hide those areas effectively.
- Afterward, wipe the surface with a damp cloth to remove the tiny coating particles. If you leave them on the surface, they will interfere with paint adhesion.
Note: After deglazing, do not touch the leather with your bare hands because you’ll be adding some oil from your skin back to the leather, which beats the point of deglazing it in the first place
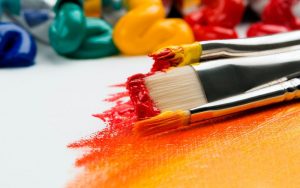
Step 3: Apply the Paint
There are two procedures you can follow when applying paint on leather. You can start painting directly on the leather or formulate a “primer” and then use it before painting your design on the fabric.
If you paint directly, you’ll have to apply several coats of paint to make the color opaque enough, which isn’t a bad thing. However, the second method will first conceal the leather’s natural color, allowing you to use very few coats while painting.
Approach 1
- Pour some acrylic leather paint into a container and stir a little to make the paint consistent. If you want to mix colors to create different shades, this is the time to do it.
- Next, dip a flat brush into the paint and cover the leather in thin, even layers. Use long even strokes and overlap each stroke to avoid missing any spot. Also, paint in the direction in which your item flexes to make the color look more natural.
You will notice that the paint looks a little faint, and the leather’s color will show through in some areas; however, this is normal. The leather will absorb most of that first coat, so the color looks a little dull.
- Allow the layer to dry for about 2-3 hours before touching your item. After the time has elapsed, brush the surface lightly with your fingers to see if it is dry enough. If the surface feels wet or some color transfers to your hand, you must wait longer. To be more precise, look at the manufacturer’s dry time recommendation.
- If the item is ready for a second coat, flex it a couple of times before applying the next coat. This action will prevent the paint from cracking later. Ensure that you flex the leather between each coat for best results.
- Apply the following coats using the same techniques. Keep adding layers, drying them, and flexing the material until the color reaches your desired shade.
- After the final coat, let the leather dry for a full day – do not touch it or move it in any way during this period.
Approach 2
- Start by mixing your acrylic leather paint with some water in a 1:1 ratio. Adding the water will make the paint thinner allowing the leather to absorb it better.
- Stir the paint until you achieve a uniform consistency, then apply it in a thin layer on the entire leather surface. Afterward, allow it to dry for 2-3 hours before proceeding.
This first layer will act like the primers you use when painting other surfaces like wood and metal. It is thin, so it will stick to the leather better, allowing the subsequent undiluted layers to adhere correctly.
It will also block the leather’s color preventing it from showing through the other paint layers. As a result, you won’t need many coats to make your color appear solid enough.
- After the first layer dries, continue painting as usual, following the same steps in approach 1, but this time, use undiluted paint.
How to Seal Acrylic Paint on Leather
Painting leather with acrylic paint is easy enough, but the most important thing is getting the color to remain on the surface. Sure, you can finish painting your item and leave the paint as it is. However, the color will be exposed and degrade pretty quickly.
The best way to delay or prevent the degradation is by sealing the paint after it dries. A sealing coat will act as a barrier between the paint and damaging elements, keeping it from cracking and fading over time. Additionally, the sealant will also make the paint color pop even more.
The best time to apply the sealant is after the acrylic paint dries, and I recommend doing it immediately for the best results. Here’s the detailed procedure on how to seal acrylic paint on leather.
Step 1: Clean the Painted Leather
When you leave the final coat of paint to dry, dust and debris will settle on the leather surface. You may not see the particles with the naked eye, but they will be there. For this reason, you must clean the painted surface before applying the finishing coat.
Otherwise, the dust will get trapped between the paint and the finishing coat, ruining the whole look. It will also interfere with the adhesion of the coat, which is no better.
- If you apply the finisher precisely 24-48 hours after applying the paint, the dust may not be embedded too deep on the surface. Therefore, you can brush it off lightly with a soft paintbrush, and you’re good to go.
- If you let the paint sit for longer, say a week or so, it is better to wipe the surface lightly with a damp cloth for the best results.
Step 2: Apply Leather Finisher
The best sealant to use on acrylic leather paint should also be acrylic-based, and the best product I recommend is the Angelus leather acrylic finisher. Artists widely use it worldwide, and it provides excellent results all the time.
This sealant comes in two application forms; brush-on and spray-on. Some painters prefer the spray version because it is easier to use and gets the work done faster.
However, I’ve received feedback from some of them claiming that they’ve had some problems with it. For this reason, I always recommend the brush-on finishers.
Don’t get me wrong, the spray versions are okay, but they are better if you want your paint job to be temporary.
To seal the paint:
- Mix equal parts of the finisher and water in a mixing bowl to dilute it slightly. Diluting it will make it stick to the painted leather much better.
- Next, apply the diluted mixture in thin, light coats using a wool dauber or a soft flat paintbrush. Be careful not to slather on the layers too thick, or you’ll ruin the entire project.
- Allow the coat to sit on the surface for about 10 minutes, then apply another coat. Keep building up the finisher in 10-minute intervals until you have about 15-20 coats.
- Afterward, allow it to dry for 24 hours.
Step 3: Apply a Waterproofing Sealer
After the finisher dries, you can leave the painted leather as it is because it already has enough protection. However, if you want to protect it further, I recommend applying a waterproofing sealer. I especially recommend this for items you’ll use and regularly wash, such as leather shoes, jackets, etc.
Waterproofing sealers also come in both brush-on and aerosol versions, so choose the convenient one for you. Use the same approach you used for the previous step to apply it.
Here’s How to Seal Leather With Acrylic Paint:
Alternative Mediums for Sealing Acrylic Paint on Leather
Apart from leather acrylic finishers, there are alternative methods available for sealing acrylic paint on leather. They may not be as effective as the acrylic-based versions, but they are convenient for painters with a tight budget.
They are also perfect for projects where you don’t intend to keep the artwork on the leather for good. Here are some of the options available:
-
Fabric Medium
Fabric medium is not a sealing agent, but it works perfectly to get acrylic paint to stay on the surface for a long time. We apply the regular acrylic finishers after applying the paint. However, you have to mix the fabric medium into the paint before applying the color for it to work.
This product improves the adhesion of the paint, giving you the option of skipping the finisher. Even though fabric medium works, it will not get the paint to stay on the surface for good. However, the color will remain on the leather longer than pure acrylic paint without a finishing coat.
-
Hairspray
Painters have used hairspray as an alternative acrylic paint sealer for a long time. However, it has only been on pieces that don’t get much use. This method will only be effective on leather pieces that do not move much.
For instance, you can paint a design on a decorative leather couch and use hairspray to seal it. The couch material is rigid and will be still most of the time; therefore, there’s very little chance of the paint coming off.
I advise against using hairspray to seal paint on leather clothes or shoes because you use these items regularly. The minute you wash them, the hairspray will come off, and the color will remain exposed.
Can You Use Acrylic Paint On Leather Shoes?
Yes, you can. Acrylic leather paint is very flexible; therefore, it can withstand the constant movement and stretch caused by walking.
You can use it to refresh the fading color of an old pair of leather shoes or add more color to a specific detail when you want it to stand out more. You can also use it to alter the color of a pair if buying a new one is out of the question.
Acrylic paint is perfect for leather shoes for a couple of reasons. First, it is water-resistant; thus, you won’t have to worry about the color bleeding when you accidentally step into a water patch or wash your shoes.
It also dries fast; therefore, you can customize your pair and rock them in as little as 72 hours.
Acrylic paint also comes in various colors, giving you several options to select. Finally, the best thing about acrylic leather paint is that it is easy to use.
It doesn’t require complicated application techniques, making it easy for beginners to customize their shoes without paying for professional services.
How to Paint Leather Shoes With Acrylic Paint
Steps involved are:
Step 1: Clean the Shoes
Before applying paint to your shoes, you must ensure they are clean. You must remove any mud and traces of dust that may interfere with the paint’s adhesion.
There is no complex way of cleaning leather shoes before painting. Simply wash them as you do regularly, then let them dry before starting the customization.
Step 2: Wipe the Shoes with Isopropyl Alcohol/Rubbing Alcohol
Leather shoes have a wax or oil coating on them. It is the thing that makes them have that familiar soft glow, and you must remove it to make the paint stick.
- Wet a wool dauber with rubbing alcohol and wipe the shoe area you want to paint. If you’re going to alter the color of the whole shoe, use a clean cloth instead of a dauber to work faster.
- If the coating doesn’t come off, you may have faux leather shoes. Shoes made from faux leather have a layer of silicone or a polymer, which is harder to remove than oil or wax. For this reason, the rubbing alcohol won’t work; therefore, you will need a leather deglazer instead. When you use a deglazer, you’ll notice the color of your shoes changing slightly. This change shouldn’t worry you because you’ll be painting them anyway.
Step 3: Apply the Paint
Before you start painting, mix all your paint beforehand. Ensure that you mix one large batch to ensure that the paint you use on both shoes has the same consistency and shade.
You may think that mixing one large batch of paint is a waste, but you’re mistaken. If you mix the batches for each shoe separately, you may combine different ratios of each color or end up with varying consistencies of paint in each batch.
As a result, each shoe could have its own shade of color, which will look weird, or the paint won’t dry evenly, causing it to crack faster on one shoe than the other.
As you apply the paint, put on thin, even layers to avoid leaving unwanted textures on the shoes. Leather is a very smooth material; therefore, any brush marks caused by thick paint will stand out.
As you apply the paint, follow the natural direction of the stretch of the shoe. Also, stretch out the shoe’s crease so that the color does not settle in the burrow areas.
If you’re creating a design with different colors, it is best to use one color at a time instead of blending them like you do when working on a canvas.
Furthermore, I recommend using shading techniques to add shadows and highlights after the solid colors dry. Doing this will add some dimension to your design.
If you’re applying several coats of paint, give each layer at least one hour to dry before applying the next one for the best results.
Step 4: Apply Sealing Coat
Use only an acrylic leather finisher for the best results. This is the most crucial step of painting shoes because it will ensure that your customization lasts. It will keep the paint waterproof and keep the color from cracking or fading quickly.
- Mix equal parts of the finisher and water to dilute it, then apply several thin coats using a wool dauber. Afterward, allow the seal to dry before moving the shoes to avoid ruining them. It may take 72 hours for both the paint and the finisher to cure correctly; therefore, be patient because it isn’t a long time.
How to Keep Acrylic Paint From Cracking on Shoes
-
Apply Paint in Thin Layers
The one mistake that painters make when customizing shoes is applying thick layers of paint. Their usual reason is that they want to finish painting as quickly as possible so that they can wear the shoes.
Sure, when you apply paint thickly, you will not need a lot of coats; hence you will finish fast. However, thick paint will crack as soon as you make the first step – even if you seal the paint!
-
Use Paint from A Single Brand
It is normal to have a design that requires more than one color when customizing shoes. As you shop, you may realize that a particular brand has all the colors you need except for a few.
In such a case, some painters buy the missing ones from other paint brands. I strongly discourage that.
You see, paint manufacturers may make paints in the same color, but their methods or ingredients may differ, even if it is just a little. This slight difference may cause the products to dry at different times or develop different shades when they dry.
So, if you use them both on one shoe, the paint that dries faster will interfere with the other brand’s drying time, which could cause the paint to crack faster than usual. It is even worse on shoes because the tension created as you walk will make the paint deteriorate quickly.
-
Do Not Use Heat
Another mistake I’ve seen people make when customizing shoes is using heat to dry the paint faster. Acrylic paint dries quickly naturally; therefore, it will crack if you hasten the process.
Applying heat doesn’t necessarily mean taking your blow drier and pointing it at the wet paint. Putting the shoes out in direct sunlight or cranking up the heat in your workroom will have the same effect.
So to be safe, allow the paint to dry naturally in conditions specified by the product’s manufacturer.
Can You Paint on Leather Jackets With Acrylics?
Many people worry that paint, especially acrylic paint, won’t last on leather jackets because they are not as heavy as other leather items like leather couches or bags.
They fear that the paint will crack and peel off when you fold or wash the jacket. However, I assure you that acrylic leather paint is the best product you can use to customize that plain leather jacket you’ve had for years.
If you’ve ever bought a pre-customized jacket, you may have noticed that the color stays put despite the regular washing and folding. Most of those designs were hand-painted with acrylic paints, which is definite proof of the product’s longevity.
Many beginners who have never worked with leather before always purchase oil, watercolor, or fabric paints because they classify leather as fabric.
Leather is indeed a fabric, but it is a unique material, so manufacturers had to create specialized products that work well on them: acrylics. The other regular fabric paints corrode the material, run, or fail to show well, which is a major inconvenience.
When painting your leather jacket with acrylic paint, you have various options. You can paint the design by hand with a paintbrush or use tools like rulers or stencils and tape to help guide you.
Basically, it doesn’t limit your creativity, and the various colors that manufacturers create make the work even more enjoyable.
Best Acrylic Paint for Leather
Here are some of the best acrylic paints for your leather
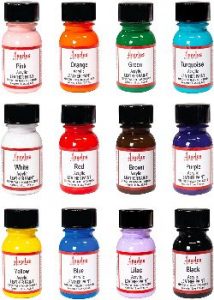
Angelus Leather Paint
Angelus leather paint is one of the finest leather coatings you will find on the market today. Its manufacturer has been producing these products and other leather-specific coatings for decades; therefore, you can be sure that it is an excellent product.
The angelus leather paint comes as a set of 12 once-ounce jars of different colors, including yellow, red, blue, green, turquoise, purple, black, and white. Basically, it has all the primary colors you’ll need, and you can mix them whichever way you want to create unique shades for your projects.
The paint set of 12 is perfect for beginner painters who are still practicing and only need a little paint. But if you want more, you can also find individual jars with more than an ounce.
 However, if you buy individual jars of all colors, you will spend much more than if you bought the paint set at once.
The manufacturers of this paint label all their jars clearly, allowing you to identify the paint color and sheen without a problem.
Furthermore, the color on the outside of the jar exactly matches the product in it, so you won’t experience any surprises where the paint color doesn’t turn out as advertised.
This paint is versatile; therefore, you can use it to customize all your leather items, from seats to shoes to wallets, without a problem.
Buy Acrylic Paint Here
U.S Art Supply Leather Paint
This product comes as a complete kit, perfect for anyone looking to start or keep growing their art design craft. The manufacturers designed it mainly as an airbrush type of paint; therefore, it is thin and perfect for painting leather items.
The painting set comes with 12 bottles of quality acrylic leather paint, each one ounce and in different unique colors. Some of these colors include hot pink, coffee brown, grass green, white, deep purple, and sapphire blue.
Apart from the paints, the kit also includes an airbrush reducer, extender base, and an airbrush cleaner, so you don’t have to purchase them separately.
 Even though the U.S Art Supply Leather paint set is primarily for airbrushes, it is still versatile enough to use with a paintbrush. This feature is excellent because airbrush painting requires specific skills and meticulousness that most beginners lack.
This paint set is available in three compositions:
- The primary colors set – contains the standard primary colors that you can mix to create other colors and shades.
- The pearlized colors set – produce a shiny pearl-like finish
- The transparent color set – contains colored liquids, but you can still see through them.
Fiebing’s Acrylic Leather Paint
This product is more of a leather dye; therefore, it gets absorbed into the fabric’s fibers instead of just sitting on the surface when you apply it. Manufacturers package it in 2-ounce containers, and it is available in eleven colors, including red, turquoise, blue, dark brown, black, and orange.
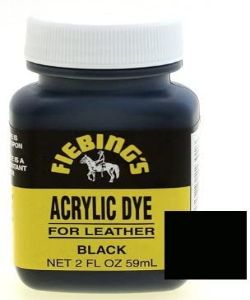 Fiebing’s acrylic leather paint is water-based, which is gentle on leather. It also dries quickly and can last longer than most paints without peeling or cracking.
Unlike most leather paints, this product is thicker; therefore, you must dilute it with water before applying it to leather for best results.
Even though it is soluble in water, Fiebing’s acrylic leather paint becomes water-resistant when dry, making it perfect for protecting your leather items.
Buy Acrylic Paint Here
How to Seal Acrylic Paint On Faux Leather
Sealing acrylic paint on faux leather is pretty much the same as sealing paint on actual leather. The best product for this purpose is an acrylic leather finisher, and you must apply it after the paint dries fully for the best results.
Since faux leather isn’t actual leather, you can get away with applying any other type of acrylic leather finish because it won’t affect the material.
You’ll need a product that is water-based and non-yellowing to prevent it from altering the color of your acrylic paint. You will also need a clear coat that doesn’t show brush strokes to avoid ruining your project at the last minute.
One of the most common acrylic sealers is mod podge. It is a glue, finish, and sealer created for art and craft projects known as decoupage.
Decoupage is an art where you cut out shapes from paper or fabric; then, you use mod podge to stick them to the surface. After it dries, you’ll add more layers of mod podge over the shapes to seal the art.
Mod podge is water-based and non-toxic, making it excellent for sealing acrylic paint on faux leather.
The other product you can use to seal acrylic paint on faux leather is a polycrylic clear finish. Painters generally use this product to seal paint on surfaces like wood, but you can also use it on faux leather because it is a synthetic material. It is also a non-toxic water-based product that lasts longer than mod podge.
Polycrylic clear finishes are flexible, making them perfect for leather. However, I advise against using them on items like shoes or clothing because they will crack faster than the other acrylic leather finishes.
For this reason, I only recommend using them on faux leather seats and other house decors.
Conclusion
Leather is one of the most fantastic fabrics to work with because you can make virtually anything from it. You can make shoes, clothes, house decors, car seats, etc. It is also very customizable, considering you can paint on it; therefore, most people want to know if you can use….
Acrylic Paint On Leather
It is possible to use acrylic paint on leather because it is water-based, flexible, and gentle on the material. Paint manufacturers today even design products specifically for leather to suit its unique properties.
The other standard acrylics also work excellently on leather but not on all leather items. For instance, you can’t use them on shoes and clothes because they cannot withstand the regular washing.
The trick to prolonging the life of acrylic paint on leather is by sealing the paint after it dries. Use acrylic leather finishers because manufacturers created them solely for that purpose.
If you do not have the specified product, you can use other alternatives like hairspray, fabric medium, or mod podge. However, these alternatives do not last as long; therefore, it is better to stick to what leather customizers recommend.
I hope this clears up all things about acrylic paint on leather. Please feel free to reach out in the comments if you need clarification on anything.