Most surfaces need priming before painting unless they are in good condition or have an existing paint finish. As such, you only need to sand the project lightly and apply a similar finish coating.
On the other hand, new or bare surfaces are highly porous and need sealing before painting. Thus, a primer comes in handy by preventing moisture from entering the wood and masking any blemishes.
More specifically, wood primer is an undercoat preparing lumber for its finish coat. It prevents wood tannins from bleeding and staining the paint.
But woodworkers wonder whether its functions can stretch to walls. So, check out the discourse below: Can Wood Primer Be Used On Walls?
You can use wood primer on walls. Ensure it dries to the touch before adding subsequent primer layers and the top coat. In addition, clean the surface, fill gaps or holes, and sand it lightly to ensure the paint adheres appropriately.
Generally, there is so much to learn about wood primers and painting walls. Moreover, priming the surface is only a section of the project. Thus, read the write-up below for more insight into wood primers, painting walls, and how to deliver a professional, durable finish.
What Is Wood Primer?
A wood primer is a thin film applied to surfaces before painting. It is a preparatory coating on materials that fill gaps and cracks, making them less visible. As a result, you deliver a smooth surface for the paint.
The formula is often transparent, but you can color it if desired. In addition, it has pigments or dyes that give a more colorful and decorative surface. Thus, you do not have to get stuck with a straight white primer.
Most primers are compatible with metal, wood, concrete, plaster, and other surfaces. Further, they deliver superior protection against harsh chemicals in paint that damage the surface.
The undercoat also improves adhesion, increasing paint durability and providing additional protection from elements, such as moisture.
Wood primers come from three primary components: Resin, pigment, and solvent. The resin size used in the formula determines how thickly it spreads over the surface.
Also, we have different primer types for various painting applications and materials. They include water-based for oil-based finishes, latex for latex paint, and even flammable ones for electrical wires.
Each primer product has its specialization, requiring you to choose a product compatible with your project. Moreover, the product label should indicate whether it’s for interior or exterior use and its durability ratings.
In addition, test out the formula before deciding what works best for you. Below are the primers explained to ease decision-making.
-
Oil-Based Primer
Usually, oil-based primers are thicker than their water-based counterparts as they have more pigment. They also have more metal filters, making them shine and providing better moisture protection.
However, the primer needs 24 hours to dry. Thus, most painters shy away from it for urgent paint jobs. In addition, you need a sponge roller, a roller with a nap, or a rolling brush that does not leave brush marks for a more professional finish.
-
Latex Primer
This formula, a water-based primer, coats wood, masonry, metal, and drywall to promote excellent paint adherence and create a uniform finish. Moreover, it protects the surface from stains, dirt, and moisture.
The primer needs three or four hours to dry, making it a darling to most painters. In addition, it is good for use for 30 days, and the paint will stick to the surface with no issues.
Further, the best time to use the formula depends on the woodwork’s condition before painting. For example, if the surface is in good condition, you can apply the primer immediately after cleaning with soap and water.
-
Urethane Primer
This formula is ideal for various applications, including wood, plastic, and metal. As a result, you can comfortably use it for cabinets, floors, auto body work, and furniture refinishing.
Moreover, urethane primers dry within 24 hours at 70 degrees Fahrenheit, and you can paint it after a 30-minute drying time.
However, the drying duration lengthens or shortens depending on the application technique and existing temperature and humidity conditions. Hence, choose a fair-weather day for a quick drying time.
-
Shellac Primer
Generally, shellac primer is organic and dries quickly. Even better, you can paint the surface in an hour when in a hurry—but letting the coat dry for at least two to three hours or overnight guarantees a better outcome.
Also, sand between Shellac primer coats to smooth out bumps and prepare the workpiece for painting.
You can apply the formula directly to wood, metal, concrete blocks, plaster, and drywall. In addition, it is excellent for previously painted surfaces, such as oil-based or latex paints.
Role of Primer In Painting
Primarily, a primer helps treat the surface before adding a topcoat and ensures maximum adhesion. Hence, the paint job lasts longer.
Even better, the formula has other uses in painting applications. They include
- Facilitates Major Color Changes
Priming surfaces before painting helps deliver a darker finish. For instance, high-build acrylic latex formulas hide vivid hues like yellow and red.
Besides, these wall colors are tough to conceal, requiring two to three primer coats for a successful result.
- Concealing Stains on Surfaces
Interior walls need spot priming to remove stains and blemishes, drywall repairs, or extensive patching.
So, consider oil-based primers to neutralize interior wall stains caused by smoke, wood tannin bleeding, mildew, and water damage.
Alternatively, seal in heavily stained walls with solvent-based primer and sealer or a Shellac primer.
Also, remember that stain blockers are the best for drywall facing water damage or rooms with smoke stains.
But always check the extent of the damage, as priming can only do so much. So, replace damaged drywall in case of significant flooding damage.
- Prepares Glossy Surfaces and Oil-Based Paint for Painting
Lightly sand and prime walls previously coated with oil-based paint or a glossy finish. The primer roughens the glossy surface and delivers the needed paint adherence.
Fortunately, painters rarely use oil-based paints. Thus, you will often be coating over water-based paint and not need a primer.
Moreover, painting glossy finishes requires more expertise and patience than home improvement projects. Hence, get a professional to help you rather than try it yourself.
- Kills Mold and Mildew on Surfaces
Solvent and oil-based primers kill mold spores and prevent future mold growth on the project. However, wash infested surfaces with water and bleach prior. This way, you’ll work with a clean and treated surface.
- New Drywall Priming
Apply a primer on new drywall or recently skim-coated surfaces to seal them and facilitate uniform and consistent paint absorption.
Luckily, these products are water-based with low or no VOC, making them indoor applications.
However, we have scenarios that do not need a primer. For instance, previously painted surfaces in good condition do not need priming.
Also, interior and exterior surfaces without peeling and chipping signs save you the priming stress.
Likewise, modern quality interior and exterior paints are self-priming, meaning they naturally adhere to painted surfaces without a primer coat.
Finally, eggshell or flat finishes on ceilings and walls do not need primers if they are smooth and clean. But still, lightly sand and primer them before painting glossy finishes or repairing drywall.
When seeking an excellent paint job, always remember the importance of a primer. In addition, although the process seems unnecessary with no visible purpose, you cannot underestimate the pros of this step.
Pros of Wood Primers
- Superior Paint Adhesion
Typically, adhesion is the paint’s capacity to stick to the surface. Further, various materials react differently to paint, affecting how well they avoid future peeling and flaking.
Thankfully, wood primers stick perfectly to all surfaces and are significantly better for paints. So, the final paint layers have better chances of enduring harsh environmental conditions for long durations.
The above aspect is also essential when painting surfaces that do not react well with your chosen paint. But do your research and get the most suitable primer and paint for the project.
- Primer Allows You to Paint Over Dark Colors
Darker tones show through the paint when working with a dark-colored workpiece. But not to worry! Primers solve this problem by providing a light-toned surface compatible with any paint tone.
Moreover, the primer can cover the darkest surface, allowing a far superior outcome when switching to a lighter hue. As a result, you deliver a consistent and more uniform finish.
- Fewer Coats Needed
Wood and drywall are porous, meaning they immediately absorb paint during application. Well, though this aspect is pleasing to a painter, it inevitably requires you to have more coats to deliver the desired color.
Fortunately, a primer seals the porous material, allowing you to paint it without using excess coats.
- Better Appearance
Primers deliver a perfectly smooth and uniform surface as they are thicker and heavier than thin paint coats. As a result, they conceal some natural features, including joint seams, wood knots, and other irregularities.
- Better Paint Durability
A primer seals surface fissures and cracks, preventing air pockets or moisture from forming and compromising the paint finish.
Furthermore, prime large paint jobs you do not want to repaint soon.
So, unless a qualified painting expert advises against using a primer for the project, always use it for surface preparation.
Cons of Wood Primers
- More Time-Consuming
Painting a room or even an entire house takes time. Further, you must wait for the primer to cure before applying the first paint coat. As a result, allocate enough time for priming and painting the project.
- Mistakes More Likely
Unfortunately, any time a project involves more steps, it becomes more complex. Even more, greater complexities come with greater room for error.
Therefore, although you can conceal primer mistakes with paint, some issues show through the final finish.
How to Prime and Paint a Wall
It is tempting to pick up a brush when the walls desperately need a new color palette. However, before you pick any tools, consider a few painting fundamentals that save you valuable time and effort.
For example, surface preparation is critical to a smooth, seamless finish. So, only paint after cleaning and priming the wall.
Step One: Prepare the Work Area
- Remove all Wall Accessories
Start by locating outlet covers, thermostats, knobs, light switch faceplates, and other items on the walls and remove them. Starting with an obstruction-free surface delivers more efficient work time.
You can unscrew and lift off most accents, so clearing won’t be that hard. But keep track of small pieces such as separators, screws, and faceplates, and use painter’s tape to cover accents you cannot remove.
- Clear the Work Area
Store appliances and other belongings in another room until you finish the project. Further, you can scoot these objects from the wall if space is an issue.
However, cover the remaining furniture or items with a plastic sheet or drop cloth to prevent accidental spills.
Remember, paint is virtually impossible to remove from upholstered fabrics. So, safeguard the furniture even if it appears farther from the wall.
Also, unplug electronics and relocate them to a safe place.
- Use a Drop Cloth
Stretch out a plastic tarp or a canvas drop cloth to help catch splatters and spills once you begin painting. Moreover, extend the accessories to the wall’s base for maximum protection.
Alternatively, use flimsy floor coverings like bedsheets and newsprint. But these materials are too thin, and paint may soak through, so position them strategically.
In addition, you do not need to cover the entire floor. Slide the drop cloth and ensure you can move from one end of the wall to the other.
- Clean the Wall
Dip a sponge or clean cloth in warm water and mild liquid detergent. Wring out the excess and rub the wall from the top to the bottom to remove dust and other debris.
This way, you guarantee particles will not interfere with the paint’s adhesion attributes.
Clean the surface gently to remove dirt, not totally soak it. Also, a small amount of diluted trisodium phosphate will help remove stuck-on grime and dirt from walls in dirtier areas like the basement or kitchen.
Fill holes and cracks in the wall before priming or painting. Then, sand the surface gently to enhance adhesion.
- Use Painter’s Tape for Adjacent Surfaces
Generally, painter’s tape protects the trim at the wall’s top, bottom, and around doorways. It also protects accents that are a pain to remove, such as dimmer switches.
In addition, ensure the tape’s edges line up lest you deliver a lopsided paint job.
Painter’s tape is available in home improvement stores, pharmacies, and supermarkets. Besides, they come in different sizes to deliver more flexibility and coverage.
Step Two: Apply the Primer
- Get the Most Suitable Primer
A standard white primer is the best bet for most jobs as it accentuates the new paint color. Besides, a gallon is enough to sort most painting projects.
Always use the formula when painting interior walls. It cuts down on the paint coats needed to achieve a deeper color and guarantees excellent paint adhesion. In addition, the primer helps when painting a darker surface with a lighter color.
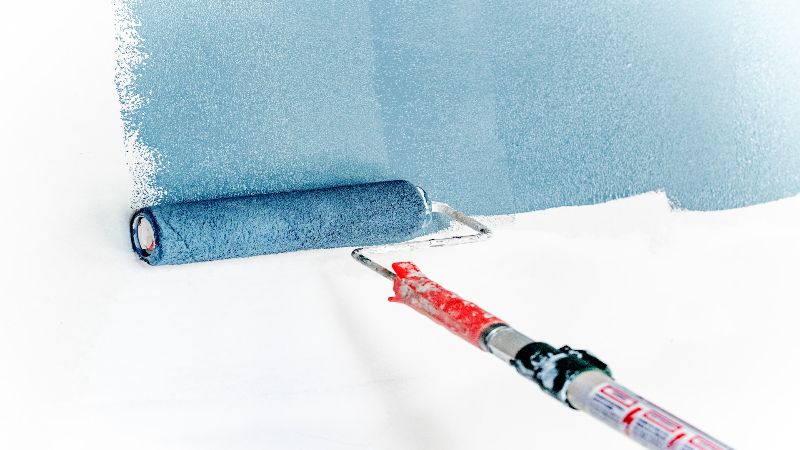
- Roll on the Primer
Apply an even primer layer from the floor to the ceilings, covering broad areas near the wall’s center. However, the base coat does not need to be too thick. Only ensure it is smooth and consistent.
Also, do not leave bare patches, as inconsistencies compromise the paint’s final color and texture.
- Fill Gaps Using a Handheld Paintbrush
Pay attention to corners, alcoves, and spaces around wall fixtures and the trim. Thankfully, a brush’s tip helps you work the formula into tight crevices and hard-to-reach areas. So you are sure of full coverage.
Match the thickness of the rolled sections as much as possible and use long, smooth strokes. Then, smooth out the coat by brushing it in multiple directions.
- Give the Primer Time to Dry
Give the base coat four hours to dry to the touch before applying subsequent primer layers or the paint.
Moreover, applying the formula in the afternoon or evening is more convenient. This way, you can wait until the next day to apply the paint.
Remember that painting over wet primer causes smudging and clouding, effectively ruining the project.
Finally, keep the work area well-ventilated by running an air conditioner or an overhead fan and opening a window.
Step Three: Paint the Wall
- Choose the Most Suitable Paint
We have many paint options for interior projects. Furthermore, consider the formula’s color, desired texture, and preferred finish.
For instance, darker shades add dimension and size to communal areas like the kitchen. On the other hand, pastels brighten the sitting or lounge rooms, while textured paint conceals wall imperfections.
Stock up enough formula that completes the project without running out. One gallon is enough to cover 400 square feet. So, do your maths and budget accordingly.
- Mix the Formula Thoroughly
Use a handheld stirrer or electric paint mixer to mix the paint, even if it was blended before purchase. In addition, always mix the paint regardless of whether it has been sitting on the shelf.
This way, you prevent pigments and oils from separating, leading to even consistency, better coverage, and a smoother surface.
Also, pour the paint into a large container or bucket to reduce splattering and sloshing when mixing.
- Paint the Trim by Hand
Dip the paintbrush’s tip two inches into the paint and let the excess drip. Then, brush the formula onto the surface, starting with one of the upper corners.
Follow the painter’s tape and work down with smooth, linear strokes until you complete the wall’s outer perimeter.
Further, paint two to three inches outward from the trim using a roller to go over the rest easily. Then, pause periodically to wet the paintbrush when the strokes become faint.
Always begin by cutting in around the edges, as this is the most challenging part when painting walls. Doing it first when you are fresh reduces the chances of making mistakes.
- Paint the Wall’s Interior
Use a wide roller to cover the middle part of the wall. The best technique is alternating the “M” or “W” pattern, working the same section back and forth until you fill it. Then, you can move to another area, repeating the pattern.
Consider an extended roller handle to reach the upper wall sections nearest to the ceiling. Also, overlap the edges while painting.
But only use the paint needed to cover the primer. Otherwise, oversaturating the rollers results in unsightly drips.
- Apply Subsequent Paint Layers
Roll out a second and third paint coat depending on how deep you want the paint color. Paint these follow-up coats using the above procedure, starting with the outer wall edges and working inward.
Then, wait two to four hours between coats to give the project enough time to dry.
Thankfully, most walls do not need more than a couple of paint coats. But extra layers are helpful when painting over darker shades or walls with coarse textures.
- Allow the Paint to Dry Overnight
Before calling it a day, examine the wall to check for lumps, drips, thin spots, and other flaws. Then, give the project at least twice as long to cure as you did the primer. Meanwhile, resist the urge to touch the surface lest you leave accidental smudges.
Lastly, interior paint needs 24 to 48 hours to cure completely. So, when the time is over and you’re satisfied with the wall’s appearance, remove the painter’s tape.
Here’s How to Prime a Wall:
Is Wood Primer Same as Drywall Primer?
A wood primer is not the same as a drywall primer. Besides, they are very different and suitable for varying projects.
A wood primer works best for raw or bare wood and delivers a hard finish, whereas a drywall primer works for bare or new drywall to give a solid finish.
Nevertheless, both products come in handy before painting and ensure that the paint coat adheres tightly to the surface. As a result, they guarantee a durable paint job.
What Is the Difference Between Wood and Wall Primer?
As discussed above, wood and wall primers are different as they serve varying purposes. For example, a wood primer works best on bare or new wood, whereas a wall primer is ideal for bare or new walls.
Below are the primary distinctions to note.
-
Wood Primer Blocks Wood Tannins
Tannic acid or tannins are in most wood and peel paints or coatings on wood. Hence, wood primers help to seal the surface and ensure that these compounds do not seep through to the paint.
Drywall primers do not effectively block the tannins. Moreover, they have high water level content, which fails to block the tannins, thus staining the wood.
-
Drywall Primer has a High Water Content
The formula has a significantly higher water content, making it unsuitable for wood projects. The excess moisture makes the lumber weak, brittle, and uneven. Eventually, it swells and cracks, compromising the paint finish.
-
Drywall Primers Do Not Soak into The Lumber
Wood only absorbs paint effectively if the primer soaks completely into the surface. Therefore, the water content of the latter needs to be at a minimum.
Wood primers are effective here because they soak into the lumber. They bind and mix with the fibers, which their counterparts will never do.
What Can I Use Instead of Drywall Primer?
Drywall has a slightly rough texture and contains gypsum. It serves as the basis of walls in your home. Further, priming the surface before painting is essential as it enhances paint adhesion, guaranteeing a durable finish.
However, you do not necessarily require a drywall primer, as we have other substitutes. They include
-
Latex Paint
This formula is a suitable replacement for drywall primer. However, water it down to deliver the desired result. This concept involves diluting latex paint with water, creating a thinner version.
Then, apply the mixture to the wall, which absorbs the liquid. As a result, you get a smoother surface to paint.
In addition, glossy paints reveal more drywall bumps and dents, so you need a base coat over them for a professional outcome.
-
Other Paints
You can use a satin or flat finish paint with little gloss and a dull finish as an alternative to drywall primer. The formula fills in the wall’s bumps and dents, delivering a smooth surface.
Next, apply a uniform paint coat and wait 24 hours before inspecting the wall for paint peels.
If they occur, sand down the drywall and apply a new paint coat. The surface absorbs the paint quickly, requiring more coats than if you used a primer.
-
Drywall Conditioner
This product seals the drywall and prevents the surface from dents, gouges, or damage. Further, use it when removing wallpaper to conceal damage caused by tools.
The drywall conditioner dries clear, making it challenging to detect. But you can follow up with several paint coats and expect a durable project.
What Happens If You Don’t Use Primer On Walls?
To painting beginners, priming drywall may be an optional step one can bypass by adding an extra paint coat. But this is not true.
Primer and paint are different formulas fulfilling varying functions. Besides, skipping the former has multiple undesirable consequences.
You will notice some consequences immediately, whereas others will not appear until the project dries. So, it is prudent to use the primer. Better safe than sorry!
Below are some effects of not using the formula before painting walls.
-
Uneven Paint Absorption
Drywall primer contains a polyvinyl acetate binder used in the carpenter’s glue, and its primary purpose is to seal the drywall paper.
Thus, without the formula, water-based paint with a latex binder soaks into porous materials unevenly, leaving you with rough areas and noticeable blotches.
The effect is more pronounced on seams and fastener heads with joint compounds as they are more porous than drywall paper.
Also, you’ll need extra paint coats and time to even out blotchy areas. And remember, paint is more pricey than primer.
-
Poor Paint Adhesion
Drywall primer’s glue-like base helps the paint adhere properly to the surface. Hence, skipping the primer increases the risk of peeling paint, especially in damp and humid conditions.
Furthermore, poor adhesion makes cleaning challenging months after the finish dries. The paint will wear off as you wipe off fingerprints or dirt and fail sooner.
Some painters blame these effects on the paint quality. But the truth is that failure to use a primer caused the issue.
-
Uneven Color and Sheen
PVA primers seal the drywall; thus, the paint covers the surface uniformly. Failure to use the product results in a reduced pigment-to-topcoat ratio.
Moreover, too much pigment soaks into the surface and delivers a lighter color. Even worse, the finish may appear washed out in some sections.
The final finish will have a chalky sheen and lack uniformity, especially when using a low-loss or semigloss paint for a top coat.
-
Bleeding Drywall and New Wood
Without a primer, water spots and smoke bleed through the topcoat, compromising the paint’s beauty. Therefore, use latex-based, shellac, or high-solids primer when working on water-spotted or smoke-damaged drywall.
Do I Need to Prime My Walls Before Repainting?
Most repainting projects do not need priming before applying the paint. However, you must spot-prime bare areas to deliver a more consistent finish.
Generally, previously painted walls are clean, smooth, and covered with the same paint type. Hence, you do not need a primer to guarantee a durable paint job. In addition, once you fill holes, spackle, and sand the surface, you are good to go!
However, using a primer is mandatory when making dramatic color changes. So, consider oil-based primers for flawed and discolored walls and apply two coats for a darker hue.
How Long After Priming Can You Paint?
Latex primers need thirty minutes to one hour to dry to the touch. However, wait for the coat to dry before adding another layer or paint coat.
Also, the period may extend up to three hours, depending on the current temperatures, humidity levels, and product type. But generally, the recommended levels are 77 degrees Fahrenheit and 50% humidity.
Avoid painting the surface too soon after primer, as it results in an uneven color, streaks, and peeling. In addition, you will spend more money to get more paint or ruin the paint job.
On the other hand, avoid waiting too long before painting the primed surface. Otherwise, it will cure and compromise paint adherence.
Furthermore, the primer cannot withstand harsh conditions and will quickly break down because of harmful elements.
Even worse, the surface will deteriorate and break down into a chalk-like finish. You’ll also observe mildew after some time, requiring more cleaning before painting.
Therefore, paint the wall within a durable duration after priming to avoid unnecessary issues.
Thankfully, if you are in a hurry, there are some tips to speed up the primer’s drying time. For instance, you can use a fan or dehumidifier to lower the humidity levels.
However, be careful when using these strategies, as low humidity is unsuitable for drying primer. The coat dries too fast and does not have time to bond to the wall, causing future paint peeling.
A spray gun can also fasten the primer’s drying time. Besides, the accessory dries the formula faster than rollers and brushes, using much air pressure to atomize the hue. As a result, it evaporates very quickly.
Lastly, use thinner primer coats instead of thick ones to quicken the drying time. The thinner layer dries faster due to a less solvent content, reducing the time needed for evaporation.
Frequently Asked Questions
- Is Paint and Primer-In-One Good For Drywall?
Paint and primer-in-one is only suitable when compatible with your project requirements. But generally, it is a top-notch interior or exterior formula with increased adhesion and stain-blocking capacity.
Moreover, the product works best when applied to bare or previously stained surfaces.
You can use paint and primer-in-one when repainting surfaces with a similar color to the existing finish. Further, the formula is premium grade and cleans easily without ruining the painted wall.
However, primer and paint-in-one work for specific paint jobs. For instance, we have projects needing high specialty primers to handle corrosion, block out color, and deliver a higher adhesion.
Even so, it is advisable to use a primer for guaranteed durability and a professional outcome. Besides, the formula is thicker than standard paint and likely to build up higher, delivering a thicker layer.
But unfortunately, this aspect messes up your paint job as the product cannot deliver on porous surfaces. So, evaluate the drywall and determine if it is better off with a primer coat before painting.
- How Long Do I Let Primer Dry Before Spray Painting?
Primer needs to dry before spray painting, even when working with drywall. So you’ll account for extra time to complete the job.
Furthermore, you cannot add another primer layer or paint on a wet surface. Otherwise, adding paint or primer coats too early causes the paint to wrinkle.
Therefore, spray all your primer coats within an hour and wait 48 hours to apply a new paint coat. But remember, the drying duration varies with the brand and existing conditions.
Conclusion
A primer is essential in home renovation projects as it helps prepare the surface for an excellent finish. Moreover, the product is available in oil-based and latex forms to accommodate various projects.
Furthermore, the primer type needed depends on the surface and your personal preferences regarding ease of application, smell, desired outcome, and drying time.
Painting walls need the most suitable primer to deliver a durable result. Therefore, check the above discussion to determine the best product for various projects.
Can Wood Primer Be Used On Walls?
Wood primer works on walls as long as the surface is clean and free from blemishes. In addition, allowing the formula to dry to the touch before adding the paint coat goes a long way in guaranteeing a durable project.
Also, do not leave the primer for long before painting the wall. Otherwise, it will cure and harden, compromising the paint’s adhesion attributes.