Today, I’d love to discuss how to thin latex paint; please stay with me for more…
Sometimes, factory-finished paint doesn’t come in the precise consistency you desire for application. It could be either too thick or too thin.
In this case, you need to add a medium, gel, or thinning agent to adjust the flow property accordingly.
There are many paint types; I can only cover so much in one write-up.
In this article, as I mentioned before, I’ll guide you through how to thin latex paint.
The most common agent for thinning latex paint is clean, soft water. In summary, this is how to go about the task:
- Set up your working station
- Open the latex paint
- Stir the paint to form a homogenized solution
- Filter the needed paint through a paint strainer
- Add water proportionally to the resulting paint filtrate
- Stir again to uniformity
Other than water, you can use a paint conditioner like floetrol. The said conditioner does more than increase the paint’s flow.
Here are some of its added benefits:
- It maintains the paint’s color/pigmentation
- Floetrol makes latex paint easier to use
- It minimizes brush marks and paint streaks
- The conditioner decreases paint wastage by minimizing overspray
- It prevents tip and nozzle clogging in spray guns
Other elements of latex paint discussed in this article include:
- When to thin latex paint
- Whether latex paint peels off or not
- How to rectify/resolve peeled latex paint
- The pointers of latex paint failure
Before I get into the above details, I’ll set the foundation by defining latex paint, outlining its uses, and the pros & cons of its use.
I encourage you to read keenly and stick to the procedures for the best outcome. Let’s begin.
What Is Latex Paint?
 Paints come in many shapes and sizes that define their quality, cost, and use.
It’s vital to understand the characteristics of a given paint to determine its compatibility with the substrate. So, what is latex paint?
It is a suspension of polymer microparticles, pigments, and additives in water.
You can also define latex paint based on its behavior; it is an emulsion that adheres to and solidifies/stiffens when it comes into contact with an appropriate substrate exposed to air.
The paint consists of tannins, sugars, resins, gums, alkaloids, starches, proteins, and oils.
Initially, the above paint was produced from natural latex derived from a given category of flowering plants.
With time, this isolation method became expensive, unsustainable, and unreliable.
The long wait for the source plants to grow, harvest, and isolate the required ingredients couldn’t keep up with increasing demands.
It led to the development of artificial/synthetic alternatives.
Currently, more than 80% of latex paint is derived from the polymerization of the following synthetic monomers:
- Styrene
- Ethylene
- N-butyl acrylate
- Butadiene
The above monomers are blended/compounded with additives and pigments to make viable paint.
When you apply it to a compatible substrate, the water constituent evaporates, while the pigment and polymers coalesce to form a hard, protective film.
The adjunctive constituents don’t evaporate as they are thermally stable under UV rays/sunlight.
It prevents the release of toxic chemicals into the atmosphere, making the paint safe.
Uses of Latex Paint
There are many kinds of paint, each playing different roles.
Therefore, you should purchase a given paint depending on what you’re coating and the purpose of painting the substrate.
In that regard, these are the uses of latex paint:
You can look at the uses in two ways, i.e., material/substrate and purpose or functionality.
Regarding substrate type, latex is used to paint wood, concrete/masonry, stucco, walls, trims, baseboards, and metals.
Concerning purpose, latex paint is used for decoration and protection of the underlying substrate.
Here is a detailed look at the uses based on substrates:
Wood
You can use latex paint on both hardwood and softwood.
Hardwoods include teak, maple, oak, and mahogany, while softwoods include pine, cedar, spruce, and redwood.
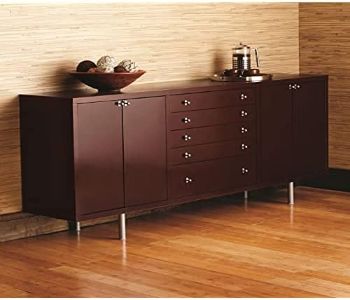
Likewise, latex works well on interior and exterior wooden substrates.
Interior wooden materials include cabinets, chairs, tables, and internal doors. Exterior wooden materials include patios, fences, barns, and cladding.
Always check the label or paint container before purchasing latex for the above uses, as some are exclusively meant for internal or external use.
Masonry
The most common masonry materials are bricks, concrete, stone blocks, and sand. They are used to make building walls, floors, decks, swimming pools, etc.
You can paint all these materials with latex paint. While latex is water-based, it becomes water-resistant when dry.
So, you don’t have to worry about it washing away once it comes into contact with water. All you have to do is wait till it’s dry.
Moreover, the paint sticks so well that you can clean the surfaces regularly afterward with soapy water.
The latex paint for swimming pools and bathroom floors contains texturizers to increase frictional force after drying. It prevents accidental slips.
Metals
You can also use latex paint on metals. You may wonder how this works, yet latex paint is water-borne.
Well, it’s because the water/solvent part of the paint evaporates, leaving a film of binder and pigment; the seal prevents contact with environmental moisture and air, precluding rusting.
However, the best paint for metals is oil-based paint. They are more durable and the least inclined to cause rusting.
Trims
Trim is the general term for materials used to cover the joints between interior walls and floors or roofs, window and door edges, etc.
Examples include baseboards, crown molding, window casing, and door casing. They are mostly vinyl or wooden boards; you can also coat them with latex paint.
It makes them last longer and look appealing.
These are uses of latex based on functionality:
Protection
Latex paint also serves a protective role, increasing the substrate’s longevity. It protects in the following ways:
- Corrosion resistance: latex paint protects materials from corrosive substances, like acids and other chemicals.
They do so by forming a solid, unreactive barrier.
- Keeps away stains: the paint forms films that repel stains and dirt.
When the stains land on the surface, they easily slip off due to the smooth texture of the paint.
- Shields against physical damage: latex paint is hard-wearing and scratch resistant.
This offers protection from physical stressors like high traffic, trauma, and abrasive forces.
- Prevents rotting and fungal growth: this is more common in masonry and wooden substrates, whereby continuous exposure to water causes decay, mold, and mildew growth.
Latex paint prevents the above situation from unfolding as they are water-resistant and present harsh conditions that discourage fungal growth.
- Protects against attack from termites and vermin: some latex paints are laden with vermicides that keep away rodents and termites.
The agents make the substrate unpalatable to destructive animals and pests.
Decoration
Latex paint is also used to decorate substrates. It improves the aesthetics of the painted materials in the following ways:
- Polished finish: the paints are available in different sheens that give a lustrous appearance to the substrate.
Such sheens include gloss, semi-gloss, satin, and matte; all of these are alluring in unique ways.
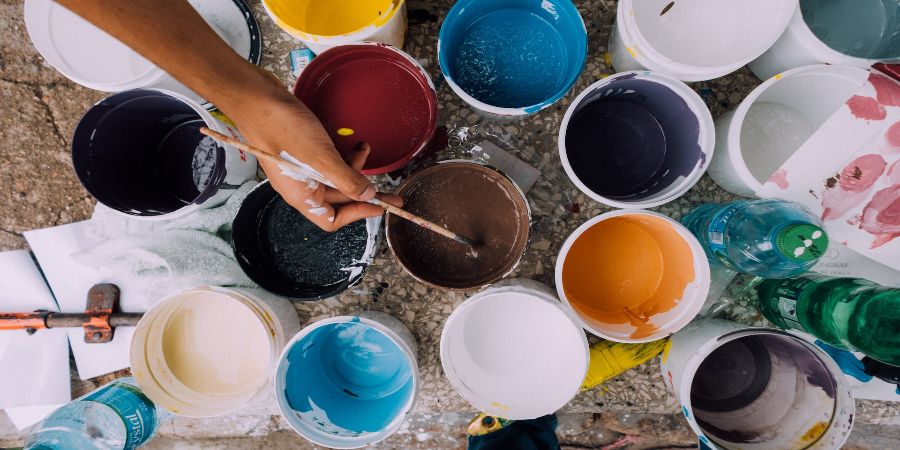
- Decorative colors: latex paint pigments come in many colors, including red, yellow, green, blue, and white.
There are various shades of colors; some are iridescent, i.e., they change colors depending on the observer’s viewing angle.
Moreover, you can mix the colors to come up with unique combinations.
- Designs, patterns, and textured finishes: You can also use latex to paint or draw designs and patterns on surfaces; this is more common in artistry.
However, you must prime the surface accordingly and apply a base coat before applying the above.
You can also achieve textured finishes using specially-made paints, mainly formulated with particulates like quartz, silica, and artificial flakes/chippings.
- Hides imperfections: Part of the decorative function of latex paint is to conceal substrate defects.
The shiny and vibrant nature of the finish upstages the unsightly imperfections.
Pros and Cons of Latex Paint
Like all paints, latex has advantages and disadvantages. I’ve dedicated this segment to outlining the pros and cons of latex paint.
It’ll help you know its working mechanism and whether you’ve purchased functional or substandard latex.
Pros
- They won’t crack or peel easily.
- Latex enables “substrate breathing” to release trapped moisture.
- The paint is non-flammable with little to no VOCs. It’s, therefore, safe for use on food-grade materials.
- They are generally more affordable than acrylic paints.
- Latex paints don’t yellow over time.
- They are odorless, hence comfortable to work with
- These paints are water-based so you can adjust their flow properties with water. You also need only soapy water to clean up the tools and spills after use.
- The paints are fast-drying; hence time-saving.
Cons
- Latex paints are slightly less durable than oil paints and acrylics
- Most latex paints require priming before application
- Premium latex paints are a little too costly
How to Thin Latex Paint
This article’s main body features the procedural aspect of handling latex.
While the factory-finished version of the paint is well-formulated and has passed all the stability and quality assurance tests, it’s not always the precise thickness that you may wish.
The main reason for the above is consumers have a remarkable disparity in their needs, and the manufacturers can’t meet all these needs simultaneously.
However, there’s always room for adjusting the flow property of paint. In this segment, I’ll show you how to thin latex paint.
Requirements
- Clean water
- Stirring rods
- Drop cloth
- Paint strainer
- Latex paint
- Clean mixing containers
- Safety gear (a respirator, latex gloves, and safety goggles)
- Measuring container
- Glass or plastic funnel
- Paper towels
Procedure
First, ventilate your working room and lay down the tarp or drop cloth.
Ventilation prevents inhalation of toxic latex paint fumes when thinning, while the drop cloth keeps the paint away from messing up the surrounding areas and objects.
Then, read all the instructions on the latex paint container or the datasheets provided; it usually contains some intel on thinning. Put on the requisite safety gear afterward.
Next, pry the paint open and stir it using the mixing stick or paddle. Stir from the bottom upwards to enable the denser portion of the paint to mix with the light upper layers.
After attaining homogeneity, pour the required paint quantity into a cleaned mixing container through a strainer.
Straining separates foreign particles and the precipitated component of paint from liquid paint. Close the primary latex paint can right after.
Pour the filtrate into a measuring cup/container and note the amount; use a glass funnel to make this transfer.
I advise you to work with small amounts of latex paint at a time because it has a short working life, like other water-based paints.
Working life is also called the pot life of paint; it is the duration in which the paint is workable.
Then, measure the appropriate amount of water for thinning the paint.
The mixing ratio of paint to water varies depending on three factors, i.e., the substrate, paint type, and spray gun type (if you’re planning to apply by spraying).
The paint type is a constant as the article only covers latex paint, so I’ll only address substrate and spray gun type.
The substrate further dictates the paint-thinner ratio in two senses: the material and surface area.
Regarding material, smooth and impervious surfaces require thicker paint than coarse, pitted materials.
The increased flowability of thinned latex paint spells reduced residence time on smooth surfaces, while the unthinned paint stays put.
Also, thinned latex fill the pores on pitted surfaces better than the viscous version; this minimizes paint wastage.
For the smooth-textured substrate, I recommend a paint: water proportion of 6:1. For rough-textured surfaces, I prescribe a ratio of 4:1.
On the surface area, large/extensive substrates need thin paint for improved coverage and lower painting costs.
In this case, I advise you to mix paint with water in a ratio of 4:1. The thinned latex flows effortlessly and spreads better than the thick paint.
The second guiding factor is the type of spray gun. There are two major types, i.e., HVLP (High Volume Low Pressure) sprayer and the airless spray gun.
HVLP sprayers pump large amounts of paint under low pressure. It means they require thinner latex paint compared to their airless counterparts.
It promotes paint flow along the machine’s channels. Here, I recommend a paint to thinner proportion of 7:2.
Airless sprayers operate at high pressures, so they can work with thick/unthinned latex.
Here, you only need to add small amounts of thinner, and the most optimum paint-to-water ratio is 7:1.
The above ratios are approximations drawn from personal experience.
The best approach is to follow the manufacturer’s recommendations, and you can also test on scrap material to help you gauge the best mixing ratios.
After adding water, stir with a stirring stick to make a uniform solution.
Voila! You’re done with thinning latex paint. You can proceed to the paint application process.
Here’s a Video On How to Thin Latex Paint:
When Should You Thin Latex Paint?
It’s often difficult to navigate through paint usage, especially when starting out.
It’s happened to me before whereby you don’t know whether the paint is thick or thin enough to go over your substrate.
The presence of numerous substrate types and latex paint brands further compound the problem.
Through experience, I’ve learned how to pick my way through the above situation. So, when should you thin latex paint?
These are the prompting factors:
When the paint is too thick: thick latex paint is usually heavy and challenging to handle or manipulate. Thinning it makes it more usable.
When the paint can’t flow easily: Viscous latex has poor surface coverage and doesn’t soak up readily into the brush or roller for painting.
Adding water makes it easy to load onto the brush bristles or roller and improves its flow.
When it has remained unused for long periods: Storing latex paint, especially leftovers of a given project, for long makes it harden.
It needs thinning before using it for the next project.
When latex takes too long to dry: If your latex paint takes over 6 hours to dry before recoating, it’s because it is too thick.
It calls for the addition of a thinner to make it lighter.
When working on large-scale projects: Industrial or commercial latex painting takes quite a long time to complete using unthinned latex paint.
It’s best to thin it for ease of use and faster coverage. It ensures timely project completion.
When the substrate is porous: Porous surfaces waste a lot of paint, so you must thin the paint to minimize waste.
When the paint is expensive: If you’re using premium unthinned latex paint, it’s better to thin it to economize its use.
Otherwise, you’ll finish the paint before completing the project, which means purchasing more paint.
Does Latex Paint Peel Off?
Poor quality paints never last long on surfaces. Consequently, they often peel off or appear distressed. But does latex paint peel off?
It’s both yes and no, depending on the prevailing circumstances. Latex paint will peel off under the following conditions:
- When the paint has run its course: latex paint has a lifespan of 7 to 10 years when applied on any surface.
This kind of peeling off is inescapable as it stems from the natural aging process. From the old adage, nothing ever lasts forever.
- Using contaminated, adulterated, or expired latex paint: These drastically undermine the functionality of paint, and in some cases, they render the paint nonviable.
It will peel off in less than five years.
- Applying several thick coats: too many thick paint layers hinder its adhesion to surfaces.
- Unprepared or inadequately prepared surface: If you apply latex on a poorly set surface, it will peel off prematurely.
Such surfaces are often heavily stained and contain defects/cracks. Poor preparation also involves disregarding routine prepping practices like sanding and priming.
- Incompatible/discordant paint layers include applying latex (a water-based paint) over oil-based paints; the latex won’t stick because water and oil are immiscible. It precipitates peeling.
I’ve saved the best part of this subheading for last. Latex paint is perfectly formulated to coat various substrates thanks to years of painstaking research and testing.
It does not peel off of surfaces, but only under the following circumstances:
- Using high-standard viable latex: purchase paint from reputable brands and ensure it has not stayed beyond its shelf life/expiry date.
Top brand paints have undergone and passed quality assurance examinations.
Therefore they meet the customer’s expectations in terms of performance, reliability, design, and maintainability.
- Working on sufficiently-prepared surfaces: sufficient preparation involves repairing, cleaning, sanding, and priming.
It sets the surface to receive and bond with the latex; the paint won’t peel off afterward.
- Applying in thin double or triple coats: thin coats facilitate sufficient drying, while two or three coats add physical strength to the paint.
All the above work synergistically to arrest excessive latex peeling.
- Following the correct application protocols and using proper tools: read and adhere to all the procedural instructions printed on the latex paint container or labels.
Also, use the right paintbrushes, rollers, or spray guns to maximize the probability of successful outcomes.
- Maintaining the paint’s properties as much as possible: altering latex paint’s properties by adding too much thinner (water), mediums, or additives makes it less effective.
When you use the said agents judiciously, it won’t affect the paint’s performance and, consequently, won’t peel off.
How to Fix Peeling Latex Paint Easily
 As we’ve seen above, latex paints also peel, and the frequency and extent of scuffing depend on several factors.
Nobody likes paint that comes off surfaces easily as it looks unsightly and doesn’t fulfill its intended protective role.
In this part, I’ll showcase how to fix peeling latex paint easily.
The process involves gathering the required tools, setting up your workspace, removing the peeled paint regions or the entire paint coat, making repairs, prepping the surface anew, repainting with latex, then sealing.
Here is the detailed account:
Requirements
- Paint scraper or wire brush
- Putty knife
- Filler/patching compound
- Drop cloth or tarp
- Paint Brushes or rollers
- Primer
- Tack cloth
- Paint
- Sealant
- Personal protective equipment
- Fine-grit sandpaper
- Painter’s tape
Procedure
The steps are:
Step 1: Preparing the Working Station
Setting up your working area depends on the substrate you are working on. If it’s a floor, you must remove all the furniture and items from its surface.
Afterward, tape off the areas to prevent staining from stray paint.
If you are working on objects like wood planks or stonewalls, cover the floor with a tarp or a dropcloth again to keep off the paint stains.
Step 2: Removing Peeled Paint
Before removing the peeled parts, put on the necessary safety gear; they include a face mask/respirator, a pair of gloves, and safety goggles.
At this point, you only need the face mask and goggles.
Then, take the paint scraper or wire brush and scrap off the peeled paint.
If it’s only tiny substrate sections, work only on the affected parts.
If the peeling affects a large portion of the surface or the entire surface, remove all the paint. You may need a helping hand for the latter case.
Don’t press too hard when removing the peeled paint to avoid scratching or gouging into the underlying substrate.
Afterward, sweep off the accumulated debris to remain with a clear or neat-looking workpiece.
Step 3: Making Repairs
Repairing involves removing projecting nails and filling holes and cracks with a filler/patching compound.
Use a claw hammer to remove the nails or hammer them in to lay flat on the surface.
Then, take a putty knife, scoop the filler compound/spackling paste and apply it to the holes.
If it’s a joint between the wall and floor, seal it with caulk. Press the patching material with the knife to fill the holes.
Next, sand down the patched-up parts to the level of the substrate.
Step 4: Prepping the Surface for Repainting
Prepping entails cleaning, sanding, and priming.
Start by wiping the surface clean. Remember, the initial sanding of the spackled spots left some debris, so you must get rid of this before proceeding.
Then, sand the entire surface with a fine-grit abrasive.
Sanding eliminates small and medium-sized imperfections that can’t be patched up with spackling compounds.
It also gives the substrate teeth to make it more receptive to the incoming latex paint.
Sand twice or three times, as needed; be careful not to sand too much as it will damage the structural integrity of the substrate (by scarring or defacement).
Afterward, remove the collected debris using a vacuum cleaner or wipe with a damp rag, followed by a dry, lint-free cloth.
Then, apply a latex primer on the dry, bare surface.
The primer adheres to the underlying substrate and the incoming paint; this improves the clinging power of latex to the surface, which aligns with every painter’s objective.
Step 5: Repainting
Then open up new latex paint or leftovers from a previous project, stir it and repaint the surface using a paintbrush or a paint roller.
It’s vital to have a variety of brush sizes and shapes, like flat, angled, and round-tipped, to work on hard-to-reach zones of the substrate.
Apply two or three coats of the paint as needed and let each layer dry completely before applying the next one.
Step 6: Sealing
Sealing forms a barrier between paint and the external environment; this shields the paint from damaging weather elements, physical stress, and fading.
You can use a sealant or varnish for the above undertaking.
Open up the sealant and apply using a paintbrush or roller. Most sealants and varnishes are transparent to enable the paint’s color to show through.
The sealant works like a screen.
During application, you must be meticulous enough to cover the entire surface to avoid compromising its protective function.
To avoid missing any part, work in an orderly manner, for example, by working on one section at a time.
Let the sealant dry for the specified times before resuming normal usage.
That’s it! Your peeling latex paint is fully reconditioned for a new look.
You can now remove the drop cloth and painter’s tape and clean up the painting tools and spills using soapy water.
Here’s How to Fix Peeling Wall Paint:
Signs of Latex Paint Failure
This segment centers on pointing out the signs of latex paint failure.
The probability of failing is always higher if you’re a student or have little experience using latex paint.
Prevention is better than cure; to prevent a bad situation from worsening; you need to identify it when still in the budding stages.
Latex failure manifests in the following ways:
Blistering
It is the formation of bubbles due to localized loss of clinging power and paint the lifting from the surface.
Causes
- Presence of trapped moisture underneath the paint
- Overexposure of the latex paint to high humidity, rain, or dew before it’s sufficiently dry
- Presence of chemicals in the latex paint that may react with the substrate
Solution
Preventative measures include allowing the substrate to dry before painting; this precludes moisture trapping when painting.
Another solution is avoiding exposure to wet conditions after applying latex. It enables the paint to dry and become water-resistant.
Curative measures include scraping and sanding down the affected parts, priming, and repainting.
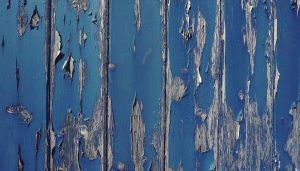
Delamination/Peeling
Peeling is the loss of the paint layer in strips or pieces. Causes of delamination include:
- Poor surface preparation
- Applying latex paint over an oil-based paint
- Initial latex paint blistering
- Using low-grade paint
Solutions
- Use high-quality latex paint from recognized brands.
- Sand off a previously-painted surface before laying down latex, especially if the original paint is oil borne.
- Resolve/fix the blistering paint problem before it gets out of hand.
- Prepare the substrate adequately before painting.
Alligatoring
Alligatoring, as the name suggests, is the crazing of the paint film to form a pattern resembling the scales of an alligator.
Causes
- Using expired latex paint, these paints harden in the storage containers when kept unused for a long time.
- Recoating before the underlying latex coats are adequately dry
- Thermal expansion and contraction of the paint due to frequent temperature fluctuations
Solutions
- Ensure you use latex paint that’s still within its shelf life. Also, don’t use leftovers that have overstayed beyond the required storage time.
- Allow the paint to dry for the specified durations before recoating.
Bleeding
Bleeding is seen mainly with wooden materials. It is the seeping of substrate contents like tannins and sap through the paint film.
It results in spotted discolorations that ruin the aesthetics of your workpiece.
Causes
- Applying fewer coats of latex paint, e.g., using one coat instead of three
- Circumventing/bypassing surface prepping
- Using knotty wooden substrates
Solutions
- Apply at least two coats of the paint; if still not enough, add the third layer.
- Add a sealant on top of the painted surface.
- Prepare the surface well before painting: for knotty wood, sand them down, and apply a stain blocker over the knots before painting.
Mottling/Efflorescence
Efflorescence is the deposition of crusty mineral salts on concrete, brick, render, mortar, and other masonry surfaces.
The white mineral salts are leached from the substrate as moisture migrates outwards.
Causes
- Using latex on damp or insufficiently dry walls
- Poor preparation of masonry material before painting
Solutions
- Let the substrate completely dry before you lay down the paint.
- Seal off the surface before applying paint. It prevents the escape of any trapped moisture.
- Use exterior latex paint for external masonry. Outdoor substrates are more exposed to sunlight and mottling, and the exterior paint is best suited to withstand the effects of excess UV rays.
Presence of Fungal Growth
The most prevalent fungal growths on poorly-painted surfaces are molds and mildew.
They grow in patches and cause discolorations leaving an unsightly, old appearance.
Causes
- Accumulation of water or moisture for long periods on the painted surface
- Incomplete surface coverage by the paint. This leaves some parts of the substrate bare and open to fungal colonization
Solutions
- Keep the latex-painted surfaces dry always. Water is a critical component of mold and mildew growth, so maintaining dry conditions makes it impossible for fungal presence.
- When painting with latex, ensure you cover the entire surface and add more layers of the paint. Work the paintbrush or roller in back-and-forth motions to get the missed areas.
Conclusion
To conclude, latex paints are popular in the painting world thanks to their versatility, affordable costs, availability, and effectiveness.
Knowing its working mechanism and how to manipulate its properties improves your painting knowledge, skills, and ability to produce satisfactory results.
To make all these materialize, read the above content on…
How to Thin Latex Paint
The procedure entails:
- Workstation preparation
- Unsealing/opening the latex paint
- Stirring or mixing to harmonize the paint constituents
- Straining to remove foreign particles
- Adding water to the paint filtrate
- Final stirring before application
I’ve given a detailed review of the above procedures in the middle segments of the article.
Other related latex paint discourses contained in the write-up are:
- The uses of latex paint
- The positives and drawbacks of latex paint
- Circumstances under which you should thin latex paint
- Whether or not latex paint peels off
- The simplest way to redress latex paint peel off
- What to look out for to spot latex paint failure
The review is a repository for all the essential information regarding latex paint.
Again, I urge you to read it to boost your knowledge and confidence in using the said paint.
On my end, I feel bountifully rewarded each time I see or get feedback on a successful project guided by this and other reviews.
Share your thoughts and experiences, and ask any related questions in the comments section.
Also, share the links to this article with your friends, colleagues, and online platforms for broader reach.
I’m looking forward to disseminating more content regarding other paint types. Till then, take care, folks!