If you’re wondering, “can wood primer be used on metal?” this article is for you.
All surface primers – wood, metal, or concrete – perform similar functions. They promote paint adhesion, create an even surface for painting, and prevent unremovable stains on the surface from showing through the paint finish.
The similarity in the functions of these products makes people wonder whether you can use them interchangeably. For instance, Can Wood Primer Be Used On Metal
You cannot use wood primer on metal because its chemical composition is incompatible with metal surfaces.
In addition, It does not contain the necessary components to ward off rust or the capability to help paint adhere to the sleek metal surface.
To ensure a flawless paint finish on the metal, prepare its surface with a primer created exclusively for use on metals.
To understand this reasoning in depth, you must first be familiar with the composition of wood and metal primers. So, in this article, I’ll discuss everything you need to know about both products before you start your next project.
I will also show you the correct way to prepare metal surfaces for priming and tell you the best primers to use on bare metal.
But first, let me tell you a little bit about wood primers.
What Is Wood Primer?
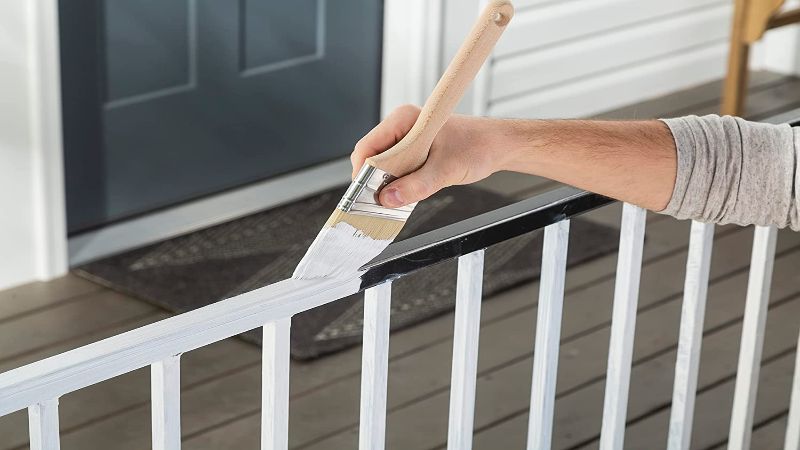
Wood primer is a preparatory coating you apply to wood surfaces before painting. It is the foundation of every paint job; therefore, you should never skip or apply it carelessly.
It is simple to say that wood primer is essential, but what exactly does it do?
As we know, wood is porous, meaning it has air spaces between its fibers. So the primary function of a wood primer is to fill up said pores, sealing the wood surface.
If you fail to prime, the wood will absorb most of the paint in the first coat, ruining the finish.
Wood primer also improves the bond between the paint and the surface. As a result, the finish will last longer, and you won’t have to worry about the paint peeling off or chipping prematurely. In addition, it hides stains and prevents wood tannins from bleeding through the finish.
Types of Wood Primers
There are three types of wood primers: Oil-based, latex, and shellac. They perform the same functions, but their varying chemical compositions make each better suited for some projects. Let me elaborate.
- Oil-based wood primers have been the industry’s standard preparatory coating for years because you can coat them with water or oil-based paints. This feature makes using them on painted or bare wood indoors and outdoors possible.
Versatility aside, oil-based primers are excellent stain blockers, preventing tannin bleed-through and other stains from showing through the finish.
On the downside, oil-based primers dry very slowly, so projects where you use them often take longer to complete. They also contain high levels of Volatile Organic Compounds (VOCs) and produce a pungent odor; therefore, they aren’t the safest choice if you value the environment.
Oil primers also require you to use harsh chemicals like mineral spirits and paint thinners for cleanup because water can’t dissolve oil.
Furthermore, they are less flexible than other wood primers and tend to get more brittle as time passes. Consequently, they are prone to cracking.
- Latex wood primers are water-based and ideal for bare woods except for cedar and other woods that release a lot of tannins. They dry quickly; thus, project completion is faster, and cleanup is easier because you only need water.
In addition, latex primers contain low VOC levels and produce no odor; therefore, they are more environmentally friendly.
On the downside, these primers do not hold up well in harsh conditions; therefore, they are best used for interior projects. You can also use them for a few outdoor projects, provided the item you’re painting is adequately shielded from the elements.
Latex primers also have poor stain-blocking capabilities, so you shouldn’t use them on stained surfaces or woods that release tannins. Don’t get me wrong, the primer will hide stains, but not as efficiently as the oil-based variety.
- Shellac Wood Primers are the best stain blockers because they hide everything, including bad odors. They are also highly adhesive and versatile, just like the oil-based variety.
On the downside, shellac primers produce a foul odor and require using denatured alcohol for cleanup. Furthermore, they don’t hold up well outdoors; therefore, it is best to restrict their use to preparing indoor wood surfaces for painting.
Pros of Wood Primer
- It Allows Full Coverage With Fewer Coats
Wood is porous, so it tends to absorb paint immediately after you apply it. As a result, you need more paint coats to achieve full coverage. Sealing the wood with a primer prevents paint absorption, reducing the number of coats needed.
- Primer Makes Wood Finish Last Longer
One of the functions of a primer is to help paint stick better to the wood surface. As a result, the color remains on the wood for years, even when exposed to the elements.
- Wood Primer Brings Out the Actual Color of Your Paint
The color of a surface often interferes with the color of paint. If the surface is darker than the paint, it will show through the finish making the color look different from what you see on your sample swatch.
Wood primer comes in neutral colors, usually grey or white. Therefore, when you apply it on wood, you’re putting a “blank canvas” over the wood, amplifying the paint’s actual color.
Cons of Wood Primer
- The only disadvantage of wood primer is that it prolongs the painting process. It would’ve been quicker if it were possible to sand the wood and slap the paint on it immediately.
However, in addition to the actual painting time, you must wait for the primer to cure before painting over it.
What Is the Difference Between Metal Primer and Wood Primer?
On a basic level, metal and wood primers serve the same purpose. They cover flaws, improve adhesion and create a neutral surface for painting.
However, they all work differently because manufacturers customize them to suit the specific properties of the intended surface. Let me elaborate.
Metals have sleek surfaces; paint does not stick to them readily. In addition, they are highly reactive to any liquid you put on them. Here’s where the metal primers come in handy.
Metal primers are compatible with the chemistry of the metal and paint; hence, they provide a stable foundation for the paint.
They either form a barrier that negates any reaction between the metal and the paint, or they react in a way that promotes a solid bond between the paint and metal.
On the other hand, wood is rougher than metal, so paint sticks readily to it. In addition, it is highly porous, so paint tends to seep deep into the fibers, which could ruin the wood. Here’s where wood primer comes in.
Wood primer penetrates the wood fibers and seals the spaces between them. This ensures that the paint stays on top of the surface as expected.
How to Prepare Metal for Priming
Even though priming itself is a preparatory step in painting metal, there are a few things that you must do to make the primer do its job properly. So, follow the procedure below to get your metal ready for priming.
Step 1: General Preparation
- Before you do anything, wear a respirator mask, goggles, and gloves to protect yourself from rust flakes released as you clean the metal.
Ensure that the gloves are cut-resistant to protect against sharp edges. Also, wear pants and a long-sleeved shirt or coveralls to protect the other parts of your body.
- Set up your workstation outdoors to prevent metal dust and harmful fumes from the prep products from lingering in your home space.
Also, ensure that your workstation is close to an electrical outlet for plugging in power tools, or get an extension cord to reach the nearest outlet.
If you have to work indoors, ensure the room is well-ventilated by opening all doors and windows or running a strong ventilation fan.
Step 2: Identify the Metal
Different metals require different primers and slightly varying preparation steps; therefore, you must identify what you have. The two basic distinctions of metals are ferrous and non-ferrous metals.
Ferrous metals are iron-based, including steel, cast iron, and wrought iron. They are highly susceptible to rust and require more complex steps to prepare them for priming.
On the other hand, non-ferrous metals are non-iron, including varieties like aluminum, copper, stainless steel, and zinc. Even ferrous metals galvanized with a thin outer layer of zinc count as non-ferrous.
- If you cannot identify the type of metal by eye, use a magnet – it will stick to ferrous metals but not to the non-ferrous type.
Step 3: Remove Old Paint and Rust
This step is necessary if you’re priming a ferrous metal. If you do not remove rust or any old finish first, you invite future paint problems. If your metal has no old finish or rust, you can skip straight to the next step.
Use a wire brush to scrape off the loose rust flakes. You can also use a paint scraper or a metal putty knife if you don’t have a wire brush.
- If the metal is heavily rusted or too large, use a drill with a wire brush attachment to get the job done faster. Ensure you keep the drill moving throughout to avoid wearing down or polishing some parts of the metal. Afterward, wipe away the dust residues with a cotton towel.
If the manual methods don’t work or you want to avoid them, use a chemical rust remover instead. These products contain either phosphoric or hydrochloric acid that can dissolve the rust, revealing bare metal.
However, be careful if you choose the chemical route because rust removers are heavy-duty.
Read the product’s instructions carefully and then use it as directed to eliminate the rust without ruining the metal. Afterward, rinse off the chemicals thoroughly and then dry the metal immediately with a towel to prevent flash rust from forming.
- For newbies, flash rust is a thin rust layer that can form in a few hours and still mess up your paint job.
You can also use a rust converter to handle the rust problem, especially if your metal has tight spots. Rust converters chemically change rust into a paintable surface and work faster than manual methods and rust removers.
Step 4: Scuff the Metal
Some metal coating products are marketed by implying that no sanding is required. However, you should do it to ensure that the finish lasts longer.
- Rub the surface with a 400-grit scuffing pad to give the metal some tooth to hold the paint. Afterward, wipe the metal with a clean towel to remove metal specks before proceeding.
Note:
- Do not sand galvanized metals because you may remove the zinc coating, making the metal more likely to rust. I do not recommend sanding non-ferrous metals, either.
Instead, rub a little bit of white vinegar onto the surface of such metals because it has acids that will etch the surface without ruining the metal. Just ensure that you wipe off all vinegar residue before applying primer.
- Do not sand your metal if you use a rust converter to solve the rust problem. The material formed after converting the rust is ready for priming immediately.
How to Prime Metal
Priming is a walk in the park after you’ve finished all the steps above correctly. All you need to do is select an appropriate primer and put it on the surface. Depending on your preference, you can select a spray or brush on metal primer.
I like using the spray variety when painting smaller metal surfaces with intricate details and the brush on variety for flat surfaces.
Once everything is in place, follow the steps below to prime the metal.
Place the metal item on a drop cloth or old newspapers if you’re working indoors. If you’re outdoors, you can also use a drop cloth or paint the item in an area where paint stains are not a big deal.
- If you’re outside, ensure your workstation is away from direct sunlight to prevent the primer from drying too quickly. Also, avoid priming when it is too windy because wind carries debris that could land on the freshly primed surface and ruin it.
- If the item you’re painting is light enough, you can easily hang it to access all its sides.
If you’re using a spray primer:
- Shake the primer container vigorously until you hear the little mixing ball rattling. If the mixing ball doesn’t rattle, select another paint can instead of striking the container.
- Hold the primer container 8-10 inches from the metal and spray in a steady back-and-forth motion. Ensure that you overlap each pass by at least 40% to avoid leaving any bare spots that could be ground zero for rust in the future.
Also, shake the primer occasionally as you work to prevent the primer from clogging the spray nozzle.
- Allow the first coat to dry as recommended, then apply another following the same steps.
For the best outcome, apply at least two coats of primer or the number of coats in the product’s user instructions.
- After the final primer coat dries, sand it with fine-grit sandpaper to prepare it for painting.
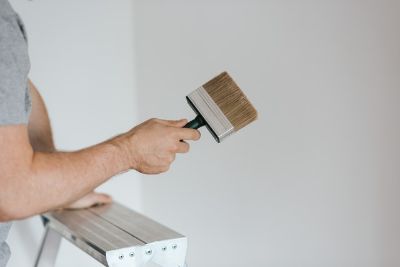
If you’re using a brush on primer:
- Pour a little primer into a separate container and dip your brush into the product.
- Apply the primer thinly, ensuring you overlap each brush pass to avoid leaving some metal parts bare.
- Allow the coat to dry, then apply 1-2 more coats as necessary. After the final coat dries, sand the surface to prepare it for painting.
Note:
- If the metal had rust, apply a zinc chromate primer before your regular metal primer. The zinc chromate product resists corrosion, and therefore it will protect your metal from further rust.
Here’s How to Prime a Metal:
What Kind of Primer Should I Use On Bare Metal?
Epoxy and self-etching primers are the best products to use on bare metal. Whichever you select will depend on the condition of the metal, the amount of time you can spare for the project, and, more importantly, personal preference.
So, let me give you some information about each to help you make the best choice.
Self Etching Primer
A Self-etching primer is a product that combines an acid with zinc particles and a little pigment. When you put it on the metal, the acid burns the surface and embeds the zinc particles into it.
These primers are perfect for bare metal because the acid and zinc particles give it a “tooth” to grip paint without sanding first. The zinc particles also protect against corrosion, thus preserving the metal’s structural integrity.
Nevertheless, self-etching primers do not offer the same level of protection as standard metal primers, even though we classify them as primers. Yes, they prevent corrosion damage, but only for a little while.
For this reason, it’s best to use them as a preparation layer before applying a high-build primer with better protection capabilities. This means using it like a metal sander to scuff the surface before priming.
Where to Use Self Etching Primers
Self-etching primers are ideal when working on metal in pristine condition or with minor damages. If the metal surface has cracks or dents, fill those up first and then apply the primer. Here’s why.
Self-etching primers don’t provide long-term protection against corrosion. Therefore, if you repair cracks and dents after applying it, the metal may begin to rust while you wait for the filler to dry and set. Consequently, you will have to repeat the whole rust removal process.
Pros of Self-etching primers
- Etch primers contain an acid component that can roughen the outer surface of the metal, eliminating the need for sanding. This feature reduces the amount of surface preparation work required before priming metal.
- These products dry almost instantly, allowing you to finish projects more quickly.
Cons of self-etching primers
- These products do not offer adequate protection against corrosion; therefore, you must always apply another high-build primer on top of them to be safe.
Epoxy Primers
Epoxy primers work similarly to epoxy glues, forming a mechanical bond with the metal. It is the most costly metal primer but worth it because of its durability.
Unlike self-etching products, epoxies do not automatically roughen the surface. Therefore, you must scuff the surface manually before applying it.
Where to Use Epoxy Metal Primers
You can use epoxy primers on all metals, whether pristine or badly damaged. Unlike self-etching primer, you can apply epoxy primer and then fix the dents on the metal.
The reason is that the epoxy will prevent the metal from rusting as you wait for the repair fillers to set. You can even leave the primer on for days and pick it up from where you left off without worrying about rust.
However, if you leave the primer on for more than seven days, you must scuff the surface lightly before proceeding. It is an added step, but it is a small price to pay for being able to work at your own pace.
Pros of Epoxy Primers
- They are the most durable primers, ensuring that your metal paint finish lasts long.
- You can leave them on the metal for up to one week without painting and not experience adverse effects.
- They offer the best protection against rust.
Cons of Epoxy Primers
- Epoxy primers cannot etch the surface; therefore, you must sand before priming. The sanding requires a lot of energy and time, but it is necessary to help the primer stick properly.
- These primers take too long to dry; thus, projects where you use them take longer to complete.
- Epoxy primers are more expensive than other metal primers; therefore, you’re out of luck if you have a limited budget.
What Happens If You Paint Metal Without Primer?
Failure to prime metal before painting can lead to many problems with the finish. It may be an extra step to the painting process, but it will help you save time and money in the future. Below are the things to expect when you paint metal without a primer.
- The moisture in the paint will begin and accelerate the corrosion process. After some time, the rust will start pushing the paint off the metal leading to flaking and peeling.
- Corrosion aside, the chemical makeup of metal paint is not as binding as metal primers. As a result, the finish will peel off sooner than usual.
Even though the metal primer is necessary, there are selected situations where you can skip it without worrying about rust.
For instance, a metal like stainless steel does not require a primer because it already has all the necessary properties to prevent oxidation. Scuffing the surface lightly can help the paint adhere to stainless steel without a primer.
You can skip the primer if you paint the metal using specialized direct-to-metal paint. Manufacturers use unique components that allow these paints to stick to all metals without a primer, and you can even apply some of them directly on rusted metal!
These types of metal paints are best used by newbies or when you have limited time because it minimizes the need for extensive preparation.
Should You Sand After Priming Metal?
Yes, you should. As you wait for the final primer coat to dry, specks of dirt, debris, and even insects could fall and get stuck in the finish.
If you paint over the finish like that, this debris will appear as tiny bumps in the paint finish, and it won’t be pretty. Sanding the final primer coat just before painting will remove all flaws, making it even.
Sanding will also give the primer coat a little tooth, giving the paint an even better grip. This will make the paint finish last even longer.
Remember to avoid using too much pressure when sanding after priming. If you press the sandpaper too hard into the surface, you risk removing some of the primer coat.
Consequently, the parts where you remove some primer will be bare and will be the starting point of corrosion after you paint.
Also, use fine-grit sandpaper when sanding after priming because they scratch the surface but not too deeply. Rough sandpapers tend to leave large scratches, which the paint will highlight.
Do I Need to Sand Metal Before Priming?
I always recommend sanding all metals before priming to help the primer adhere better. You can get away without sanding using a self-etching primer or a rust converter to treat rusted metal.
But, if you are unsure when to sand metal before priming, here are a few pointers to guide you:
- Always sand metal before priming when working with ferrous metals, especially those with a bit of rust on them. Not only will sanding help the primer stick, but it will also remove any rust that remains after the removal process.
- Sand the metal even if you’re using direct-to-metal paints. Yes, these paints can stick to bare metal without much hassle, but slight scuffing will ensure the paint remains on the surface for longer.
- Always sand your metal after repairs – even the most minor ones. The scuffing will help level any fillers you’ve used, so they do not show through the finish as raised points.
- If your metal has an old finish, you must sand it regardless of its condition. An old finish still in good condition requires light sanding to scuff the old paint to allow the new primer to adhere. On the other hand, an old chipped or peeling finish requires extensive sanding to reveal bare metal before priming and painting.
Conclusion
There are several surface primers today performing similar general functions. Whether it is a wood, metal, concrete, or plastic primer, they work to improve paint adhesion and hide stains on the surface, among other things.
The functional similarities have made many painters curious, wondering if you can swap one primer for another without consequences. For instance, using a metal primer on concrete or wood primer on wood.
Since metal and wood primers are the most common products today, I wrote this article to answer one of the most asked questions by painters:
Can Wood Primer Be Used On Metal?
And here’s what we found out.
The chemical composition of wood primer is incompatible with metals. Therefore, it will not prevent the metal from corroding, which is the most important reason for priming metal in the first place.
If you want a lasting paint finish on metal, preparing the surface with a metal-specific primer like self-etching or epoxy primer is best.
Self-etching primers contain acid and zinc particles that roughen the surface, allowing you to apply primer without sanding the metal first. However, it does not offer lasting corrosion protection and must be coated with another high-build primer for the best results.
On the other hand, epoxy primers provide guaranteed protection against rust for a long time. You can even leave it on the metal unpainted for up to one week.
However, epoxies dry slowly and are expensive, and you must scuff the metal before applying the primer.
Even if you select the best metal primer, your work will not turn out well without proper preparation. So, before priming the metal, remove old paint and rust and scuff its surface.
You must also identify the specific metal you have to know which products and preparation activities to do before priming.
Although priming is necessary, you can skip it if you have galvanized metal or use direct-to-metal paint. All you need to do is scuff the surface lightly, and then the paint will adhere without much hassle.
Thanks for reading this article, and I hope I have answered all your questions thoroughly. Please reach out in the comments below if you need clarification on anything.