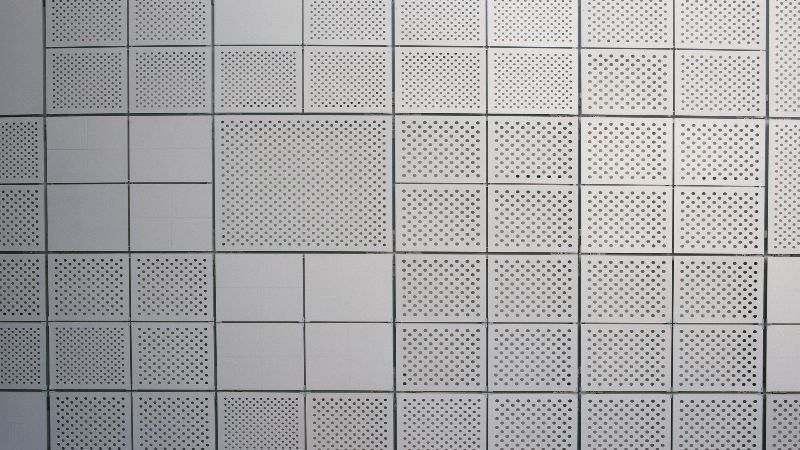
Asbestos tiles have no limits for beauty and decoration, which begs the question, can you paint over asbestos tile, especially if you are looking to further decorate?
Here’s what you need to know about asbestos. Asbestos tiles rose to prominence between 1950 and the 1980s. Even so, they still are a favorite of a large group of individuals.
The best thing about these products is that they are practically indestructible, strong, cheap, and versatile. It takes us back to our topic of discussion, can you paint over asbestos tile?
Yes, you can paint over asbestos tiles making them easy to clean and maintain. Painting over asbestos tile remains one of the safest ways to cover up and seal the material. Ensure that it is intact and not compromised before sealing.
For the damaged asbestos tile, you may require a professional to safely remove the material. After removal, you will need to replace them before painting.
Painting over asbestos tile is a great way to offer it protection by covering and sealing the tile while it is still intact.
When asbestos tiles start to experience surface damages, you may be forced to do a complete overhaul and replace the tiles which can prove to be costly.
Other than painting, there are several other ways that you can use to protect your asbestos tiles like using hardwoods and carpeting.
What’s best about asbestos is how it’s fire and heat-resistant. Not only that, but this item also absorbs sound, making it the perfect building material.
In this post, you will learn more about asbestos as a tiling material, protecting it, and keeping it in the best shape possible.
Keep reading for more insight regarding the subject.
What Paint Can I Use On Asbestos Tiles?
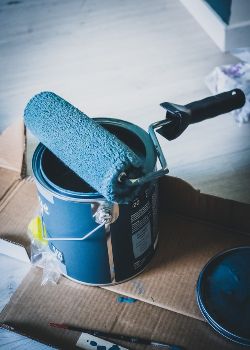
The paint to use on asbestos tile should be the oil-based paint because it offers great adhesion properties.
Oil paints further offer so much resistance to wear and tear compared to their latex counterparts.
As for the high traffic areas like the floor.
It would be best to go for polyurethane formulas because poly has a reputation for withstanding vigorous use as well as durability.
How to Paint Asbestos Tiles
Before painting, start by properly preparing the surface. Here are the steps you need.
Step 1: Check for Any Fault
It is important that you take a look around your tiled surface, and identify the faults like cracks, breakages as well as signs of wear and tear.
Also, check if there is any exposed adhesive since it might contain asbestos fibers.
Tip: You shouldn’t inhale asbestos fibers because they can cause some serious health complications.
It would help if you use protective gear when handling asbestos.
Step 2: Remove or Repair Damaged Flooring
The slightest mistake can compromise your whole project and possibly put you in a position where you have to revamp the whole project and start over, again.
Therefore, it would be wise to remove or repair the damaged flooring. If you are confident about the process, you can do it by yourself or look for a qualified contractor for the job.
Looking for a qualified professional will ensure that you get it right especially if you have never handled such a task before.
Step 3: Prepare the Surface.
You can do this by removing any polish or wax.
Tip: It’s not recommended to use materials such as abrasive pads, sandpaper, power stripper, or wire brushes on asbestos tiles.
The best material for surface preparation is chemical solvents. For this case, trisodium phosphates will work best.
A mixture of one part alcohol with three parts water can also be of help.
Step 4: Vacuum the Floor
The reason for this step is to get rid of any remaining dirt or dust.
Tip: Ensure you have protective clothing.
Note: Intact vinyl asbestos tiles don’t release asbestos fibers into the air since they are non friable.
Painting the Floor
Below are the necessary steps you’ll need to paint asbestos tiles.
Step 1: Choose the Best Primer
I recommend using oil based primer since it will help in enclosing the asbestos fibers. As seen above, having the fibers in the air poses a threat to your health.
Step 2: Prime the surface
Before priming the surface, ensure you cover the baseboards with masking tape. You can also consider removing them.
Use a roller or a brush to evenly prime the surface.
Ensure you leave an escape route so no bubble can get trapped before the surface has completely dried.
Step 3: Paint the tiles
You’ll only begin this step after the primer has dried. Go for an oil based paint since it’s water resistant and adheres better than latex based paint.
For better protection and enhanced durability, coat the paint with polyurethane. Before doing this, allow the painted surface to cure for at least two to three days.
I recommend applying approximately three coats of clear water based polyurethane.
Tip: For a prolonged life span, you may want to add a maintenance coat of polyurethane every two years.
Is Asbestos Tile Under Carpet Safe?
The condition for carpeting asbestos tile is that the tiles should be in the best shape possible with no damage over them.
Again, this question trickles down to an individual preference.
I have installed and seen several cases where the carpet is laid over an asbestos tiling without any concerns over time. Here’s how to go about the process.
Method One: Applying Glue
Gluing is the easiest and the most straightforward method when the floor/tiles are smooth and consistent.
It takes any flooring adhesive to stick/glue the carpet to the tile.
A few examples of best flooring adhesives are: ROBERTS R6300-1 Pressure Sensitive Adhesive for Carpet and 3M Super 77 Multipurpose Permanent Spray Adhesive Glue
Once you have applied your adhesive to the surface, lay your carpet on top and give it up to 24 hours to dry- to be on the safer side.
What’s impressive about this method is the flexibility that it offers, it allows you to remove the carpet whenever you feel like replacing it.
Even as you install carpet over your asbestos tile using this method, it is important that you apply glue properly to all the surfaces you intend to cover to prevent chances of damage as well as dust accumulation beneath the carpet.
As much as gluing is the easiest approach, it comes with some drawbacks as glue would from time to time come off meaning it would help if you re-apply glue after every 6-12 months.
Method Two: The Double Stick Installation
The double-stick installation method is what you need for the carpeting of your basement floor because the carpet will be insulated. This method is more or less the same as the first one.
Gluing and double stick method only difference is the use of padding underneath. In this case, you’ll need to buy extra padding to use under the carpet.
The extra padding that you lay under the carpet offers more comfort and extended durability.
Layering the padding underneath will give you the most comfortable result, even though you will encounter some difficulties when removing the carpet.
This method does increase the height of the carpet, which might result in problems with the thresholds or doors. Additionally, you will find this process time-consuming, considering the layers are thicker, which will result in glue taking a lot of time to dry.
Method Three: The Wood/Tack Strips
If you are not up to glue or double-stick installation, you could go the tack strips way.
Here, all you should do is outline the room’s perimeter using tack strips- wooden strips with nails holding the carpet.
In this method, you should put the paddings first to give you enough height.
Once you have set paddings the right way, put the carpet over it. Then, tack the carpet on the nails.
You will realize that this process is easy to install. When it comes to a time when you have to remove the carpet, it will be even easier.
In this process, there’s stretching, which can cause damage to the asbestos tiles underneath.
It is also possible that the carpet might also dislodge itself from the strips if used frequently.
You should find it easy to install a carpet over asbestos tiles with all the methods discussed.
How to Safely Remove Asbestos Tiles
Even though removing asbestos requires professionals, you can do it at home. However, ensure you abide by your state’s and city regulations of asbestos removal.
Also, take the same safety precautions as the professionals.
Here’s How to Remove Asbestos Tiles from Floor:
The Equipment for Safe Asbestos Flooring Removal
-
Plastic Sheets
You’ll use the sheets to seal off the working area. Doing this will prevent asbestos fibers from spreading.
Also, don’t forget to turn off the air conditioning unit and the heating ventilation.
Tip: If you have any item you can’t carry away from the working area, consider covering it with plastic sheets.
-
Air Purifier With a HEPA Filter
Yes, you might have covered all the exposed areas. But this doesn’t prevent the tiny asbestos fibers from contaminating the surrounding air.
Therefore, you may want to have an air purifier in the working area to reduce the risk of contamination.
- Pump Sprayer Filled With Water
While removing asbestos from your floor, you’ll realize that there will be some dust in the air.
Therefore, you’ll have to keep the tiles wet.
You can quickly do this by spraying the floor and any old adhesive underneath.
Consequently, you can use a solvent to dissolve the old adhesive.
-
Disposable Coveralls and Gloves
You’ll need disposable overalls and gloves since asbestos is not very easy to wash out of clothes.
-
Respiratory With a High Efficiency Particulate Air (HEPA) Filter
It’s necessary to protect yourself from harmful asbestos fragments. Therefore, you’ll have to use a full or half face mask with a HEPA filter.
-
Sealable Plastic Bags for Disposal
Sealable plastic bags will be necessary due to the harmful nature of asbestos fragments.
-
Wet Wipes or a HEPA Vacuum
To prevent stirring up asbestos dust, consider cleaning the work area and tools with disposable wet wipes.
When Should I Remove Asbestos Tiles?
It’s not safe to stay with chipped asbestos tiles in your home due to their harmful effect on your respiratory system.
For this reason, you should immediately remove your asbestos tiles when you notice any cracks.
It’s even better when you do it before the tiles chip off to reduce any chance of air contamination.
How to Seal Asbestos Tiles
Asbestos is known for causing various respiratory diseases such as cancer.
The best way out is to seal them to prevent future exposure.
Note: it’s important to call a professional if the tiles have chipped.
Here is how you can seal asbestos.
Step 1: Removing the Baseboards
First, you’ll remove the baseboards in all areas with the tiles. The best tool to use is a pry bar and a hammer.
You have to be very careful while prying the baseboards away from the wall.
With this in mind, you’ll avoid splintering the boards since you may want to use them again.
Removing the board is a good decision as it will enable you to apply the embossing leveler effectively.
Step 2: Prepare the Floor.
You can do the floor preparation by wet mopping it.
Doing this will ensure that no dirt and debris are left to contaminate the air.
Suppose your floor has any oily areas. Consider using a degreasing cleanser before you rinse it with water.
Give the floor some time to dry until it’s moist to the touch.
Step 3: Mix the Embossing Leveler.
When mixing the embossing leveler with water, ensure you follow the manufacturer’s instructions.
I recommend using a wood paint stirrer stick to do the mixing until you get a smooth consistency.
Step 4: Fill the Bucket With Water
Fill one of the remaining buckets with clean water. It’s this water that you’ll use to rinse the metal trowel when applying the leveler compound.
Step 5: Pour the Mixture.
It’s now time to pour the mixed embossing leveler compound on your asbestos tiles.
Note: Don’t pour in excess since you only need a moderate amount.
Step 6: Smooth the Mixture
Do this gently using a metal trowel.
Tip: The embossing leveler takes a short time to set or cure. Therefore, you’ll have to trowel quickly.
Ensure you uniformly spread the mixture on the tile’s surface to create a thin level layer. I
f you do it correctly, the thin layer will create a perfectly sealed surface.
Step 7: Rinse the Metal Trowel Every few Minutes
It would be nice to keep rinsing the metal trowel in the bucket filled with clean water. Doing this will prevent the accumulation of the leveler compound on the metal trowel.
Step 8: Allow the Embossing Leveler to Dry
The recommended drying time is approximately two hours. It will also help to check the manufacturer’s instructions for the appropriate drying period.
Remember not to walk on the surface when it’s yet to dry. Finally, carefully re-install the baseboards using a hammer.
Final Thoughts
We have seen how asbestos tiles are strong, incombustible, alkali and heat resistant, sound absorbent, and versatile, among other advantages.
The only drawback is that asbestos fibers can cause serious respiratory diseases.
Even so, there are various ways to prevent the release of these fibers into the air. One of them is by sealing the tiles.
Painting is also a better way of protecting many surfaces while giving them an elegant look. But…
Can You Paint Over Asbestos Tile?
Yes, you can protect your asbestos tiles by painting. I recommend using oil based paints since they are long lasting and have good adhesion properties.
It’s my pleasure that you have read this article to this point. Suppose you have any clarification, please feel free to share with me in the comment section below.