The use of dip powder nails dates back to the early 1990s, thanks to the invention by a popular nail company called SNS.
These products came as a remedy for beauty with durability since they can last more than three weeks.
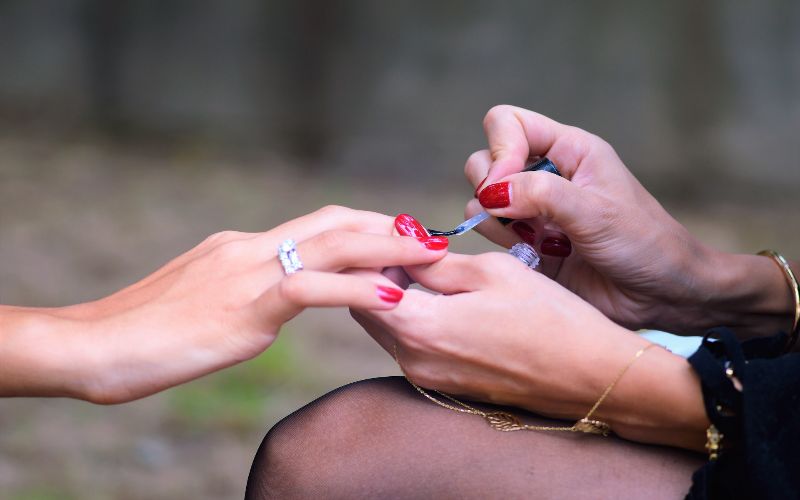
The application method is more straightfoward than with acrylic. But the question is, can you paint over dip nails?
Yes, you can paint over dip nails because the dip powder is usually sealed with a final top layer coat before you leave the salon or the nail parlor.
Circumstances that need a temporary change of your nail color, like a job interview, allow you to paint over dip nails.
It is best to paint a neutral shade over your dip polish and later remove it with a non-acetone nail polish remover.
That way, you will still be preserving your manicure underneath.
However, avoid doing this at home. Instead, get a professional to do the job.
Continue reading this article for more information around the subject.
Can You Use Regular Polish Over Dip Nails?
 Yes, you can if you get bored with the previous color.
Doing this is easy since you can apply the regular polish without damaging the color of the dip nails underneath.
Note: Ensure you use a nonacetone nail polish remover when removing the nail polish from your dip nails.
What if you accidentally use the acetone polish remover on your dip nails?
You must be ready to watch the outer layer become sticky and wear off in such a case.
But what makes acetone and non acetone nail removers different? It’s the ingredients used in their production.
For acetone polish remover, the active ingredient is isopropyl alcohol.
On the other hand, the non acetone removers have less harsh ingredients, including ethyl acetate.
With such formulation, the non acetone doesn’t work as quickly as the counterpart. Even so, the product does the job as you expect.
Another benefit of the non acetones is that they won’t dry up your cuticles.
How Do You Paint Powder Dip Nails?
Painting over dip powder nails is a job you’ll love, especially if you follow the quick steps below.
Step 1: Nail Preparation
You’ll want to start by buffing and shaping the nails until they fit your desire.
Step 2: Clean the Nails
Use a special solution to ensure that no oils remain on your nail.
Step 3: Dip Nails into the Powder
Before dipping the nails into the powder, ensure you put on the base coat. Afterward, get rid of the excess using a soft textured brush.
Step 4: Repeat Step 2
Repeat the second step at least twice to ensure an even application. Up to three layers of dip powder will be enough.
Doing this will make your nails thin but very strong.
Step 5: Apply the Sealant
Here, you’ll have to apply a thin sealant layer before buffing your nails.
Tip: In this step, you can consider reshaping your nails if you realize they need any improvement.
Step 6: Paint the Nails
After keenly following the above steps, it’s time to apply the nail polish.
Pro Tip: It’s wise to do the painting before applying the topcoat layer.
Also, ensure your nails are matt and buffed when painting.
Step 7: Do Some Designs
With at least one or two layers of regular polish on your dip powder nails, do whatever designs that will give you goosebumps.
Step 8: Topcoat
Finally, topcoat your beautiful nails to enhance their durability.
Here’s a Video On How to Paint Dip Nails:
Note: If you carefully follow the above steps, your nails can last between 3 weeks to a month.
What if you get bored with the previous color on your dip powder nails after a few days or weeks?
Here, you’ll have to repaint them using regular polish. You’ll also want to use the same application methods as you would do with your bare nails.
Also, remember to use a non acetone polish remover to get back your dip powder nail color with no damages.
What Are the Benefits of Dip Powder Nails?
Here are some of the benefits that will make you go to the nail salon to renew your manicure with dip powder nails:
- Long Lasting
The nails will take you for over three weeks without chipping, unlike the gel nails.
- No light is needed for curing.
You won’t have to spend more time in the nail salon with such nails since they don’t require UV light to be firmly sealed on your nails.
Note: If you go for a professional nail master, you’ll receive a full dip manicure in less than 45 minutes.
- Easy Application
The best thing about the dip powder nails is that you can purchase the kit and make the application in the comfort of your home.
All this is because you won’t need UV light to dry. The application process is also straightforward if you follow the correct steps.
- Not Bad for Nails
Various brands offer quality products that can’t harm your nails. A good example is the dip powder enriched with calcium and vitamins.
With such a product, your nails will have enough strength and continuous growth.
- Works On Both Natural and Artificial Nails
What’s best about these nails is how they offer more durability than acrylic and gel nails.
You cannot forget that you can use them on natural nails to increase strength and artificial ones, including press on nails and acrylics.
What Are the Draw Backs of Dip Nails?
- They might look bulkier than regular polish.
Suppose you accidentally put too much powder on your nails. They might look bulkier. Thus, consider shaking off the excess before sealing.
- Hygiene issues
Hygiene can’t be a problem if you do the painting at home. However, if you go to a salon, ensure the technician uses different bowls for each client.
Alternatively, using a brush for the application will help prevent hygiene issues.
- Allergy
It’s good to know that the bonding product for dip powder nails is often a monomer.
Note: Monomers are usually allergens that can irritate the nail beds.
- Removal cause nail damages
While removing the dip nails, you must soak in acetone for about 10 to 15 minutes.
You might want to file your nails if the dip does not come off within this time frame. If you do this, you might end up damaging your natural ones.
How Do You Use Regular Polish Over Dip Powder?
You’ll require the following for the application process:
- Topcoat
- Basecoat
- Soft brush
- Regular nail polish
- Alcohol or acetone
- Nail file (s)
Here are the steps you need to use your regular polish over the dip powder:
Step 1: Buff your Nails
Buffing your nails means getting rid of the first layer of your dip nails. Doing this will also result in removing the color.
Thus, you’ll require a rough file while beginning. Use it to scrub off until you remove the very first layer.
The next step is using a smoother file to remove the smaller details.
Step 2: Clean
Ensure you eliminate any dust leftovers from your cuticles and the entire nail surface. Consider using a brush to swipe over the nails.
If there is any remaining dirt, remove it using either alcohol or acetone.
Note: Acetone is not a good choice for removing the remaining dust leftovers. Therefore, you’ll want to be very careful when using it.
It would be nice to use it only when clearing up your cuticles.
What if you accidentally wipe out your dip powder nails with acetone? In such a case, you’ll irreversibly damage the artificial enhancement.
Step 3: Apply Base Coat
If you want to smooth out your nails, consider applying the base coat. It will ease up painting with regular nail polish.
However, this step is optional.
Step 4: Apply the Regular Nail Polish
Once you are satisfied with the first three steps, apply the new color. You can paint as many layers as you please.
Step 5: Apply the Top Coat
Applying the topcoat is optional. However, your nails will be more durable if you choose to do so since they’ll be well protected against cracks.
How Do You Put Gel Polish Over Dip Powder?
Applying gel polish over dip powder requires the following steps:
Step 1
Start by applying on to your natural nail. Afterward, apply on the base, specifically at the meeting point of the tip and the nail.
The next step is dipping the nail into the natural powder.
Step 2
Apply the base up to ¾ of the nail before dipping it into the natural powder and repeating the process.
Step 3
Unlike step 2, where you applied the base to ¾ of the nail, here you’ll have to do it for the entire nail.
Also, remember to repeat the process.
Step 4
You’ll have to apply the sealant to your entire nail gently. Doing this will enhance the durability of your nails.
Step 5
After protecting your nails, use either a file or an e-drill to shape them.
Note: You don’t need to buff the nails. Just rough them.
After this, remember to remove the excess nail dust.
Step 6
You’re now ready to apply the gel. I recommend using only one coat of gel polish. The color choice will depend on your preference.
Once you’re done, cure the nails using a lamp.
Step 7
Apply the second coat of the gel polish and use the lamp to cure it.
Step 8
Add a layer of a top coat and allow it to cure for at least 60 seconds.
Step 9
Finish by gently applying a thin layer of nourishing oil on the cuticles.
Why Are My Dip Nails Not Lasting?
There are several reasons your dip will not last, and each reason comes with its side effect.
Let’s take a look at some:
- Cracking
You might experience vertical cracks on your nails several days after dipping. Such occasions always happen if you unevenly apply the products between coats and layers.
For this reason, you need to be very careful with the application angle.
Pro Tip: Suppose you make the application with the brush tilted upright (perpendicular to the nail). The product will build unevenly.
In such situations, your painting will crack. Besides that, dipping your finger at 90 degrees with the powder will also result in an uneven surface.
So what’s the remedy?
If you want to avoid uneven application, ensure the brush is parallel to your nail. While applying, gently move the brush from the cuticle to the free edge.
Note: Consider using long strokes for the application.
- Uneven Colors
It would help if you remembered that the dipping powder is a mixture of pigments.
Therefore, if it sits for long without using, it will settle. Such a case will result in uneven colors after application.
You can prevent this is by shaking the closed jar before use.
- Expanding
You must know that it’s not easy to maintain the color within the nail’s boundaries, especially when using thin layers and coats of products.
The expansion mainly occurs at the sidewalls and the cuticles. It happens when dipping powder tends to absorb the product quickly.
Worry not since we got a solution for you.
If you want to avoid this, I suggest applying the adhesive on at least ¾ of your nails. Please don’t forget to leave a small margin below the cuticles.
After applying the first coat, dip your finger into the powder at a 45 degrees angle.
It’s necessary to tap off the excess before applying the second coat of adhesive. For this coat, I recommend leaving a small space below the cuticle.
Also, remember to repeat the dipping process.
Note: Working with small increments will prevent flooding the sidewalls and the cuticle with color.
- Lifting
If you notice your dip nails lifting, it means the dip powder didn’t adhere properly.
The worst part about such an issue is that it begins at the preparing stage.
Another reason for lifting is due to oily nail beds. Such nails will prevent the products from adhering.
Additionally, lifting can occur if the product gets to your cuticles or the surrounding skin.
Tip: For proper adhesion, ensure your nail plate is free from moisture and debris.
What will you do to avoid lifting?
First, you need to take care of your steps. Again, consider using an appropriate cuticle remover while removing the dead skin from the nail plate.
I suggest using a 180 grit file for buffing the nail’s surface. Doing this will provide the right texture for proper adhesion.
Finally, apply a primer for dehydration before applying the base.
Here are other ways to avoid lifting:
- Thoroughly removing the cuticles.
- Buff your nails before starting the manicure.
- Remember to wash your hands after buffing and cuticle trimming.
Note: If you have oily nails, consider washing your hands with soap and clean water. It will help in combating the nails.
- Thickening up of the base coat or the topcoat
If you want to avoid such a problem, I suggest making the application with a brush saver. Also, don’t leave the brushes out of the bottle longer than expected.
While working on your dip nails, please remember the following:
- Proper nail preparation.
- Protect your nails from chipping or lifting.
- Keep your brushes and product bottles clean.
- Don’t put too much base or topcoat.
How Do You Take Off Dip Nails?
Did you know you can safely remove our dip nails from your home without damaging your natural nails?
Let’s found out how…
First, you’ll need to have the following tools:
- A bowl
- Nail buffer
- Nail clippers
- Double sided file with grits of 100 or 180.
- Pure acetone
- A metal cuticle pusher or an orange stick
Note: Consider doing this in a well ventilated room, preferably near a window, since the acetone has strong fumes.
Besides, remember to cover your workplace to prevent stains or scratches.
Step 1: Cut and File
If you want to speed up the entire process, cut the dip powder nail extensions to your natural nail length.
Note: Use a clipper for cutting.
Next, buff the nails using the course side of your nail file. Doing this will help remove the shiny top coat of the manicure (seal).
Tip: The thinner the dip powder layers, the less time you’ll need to soak your fingers afterward.
Step 2: Soak Your Nails In Acetone
It’s nice to remember that acetone is not good for your skin since it might make it dry.
If you want to avoid this, consider rubbing petroleum jelly into your cuticles and on your fingertips.
While rubbing, avoid your nail bed.
When your hands are well protected, pour the acetone into a bowl and dip all the fingernails into the bath.
Leave the nails in the bath for at least 10 to 20 minutes for the dip powder to loosen.
Suppose you realize that after 20 minutes, the powder has not loosened, don’t hesitate to continue dipping for an additional five to seven minutes.
Step 3: Push the Dip Off Your Nails
Once you notice the dip is flaking off, gently remove it from your nails using either an orangewood stick or a metal pusher.
Pro Tip: It would be best to start from the cuticle area to the end of the nails.
Also, ensure you don’t apply too much pressure to your nail bed.
Step 4: Buff and Shape
You don’t have to worry if there is any remaining polish. Gently buffing with a nail buffer will help you out.
Besides, buffing your nails will ensure you get a smooth finish.
What if you have jagged or uneven nails? Here, you’ll need to use the opposite side of your double sided nail-file (180) to even out the nails.
Note: Remember to maintain the length on the side, especially if your nails feel weak.
Step 5: Hydrate and Massage
After successfully finishing the above steps, there are chances that your skin has dehydrated from filing and dipping in acetone.
Therefore, applying your favorite hand creams and oils will help ease hydration. Finish off by massaging your fingertips.
How Long Does Dip Nails Last?
Once you apply and accord your dip powder nails proper care, expect them to last for around 3-4 weeks.
Again, the durability of your dip nail varies depending on the brand of Dip Powder you use.
Other factors affecting the durability of dip nails are the amount of activity you do and their intensity.
Premium brands of dip nails tend to last longer. And the more you do with your hands, such as house cleaning, gardening, and laundry will shorten the lifespan of your dip nails.
How to Make Dip Nails Last Longer
Some of the steps to ensure your dip nails last longer are:
Prepare and Clean Your Nails Properly
Proper preparation and cleaning of your nails are essential to ensure that your dip nails will last longer.
It will help prevent them from lifting prematurely.
Even as you prepare your nails for dip powder, ensure that you tend to your nails by filling them.
Use a Dehydrator and a Nail Primer
Dehydrators and nail primers are synonymous with acrylic and gel applications.
However, they can also be used to extend Dip Powder Nails’ life span and significantly minimize their chances of lifting.
Nail Primers play a role in the adhesion between the base and dip powder by roughening up the surface of the nail plate.
The Dehydrator removes oil and moisture from your nails.
Dehydration, in this case, is excellent for a better bond between the base and the nail plate.
Correctly Apply Your Dip Powder
You need to apply your Dip Powder the right way for them to be durable.
Correct application means following all the stated steps to the letter as indicated by different brand manufacturers.
Skipping some application steps will only result in a finish that might last for a while.
What You Need to Know Before Getting a Dip Powder Manicure
- It’s good not to try it at home because you’ll be dealing with chemicals that can harm your nail plate or skin.
It doesn’t matter even if you’re using professional-grade products since they also contain harmful chemicals.
- You won’t get the desired treatments in the salon- such happens because of sanitation concerns.
- Dip powder nails have extensions- Therefore, you shouldn’t worry if you have short nails.
- Besides, you can file them down to your desired nail shape.
Note: The dip powder is lighter than acrylic. Thus, it has enhanced durability.
- Your natural nails might become fragile- this is not the only case since your nail plates can also become brittle and dehydrated.
If you want to void this, go back to the salon for the removal process (by a professional).
- Aftercare will help restore your nails’ health- Thus, I suggest applying cuticle oils and quality moisturizers several times a day.
How Much Do Pip Nails Cost?
If you go to a professional for the dip nails manicure, the entire process will only require about 45 minutes to an hour.
The price for this will range between $30 to $50. Besides, the price also depends on the location and the salon.
Can You Fill Gel Dip Nails?
Yes, you can do this even without starting from scratch or soaking off your previous manicure.
Suppose you want to save more time doing this. I suggest doing this with a mani in good shape.
What if you have major lifting? In such a case, soak off the dip powder before giving your nails a fresh start.
Doing this will help prevent fungal growth while avoiding contamination.
What Is Better Gel or Dip Nails?
The good thing about the gel and dip is that they beautify your nails.
Despite this, which one will you choose?
To find out, let’s take a breakdown of each product separately.
Dip Nails
- It’s acrylic based.
- Cures in the air due to its colored powder acrylic mixed with glue type resin.
- It requires a base or a primer coat.
- You need to work in layers.
- You’ll apply a top coat that cures in the air.
- It lasts up to 5 weeks with proper preparation, application, and maintenance.
- It takes longer to dissolve and remove.
- The manicure is a bit expensive.
- A professional will take about 45 minutes to make the application.
- It can be unhygienic if you dip your nails in the same powder as other customers in the salon.
- There is potential damage to your natural nails.
- The removal process is quite long.
Gel Nails
- The painting process is similar to regular nails.
- It requires UV or LED light to harden.
- The manicure can last only between two to three weeks.
- It’s easy and first to remove.
- There is potential damage to nails.
- It’s cheaper than dip nails.
- The compilation time is approximately 45 minutes.
From the above differences, you notice that dip nails have more advantageous features than gel.
If you have a fixed budget, go for gel since they are cheaper. But if you need quality and durability, a dip nail manicure is what you need.
Can I Put Gel Polish Over Dip Nails?
Yes, you can. If you want to do this, follow a similar dip powder nail application, then rough it without buffing it.
The rough texture will allow the gel to adhere to the powder without peeling off.
Note: You’ll want to skip the second seal protect.
The gel application process will be the same as the traditional one (applying the first coat and cure it, then apply the second one and cure again).
Why Do My Nails Hurt After Getting Dip Powder?
Here are the reasons why your nails may hurt after getting dip powder:
- The technician might have used a tip that was smaller than your nail size.
- The c-curve pinch might be too hard.
- Your nail plate might be over filed with either a hand or electric file.
Can You Use a Regular Top Coat On Dip Nails?
Absolutely! However, it will depend on the type of topcoat. The reason is that most gel topcoats will work over dip nails due to their interaction with the activator.
On the other hand, matte topcoats won’t produce the same results.
Pro Tip: Consider skipping the activator step when using a regular top coat on dip nails.
However, the durability will not be the same compared to not skipping the activator step.
Final Thoughts
Up to this point, you have noticed how dip powder nails have immense durability, among other advantageous features.
You only need to pay attention to the application process. If possible, seek a professional’s assistance. So, the remaining question is…
Can You Paint Over Dip Nails?
Yes, you can paint over your dip nails and get brilliant results.
Thanks for taking your time on this article. Despite all the points I have provided, please feel free to text in the comment section below if you have any observations, addition, or question.