When choosing paint and primer, you must ensure they are compatible before using them together. If they aren’t, the primer won’t hold the paint properly; hence the paint coat will have bubbles or peel off the surface.
When it comes to primers, oil-based primers are more revered because they are durable and hide stains better.
On the paint side, most painters prefer the latex ones because they are easy to apply and touch up and have low VOCs. But are these two compatible? Can You Use Latex Paint Over Oil-based Primer?
You can apply latex paint over oil-based primers because oil primers are compatible with most paint types.
However, oil-based primers are sleeker; hence you must prepare the primer coat by sanding and cleaning it properly before applying the paint.
The scuffing will rough up the surface, ensuring that the color and primer form a good bond.
You can use this combo in several applications, be it wood, or walls, indoors or outdoors. It also helps when you have a surface painted with oil paint but want to repaint it with latex paint without removing the old paint.
The use of these two products can be a little confusing, especially if you do not know some important details about them.
Knowing how manufacturers designed them to work will help you understand why they are compatible.
Additionally, the information will help you make better choices when shopping for other coating products. So let’s dive in.
What Is Latex Paint
Latex paint is one of the most widely used paint types in the world. Manufacturers make them using pigments for color and artificial plastic polymers as binders, all suspended in a water base.
These paints are called “latex” because initially, paint makers used the sap from the Brazilian rubber tree as the binder – commonly known as later rubber.
With the many resources available today, manufacturers reverse engineer the same compound in labs to mimic natural latex, and it works perfectly.
Today, the two main plastic polymers created as binders are acrylic and Vinyl Styrene. So as you shop, you will come across products labeled either “Acrylic latex paint” or simply “latex paint.”
The acrylic latex versions use 100% acrylic resin binders, while the other versions use only vinyl or a mixture of vinyl and acrylic as the binders.
 The all-acrylic latex paints have the highest quality and are the most durable. They adhere well to surfaces and are flexible; hence they can move with the surface as temperature changes. However, they are also more expensive because acrylic is expensive.
On the other hand, the all-vinyl versions are cheaper because vinyl is cheap; however, they lack the quality of 100% acrylic paints.
The vinyl resins are stiffer, making these paint types rigid and prone to cracking, especially in areas with constant temperature fluctuations. For this reason, they are most useful for indoor painting projects.
Manufacturers sometimes use a combination of acrylic and vinyl resins as binders to make the paints more durable. The costs of such products always vary based on the amount of acrylic used.
The more the acrylic, the more the paint will cost, the more durable it will be, and vice versa.
So as you shop, purchase “100% acrylic latex paints” if you want the durable kind or simply “latex paint” if you want the ones with pure vinyl or a mixture of vinyl and acrylic.
One of the things that make latex paints popular is their safety. They contain very little to no VOCs; hence they release fewer harmful fumes as they dry.
Additionally, they dry super fast, and you can clean them with regular soap and water because they are water-based.
Even though this paint type is safe for the environment, I still recommend that you work in a well-ventilated space and put on proper protective gear when handling it.
What Is Oil-Based Primer
As the name suggests, oil-based primers use oils instead of water or chemicals as their solvent. They have been a standard in the painting industry for decades and have several features that make them popular.
These primer types work well with both oil- and water-based paints, making them versatile. You can use them on many surfaces, including wood, metal, and interior and exterior walls.
They are good at hiding stubborn stains and stopping wood tannins from bleeding through fresh paint. Furthermore, oil-based primers are more durable than most primer types.
They dry into a rigid film that is hard to remove, protecting the surface for longer. They even shield the surface from water damage during the short period before you paint it.
On the downside, you cannot clean oil-based primers with soap and water. You need to use harsh chemical solvents like Turpentine or paint thinner to clean up accidental spills and wash the painting tools.
They also dry very slowly; therefore, they are unsuitable for rush projects.
They also have high VOC levels and release harmful fumes as they dry. These fumes are toxic to people, especially when exposed to high concentrations for a long time.
For this reason, you must always maintain good air circulation in your workspace to keep fresh air flowing.
Why Should I Use Latex Paint Over Oil Primer?
Oil primers are versatile; hence you can paint over them using oil or latex paints. Applying oil paints over oil primers produces the best and most durable results, but most painters like the using latex paint over oil primer combination. Why is that?
Below are a few important reasons to use latex paint over oil-based primers.
-
To Reduce Working Time
All oil-based products – paint and primers – take a long time to dry. So when you use them together, you will spend more time waiting for the layers to dry, making your project run for longer.
The usual painters’ reaction to this problem is to switch to water-based products because they dry faster. However, the results are never as durable as the oil over oil combination.
For this reason, painters resort to using latex paints over oil-based primers to try and reduce project durations without sacrificing durability. The oil primer will take time to dry, but the latex paint will make up for lost time because it dries fast.
-
To Make The Paint Job More Durable
Latex paints are durable but not as durable as oil paints; therefore, painters often look for clever ways to make them last longer.
Since primers determine topcoats’ adhesion strength and durability, it makes sense that using a durable primer with less durable paint will still produce fantastic results.
In this case, oil primers are more sturdy and provide better adhesion; hence, they keep the latex paint on the surface for longer.
-
To Be More Considerate Of The Environment
Oil-based products contain high amounts of Volatile Organic Compounds (VOCs), harmful to the environment. So if you use an oil-based paint over an oil-based primer, there will be an overload of the paint fumes, which puts the environment at risk.
The best way to reduce the possibility of causing too much damage is by using latex paints over oil primers instead of oil paints.
The latex products are more environmentally friendly, and since they are compatible with oil primers, you’ll still be assured of their durability.
When to Use Oil-Based Primer?
Oil-based primers were popular in the olden days, but painters are using them less and less because of their high VOC levels.
However, there are still specific applications where you must use them if you want fantastic finish results. Below is a list of applications where you must use an oil-based primer.
-
When You Need to Cover Stubborn Stains And Odors
Sometimes, the surface you’re painting may have stains that won’t come off no matter how hard you scrub. It may also have some foul odors that make your surroundings smell terrible.
You may paint over these stains and odors to hide them, but they tend to seep through paints, especially water-based paints.
It is best to use an oil primer before applying your paint in such cases. Oil primers have high hiding properties that seal off the unwanted stains and odors, keeping your paint coat immaculate for longer.
Don’t get me wrong, water-based primers also hide stains well, but some degrade quickly, causing the stains to show through eventually. So, it is best to stay on the safer side by using oil primers.
-
When Painting Fresh Wood And Metal
Unfinished surfaces do not have a protective coating like paint; therefore, they are more prone to moisture damage. The most suitable examples here are fresh wood and metal.
When new wood comes into contact with moisture, the wood grains swell, causing the whole board to deform. On the other hand, metals corrode when water touches their surface.
You may think that pouring water on these surfaces is the only thing that can cause damage, but you’re wrong.
Some products like latex primers contain moisture that can cause similar damages if you use them to prepare wood and metal for painting.
For this reason, the safest products to use are oil-based primers; then, you can topcoat them with any paint you like.
-
When Painting With Oil-Based Paint
If you intend to use oil-based paint for your project, you must always start with an oil-based primer.
Oil-based paint and primers have similar characteristics; therefore, they are more compatible. If you use oil paint with other primer types, your finish will degrade faster. Let me explain.
If you use oil-based paint over a latex primer, the paint coat will crack sooner than you expect. The reason is that the primer will remain flexible while the oil paint gets more brittle as it ages.
As the latex primer moves with the surface, the oil paint will stay put, and the tension caused by the different movements will cause the brittle oil paint to crack.
On the other hand, shellac primers are compatible with oil-based paints, but you cannot use them in all applications.
Manufacturers design most oil paints for outdoor use because they can withstand harsh conditions.
Shellac primers, however, are durable, but they soften when exposed to the high heat outside.
Therefore, if you use a shellac primer under oil-based paint, the paint will wrinkle or peel off as soon as the shellac softens a little.
For this reason, it is best to use shellacs for spot priming whenever you use them outdoors.
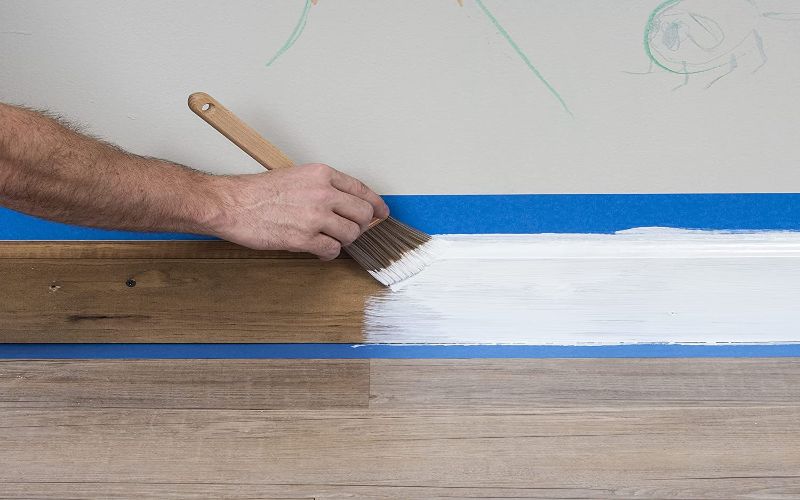
How to Paint Over Oil-Based Primer with Latex
The process explained below is the steps you will take after you have already prepared and applied the oil-based primer to your surface. Wait for the primer to dry for 24 hours before beginning step 1.
Step 1: Sand the Primer Coat
Oil-based primers have a slightly glossy surface. You may not see a noticeable shine, but when you paint straight over it, the paint will peel off just like if you paint straight over any other glossy surface without proper preparation.
To prepare the primer surface, you must scuff it gently with fine-grit sandpaper to remove the shine and give the latex paint something rough to grip.
- Choose a 180- or 220-grit sandpaper for this step because they will not leave deep visible scratch marks on the primer surface.
- Scuff the surface using consistent back and forth motions and use very little pressure; otherwise, you will remove parts of the primer coat, exposing the surface underneath.
Step 2: Remove the Sanding Dust
The sanding process produces some dust. It may not be as much as what comes off when you sand something like bare wood, but it is there, and it will interfere with paint adhesion.
- Start by sweeping off the sanding dust with a soft brush or use a small vacuum to remove it.
- Next, dip a clean rag into some warm water, then wring out excess liquid to leave the rag damp.
- Wipe the surface to get rid of the remaining dust, then allow the surface to dry before you proceed.
Note: You can also mix some Trisodium Phosphate (TSP) with warm water and use the solution to clean the surface.
This solution is especially effective if you have left the primer bare for more than 24 hours and think there may be some grease build-up.
Step 3: Apply the Latex Paint
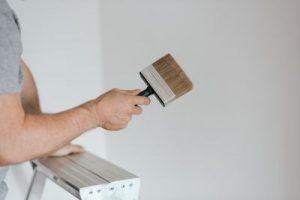
Once the surface is dry, apply the paint using a good quality paintbrush for best results. Since you’re applying latex paint, the best brush to use is a synthetic brush with either polyester or nylon bristles. These brushes will maintain their shape throughout the painting.
Avoid using natural bristled brushes with latex paint because the water in the paint will make the bristles swell, causing the brush to lose its shape as you work.
- Dip the brush in the paint, ensuring that only ¼ inch of the brush’s bristles touches the paint.
- Apply the paint using short strokes, keeping a wet edge at all times to prevent lapmarks.
- Two coats of latex paint are enough to achieve complete coverage, mainly because you used an oil-based primer to prepare the surface. However, you can apply up to three thin coats if you feel it will improve the finish. Allow each layer to dry for 4-6 hours or as directed by the manufacturer before applying the next ones.
After applying the final coat, the paint surface will be dry enough to touch in 2 or 3 days. Nevertheless, you have to wait up to a month for the paint to cure properly before putting your item through heavy use.
Oil-Based Primer vs. Water-Based Primer
The one primary difference between oil- and water-based primers is that oil-based primers use natural or synthetic oils as a solvent, while the water-based versions use water.
However, other factors can help you differentiate them and determine which is better for your particular project.
This section will discuss their differences and similarities in formulation, dry time, durability, etc., to help you understand the two products in-depth.
-
Drying Time
The drying time of a coating product solely depends on the solvent manufacturers used to make it. The faster the solvent can evaporate from the surface, the quicker the product dries.
Since water-based primers use water as the solvent, they dry reasonably quickly because water evaporates fast. You can recoat a water-based primer in as little as 30 minutes to 1 hour.
However, the times vary depending on the primer brand you have, so check the manufacturer’s instructions for accuracy.
On the other hand, oil-based primers can dry up to 4 hours because oils take longer than water to evaporate.
-
Adhesion
Both products promote excellent paint adhesion; however, oil-based primers are better, mainly if you use compatible paints.
If you’re looking for versatility, water-based primers will work on several kinds of materials without a problem. You can also use them for indoor or outdoor applications.
On the other hand, the oil-based versions are versatile as well, but painters only use them when they do not have a choice.
For instance, when painting surfaces like fresh wood or bare metals, water-based primers will cause more harm than good; therefore, oil-based primers are the natural solution.
-
Durability
Oil-based primers last longer than water-based primers because they dry into a more rigid film that is hard to scratch off. They can resist harsh weather conditions and rough handling; hence painters mostly use them for outdoor projects.
On the other hand, water-based primer is durable, but it will degrade faster if you expose it to the same conditions as the oil primers. For this reason, they work better and last longer when you use them for indoor projects.
-
Consistency
Consistency refers to the thickness of a product, and it is one of the essential factors to consider when choosing products for a project. The thickness affects how easy or hard it will be to handle and apply the primer.
Water-based primers are thinner than oil primers; therefore, you can stir and apply them easily. For this reason, they are the perfect products for beginner painters and DIY enthusiasts.
On the downside, the thinness of water-based primers comes with some drawbacks. First, the thin coats may fail to prevent odors and stains from seeping through the paint.
You may apply several coats of the primer to make up for this, but there is no guarantee that it will hold up for a long time.
On the other hand, oil-based primers are thicker; hence they cover surfaces more efficiently with fewer coats and prevent bleed throughs much better.
On the downside, the thickness of oil primers makes them prone to brush marks.
How Long Does Oil-Based Primer Take to Dry?
Oil-based primers will take 8 hours to dry adequately, but I recommend waiting 24 hours before painting over them. If you cannot paint within 24 hours, you can wait a few more days, as long as you don’t let the primer sit bare for more than two weeks.
The dry times mentioned above are standard for all oil-based primers; however, the dry times can vary depending on three main factors. These are:
- How thickly you apply the primer
- The humidity of your surroundings
- The temperature around your work area.
Below is an in-depth discussion of each factor to help you understand their effects better.
-
How Thickly You Apply The Primer
When you apply the primer in thin coats, the solvent will evaporate more quickly, allowing you to apply the next coat faster.
The reason is that the solvent at the bottom will move a short distance through the thin layer to reach the atmosphere, causing it to dry more quickly.
On the other hand, the solvent in thickly applied coats will take forever to get to the surface, slowing down the dry time.
The same thing happens if you put on too many coats of the primer. Even if you apply thin coats, too many of them will slow down the drying process. Why is that?
When we apply primer, we often recoat it as soon as it becomes dry to the touch. At that stage, the primer isn’t fully dry; thus, it is always best to give the final coat 24 hours to dry before painting.
That 24-hour period is enough for the solvent in all the primer layers to evaporate completely.
When you apply many coats of primer, they will lose moisture much slower; therefore, you’ll wait longer before painting.
-
The Humidity of Your Surroundings
Humidity refers to the volume of moisture in the air, and it plays an essential role in the drying of coating products. When there’s too much moisture in the atmosphere, the oil primer remains tacky for a long while because the oil has no way to escape.
On average, the perfect humidity for priming a surface is 50%. This figure may vary depending on your product; therefore, it is important to check the product’s manual to know the precise percentage that the manufacturer recommends.
-
Temperature
Manufacturers always specify temperature recommendations for using their products because different temperature levels affect coating products differently.
High temperatures will cause the surface of oil primers to dry too quickly. As a result, the finish will remain wet beneath the surface, and after a while, you’ll start noticing bumps and wrinkles forming on the surface.
On the other hand, very low temperatures will make it hard for the oils to escape causing the primer to remain wet for a long time.
For this reason, it is best to always adhere to the manufacturer’s temperature recommendations for your projects to turn out flawless.
How Do You Make Oil Primers Dry Faster?
I always recommend allowing surface coatings to dry naturally for the specified amount of time recommended.
However, I also understand that you may need to finish some projects quickly, which means getting your products to dry faster, especially if you’re using slow-drying oil primers.
The method painters commonly use to dry oil primers is applying direct heat to them. Some people use radiators, heat guns, blow driers, or other heating tools, depending on what’s available.
These methods work, but they also increase the chances of ruining the finish before starting the project. Let me explain.
When you apply direct heat on a freshly primed surface, the top side of the primer coat will harden fast, leaving the bottom wet.
When the damp layer finally starts drying, it pulls at the already dry part, causing it to crack.
The safest way of using heat to dry oil primer quickly is by using your home heating system. I recommend this method only if the natural temperature is way below what the manufacturers recommend for the proper drying of your product.
Adjust the heat in your work area to match the specs on your product’s label, and you’re good to go. If the temperature is already optimum, it is best to let the oil primer dry naturally.
Below is a list of safer techniques to dry oil primers faster. They are better than using direct heat because you employ them during application; hence, they don’t affect the primer coat’s uniformity as it dries.
-
Lower The Humidity Of Your Work Area
If your location is too humid, use a dehumidifier to lower the moisture content in the immediate surrounding of the piece you’re painting. If you do not own a dehumidifier, wait for a less humid day to begin priming.
-
Buy A Fast-Drying Oil Primer
Oil-based primers dry slowly, but a few modern types have special additives that make them dry quicker. So when shopping for primers, prioritize the ones labeled as “Fast-Drying.”
If you already have the standard types, you can purchase a fast-drying additive and mix it with your product.
-
Increase Air Circulation
Improving the ventilation of your work area will also hasten natural primer drying. You can run a fan at low speed or open doors and windows to allow fresh air from outside to circulate.
Best Latex Paint
Here is the list of my top product based on first-hand experience.
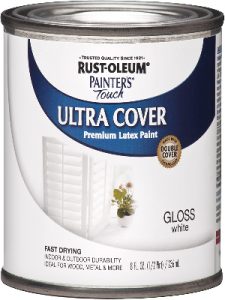
Rust-Oleum Painter’s Touch Ultra Cover Premium Latex Paint
The Rust-Oleum Painter’s Touch is a water-based acrylic paint that resists chips and provides long-lasting protection to surfaces.
It protects multiple indoor and outdoor surfaces, including wood, masonry, metal, plaster, and unglazed ceramic.
This product dries to touch in 30 minutes, and you can begin moving and handling your piece in about 1 hour.
It dries fully in 2-4 hours, which is the best time to wait between coats.
It also goes on the surface smoothly, leaving no brush marks, and provides excellent coverage with a few coats – a quart of this paint can cover up to 120 Sq Ft.
The most significant advantage of this product is that it contains low VOCs; hence it is non-toxic. It also has no odor, and you can clean it up quickly with regular soap and water.
You do not have to thin this paint unless you are painting in hot, dry conditions. In such cases, use 2 ounces of water per quart to extend drying time and prevent cracking.
Before using this product, stir it thoroughly to redisperse settled pigment. Also, use a good quality synthetic brush to apply it for the best results. (The manufacturers discourage roller application)
 Pros
Pros
- Provides a smooth, durable finish on interior and exterior items
- Its formula allows it to resist chipping and fading
- It Dries quickly for fast project completion
- It has a low odor
Cons
- You cannot use a roller to apply it
- Some consumers complain that it is too thin
Benjamin Moore Regal® Select Interior Paint
This is a premium-quality, 100% acrylic paint and primer with excellent hide and spatters resistance. It comes in five different finishes giving you choices for painting several interior surfaces such as ceilings, trims, walls, kitchen cabinets, and furniture.
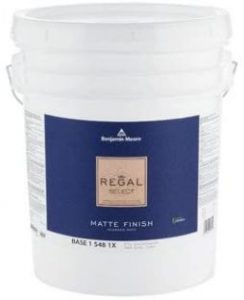 It is a 2-in-1 product, providing priming and coloring functions simultaneously. The paint-primer tech makes it thicker than standard acrylic interior paints; thus, it offers excellent hide and coverage with few coats.
It has high self-leveling qualities that make it easy to apply smoothly and do seamless touch-ups.
Furthermore, it dries quickly and is designed with stain-release technology that makes it easy to clean with less scrubbing.
This product also contains additives that make it mildew resistant, meaning you can apply it to a mildew-infested area to prevent further growth.
This feature makes it perfect for painting bathrooms, washing areas, and other interior spaces that come into contact with a lot of moisture.
It also has no Volatile Organic Compounds and produces a low odor making it safe for the environment.
Pros
- It is 100% acrylic, hence durable.
- It provides excellent hide and coverage with few coats
- It dries fast
- It comes in 5 finishes
- It provides the functions of a paint and primer in one
- It is mildew resistant
- Low odor
- Zero VOCs
Cons
- It is pricey
Best Oil-Based Primer
Best oil based primers include:
KILZ Original Interior Oil-Based Primer
The KILZ Original Interior Oil-Based Primer is one of the oldest brands trusted by professionals worldwide.
It perfectly covers tough stains like water stains and blocks odors from pets and nicotine that have clung to surfaces over time.
Furthermore, it is one of the most durable oil primers on the market.
This primer is compatible with most surfaces, including brick, masonry, and painted metals. It dries to the touch in 30 minutes, and you can paint over it in as little as 1 hour.
However, you will get the best finish results if you let it dry completely, which takes only 24 hours.
On the downside, it produces strong fumes as you apply it, and it keeps producing them until it dries completely.
It also contains High VOC levels, making it harmful to the environment in large quantities. The drawbacks of The KILZ Original are not quality-based – It is still one of the best.
 Pros
Pros
- It Blocks stains as well as odors.
- It is compatible with several surfaces, including masonry and painted metal.
- It dries in one hour and becomes ready to paint in 24 hours.
Cons
- It has high VOC levels
- It produces a strong odor until it dries.
Rustoleum’s Zinsser Cover-Stain® Oil-Based Primer
The Zinsser Cover-Stain® oil primer-sealer does a great job at hiding deep stains and sealing surfaces before painting. It is especially best for woods like redwood and cedar because it blocks the tannins that ruin paint finishes.
However, you can also apply it to metal or concrete, and you do not need to sand it to make it adhere. Moreover, you can use it with any topcoat you have.
This product dries quickly, needing only 1 hour between coats, but you have to give it up to 24 hours to dry before painting.
It works well for interior and exterior surfaces, but I recommend using it primarily outdoors.
A quart of this primer can cover a 100 Sq Ft surface well, which means you won’t need a lot of it to get the job done.
On the downside, this primer has High VOC levels, and the paint itself is combustible; therefore, avoid using it near open flames to prevent fire accidents.
 Pros
Pros
- It dries in 1 hour
- It hides deep stains and blocks wood tannins from ruining the paint.
- You can paint over it without sanding.
- You can use it to paint many surfaces, both indoors and outdoors.
Cons
- It has high VOC levels.
- It is Flammable.
How Can You Tell If Paint Is Latex or Oil-Based?
It is always essential to know the type of paint you have, whether you’re painting a surface for the first time or painting over old paint.
This information is important because the way you prepare the surface will depend on the kind of paint used.
If you are painting something for the first time, the logical thing to do is read the paint label you have. Manufacturers always label what kind of paint it is in bold writing.
If you’re painting an already painted surface, you can determine the paint type using the alcohol test.
To do the test:
- Mix a little detergent with warm water and use the solution to wash the painted surface. Afterward, dry it with a clean towel.
- Next, take a cotton ball and soak it in some rubbing alcohol, then use it to wipe the cleaned area. It is latex if some color rubs off, but you have oil-based paint if the cotton ball remains clean.
Why Oil Paints Don’t Mix
When it comes to mixing coating products, it is always wise to combine products with the same base. This means mixing oil with oil, latex with latex, etc.
Even though this is true, sometimes mixing oil paints is a bad idea, especially if you do not know the kind of oil used in the formula.
The main oils used to make paints are raw linseed oil, boiled linseed oil, tung oil, poppy oil, nut oil, etc. They are all oils, but they have different characteristics, which they transfer to the paints they make.
For instance, raw linseed oil takes too long to dry, but it has no VOCs. On the other hand, boiled linseed oil dries faster because manufacturers add petroleum-based or heavy metal drying agents.
The additives make them dry quickly, but they also increase their VOC levels.
So if you mix a paint made with raw linseed oil with one made with boiled linseed oil, you will be canceling out their specific unique functionalities.
The boiled linseed oil paint will lose its ability to dry quickly, and you will be adding petroleum agents to the pure raw linseed oil paint.
If you must mix your oil paints, I recommend that you only mix products from the same brand because manufacturers tend to select a favorite oil and stick with it for all their oil products.
Conclusion
The compatibility of paint and primer is the most important thing to consider before beginning a project. If your products are not compatible, the primer will not serve its purpose, and your paint job will fail after a short period. This article answers the query..
Can You Use Latex Paint Over Oil-Based Primer?
Oil-based primers are compatible with most paints, including latex paint. However, you must scuff the primer surface with fine-grit sandpaper to ensure maximum adhesion.
Despite their compatibility, the latex paint – oil primer combination will fail without proper preparation.
Thanks for reading this article, and I hope it clears up everything for you. If you have any questions, don’t hesitate to ask us in the comments section.