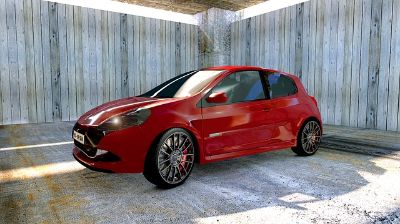
 Acetone is a potent solvent that can dissolve other materials such as plastic, paint, varnish, and grease. It is the main component in nail polish and paint removers, and DIY enthusiasts use it for cleaning and degreasing surfaces. Every motorist knows that acetone comes in handy for minor car detailing tasks. However, there is a constant risk of the acetone coming into contact with the car paint as the job progresses. Consequently, the motorists always wonder, Will Acetone Remove Auto Paint?
Acetone contains chemicals that will slowly eat away at auto paint. The reaction takes effect in a few hours, so you have a small window to react appropriately and minimize the ruin. The best way to reduce damages to your car paint is to avoid using acetone in large amounts and ensure that you rinse it off every chance you get.
Acetone requires a quick rinse-off because it evaporates almost instantly. The fast evaporation rate may seem like an advantage, but it leaves behind a residue with powerful components that eventually erode the paint.
Will Acetone Remove Automotive Clear Coat?
Yes, it will. Acetone will soften most clear coats and turn them into a jelly-like consistency that is easy to remove when left to sit on the surface for a long time. So if you intend to remove grease or any other stain from your auto clear coat, use the acetone sparingly, then rinse it off with a lot of water immediately before it starts breaking down the clear coat. Additionally, always re-wax your car surface after cleaning it with acetone because the color in that area will most likely be raw.
However, If you intend to do away with your car’s clear coat completely, you will need a lot of patience and some hard work to ensure that the coat comes off properly. First, you will have to apply the acetone in large amounts, then let it sit and dissolve the paint before rubbing it off for proper removal.
How fast it will take you to remove an automotive protective layer will depend on the strength of the acetone you use. The higher the percentage of acetone, the faster and better it will remove the clear coat. On the downside, using acetone to remove automotive clear coats doesn’t guarantee the safety of the paint underneath, so I suggest finding alternative methods.
How Do You Use Acetone on a Car?
Even though acetone can easily damage automotive clear coat and paint, some car detailing jobs require minimal amounts of it. These tasks are safe to perform on the vehicle without worrying about acetone accidentally splashing and damaging parts of the car.
The first way you can utilize acetone on your car is to restore foggy headlights. Manufacturers make vehicle headlights from polycarbonate, which quickly degrades upon too much exposure to UV rays. They add a transparent protective layer that takes twice as much time to wear out to protect the polycarbonate. So if you leave your car outside for long periods, the protective layer will give in, and you will notice the headlights getting foggy over time. Soon, They may not illuminate your way properly, causing unwanted road accidents.
You can clear foggy car headlights quickly with acetone by following the procedure below:
- Start by cleaning the affected headlight using regular window cleaner. Spray a good amount of window cleaner on the headlight, then use a clean, lint-free towel to rub it and remove dirt, bugs, and other debris.
- Next, use some steel wool to rub the headlights and remove the headlight coating gently. You can also use fine-grit sandpaper to scuff the headlight but make sure to keep the area wet as you sand to avoid leaving scuff marks on the surface.
- Finally, pour some acetone on a clean towel, then wipe the headlight from one end to the other. Make sure to use clean single swipes to reveal the crystal clear light.
The other way to use acetone on your vehicle is to remove scuff marks on the car’s paint coat. Start by washing the scuffed area to remove the dirt that may scratch the surface more as you rub in the acetone. Next, pour a little acetone on a clean towel, then rub the area until the scuff marks start to disappear. Once all the spots get off, rinse the area with running water, then polish the surface to match it to the rest of the coat.
Does Acetone Dissolve Spray Paint?
When spray painting a piece, a blast of color may stray outside its intended surface, leaving streaks on clothes, skin, upholstery, among other things. These streaks are challenging to eliminate with water unless you wipe them off while the paint is still wet.
Furthermore, most spray paints are oil-based; hence they are harder to remove because the oil/alkyd binding agents don’t dissolve in water. So, which solvent works best to remove spray paint?
Acetone can dissolve spray paint, but you cannot use it safely on all surfaces. It has adverse effects on surfaces such as plastic, wood, leather, and vinyl, so it is best to consider other solvents to remove spray paint from them.
I also recommend avoiding using acetone on clothes, especially those made from synthetic fabrics, because they fade after contacting the solvent. However, if you must use it, ensure that it is a natural-fiber fabric and test the solvent on an invisible part of the garment to gauge its reaction.
You can safely use acetone to dissolve the spray paint on materials such as glass and metal because it does not affect their physical states. However, you have to ensure that you cover all materials that surround them to avoid splashing acetone on them by accident.
Does Acetone Remove Enamel Paint?
You can use acetone to remove enamel paint; however, its formulation makes the task difficult. Enamel paints are oil-based, and manufacturers developed them to provide surfaces with lasting protection against mechanical damage. They cure into a hard coat that will take acetone forever to dissolve effectively.
Moreover, since acetone evaporates quickly, you will have to use large amounts of it to remove enamel paint, especially if the coat has too many layers or the coated surface is too big.
I recommend using acetone to remove enamel paint when the stains are tiny paint drips or cleaning paint brushes that you used to apply the paint.
How to clean paint brushes with acetone
- Start by removing as much paint as you can using ordinary soap and some water. If the paint has dried already, scrape off any large flecks lightly because water cannot dissolve dry paint.
- Next, wear safety glasses and protective gloves to keep the acetone from harming your skin and eyes.
- Pour some acetone into a metal or glass container. It is best to avoid plastic because acetone slowly eats away at plastic. Ensure that you pour enough solvent to fully dip the brush bristles but not too much to reach the handle.
- If the enamel paint is still fresh, rub the brush between your fingers and against the bottom of the container to loosen the stain immediately. However, if hardened paint is on the brush, let it soak in the solvent for a few hours to loosen the product before rubbing it with your fingers.
- Once all the paint comes off the brush, wash it with soap and water to remove traces of acetone. Shake off excess water, shape the bristles, then set the brush down to dry.
How to remove paint drips with acetone
- Use a paint scraper to remove as much of the paint from the surface as you can. Scraping is incredibly easier when removing thick layers of paint. Moreover, it is essential because it reduces the amount of finish that the acetone has to dissolve.
- Pour a sparing amount of acetone on a clean cloth, then rub the stain. If the paint was on the surface for a long time, pour a small amount of solvent onto it, then let it sit for a few minutes before rubbing.
- As you rub the stain, the acetone will lift the paint, so you will have to switch to cleaner sections of the cloth. This way, you avoid re-introducing stain marks to clean areas on the surface.
- Once all the stain comes off, wash the surface with soap and water to remove all traces of acetone.
What Does Acetone Do to Spray Paint?
Acetone breaks down spray paint from the top layer going down to the surface. It reacts with top molecules in the paint layer, softening then mixing with them to form a malleable composition that is easy to remove. Since acetone works from the top going down, it poses minimal physical damage risks to the surface underneath.
However, the fast evaporation rate of acetone comes as a disadvantage when removing spray paint from a surface. First, you may have to use too much solvent to dissolve the spray paint if the acetone evaporates before it has a chance to loosen the stain.
Furthermore, you will have to rub the spray paint constantly to work the acetone into it to encourage breakdown. The constant rubbing is a tedious job, and it becomes even more complicated if the spraypaint has been on the surface for a long time.
How Do You Remove Clear Coat From a Car Without Damaging Paint?
Automotive clear coats protect car paint from minor scratches, dust, and environmental impacts. They improve the longevity of the color and maintain the glossy shine of the finish. However, clear coats eventually sustain scratches and start deteriorating because of constant exposure to the elements. They start to peel off, thus exposing the underlying paint and risking your whole paint job,
To restore your vehicle’s glimmer, you will have to remove the old clear coat and apply a fresh one. Additionally, you will have to be particularly careful not to damage the paint; otherwise, you will have to re-paint the vehicle. I suggest that you hire a professional to perform this task for you, but if you must do it yourself, use the steps below to guide you to remove a clear coat from your vehicle without damaging the paint.
Step 1: Wash the car.
Cleaning is an essential step in paint repair and maintenance tasks. It is vital because it ensures that no solid specks of dirt and debris would further scratch the paint surface as you treat it.
- Use a soft brush or duster to sweep off as much dust as you can, then hose down any remaining debris with your garden hose.
- Apply some soap to the car, then use a washing mitt or a microfiber cloth to rub and remove stubborn residues. Make sure to use minimum force as you scrub to avoid scuffing the paint.
- Rinse off the soap foam with running water, then use a soft, dry cloth to remove excess water. Finally, allow the vehicle to dry properly in a well-ventilated area.
Step 2: Wet Sand the clear coat.
Soak 400, 800, 1000, and 1200 grit sandpapers in water for 15 minutes to prepare them for this next step.
- First, use the 400 grit sandpaper to rub the surface and weaken the clear coat. Ensure to use gentle movements and pressure to avoid getting to the paint below. If any scratches or problem areas stand out, scuff about 1 inch around them to allow space for blending in later.
- Switch to the finer 800 grit sandpaper and scuff using the same precautions as before. Keep wet sanding, switching to higher grit sandpapers until you reach the finest 1200 grit paper.
- Once you’re satisfied with the level of smoothness, wipe the surface to remove sanding dust, then let it dry.
- Once dry, use any fine-grit sandpaper to dry sand the surface to achieve extra smoothness for your surface.
This step is crucial because it will significantly impact your task’s outcome; therefore, take your time and check your work regularly as you sand. Feel the surface by hand to ensure that you’re making progress and adjust your technique where needed.
Step 3: Rinse the Surface
Use a hose to wash away all sanding dust and fine-grit particles. Check the dripping wastewater, and if it looks milky, it is the right time to stop sanding. If you scuff the surface further, you risk interfering with the undercoat. Once all the residue comes off, wipe the surface with a clean microfiber cloth, then let it dry completely.
Step 4: Buff the Surface
With the surface smooth and even, it’s time to apply some polish to the whole surface of the car. Set your electrical polisher to a low rotational speed of about 1200 revolutions per minute and apply the product generously over the entire surface. Use consistent circular motions with some overlap to ensure that you cover every bit of the paint.
If you do not own an electric polisher, you can use a 100% wool pad to complete the task manually. When buffing by hand, always wear rubber gloves to prevent skin burns and use the polishing product sparingly to avoid a smudgy outcome.
When you finish, buff the surface a second time, but this time, use a buffing compound and use higher revolutions per minute on your electric polisher. Remember, the buffing compound can burn the paint coat if used carelessly. So if you are unsure, test the buffing agent on a spare part to ensure that it is mild and safe to use.
Step 5: Wax the car
Finally, wipe the polished area to make it brighter, then apply a spray detailer to give it an extra glossy finish. You can complete the task at this point, but I recommend waxing the car to achieve more evenness and shine to your paint job.
Conclusion
Acetone has several home and industrial applications, with the main ones being dissolving other materials and removing stains from surfaces. The high degreasing nature of acetone makes it efficient for its specified tasks. However, sometimes it can be too strong and have adverse effects on plastic, leather, and vinyl materials.
Motorists have several uses for acetone on their vehicles. It is the leading go-to solvent to tackle minor detailing jobs; hence there are chances of it coming into contact with car paint from time to time. Since acetone is usually associated with dissolving and removing nail polish, it’s okay if you ask…
Will Acetone Remove Auto Paint?
You can safely use acetone on or near auto paint without risking severe damage to the paint. However, the safety of acetone on auto paint is limited because if you let the solvent sit on the color for too long, it will attack it and cause irreparable damages. The key to putting acetone on any surface, including car exteriors, is to use it sparingly and rinse it off immediately so that it doesn’t evaporate and leave harmful residue on the surface.