Acrylic paint on shoes?
Yes! That’s right, and get it from me, applying acrylic paint to your shoes can take the look to an entirely new level when done correctly.
Acrylic paint is the most versatile regarding the sheer number of substrates it can go on.
Sadly, one item we’ve never given much focus on is shoes. Back to our question, can you use acrylic paint on shoes?
Mind you, shoes are made of different materials, including leather, rubber, synthetics, foam, and textiles (cotton, polyester, nylon, wool).
Yes! You can use acrylic paint on shoes, and it’s the most commonly used in that regard.
Painting shoes with acrylics enables you to communicate expressively and stylishly; you can use different colors and designs to make unique footwear.
Acrylic paint sticks pretty well to shoes if you apply it correctly.
Acrylic paint doesn’t crease, is easy to use, has excellent durability, and is resistant to fading when it dries and cures on shoes.
Moreover, you can improve the above qualities by sealing the acrylic; I guarantee your shoes will always look as good as new.
This article highlights the use of acrylic paint on various shoes like air force ones, canvas, leather, vans, and vinyl.
I’ve also included the procedure for applying acrylic paint to shoes and how to seal it.
The above introduction makes it easy to tell that the review contains plenty of essential and valid content, so I suggest you read it through and through.
If you don’t read it wholly, you risk making small procedural mistakes that may amplify in a detrimental way to your shoe.
I’ll start by explicating acrylic paint.
What Is Acrylic Paint?
If you’re a painting newbie or student, you’ll be confounded by the sheer number of paint types in the market.
It’s essential to know the paint you are looking for before purchasing. In this section, I’ll explain acrylics; what is acrylic paint?
It is a waterborne paint composed of acrylic polymer emulsion, silicone oils, pigment, defoamers, metal soaps, and stabilizers.
The above constituents are suspended or dispersed in a solvent medium, which is water.
You may wonder why acrylic paints hold firm to surfaces, yet they are water-based.
The reasonable expectation is that they should immediately come off substrates when they contact water.
But the paint defies the odds and stays firmly put. How could this be?
Well, it’s because acrylic paints only dissolve in water when they are still wet. Upon drying, they become water-resistant.
It’s crucial to understand that water resistance is different from being waterproof.
The former means it can repel water to some degree, while the latter means it’s wholly watertight or impervious to water.
The water-resistant characteristic isn’t substandard; it enables you to remove the paint for makeovers and repainting.
You can adjust the texture, hardness, appearance, flexibility, and other features of the paint in question by adding an acrylic medium, clean water, or both.
The modifying agents make the paint more versatile, and that’s why acrylics work well on numerous substrates.
Regarding shoe materials, you can use acrylic paint on leather, canvas, vinyl, plastic, rubber, cotton, linen, etc.
Outside the shoe realms, you can use acrylics on metal, glass, wood, composites, cardboards, and other materials.
The key to successful application is getting the preparatory practices right and following all the painting protocols.
The prepping processes vary slightly as the substrate materials are different.
You can apply acrylic in thin and light coats or washes to create effects similar to watercolors and various waterborne media.
Reciprocally, you can lay down the paint named above in thick layers of molding pastes and gels; they form paintings that evoke relief.
Some users also employ acrylic paints in artistry to accentuate raised features and amplify the aesthetic aspects.
The beauty of using acrylics is you only need water and a cleaning agent like detergents or soap to remove wet stains.
It enables you to clean the painting tools, spillages and spatters easily.
Use water and a cleaning agent like soap to remove wet acrylic paint from paint brushes, skin, or unwanted surfaces (spills & spatters).
Can You Use Acrylic Paint on Leather Shoes?
Acrylic paint has only ever worked its magic on numerous substrates.
But what if the material is made of leather? Remember, leather is tanned animal hide. Can you use acrylic paint on leather shoes?
You can! Most leather shoe painters use acrylics to adorn and protect them.
The paint has been used on leather for several years, giving it a seal of approval for continued use.
There are many acrylic paint colors to choose from; you can either use a single color or mix multiple colors to decorate the leather shoes.
Before painting the leather, you must prepare the shoe adequately.
Preparation involves cleaning the shoe and removing the thin waxy finish covering the leather.
Cleaning is done using a rag or cloth soaked in clean water and if the shoes have grease/oily stains, remove them using degreasing agents like alcohol or acetone.
I suggest using the Angelus Leather Preparer & Deglazer for further cleaning and to strip the clear coat.
The product is so highly effective that you need only small amounts to get the job done.
Therefore, it comes in small bottles (5 fl oz/147 ml) that will last you through several shoe pairs.
Caution: don’t use the agent mentioned above on other substrates as it’s exclusively meant for leather products (like shoes, belts, bags, and seats).
Also, the product is highly flammable and fatal if swallowed, so don’t store or use it near fire sources and keep it out of reach of children.
As for paint, I highly recommend the Creative Nation Acrylic Leather Paint!
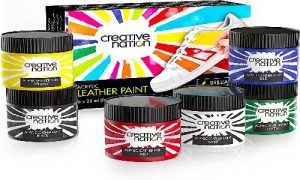 I recommend it because it’s sold in packs of 6 or 12, each unit containing 0.95 fl oz of paint.
The advantage of selling the product in packs is that the units are in different colors, making them perfect for decoration.
Usually, you would want to paint each section of your leather shoes in different colors.
Other than the variety edge of the Creative Nation paint, it has the following desirable features and advantages:
- All the paint units are miscible and easy to blend, enabling you to combine colors to come up with even more unique hues.
- It is easy to apply: the paints go smoothly on all leather types.
- This leather paint has good surface coverage thanks to its rich formulation; a little amount can go a long way.
- Creative Nation acrylic paint becomes water resistant once it dries. It makes the paint last longer and also protects the underlying leather.
- It is fade-resistant: this preserves the original paint color throughout the lifetime of the leather shoes.
- The paint doesn’t peel, crack, or scratch easily. It enables you to put on the shoes and walk or run without worrying about paint wear.
For optimum results, apply the paint in thin layers.
It enhances faster and proper paint drying and curing.
If you lay down in thick coats, the paint won’t cure well, and it will crack or crease when you start using the shoes.
After painting, you can seal the shoe to shield or secure your design.
I’ll discuss the sealing process in the ending segments of the article. Read on.
Can You Use Acrylic Paint on Air Force Ones?
Nike makes top-quality footwear that you can customize to look even classier.
One of their best shoe brands is the air force ones! Can you use acrylic paint on air force ones?
Absolutely yes! Air force ones, abbreviated as AF1s, are made of leather and other materials.
Since acrylic is perfect for leather, AF1s will readily accept the paint.
Acrylics for AF1s and other shoe brands are available in various sheens, including satin, matte, and gloss.
It’s always indicated on the paint container, so I advise you to check before purchasing.
I recommend you use Angelus paint, specifically for natural and synthetic leather.
Using agents not designed for the AF1 shoe material will damage your precious footwear.
The damage may not be immediately noticeable as the chemicals in the said agents cause gradual degradation.
Factory-finished air force ones are usually coated with protective wax.
It’s advisable to remove this layer before applying the acrylic. It enables the paint to interact directly with the leather.
While the acrylic will still go over the waxy layer, it won’t adhere well.
To remove the above protective coating, take a leather deglazer and pour some on cotton wool or a clean rag.
Then, rub it on the shoe until the layer comes off. Don’t deglaze the whole shoe; work only on the parts you’ll paint.
The AF1 design features contoured segments that make using different acrylic paint colors easy.
You can mask the parts you don’t want to be painted using painter’s tape.
Such parts include the soles and the Nike swoosh.
After painting AF1s, you can apply a sealant for added protection. It keeps the paint from peeling, cracking, and fading.
I advise you to seal the entire shoe; the best agents for this undertaking are Liquitex Basics Acrylic Varnish and Aleene’s Original Acrylic Sealer.
If you’ve painted the shoe with Angelus leather paint, I prescribe using Angelus Acrylic Finisher.
Can You Use Acrylic Paint on Vans?
Vans are casual rubber-sole shoes that you can wear for everyday use. As such, they are a form of sneakers.
Can you use acrylic paint on vans to make them more flashy and elegant?
You can! Vans is a shoe brand and not material.
The material itself is canvas, made from cotton and occasionally linen.
Since you can use acrylic on canvas material, it’s straightforward to conclude it can also be used on vans shoes.
Similarly to leather shoes and AF1s above, you must prepare vans adequately before applying acrylic paint.
The painting techniques vary depending on the finish you want.
You can paint the entire shoe with one color, paint sections of the shoe with different colors, or make drawings.
If you’re planning to paint the entire shoe in one color, I advise you to spray paint with rattle cans.
It’s because block painting is a general process that doesn’t have too many intricacies; the goal is simply to coat the substrate.
Regarding acrylic spray paint for vans, I recommend the Krylon COLORmaxx Paint + Primer.
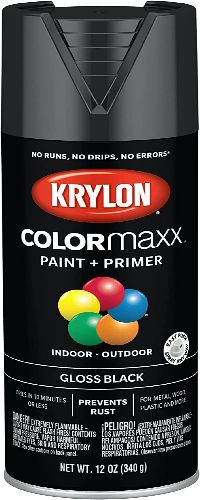 It’s an excellent product with a glossy finish and is available in 12 fl oz cans. It has the following desirable features and benefits:
- It’s available in many trendy colors and sheens to meet most consumers’ needs.
- It is a paint and primer in one, giving it an excellent adhesion profile on the vans.
- The paint is easy to use: you only need to shake and press on the nozzle to discharge the contents. Moreover, you can spray it from any angle.
- This product dries quickly (10 minutes), saving time and enabling faster project completion.
- It is fade-resistant and confers durability to the shoe material underneath.
If you want to do more intricate painting (like drawing or painting each shoe segment with different colors).
I suggest using paintbrushes or an airbrush.
I prefer the latter between airbrushes and paintbrushes because it gives you more control and is more convenient for using multiple colors.
However, the advantage of airbrushing is it dries faster and doesn’t leave any brush marks.
My go-to airbrush paint for vans is the SigWong Airbrush Paint set.
It’s usually sold in packs containing 24 colors, so you can be as creative as you wish with the designs and color patterns.
The paint is worth using on vans for the following reasons:
- It’s a ready-to-spray: this is due to the near-perfect formulation that requires little or no dilution.
- The paint works on a wide range of shoe materials, including vans, leather, canvas, and vinyl.
- SigWong acrylic paint is easy to clean when wet/fresh; you only need soapy water to clear accidental spills and stains.
- This set contains richly-pigmented paints for a bolder and more conspicuous finish.
- The paint kit comes with two airbrush cleaners.
- It has strong adhesive power and an excellent durability profile.
After painting the vans, it’s best to add a clear-coat sealant to keep the paint intact.
It preserves the design’s color and bonding with the van’s material.
Can You Use Acrylic Paint on Vinyl Shoes?
The vinyl material makes flexible, smooth, shiny shoes; they often appear sleek.
Taking the skiddy and polished texture into account, can you use acrylic paint on vinyl shoes?
It’s a firm yes! Vinyl is a form of plastic made up of vinyl monomers; it’s a synthetic/artificial substance.
While vinyl-made shoes have a slippery/skiddy texture, acrylic paint will easily go over and set on this footwear.
However, you must prep the surface accordingly before you apply the paint.
Prepping involves removing the laces, cleaning, and scouring the surface.
Cleaning entails wiping with a degreasing agent, then wiping with water-soaked cloth and letting it dry.
For scouring, I advise using 600-800 grit Scotch-Brites; these are non-scratch scuffing sponges that give the vinyl surface teeth to grip paint.
Don’t use sandpapers for the above undertaking as they will damage the shoe.
I recommend the Lefranc Bourgeois Acrylic Vinyl Emulsion for the single-color painting of the shoes mentioned above.
It comes in 750 ml containers and is famed for its tolerance to harsh and dynamic weather conditions.
The paint has magnificent color stability and can go on several shoe materials like vinyl, canvas, leather, and linens.
Additionally, the paint comes in numerous colors, so you can purchase the one that suits you.
If you want to decorate the vinyl shoes with multiple colors, I advise you to purchase Caliart Acrylic Paint Set.
The set comprises 24 color units and has 12 assorted soft bristle brushes.
Other advantages and characteristics of the said paint are:
- The paints are richly-pigmented to give vibrant colors
- The units are packaged in easy-to-discharge squeeze bottles for convenience of use
- Caliart Acrylic paints have a smooth consistency
- The paints have good surface coverage so a little amount can go a long way
- These paints are non-toxic and safe for children, so they can use them for practice
- They are fast-drying hence saves on time
- Caliart Acrylic paints are easy to clean while wet; all you need is soapy water
If the acrylic paint is too dense, add water to thin it, or you can use floetrol to improve its flow properties.
Due to the smooth texture of vinyl surfaces, applying the paint in thin layers is advisable and allowing each coat to dry for the specified time before re-coating.
Sufficient drying ensures proper paint adhesion to the shoe.
The paint won’t set in well when you use thick coats, resulting in peeling and cracking.
When you’re done with the paint application, let it dry for at least three days before layering a sealant to protect the design.
I favor Aleene’s Original Acrylic Sealer for this final bit of the project.
Can You Use Acrylic Paint On Canvas Shoes?
Bata makes top-grade casual canvas footwear for all demographics.
At times, we yearn for a customized canvas that looks unique. In that regard, can you use acrylic paint on canvas shoes?
Yes! The versatility of acrylic paint is second to none. Like in vinyl and leather materials, the paint effortlessly goes on canvas.
Canvas has a smoother texture/feel than leather and suede-made shoes.
It, therefore, needs a slightly different approach for application.
Here, you should use thinner layers and press the paintbrush more firmly for better adhesion.
Another point that makes acrylic the best for canvas is its fast drying time.
It makes it suitable for large-scale use as it ensures faster project completion.
It’s also convenient for small-scale painting as the shoe won’t remain tacky and wet for long.
If your children have canvas-made shoes, you can let them paint on the footwear with acrylics.
It’s because the paint is non-toxic and therefore safe. It also lets them explore and unleash their potential in artistry.
How to Apply Acrylic Paint On Shoes
After reading the above content, you have more insight into how acrylics relate to shoes.
We can now proceed to the action part in the name of how to apply acrylic paint to shoes.
The process involves setting up your working station and the shoes, squeezing and laying out the acrylics on a painter’s palette.
Before the final paint application, you must sketch your design outlines and test the paint on a painter’s palette.
Afterward, apply a sealant or varnish for added protection.
Here are the materials needed and the detailed process:
Requirements
- Paintbrushes
- Acrylic paint
- Painter’s palette
- Paper towels
- Painter’s tape
- Acetone or rubbing alcohol
- Palette knife
- Clean water (in a cup or small container)
Procedure
First, prepare your working station by removing all the unnecessary surrounding items.
It gives you more working space and mitigates staining.
Next, ensure your working area is well aerated to prevent paint fumes inhalation.
Then, remove the shoelaces from your footwear and store them together away from your working area.
The laces are not meant to be painted, and removing them gives you better access to the shoe’s tongue if you want to paint them too.
Take a paper towel or cotton ball and soak it in acetone. Use it to clean the shoe and remove the factory finish on its surface.
Removing the clear factory finish exposes the shoe’s fabric for direct contact with the incoming paint; this, in turn, promotes paint adhesion.
If your painting technique involves sketching to outline the shape of the painting, do so at this point. Use a pencil or an erasable maker.
Then, take the painter’s tape and cover the areas you don’t want to be painted. The most commonly covered parts are the soles, tongue, and collar.
The above statement doesn’t mean that the named parts must not be painted; if you want to decorate or paint them, be my guest.
Also, fill the inside of the shoe with old newspapers to prevent paint from getting in.
If your shoe has a smooth or polished texture, like those made of plastic or vinyl, scour the surface using a scuffing pad like Scotch-Brite.
It’s a non-scratching abrasive that makes the surface more receptive to paint. Go easy on the smooth shoe material with the abrasives.
Don’t use abrasives on leather and suede-made shoes as their surfaces are good enough to grip paint. Further scouring will damage the material.
Afterward, take the acrylic paint set and lay out the colors you’ll use on the edges of the painter’s palette.
Paints like Caliart Acrylic Paint set are packaged in squeeze bottles that are convenient for discharging the paint when laying out.
When parading the paint colors, you’ll use, arrange them in some order, e.g., from warm to cool or light to dark.
It is not a requirement, but I recommend it to avoid confusion when switching colors.
If you want to mix different paint colors, don’t use paintbrushes.
Instead, use a palette knife to pick up and transfer the paints to the center of the palette for mixing.
Using the brushes will mess up the chroma of the individual paints.
A shoe’s most commonly painted parts are the toe cap, upper/vamp, quarter, and heel counter.
You can paint any part you wish to or even the entire footwear.
Before you start the actual painting, test out the appearance and ease of application of the paint on the unused areas of the palette.
If you don’t like the color, opt for another one or mix the available hues using the principles of color theory.
If the paint’s viscosity is too high, mix it with clean water from the container.
Do the mixing on an unused part of the palette until you attain the desired flow property.
I suggest you use thick brushes if you’re just painting without putting in artistic details like drawings.
Take the paintbrush and load it with paint on the palette.
Start with a thin and light-colored first coat, then apply a thicker and heavier second coat after the first one dries.
Follow the drying times recommended by the paint manufacturer.
Paint other shoe sections in-between the drying times; it hastens the painting project.
If you’ve planned to paint with artistic details, like drawings, start by applying a light base coat to the shoe.
The base coat makes the substrate more receptive to paint.
Let the above layer dry, then come in with the artistic paintings; this solely depends on your creativity; drawing skills is a huge plus.
Afterward, remove the painter’s tape and let the shoe dry undisturbed for at least 3 days.
Clean the working station and painting paraphernalia immediately after you’ve finished painting.
The acrylic paint stains will come off easily when still fresh.
If you delay cleaning by more than 24 hours, the paint will harden and become water-resistant; at this point, it’s often challenging to remove it, even with soapy water.
After your paint has dried on the shoe, come in with a sealant or varnish to improve its durability and prevent color fade.
I’ve discussed sealing in detail in the next segment.
Here’s How to Apply Acrylic Paint On Shoes:
Can You Seal Acrylic Paint?
We’ve seen that you can apply acrylics to shoes.
However, you may want to take more measures to ensure the paint lasts longer and doesn’t fade quickly.
If it’s so, can you seal acrylic paint?
It’s a definite yes!
Acrylic paint, just like other paints, needs sealing to protect it from direct exposure to harsh environmental conditions like excess water and UV rays.
The clear top coat also amplifies the underlying color and keeps it from fading and frictional wear.
It’s important to allow the paint to dry completely before applying the varnish or sealant.
If you’ve applied thin coats, let it dry for at least three days; if you’ve used thick coats, let it dry for at least five days.
I recommend sealing with Angelus Acrylic Finisher for leather shoes, especially if you’ve already painted with Angelus Leather Paint.
Because the products are from the same brand, they’ll easily harmonize. The said finisher has the following characteristics:
- It comes in 4 fl oz bottles.
- The finisher is available in various sheens, including matte, gloss, and high gloss.
- Angelus acrylic top coat is water-resistant, shielding the underlying paint from water damage.
- This finish doesn’t crack, streak, or peel easily.
- It’s durable and available at an affordable cost.
Caution: Remember to keep the Angelus Acrylic Finisher away from children as it’s harmful when consumed or accidentally gets into the eyes.
Also, do not store it in extremely low temperatures; it may cause freezing, making the product lose its viability.
If you prefer sealing with varnish, I recommend the Liquitex Basics Acrylic Varnish. It has the following selling points and features:
- It dries to form a clear/transparent layer over the acrylic
- The varnish doesn’t yellow over time
- It forms a permanent protective coat which improves paint and shoe durability
- Liquitex varnish has fast drying times, which is time convenient
- The varnish is easy to remove for makeovers; this enables you to repaint the shoe with the same or different colors
- This product comes in 250 ml (8 fl oz) bottles
- It’s highly effective and has excellent surface coverage, so a small amount will cover many shoe pairs.
The other excellent acrylic sealant is Aleene’s Original Acrylic Sealer!
This agent is manufactured by Aleene’s Original company, which specializes in premium adhesives and related products.
The product named above is completely in sync with its sealing role due to the following reasons:
- It’s available in various finishes like pearlescent, satin, matte, and gloss
- The sealant forms a clear, non-yellowing top coat
- Aleene’s acrylic sealer dries fast and evenly over surfaces, including shoes
- It forms a long-lasting, weatherproof layer, so you can don the shoes in almost all weather conditions without worrying
- This sealant confers hard-wearing properties to the acrylic paint and shoe material underneath
How to Seal Acrylic Paint
Let’s say you want to seal acrylic paint on shoes, but you’ve never tried it or have little experience.
It’s one of those instances where your mind is willing to do something, but you have no idea how to execute it.
In this part, I’ll demonstrate how to seal acrylic paint.
The process is quite simple.
It entails purchasing the right sealant, ventilating your working room, shaking the sealer aerosol can, and discharging the contents.
Take a look at the detailed requirements and procedure below:
Requirements
- Sealant or varnish
- Respirator
- Latex gloves
- Safety goggles
- Paper towels
- Painter’s tape
- Old newspapers
Ensure the initially painted shoes are completely dry.
If you apply varnish/sealant before sufficient drying, there’ll be moisture trapping.
It weakens paint adhesion and destroys shoe fabric.
If the shoes have accumulated dust during the drying period, wipe them with a clean, dry rag or paper towels.
Procedure
Set up your working station by clearing the materials you don’t need.
It’s also important to work in well ventilated spaces to avoid the nauseating effects of inhaling oversprays.
Some sealants have strong odors that could precipitate allergic respiratory reactions.
Next, stuff old newspapers into the shoe to prevent the varnish from getting inside.
Remember, sealers have low viscosity, so they can easily find their way inside the shoe if you don’t cover it.
Then, take painter’s tape and mask the outer surface areas of the shoe that you don’t want to seal.
While it’s not a must to seal the entire shoe, I advise you to seal it wholly.
It fulfills the function of the protective finish that you removed before painting.
Afterward, put on all the necessary safety gear. The most important ones in this respect are the respirator and safety goggles.
Next, take the sealant rattle can and shake it well. Shaking mixes the constituents and activates some of the ingredients.
Hold the can 5 to 8 inches from the shoe and press on the nozzle to let out its contents.
Ensure the nozzle points directly to the substrate to preclude wastage due to overspray.
Let the first coat dry for 2 hours before applying a second layer.
It’s important to note that applying a second and third sealant coat to shoes is done on an as needed basis.
If the first one layers perfectly, it’s best not to add more. Too many coats obscure the underlying paint pattern/design.
If you’ve opted to apply a second layer, use the same procedure as the first.
Remove the painter’s tape and newspaper material stuffed inside if only one layer is sufficient.
Then, let the shoe dry undisturbed for a minimum of 24 hours. Meanwhile, start working on the other shoe with the same procedure.
Here’s How to Seal Acrylic Paint:
Conclusion
We’ve come to the tail end of this write-up.
Painting shoes is a delightful art that improves aesthetics, diversifies your sense of fashion, and makes you more confident when you put them on.
However, you must use the right paint and apply it correctly for the best results. So,
Can You Use Acrylic Paint On Shoes?
It’s a resolute yes!
Acrylic paint is among the best for shoes and is largely used for decorative purposes.
As there are plentiful shoe types, I’ve featured the most common ones, including canvas, leather, vans, vinyl, and air force ones.
I’ve also incorporated the procedures for applying and sealing acrylic paint on shoes to make your shoe painting experience whole.
Acrylic paint is popular with shoes for the following reasons:
- It is water-based: this makes it safe for all types of shoes as there are no damaging chemicals
- The paint is durable and scratch-resistant, so it won’t come off easily even if you subject the shoe to washing
- Acrylic paint becomes water-resistant when dry, so it doesn’t let in or soak up water
- It produces a minimal odor that quickly dissipates, and it is also environmentally friendly
- Acrylics are easy to use on shoes and come at affordable prices
I recommend you read the above content as often as you wish, and if there’s any unclear part, you can seek clarifications in the comments section.
It’s best to follow all the instructions herein for optimum outcomes.
Share the content widely and kindly purchase through the links. Have a good one!