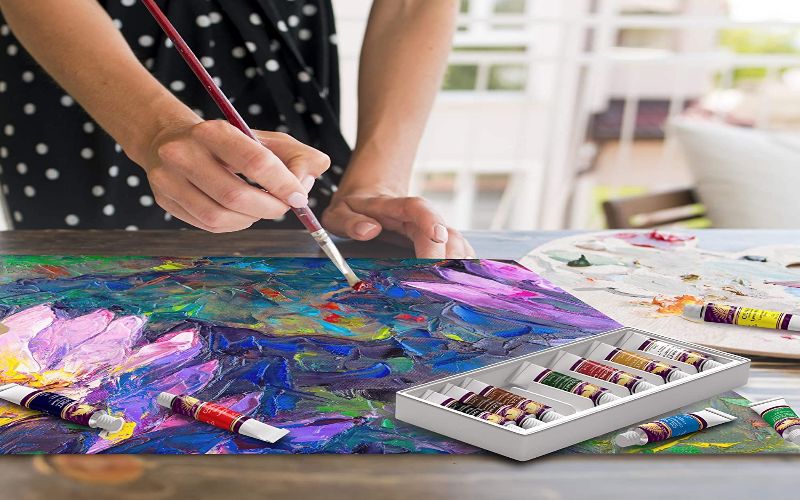
Paints abound in today’s world! The broadest categorization is water-based/waterborne paints and oil-based paints.
The two classes are further subdivided into groups. We’ll move further down the classification tree and discuss acrylic vs oil paint.
The above paints have many differences that set them apart in the painting world. They show a disparity in their components, application technique, base solvents, drying times, VOC compliance, durability, etc.
This article entails an extensive discussion of the differences above, sealing the paints, how to paint on wood, whether you can apply any of the two colors on top of the other, etc. I’ve also reviewed a few top-notch acrylic and oil-paint products.
Read the entire article intently to get to know paints, what’s best for your project, the do’s and the don’ts when using the above products, the best application techniques, and plenty of helpful intel.
What Is Acrylic Paint?
Acrylic paint is water-based paint consisting of pigment, acrylic polymer emulsion, silicone oils, stabilizers, metal soaps, and defoamers; all these constituents are dispersed/suspended in a solvent vehicle, which is water.
You might wonder why acrylic paints remain stuck to surfaces while they are waterborne. They should wash off upon contact with water, shouldn’t they?
Well, here is what happens: acrylic paints only solubilize in water when they are still wet. When this paint dries, it becomes water-resistant.
It’s important to point out that water resistance does not mean waterproof. Water-resistance means it can repel water for some time, while waterproof means it’s totally impervious to water.
The resistant attribute is beneficial as it helps you to remove the paint when you want to change to another paint or when you want to clean it up.
You can modify the flexibility, hardness, texture, appearance, texture, and other properties of acrylic paint by adding water, using acrylic media, or both.
These paints can bond to numerous substrates thanks to the above-mentioned modifying agents.
You can use acrylics on canvas, wood, cardboard, metal, glass, and other materials. However, the preparatory practices that precede its application vary for most of these substrates because they are made of different substances.
So, the interaction with the paint is understandingly dissimilar.
You can also lay down acrylic in thin coats or washes to produce effects that look like watercolors and other waterborne media.
Conversely, you can use the paint in question to build thick paint layers of gel and molding pastes; these form paintings that contrive feelings of relief.
Some people also use acrylic paints in arts to highlight raised features and augment their aesthetics.
Use water and a cleaning agent like soap to remove wet acrylic paint from paint brushes, skin, or unwanted surfaces (spills & spatters).
What Is Oil Paint?
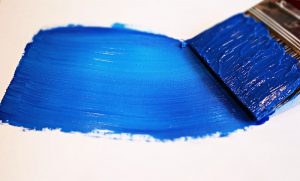 Oil-based paint is a slow-drying paint comprising pigment particles suspended in a drying oil, e.g., linseed oil.
There are two kinds of oil paints: those consisting of oils, e.g., linseed oil, and those composed of synthetic oil, e.g., alkyd.
Both types work excellently, resulting in high-quality finishing on substrates like wood. However, the alkyd-based type is increasingly becoming common owing to its strength and affordability.
The origin of oil paint and the dates of adding its additives like thinners and driers are still unknown. Different texts cite different sources, but there are similarities in a few aspects of its development to the current varieties.
The first documented and still most frequently used solvent vehicle is linseed oil. The oil is pressed from the seeds of flax plants.
Present-day methods use steam or heat to make refined varieties of this oil containing few impurities, but some artists favor cold-pressed linseed oils.
Other vegetable oils like walnut, hemp, soybean, sunflower, poppy seed, and safflower oils can be used as substitutes for linseed oils for various reasons.
For instance, poppy and safflower oils are lighter/paler than linseed oil, giving more vibrant/bright color shades.
The addition of thinners like turpentine and white spirit changes oil paints’ density and flow; the addition of varnish improves their sheen.
Following application, the thinner and solvent part of the paint evaporates, leaving the other constituents to form a compacted coating; this is the rationale behind its functioning.
Modern applications of the above paint are finishing and fortifying timber and metallic materials. They are also utilized in artistry and decoration of household items.
Comparison Between Acrylic and Oil Paints
These paints vary in several facets. In this section, I’ll discuss the discerning features that make the paints in question what they are. Read keenly for maximal benefits.
They differ in luster, exterior vs. interior use, durability, application methods, costs, cleaning up, drying times, pros, cons, coverage, thickness, etc. Here is the in-depth analysis:
Luster
Luster means sheen level or glossiness! Oil paints have more luster than acrylic paints. As we’ve already covered, acrylic paint is water-based, and oil is usually shinier than water.
Here, the reason behind the different sheen levels is rather apparent; we all know how well oil glistens and reflects light and that water is no match in this regard.
The drawback is that oil paints lose their sheen faster than waterborne paints. With time, the oil paint ages and turns yellow with a considerably lower luster than its initial new look. Water paints retain their luster over long periods.
It’s crucial to note that luster maintenance and durability don’t relate directly. Oil paints are more durable but don’t retain luster for long; water paints are less durable but are good at keeping their luster. So, don’t confuse the two attributes.
Durability
Oil-based paints are more durable than acrylic paints; they dry harder than acrylic paints, but they also take longer to dry. Therefore, the oil paints have a higher abrasion resistance.
The pitfall for the durable oil paint is it yellows over time thus changing the outlook or color of the painted material.
Contemporary acrylic paints have improved flexibility and durability. This allows them to contract and expand as the weather changes. They are still not as durable as oil paints, but the difference is not as pronounced as before.
Exterior vs. Interior Use
Some texts refer to the above as outdoor vs. indoor use; it’s the same thing.
People, including painting experts, have varied opinions on which of two is best suited for indoor/outdoor surfaces. Both paints have advantages and disadvantages for each surface.
Oil paints protect outdoor surfaces better because they are more scratch and trauma-resistant. But the oil based paints take longer to cure and release high VOCs that are harmful to the environment.
Traditional acrylic paints are not suitable for exterior surfaces because they are not durable enough. Modern varieties work perfectly for outdoor projects because they have revamped durability and shorter drying & cure times than oil paints.
Durability profile is still essential for indoor projects, but not as much as outdoor projects. In this case, I prefer acrylic paints because they are less toxic, dry faster, and are cheaper than the oil-based varieties.
However, you can use oil paints to mitigate damage to high-use indoor materials like doors and tables.
Application
Oil-based paints are denser and require a more gentle application to spread evenly. It makes the laying down task more time-consuming than acrylic paints.
Acrylic paints, being thinner, can cover surfaces faster, and you can apply them at a brisk pace.
Cleaning Up
Acrylic paints are easier to clean because they are water-based. You only need water, soap, or detergents to wash off accidental spills from clothes, hands, walls, and furniture. If the stains are stubborn, you can use warm water and scrub the paint to remove them.
Oil paints, on the other hand, are challenging to clean up. They need special agents like mineral spirits, acetone, or turpentine to wash off; these are collectively called paint thinners.
Waterborne agents cannot remove oil paints because water and oil don’t mix in the first; they mutually repel each other.
Drying Times
The drying times and curing rates of acrylic and oil paints vary because they have different solvent bases and constituents.
The drying/curing times are in ranges rather than fixed values! It’s because there are environmental and substrate variations that result in differences even for a given paint type.
The durations differ as follows:
| Oil paints | Acrylic paints |
| Touch dry: 6-8 hrs | Touch dry:30-60 mins |
| Recoat ready: 16-20 hrs | Recoat ready: 2-3 hrs |
| Total cure: 1-4 weeks | Total cure: 2-3 days |
We deduce from the above that acrylic paints dry faster than oil paints. This is mainly advantageous, but the downside is you have to work more quickly when painting with acrylic.
It maintains a wet edge throughout the painting. However, if you’re doing artistry that needs time, you can add acrylic retarders to the paint or just use oil paints.
Costs
The popular belief out there is that oil paints are much more expensive than acrylics. This belief has a trace of truth to it, but the price difference is not as big as people perceive it.
The most expensive acrylic paint costs about the same as high-quality oil paint. However, the most highly-priced oil paints cost more than all acrylic paints.
The perceived cost difference is because acrylic paints have a wide price range while oil paints have a narrow price range, so most people go for the cheaper acrylics and compare them to good oil paints.
The determining factors for costs are the paint components, especially pigments. The pigment gives the paint its color; it usually takes a long time and resources to discover and develop pigments.
Can you believe that? It’s true. Therefore, pigments are the most pricey paint constituents, and most oil paints contain costly pigments.
The price difference won’t be as much if you use the same pigment for oil and acrylic paints. Here, the cost determinant shifts to the other paint components, mainly binders and the solvent vehicle.
Since oil is more expensive than water, the oil paint will still cost more.
Another point is oil paints need non-polar agents like mineral spirits and turps for thinning/dilution, while acrylic paints only need water.
The former makes oil paints more expensive than the latter because water is more available.
Paint area/coverage also comes into play on the cost matter; it takes more acrylic to paint a given surface area than oil paint. It means an oil paint has better coverage than acrylic, so you’ll buy more acrylic (higher costs) for the said surface.
Other price-dictating factors include the manufacturing company/paint brand, forces of supply and demand,
From the explanation above, it’s true to say that oil paints cost more than acrylics, but the difference isn’t as much as it has always been depicted.
Paint Area
The paint area is also known as the spreading rate. Acrylic paint is thinner than oil paint; it quickly spreads on surfaces. But, it does not cover well; you have to do a second and third coat to get good results.
The thickness and consistency of oil paints make them cover surfaces well, and you can do one or two coats.
Knowing the paint area for a given paint is vital as it helps you determine the amounts you want to purchase.
The last thing a professional painter or DIY enthusiast may want is to run out of paint when in the middle of a project.
Conversely, stocking too much paint for your project will make you have large amounts of leftovers; this makes the painting project expensive for nothing.
The best solution to the above situation is to work out how much paint you’ll need for the project. The formula for the all-important calculation is as below:
(Surface area ➗ Spread rate) ✖ Number of coats
The answer is in liters!
Use a metal tape measure to get the dimensions of the surface to be painted. Measure the length and width and multiply to get the surface area.
If there are windows and doors on the surface, subtract the area they’re occupying from the total surface area.
Obtain the paint’s spread rate/theoretical coverage from its technical datasheets or consult your dealer.
VOC Amounts & Odor
Acrylic paints have low VOC levels and are harmless to the environment and humans. On the other hand, oil paints contain high amounts of VOCs that pollute the environment and pose respiratory health risks to humans.
Oil paints also have strong odors that linger for long; they leave a nauseating effect, especially when you inhale them for long durations.
Acrylic paints have minimal odors that disappear after a short while; this makes them ideal for people allergic to strong smells.
What Are the Pros and Cons of Oil Paints?
Pros
- The paints are durable and resistant to temperature fluctuations
- Oil paints have superb leveling properties that eliminate brush marks
- Oil-based paints have richer pigmentations than acrylics
- Oil paints have an excellent surface coverage profile
- Their long drying times enable you to correct mistakes
- These paints blend seamlessly. Therefore, it’s easy to change through different colors.
Cons
- Some oil paints release high amounts of VOC (Volatile Organic Compounds), leading to the eye, ear, respiratory tract irritation, and skin sensitivity reactions.
- Oil paints yellow over time; this changes the appearance of your art or surface.
- It’s difficult to clean up accidental spills and spatters; you have to use mineral spirits, turpentine, or acetone.
- These paints take too long to dry.
- Traditional oil paints are harmful!; most were taken off shelves courtesy of environmental-protection initiatives.
Pros and Con of Acrylic Paints
Pros
- These paints are easy to apply
- They don’t yellow as they age; this maintains the color and appearance of your work
- The paints have short drying times so that you can complete your project quickly
- Acrylic paints are VOC compliant and, therefore, eco-friendly
- Premium enamel acrylics have a similarly excellent durability profile to oil paints
- You can easily clean up these paints after use; you only need water and soap
- The colors come at budget-friendly costs
- You can thin or dilute acrylic paints with water, which is more accessible than mineral spirits and turps
Cons
- Generally, they are less durable than oil paints
- These paints are prone to brush marks
- Their short drying times demand that you work fast; this compromises painting quality
- The quick drying times also give you little room to correct mistakes
Can You Paint Acrylic Over Oil Paints?
At times, you may want to use more than one paint type on a given surface, or you may want to change over to another paint. If your case involves acrylics and oil paints, can you paint acrylic over oil paints?
You can’t apply acrylic over oil paints; it won’t work! Oil paints take longer than acrylics to dry and cure. Using acrylic on oil paint will mess up the still wet layer underneath, leaving your work distorted.
Also, the acrylic paint can’t cling sufficiently to the fresh oil paint; the two will separate after a few days.
The disparity in drying times means the acrylic on top of the oil will trap moisture from the yet-to-dry oil paint. Trapped moisture is one of the worst nightmares for a painter; it damages the artistry and the painted substrate.
Again, the moisture and VOCs released from oil paint will make the non-breathable acrylic on top crack; this ruins your painting.
From the above explanations, nothing good comes from laying acrylic over oil paints, so I strongly discourage it. If you want to shift from an oil paint surface to acrylic, I recommend you completely sand off the oil paint, then prime the surface for incoming acrylic. That’s the best and only way around this state of affairs.
Can You Paint Oil Paint Over Acrylic?
We’ve now reversed the roles; can you paint oil paint over acrylic? Are the consequences the same, or is this a different ball game? Continue reading to find out how interesting the above situation pans out.
You can apply oil paints on top of acrylics. As I have intimated above, this is a different situation from the initial case. Acrylics are receptive to oil paints because they dry quickly and contain less volatile compounds. These two attributes are pretty essential to the materialization of the above quest.
On the quick-drying point, acrylics take only 3 hours to dry for top coating. It enables you to apply oil paint on time and when the underlying coat is moisture-free.
The dry acrylic provides an excellent surface upon which the oil paint adheres.
Containing fewer amounts of volatile compounds ensures the acrylic paint does not release any vapors that will weaken the acrylic-oil paint bond.
Do You Need to Seal Acrylic or Oil Paintings?
All painters would like to give their paintwork the best longevity profile. Sealing is one of many ways you can make a painting last longer, but not all paints require sealing. In our case, do you need to seal acrylic or oil paintings?
It’s a resounding yes! Sealing maintains the paint color, protects the paint from scratching, makes the surface easy to clean, arrests peeling & flaking, and prevents the paint from washing off.
You can seal both acrylic and oil paintings using a varnish; this creates a removable layer that will enable you to change the artwork as you please.
I urge you to use an acrylic varnish for acrylic paints and to use oil-based varnishes for oil paints. There is a wide array of varnishes to select from; you can choose the luster of your liking.
Best Acrylic Paints
After all of the above details, here is a list of the best acrylic paints and their features:
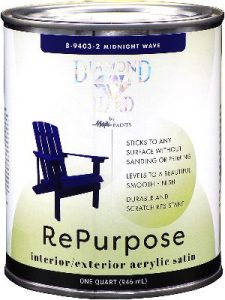
RePurpose Diamond Hard interior/exterior acrylic satin by Majic PAINTS
This product is one of the best in the market. It’s suitable for wood, aluminum, glass, vinyl, and metal. Its application is a one-step process that lets you sand and prime out of your own volition.
The paint still adheres well if you choose not to prime or sand. The paint is perfect for interior and exterior projects, and it’s available in 10 distinct colors.
 Its desirable features include:
- It has remarkable color retention
- Excellent leveling properties that eliminate brush marks
- It’s easy to apply
- The paint is durable
- It dries quickly to enable you to finish your project in time
- This paint is available at budget-friendly prices
- It is non-toxic
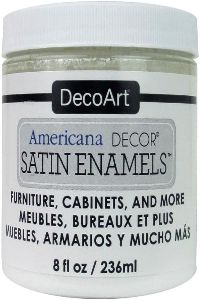
DecoArt Americana Decor Satin Enamels Acrylic Paint
DecoArt is a pre-eminent acrylic paint maker since 1985 and sells in 65 countries around the globe. One of its valued products is the Americana Decor Satin Enamel meant for wooden surfaces like household furniture, doors, kitchen cabinets, and baseboards.
This above-named paint is often purchased alongside the Golden Acryl Med 32 Oz Gac-800 which has anti-crazing properties. The addition of the Gac-800 to Decor Satin Enamel Acrylic ensures the paint dries smoothly, and evenly, with a good gloss and moderate clarity.
 Other qualities of the DecoArt acrylic paint are:
- It has a smooth and straightforward application that needs minimal brushstrokes
- The paint comes in 21 color shades that you can mix to your taste
- A single jar of the paint has a wide two-coat coverage of around 20 square feet
- It’s water-based and therefore non-toxic
- It is easy to clean up accidental spills; you use only soap and water
- This paint reduces grain raising on wood
Acrylic Paint Set, Caliart 52 Vivid Colors
This paint is made from high-quality raw materials, and it comes in 52 different colors, including four metallics. The paint works well on canvas, ceramic, wood, and fabric.
Clipart has designed this acrylic paint for all age demographics, i.e., children, teens, and adults. You can use it for professional, student practice, and DIY projects.
The colors are packaged in a well-arranged manner inside a sturdy box for convenience and to avoid confusing or mistaking one color for the other.
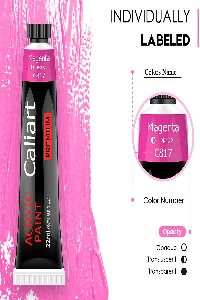 Other outstanding features of this paint are:
- It has a wonderful viscosity profile that lets you build texture and put in more details
- The wide range of combinable colors gives you room for creativity to come up with even more color schemes
- It’s water-based hence easy to apply and clean up after use
- The paint is environmentally-friendly
- You can thin it with water to improve its flow properties
- The colors have good surface coverage
Best Oil Paints
Here is a list of the best oil paints:
Real Milk Paint Hemp Oil for Wood Finishing
The above is an oil paint derived from natural raw material in the name of the hemp plant; Real Milk Paint Co. is the manufacturer.
The oil is squeezed from the plant and added to pigment and a few ingredients to make the above paint. It has a light, nutty odor and is principally used on wood.
This paint penetrates well into porous surfaces, so you don’t need to use a wood conditioner before application.
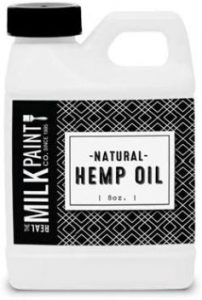 Other desirable qualities include:
- It’s highly durable, as is typical of oil-based paints
- The paint requires turpentine or mineral spirits to be thinned
- This paint comes at a pocket-friendly price
- It dries to give a matte finish
- Hemp oil paint takes 7 to 10 days for the surface to be ready to use and around 30 days to cure fully
- The paint comes in different-sized packages, i.e., 8, 16, 32 ounces, and a gallon
Real Milk Paint Half and Half Pure Tung Oil
Real Milk Paint Co. makes a range of oil paints; the half and half pure tung oil and citrus solvent is one of its high-end products.
This paint is among the best wood finishes out there. It’s also cleared for food-grade materials like countertops, chopping blocks, and kitchen cabinets.
The paint is available in different sizes, including 16 oz, 32 oz, and a gallon. It’s advisable not to use a wood conditioner before its application as the conditioner seals the wood, preventing tung oil’s absorption and adherence.
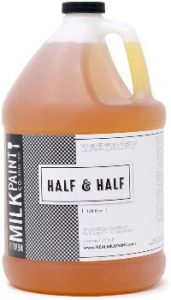 Other worthwhile features are:
- It’s waterproof; especially 10 or more days following its lay-down
- The paint is mixed with a citrus solvent to save you the paint thinning agony
- This paint produces a matte finish
- It has an exquisite durability profile
- Half and half tung oil paint has a “natural honey” color that gives surfaces an antique appearance
- The paint comes at an affordable price
Castle Arts Supplies 24 ✖ 12 Oil Paint Set
Castle Arts is a force to be reckoned with regarding the manufacture of top-notch oil paints for artistry. One of the best in its lineup is the Castle Arts Supplies Oil Paint Set.
This paint is formulated with well-balanced amounts of pigment and oil to give a smooth, firm, and consistent texture, the perfect combination for professional and would-be artists.
The manufacturers are so confident with this product that they have a refunding policy for unimpressed users. That in itself highlights the high-quality and delivering nature of the paint.
More notable features of the above paint are:
- It’s versatile; you can use it to draw on a canvas, wood, cardboard, and many other surfaces
- It is comparatively easy to clean than other oil paints
- The paint offers excellent value for its money
- This paint is easy to work with, and it comes in a variety of colors
- It has excellent surface coverage
- The paints are well-packed in small tubes that give you easy accessibility
Magicfly Professional Oil Paint Set, 40 Tubes
Magicfly is another household company that makes fantastic paint products. The professional oil paint set is first-rate compared to many oil paints. It contains 40 unique colors that include the primary colors, metallic, gold, silver, and their shades.
This paint is ideal for several substrates, including canvas, cardboards, wood, and fabrics.
The colors are richly-pigmented to ensure strong adhesion and that they don’t dull or fade easily. The paint also glides smoothly on surfaces making it easy to mix and use.
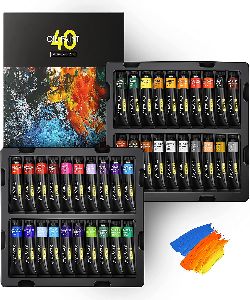 Other defining features are:
- It has a thick consistency and exceptional surface coverage
- This paint is easy to use
- It’s ideal for beginners, students, professional artists, and hobbyists
- The output of this paint matches its value
- It has good tinting strength and opacity for layering
- Magicfly oil paint is durable and resistant to cracking
- This paint dries slowly to enhance the blending of the different colors
Acrylic Paint Vs Oil Paint On Canvas
Artists have a fondness for painting on canvas. The paint type you choose will have a bearing on all facets of your outcome. These include drying times, durability, luster/glow, water resistance, etc. This section will compare acrylic paint vs oil paint on canvas.
Both paints work perfectly on canvas, provided you know what you want, and the painting fits into your schedule. These are the two most used paints on canvas.
However, acrylic edge oil paints a little bit because it’s used mainly by students, hobbyists, and beginners. Oil paints on canvas are typical of professional painters and those with vast experience in the painting realm.
There are more painting students and beginners than professionals, so that explains why acrylic paints preponderate over oil paints with regard to painting on canvas.
Acrylics also edge oil paints because of environmental conservation campaigns that advocate for the use of water-based paints like acrylic instead of harmful oil-based paints.
How to Apply Oil Paint On Canvas
Requirements
- Palette: pad of palette paper, glass, or wooden palette
- Oil paint
- Toning agents: earth tones
- Solvent/paint thinner
- Cotton rag or lintless paper towel
- Paintbrushes: The main types are synthetic and natural bristles. The main shapes are Filbert, flat, and round
- Palette knife
- Primed canvas pad; primed with acrylic gesso or oil-primed canvas
Step 1: Toning the Canvas
Here are a few basics on toning before we get to the procedural bit:
Toning refers to applying a non-absorbent ground/foundation color to a white canvas. Toning is essential even for primed canvas; you can do this using earth-tone colors.
In a more definite sense, earth tones are natural colors derived from clay earth pigments; these pigments include ochre, umber, and sienna.
You can use their natural forms, known as raw sienna and raw umber, or their heated forms, known as burnt sienna and burnt umber.
The two main advantages of earth tones are:
They dry at a conveniently moderate pace: By comparison, an oil-based primer takes an awfully long time to dry. It becomes an inconvenience, especially when you’re time-bound.
On the other hand, the acrylic ground dries so fast that you won’t get enough time to even it out.
Secondly, earth tones are neutral colors and, therefore, non-intrusive. These colors are flat and muted, with some semblance to the color of soil/earth.
Note: The above is not a complete dismissal against using oil-based or acrylic tones! It’s more of an advisory tone to let you know what you’re signing up for when choosing a ground/toner. You can use oil-based if you’ve got the time or if your painting requires detailed attention.
Conversely, I advise you to go for acrylic primer if you want to paint “immediately” after laying ground or if you don’t want to even out the primed surface.
Canvas Toning Procedure
Squeeze out small amounts of the toning paint onto the palette and add an appropriate thinning solvent. If the earth tone is oil-based, add turpentine or mineral spirits; if it’s water-based, add water. In this case, we’re using mineral spirits.
Mix using the palette knife until you get a consistent mixture.
Add just enough amounts of the solvent. If you thin too much, the paint will flow excessively, and it will be prone to brush marks.
If the toning agent is too thick, it will be challenging to apply and take too long to dry.
Apply the thinned paint to the canvas using a paintbrush.
At this point, the toning agent leaves an uneven effect on the canvas, i.e., visible brushstrokes and lighter & darker portions. If your final painting requires such a surface, let it dry for 24 hours before proceeding to the painting part.
However, if your final painting needs a smooth, more even surface, let the toning agent sit on the canvas for 2 minutes and then wipe it on with a clean rag.
Wipe and blend repeatedly until the color appears smooth. You can also use a lintless paper towel for this undertaking. Afterward, let the color dry for 24 hours before you start painting.
If you notice the tone is too dark on either of the above surfaces, you can correct it by directly applying small amounts of solvent to the canvas. Use the rag or brush to buff to the right tone.
If it’s too light, lay down a second layer of the paint with reduced thinner quantities. Let it dry for 24 hours, and then paint as I’ll explain below:
Step 2: Painting
Incidentally, one crucial expertise that will complement your painting is good drawing skills or painting background.
First, ventilate your working area, and wear appropriate safety gear.
For an artist, painting canvas is dependent mainly on creativity; you can paint anything you want, provided it looks great and captures attention. I’m only obliged to share good painting tips and how to handle your painting paraphernalia.
The most successful painting technique is applying from thin to thick paint. Thin and thick, in this case, do not mean the size of the coats! Instead, it means the viscosity profile of the paint.
So, start with thinned/low-viscosity paint and reduce the amount of thinner in the paint as you progress. At the end (final layers), you should use pure paint devoid of any medium or thinner.
The concept above is a little tricky to grasp in one go; it requires regular training to get the experience. Utilize the pages of the palette paper pad to practice until you get the hang of it.
The second recommendation is that you should paint from dark to light. The statement is as straightforward as it sounds, i.e., lay down the darker areas of your art/drawings followed by the lighter areas.
Since the initial technique advocates applying thin to thick, the darker areas will end up thin, while the lighter areas will be thick. It harmonizes the two techniques I’ve mentioned.
To confirm the veracity of the points above, take a look at some of the best works of art (paintworks) in museums and art galleries; you’ll notice that the brightest parts have the thickest paint on the piece.
The dark to light technique doesn’t bar you from going back to redo or touch up the dark areas once you’ve started working on the light sections.
You can make amends and modifications as necessary; it’s just a general guideline that you should work your way through the painting from dark to light.
When it comes to color mixing during oil painting, it’s crucial to know that the color theory works the same way with acrylic paints and other water-based paints.
Your only homework is to research and learn about colors and the concept of color theory.
The primary colors are blue, yellow, green, and red; you can combine them in varying amounts to create a gamut of colors to set you off.
Color mixing is not rocket science. It doesn’t have a fixed recipe; you can use several methods to get the color you want. So, don’t struggle to memorize everything, just learn the basics of color theory, and you’re good to go.
I discourage the chronic use of black color to darken other colors; it blunts your creativity as you’ll be overdependent on black.
There are many ways to darken bright hues if you understand the color mixing. If you get hooked to black, you’ll tend to paint every dark-colored substance-using black, even if the original color is dark blue, gray, or taupe.
For the palette paper pad, simply tear off the paper on top, crease it up, and throw it away. If it’s a glass or a wooden palette, clean the oil paint using turpentine and lather using warm water; ensure you scrub it lightly when using the cleaning agents I’ve just mentioned. Afterward, allow it to dry before storage.
Likewise, clean the paintbrushes by dipping them in turpentine or mineral spirits. It’s essential to wear a full-face respirator when actively using turpentine because it emits toxic fumes.
Turpentine breaks off oil paint from the bristles. After soaking in the paint thinner, wipe the brushes with a paper towel, then wash in warm water. This removes any left residues.
Let the brushes dry and store them for future use.
Don’t pour away the turpentine after dipping the brushes in it. Instead, let the paint sediments settle down the container and decant off the turpentine into a clean container for reuse.
How to Apply Acrylic Paint On Canvas
Requirements
- Palette: pad of palette paper, glass, or wooden palette
- Acrylic paint
- Drop cloth
- Paint thinner: water
- Cotton rag or lintless paper towel
- Paintbrushes: The main types are synthetic and natural bristles. The main shapes are Filbert, flat, and round
- Palette knife
- Primed canvas pad; primed with acrylic gesso or oil-primed canvas
Step 1: Toning the Canvas
The toning process is the same as the one I described above. The only differences are in the toning agent, thinning agent, and drying time. The toning agent here is water-based, while the thinning solvent is water. The drying time before you start painting is 3 hours.
Another difference is when you tone with a water-based agent like acrylic paint, you won’t get much time to wipe/smooth over the uneven surface with a clean rag.
It’s because water-based paints dry quickly and the brush strokes, light & dark sections persist.
You can only smooth over acrylic when dealing with a smaller surface area.
Step 2: Painting
Ventilate your working area and put on the appropriate safety gear.
As with oil painting and other painting projects, drawing and painting aptitude comes in handy in myriad ways. It gives you confidence, puts you at ease, and hastens your learning process in painting canvas with acrylic.
As I mentioned in the oil paint segment, this kind of painting leans mainly on your creativity; I can only share the tips to make your artwork more effective and durable.
The tips and techniques used here are the same as those mentioned above (in the oil painting procedure). Scroll up and take a gander for more details.
The only differentiating factor is using water as the thinning agent for acrylics instead of turpentine or mineral spirits. Likewise, you use water in place of turps to clean up the brushes and accidental spills after painting with acrylic.
Acrylic Vs Oil Paint On Wood
When you hear the words wood and paint, the immediate things that come to mind are furniture, decks, doors, baseboards, and other wood-made materials.
In this part, I’ll go over the determining factors and considerations to take when choosing acrylic vs. oil paint on wood.
Both paints do the simple task of coating wood, protecting, and adorning it. However, they have their differences that make each of them better than the other based on the presenting situations.
The differences are in their drying times, durability, costs, clean up, VOC content, luster, odor, indoor vs. outdoor usage, paint area, and application.
I’ve already given a detailed discussion of the differences mentioned above under the comparison between acrylic and Oil Paints subheading.
The points apply similarly in this case. I urge you to refer to the earlier segments of the article for a better understanding.
How to Apply Acrylic Paint On Wood
After all of the above twists and turns regarding acrylic vs. oil paint, let’s now look at how to apply acrylic paint on wood.
The process involves cleaning the workpiece, filling defects and holes, sanding, priming, light sanding, painting, and top coating.
As it’s apparent, there’s a lot involved in painting the wood; if you follow all these, the paint will adhere well, and it will last long.
Don’t jump any of the steps, as it’ll compromise the integrity of the paint. Here is the breakdown of the steps I’ve just mentioned:
Requirements
- Acrylic paint
- Synthetic bristle paintbrush: 2-3 inches
- Wood filler
- Sandpapers 120 and 360-grit
- Drop cloth
- Water-based primer
- Putty knife
Procedure
First, spread the drop cloth on the floor to avoid paint spillage to unwanted areas.
If it’s an old piece of furniture, say a nightstand, start by removing all the hardware.
Next, clean the workpiece by spraying a degreasing agent, sitting for a few minutes, and wiping it using a spongy material.
Afterward, rinse the wooden workpiece by wiping it with a rag soaked in clean water.
Then, take a putty knife and apply the filler compound to holes and cracks on the furniture
The filler compound will dry ready for sanding in 1 hour. Hook up 120-grit sandpaper on a surf prep sander and sand down the wood.
Next, wipe off the accumulated debris using a damp cloth.
Then, apply the water-based primer, let it dry for 3 hours, and use a second coat of the primer as needed. The primer improves paint adhesion to the substrate by binding to the wood underneath and the incoming acrylic paint.
It also prevents tannins from bleeding through the wood and paint.
Wash the brushes with warm water and soap as you wait for the surface to dry. Since the primer is water-based, it will come off the brush quickly.
Next, sand the wood lightly using fine sandpaper (360-grit); this gets rid of any imperfections that you overlooked and those that are invisible. Wipe off the dust using a clean rag, or you can vacuum the surface if you can access a vacuum cleaner.
Then, open the acrylic paint and stir it using a stirring paddle or a clean wooden stick so that the paint is consistent.
Caution! Don’t shake the paint can, as acrylic paint has the dubious distinction of forming bubbles. The bubbles are unwelcome in painting as they trap moisture and cause unevenness to the painted surface.
Pour off some of the acrylic paint into an empty container or a painting cup and put back the lid on the original container.
Take the synthetic bristle paintbrush and dip it into the acrylic paint. I discourage using natural bristle brushes because they habitually absorb water-based paints like acrylic.
After dipping, remove excess paint by tapping the brush against the side of the container.
Then, paint the wood along its grain. Follow these tips when applying paint:
- Always keep a wet edge: acrylic paint dries fast, so be a little bit fast to maintain the wet edge.
- Don’t apply too much pressure: paint gently but firmly to move fast and avoid getting tired.
- Apply the paint in thin coats: it ensures good leveling and complete drying between coats.
- Watch out for drips and runs, especially in vertical areas: it prevents the formation of streaks. This paint is thinner than oil paints, so you have to be careful with the drips. When you catch the drips, smooth them over immediately to avoid sanding them down later.
Use a smaller angled or round brush to apply the paint to hidden and hard-to-reach areas.
Let the first coat dry for 3 hours, then apply a second coat using the same procedure as the first coat.
If the acrylic paint has a built-in topcoat, you don’t need to apply another topcoat. Even if it doesn’t, the acrylic paint is good enough; but you can use a topcoat.
After painting, remove the drop cloth and clean accidental oil spills from surfaces using soapy water.
Wash the brushes with soapy water and rinse them in warm water before letting them dry for storage.
There you go! You’ve successfully painted wood with acrylic.
How to Apply Oil Paint On Wood
All paints are not the same! The differences couldn’t be more prominent than oil paints and water-based paints.
We’ve already looked at acrylic paint application. We’ll now handle how to apply oil paint on wood.
The procedure entails priming, mixing, and thinning the paint, painting, and cleaning up. The in-depth protocol is as follows:
Requirements
- Oil-based paint
- Natural or synthetic bristle angled paintbrush
- Drop cloth
- Roller tray
- A roller frame and a foam roller
- Empty mixing container
- Clean rag
- Paint thinner: turpentine, mineral spirits, or acetone
- Safety gear (gloves, a full-face respirator)
Procedure
Ventilate your working area, lay down the drop cloth to cover the floor, and put on safety gear.
Prepare the wood surface by priming using an appropriate oil-based primer and let it dry for 24 hours.
Open up the oil paint and stir using a paint stick or stirring paddle. It makes the entire paint solution homogeneous.
Pour off the amount you need into the empty container and add turpentine if the paint is thick.
Turpentine is a thinning agent that helps to improve the flow property of oil paints. If you accidentally put in too much thinner, add the original paint to get your desired viscidity.
If you’re painting a wooden kitchen cabinet, start by cutting in the edges and corners using the angled paintbrush. Dip the brush into the paint, tap it against the container walls to remove the excess paint, and apply the paint gently but firmly.
Use a foam roller and frame to paint large, flat areas of the wooden material.
Clamp the foam roller onto the roller frame and soak it into the paint in a roller tray; pass the roller onto the rails of the tray to remove excess paint. Rolling makes the painting process easier/faster and precludes the formation of brush marks and paint drops.
Remember to stir the oil paint regularly in the course of painting to maintain its uniformity.
Let this first coat of oil paint dry for 24 hours, and if you’re not satisfied with the finish, sand lightly with fine-grit sandpaper and apply a second coat using the same procedure I’ve highlighted above.
Let the second coat dry for a few days before resuming normal usage.
After you’ve finished painting, clean your tools and accidental spills using turpentine, wipe it dry, and then follow through with warm water or soap.
Conclusion
This has been a relatively long article concerning acrylic vs oil paint. It’s laden with precious information regarding the said paints.
Some of the things I’ve highlighted are a comparative analysis of the two paints, the appropriateness of painting acrylic over oil paints and vice versa, whether there is a need to seal acrylic and oil paints, side by side comparison of acrylic and oil paints on canvas, etc.
I’ve also mentioned a few quality products to see you through your painting odyssey. I’ve sourced the knowledge of their splendor from personal experience and customer reviews.
I urge you to read the article in its entirety so that you can benefit now and in the future when handling the paints in question.
If you read the review and purchase the items I’ve included herein, you’ll get the best painting experience, and your painting will last longer.
