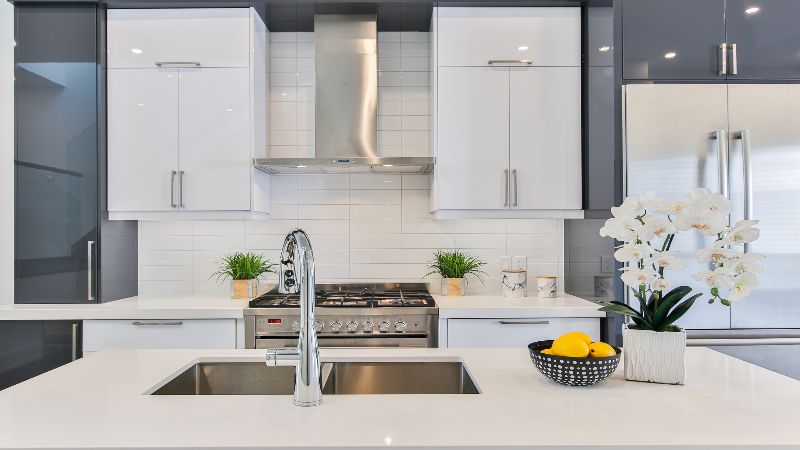
Can you paint a kitchen sink? Is a question that homeowners new to painting keep dropping in my mailbox. Let’s get answers…
Yes, it is okay to paint a kitchen sink to give it a refresh. You can paint stainless steel and acrylic sinks at home.
The steps involve removing all hardware and cleaning the sink. Using sandpaper, scuff the sink to help improve adhesion for subsequent steps.
Use acetone to remove the gloss from your sink.
Acetone is one of the most effective cleaners and degreasers and removes dirt, grease, and grime from stainless steel sinks.
Acetone breaks down and removes tough stains easily.
Always opt for acetone if you have adhesive, paint, and other stubborn stains on your kitchen sink.
After cleaning, prime and paint your kitchen sink with your desired color.
Note: Go for a paint color that nearly complements the sink’s default color.
How to Paint a Kitchen Sink
Kitchen sinks are available in various colors and materials like stainless, steel, acrylic, and porcelain.
If you use the right finish on sinks, they are likely to last a lifetime.
Most homeowners willing to sell their homes benefit greatly from painting their kitchen sinks.
And that’s due to the new quick update, which attracts potential buyers.
Painting your kitchen sink is a straightforward task.
However, even if painting seems effortless, proper preparation is the key to a successful paint job.
Keep reading to find out how to paint your kitchen sink with easy steps.
Step 1
Every painting job requires proper preparation to promote better paint adhesion.
So begin by withdrawing everything from the sink.
Remember, you are removing all parts you don’t want to catch the paint.
After that, you close the valves and disengage the water lines that supply water to the sink.
Next, reach out at the bottom of the sink to remove drains by unfastening the nut below the cabinets.
And then pull out the drain through the sink pan.
Step 2
 After removing all the hardware, wash the sink to wipe out the sticky leftovers.
You may also want to focus on the sink pan to peel off any grime.
You may want to employ a scrub pad if necessary to get rid of the sticky material.
Once you are done, dry the surface with a cotton rag before proceeding.
The next thing is to sand your sink with the recommended sandpaper. Products such as 120 grit sandpaper will do fine.
The advantage of sanding the sink is to offer the paint something to adhere to.
However, you will not want to peel off the sink coating with your sandpaper.
So be sure to sand the surface lightly not to mess with the existing coating.
Next, take your acetone and give your sink the final touches. The acetone crumbles other elements in the sink, such as paints, glues, and varnishes.
However, ensure your workspace is properly ventilated since acetone is harmful if inhaled.
You may also consider wearing gloves and avoiding eye contact when using acetone.
After that, slowly wipe down the sink while not disregarding any particles.
Tip: Ensure no chemicals are in the sink to evade dangerous mixes.
Step 3
Now that your sink is ready for painting protect the parts you don’t want to catch the paint.
You can use painter’s tape to cover the countertop around the sink.
Begin with taping a 2″ wide area from the sink’s edge and above the countertop.
Be sure not to overlap the sink flange. After laying down merely 2″ wide strips around the sink, cover all parts encircling the sink.
Doing this creates a deserted area where you can work without paint dropping on the countertops.
Tip: suppose you own an undermount sink; I suggest you direct the tape down above the naked edges of the countertop.
Step 4
Once your areas are protected, take your primer and stir it thoroughly before applying.
You will need to use a paintbrush for consistent results.
Additionally, don’t use thick coats of primer since it will take time to dry. Apply the first coat of primer over the parts you want to paint.
Then follow with gentle strokes in all directions. After the coat is dry to the touch, you can prepare to start painting.
Tip; if you utilize a spray machine, it’s better to paint following one direction for precise results.
Step 5
That very moment your primer is dry, you can now paint. Begin by stirring your paint to form an even solution.
Then wear your gloves and protective supplies. Note that if you have an acrylic sink, there’s no need to prime it before painting.
You will not want to apply all the paint at once. So make sure your first coat is relatively thin.
Use your paintbrush to distribute even strokes of paint across the sink.
Still, you will want to ensure that you avoid moving backward after painting.
The essence of doing this is to avoid chipping off the areas which had already begun to dry.
Immediately the first coat becomes tacky; add the second coat. Again, it should be thin like the previous one.
Follow the drying time highlighted on the can before you add an extra coat.
Once you are done, give the paint nearly 24 hours for it to dry entirely.
Step 6
After the close of the operation, put the hardware back into its position.
After that, fasten the nuts and clutch the faucet before reaching the water lines.
And be cautious not to scuff off the paint when reinstalling the faucet.
While bedding in the sink drains, you may want to apply a thin layer of plumber’s putty beneath the sink’s drain flange.
As such, you will obtain a waterproof seal. However, you will need to follow the directions before use.
Here’s a Video On How to Paint Kitchen Sink:
What Kind of Paint Do You Use on a Sink?
Kitchen sinks don’t just adhere to any type of paint. For instance, standard paints won’t bring a rustic look or replenish your sink’s appearance.
As an alternative, you ought to purchase paints with an epoxy base. Such paints dry quickly to create a smooth and hard finish.
Can You Paint On an Old Kitchen Sink?
Yes, painting an old kitchen sink is among the most rewarding ways of restoring its beauty.
Since the sink is often susceptible to high demands, it’s likely to wear out over time.
Fortunately, you can enhance it to look its best by following the instructions in this guide.
- To begin, you have to prepare the surface first. Use trisodium phosphate to give the sink a thorough cleaning.
Ensure that you reach out to all areas of the sink. Then follow with sanding the sink lightly not to overdo it.
I suggest you use fine-grit sandpaper for demanding results.
- Once you are done, use a paper towel to apply a coat of bonding agent.
However, you ought to check the label for clear instructions. Never try to assume your measurements.
- The next step is to apply an epoxy primer to the sink.
After that, give it time to dry and repeat, sanding it to form an even surface.
Can You Paint a Porcelain Kitchen Sink?
As many homeowners can attest, porcelain sinks are a lovely addition to any kitchen. But can you paint a porcelain kitchen sink?
Yes, you can paint the porcelain kitchen sink. First, cover the sink’s surface with a bonding agent designed for use on porcelain.
Have your gloves on to protect your hands.
Popular Painter recommends using a rag or cotton cloth to wipe the bonding agent on the sink’s surface.
Normally, acrylic urethane paint adheres properly to the porcelain.
Since porcelain is available in myriad attractive designs, cleaning them is easy.
However, they chip easily, primarily if you place a heavy gadget on them.
Given that the porcelain sink is naturally durable, it’s easy to paint it other than replacing it entirely.
Even better, you can opt for a paint color that blends with the sink’s original color.
You may also want to apply thin coats of enamel if the surface has an outdated color. For more clarity, check out the steps below;
How to Paint a Porcelain Kitchen Sink.
Step 1
The initial is to cleanse the surface using typical household cleaners that eliminate rust, lime, etc.
As usual, never use harsh abrasives since they might scratch the old porcelain.
Next, soak a clean cloth in denatured alcohol. Once the cloth is wet, use it to wipe the whole sink.
Doing this serves to deter the residue left out from cleaners.
Step 2
After the sink is entirely dry, seal it with a bonding agent.
However, you will want to use a bonding agent specially crafted for porcelain use.
Still, remember to wear protective gloves to avoid bleaching your hands.
Merely one coat of bonding agent is ideal to prepare the porcelain for painting.
Step 3
If necessary, mask off the nearby features with painter’s tape and plastic sheeting.
In the process, you will want to wear a mask with a ventilator to evade sniffing the chemicals.
Additionally, working with your windows opened offers proper ventilation for faster paint drying.
Step 4
It’s now time to paint. Begin with light coats of enamel paint.
And if weather permits, it’s wise to disengage the sink and paint it from the outside.
Painting outdoors enhances better ventilation, plus you avoid the risk of paint dripping on your accessories.
After covering the first coat, don’t rush to the second one.
Check the label for the dry period. Ideally, it’s usually ten to fifteen minutes.
Once it’s dry, repeat applying at least two coats for consistent results.
Step 5
You are now done with painting. Next, position a heat lamp close to the porcelain sink for it to cure quickly.
Suppose you don’t own a heat lamp, don’t worry, just leave the paint to dry completely.
Once it’s dry, I suggest you wet sand the sink with 1000 grit sandpaper.
The essence of wet sanding is to level out ragged patches and other rough areas.
After sanding, clean the sink with paper towels to wipe out the lingering dust.
Not to forget, you will need a foam pad to eliminate possible lingering scratches.
Tip: Never use acid etch on the surface before using the bonding agent.
Acid-edging the surface might bring about damaged household pipes.
Can You Paint a Porcelain Kitchen Sink in a Different Color?
Yes, you can paint your porcelain sink in a different color, but that’s if you sand it well.
In addition, it’s important to ventilate the space well and wear a respirator in the process.
However, changing your porcelain color will be a nightmare if you are not precise with your prep.
The most time-consuming part is sanding, but you must get it right.
Tip: The best paints that adhere to porcelain surfaces include acrylic, urethane, enamel, food-safe paint, and so much more.
Can You Paint a Stainless Steel Kitchen Sink?
Stainless steel kitchen sinks are commonplace for most owners.
They are illustriously known for their corrosion resistivity and their glossy look.
However, stainless steel sinks get rusty over time due to maximum ill use.
Also, they have a relatively smooth surface which makes painting tricky.
But fortunately, there are proven techniques you can employ to fasten the process. Find out below.
- Start with scuffing up your stainless steel sink.
But, if your sink displays signs of wearing, it’s wise to skip this step.
That’s because the paint will hold up easily on the rough surface. Use a wire sponge for scuffing the sink.
You will need to do it precisely not to mess with the protective coating.
- The next thing is to clean the surface.
A typical soap is not a better pick in this event. Instead, you will need a degreaser to do the trick.
- Take a bonding agent that’s rated for stainless steel sink.
Stir the mixture thoroughly and apply it using a sprayer.
Once applied, give the primer a mole time to toast before you paint.
You can also use a paintbrush if hiring a spraying machine is a big deal.
- Finally, take your preferred paint and begin to apply your first coat.
Don’t just aim to attain full coverage with the first coat.
Instead, many thin coats will work best rather than a thick coat that dries unevenly.
Tip: Since the stainless steel sink is overly slick, diluting the paint with water is good.
Diluting aids in enhancing a masterly finish free from imperfections and unimpressive brushstrokes.
Also, avoid painting bare stainless steel surfaces since the paint will chip off and peel easily over time.
Can I Use Spray Paint on a Stainless Steel Kitchen Sink?
As much as stainless steel contains super hard chromium, it is possible to paint it the same way as other types of steel.
If you choose to spray paint a kitchen sink, it would be best if you prepare it first.
Preparation involves cleaning off oils and scuffing with sandpaper or steel wool.
Follow the previous steps by priming with a stainless steel primer and then paint your kitchen sink.
It’s advisable to use spray paint on a stainless kitchen sink.
Nonetheless, there are exceptions to that answer.
Be sure to begin by applying a bonding agent before you spray paint the sink.
Doing this fosters the paint to hold up as expected.
Is Powder Coating Better Than Paint on Stainless Steel Sink?
Yes, that’s true. You will get enhanced performance from powder coating instead of painting with liquids.
What Paint Will Stick to Stainless Steel?
Despite the many paints that can obey stainless steel surfaces, epoxy-based paint is a better pick.
Such paints offer excellent durability and form an attractive sheen.
Better still, you can employ other types of paint. But that’s if they are sanctioned for stainless steel surfaces.
Can I Spray Paint a Metal Sink?
Spray painting a metal sink is not overly straightforward.
That tells you it needs adequate preparation, such as wiping out oils and scuffing the surface.
It’s also interesting to know that spray painting metal sinks need a good bonding agent.
You can’t just use any primer on metal surfaces.
Therefore, ensure that you settle for primers rated for use on metal sinks.
Otherwise, chipping and peeling off will be practically unavoidable.
How Do You Spray Paint a Sink?
Spray painting a kitchen sink is an affordable means of reviving its look.
But before you even start, be sure to sift through the user’s guide to ascertain the recommendations.
However, sometimes the user’s guide doesn’t stress enough the essence of surface prep.
So it’s your responsibility to do it yourself carefully for promising results.
To spray paint your kitchen sink effectively, check out these guidelines:
- The first step involves surface preparation.
Take out your sink if necessary and give it a thorough cleaning. You will have to close all valves controlling water to the sink.
And then use a recommended degreaser to wipe out oils and other impurities.
- After cleaning, dry the sink with a clean cloth and scuff up the surface.
You don’t have to use much energy as you will spoil the exterior coating.
- Next, wipe out the remaining dust from standing.
And then, prepare your primer by shaking it to create a uniform mixture.
Pour the primer into a sprayer and apply it to the entire surface. Since you are aiming for the best results, don’t rush.
Take your time to spray all sides until you attain full coverage.
In the process, it’s good to pull back and check for any deformities before proceeding.
If you have done a good job, leave the primer to dry completely for adequate paint adhesion.
- After the primer is dry to touch, the surface is ready to paint.
Take your paint and mix it well for it to form a uniform layer. And then use a sprayer to begin the painting job.
It’s best to work from the outside since it allows you to paint freely.
You will also consider wearing protective gear to avoid sniffing the dangerous fumes.
Next, direct the paint towards all confines of the sink for better results.
Not to forget, ensure you follow the drying instructions issued on the can.
- If the dry time is due, add an extra coat and avoid forming overlapping layers.
After that, wait for the paint to dry and mount your kitchen sink.
Tip: When spray painting, it’s better to do it from the outside. You will also need to wear gloves and a facemask for your safety.
Can Ceramic Sinks be Painted?
Ceramic sinks are a great addition to any kitchen space.
Such sinks boast a rigid surface that is resistant to high demands like scratching and other impacts.
These features make ceramic sinks a better pick for most homeowners.
Due to the smooth surface of ceramic sinks, people ask, can ceramic sinks be painted?
You can indeed paint ceramic sinks instead of reinstalling a new one.
Suppose you want to paint your ceramic sink; take note of these exceptions.
- Never use bristle brushes to paint or clean ceramic sinks. Such options are abrasive and may ravage the decorative exterior surface.
- After painting, don’t accept cleaners soaking into your sink’s surface. It will help if you rinse and then dry with a soft rag to avoid soap buildup.
- Don’t over sanding since the exterior coating might get damaged.
Is there a Waterproof Spray Paint?
If you have a spray paint project, you are dared to ask, is there waterproof spray paint?
Deciding on an ideal paint for a better finish on your project is a crucial decision.
And with spray paint, you ought to be careful with moisture protection.
Ideally, spray paints are quick-drying options, and not all are rated waterproof.
Mostly, outdoor spray paints are usually considered waterproof.
However, you still have to check the label to certify that the spray paint is waterproof.
The outdoor spray paints are water-insoluble. That makes them hold up well against water over time.
Despite that, better preparation is what determines whether the paint will work as expected or not.
So be sure to prepare the surface you intend to spray paint. In addition, the spray paint will also repel water if you apply extra coats.
Tips: Add a sealer or varnish after painting to make your spray paint more waterproof.
Do You Need a Primer for Spray Paints?
Generally, not all spray painting projects need a primer.
But it is essential since it helps the paint endure a long time and up to the surface.
Besides that, priming is good for water-based paints as it prevents water from chipping off the paint with time.
Does Rain Wash Off Spray Paint?
Rain might not be the prime pinching problem with spray paint peeling off.
However, in some cases, the rain will wash off your spray paint.
Most outdoor spray paints can stand up rain, but with poor preparation, it’s pointless.
After painting, you should not expose your painted surface to rain unless the recommended time is due.
If you paint outdoors and rain approaches; you need to cover your project.
Doing this will prevent you from counting losses from your costly project.
Even better, wait for sunny days to execute your painting project.
Do I Need to Seal a Spray Paint?
There are restricted ways rated more convenient than spray painting any project.
However, the prime challenge is how to make your paint last? The only rewarding solution is to seal the spray paint.
Once your painted surface is dry, you may want to add a clear coat of spray paint. Products such as Minwax water-based sealers will do the trick well.
Note that sealing spray paint is very integral.
The reason is it enables your paint to withstand the high traffic and probably last longer.
Do Ceramic Sinks Scratch Easily After Painting?
Ceramic sinks are rated a pocket-friendly option among the numerous alternatives.
Their surface is relatively smooth and won’t take up much water. That alone makes them perfect for just about any kitchen.
However, they are likely to chip easily if poorly maintained.
So be sure to keep them in good condition, primarily when installing them after painting.
Final Thoughts.
We have seen how painting a kitchen sink can help cut the cost of bedding in a new one.
There is no need to call an expert to handle this task for you.
Despite the easy setup, you have to follow each step if you want to reap the best.
This is essential as it dictates how well your paint will hold up to the surface.
But, people are still skeptical that painting a kitchen sink is possible. They often ask…
Can You Paint a Kitchen Sink?
Yes, painting a kitchen sink is possible. The most time-consuming part is preparation. So for better results, take your time to prep the surface before painting.
Thanks for navigating through this guide. Suppose you are satisfied with the information in this guide; reach out in the comment section.
Meanwhile, have a nice painting project.