Painting your ceramic mugs and plates is a good way to decorate them. However, you only have a few choices if you plan to paint these items because not all paints make a permanent bond with ceramic surfaces. Acrylic paint, for example, is a versatile formula “open” to all your ideas. You can use it on various projects, including painting ceramic mugs and plates, provided you take precautions. Unlike other paints with limited color options, acrylic is available in various colors. And with so many uses on different surfaces, can you bake acrylic paint on ceramic mugs and plates?
You can bake acrylic paint on ceramic mugs and plates in your typical oven. The good thing about acrylic paint is that it is non toxic so you have nothing to worry about. Baking acrylic paint on ceramic mugs and plates help with enhanced protection to these surfaces. Above all, baking gives the surface of your ceramic or glass piece a nice gloss finish. It also presents an appealing way of making your DIY gift.
As you read this post, you will get to learn so much about acrylic paints and how to bake it on ceramic mugs and plates. I’ll also guide you on how to go through different processes to get the very best out of your creativity in the baking of acrylic paints.
Stay with me…
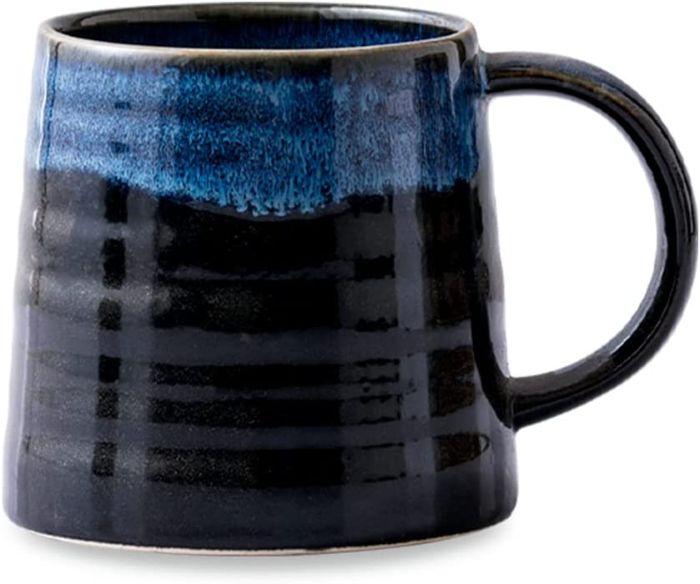
Can You Bake Ceramic Mugs With Acrylic Paint?
 Painting ceramic mugs are a great way to revive their look, and you can achieve precise results using high-quality paints like acrylic. This paint option compliments almost all surfaces, but one might ask whether or not you can bake ceramic mugs with acrylic.
You can bake your ceramic mugs with acrylic to make them safe for use. Baking ceramic mugs with acrylic paint also decreases the curing time needed for paint to set while also maximizing the production rate of painting when working with multiple coats of colored paints.
When baking ceramic mugs with acrylic paint, you have two options: Use an oven or fire the acrylic in a kiln. It’s better to use an oven, considering it’s much faster than baking your ceramic mug in a kiln.
Whichever method you choose, ensure you take precautions if you want to use your new mug for drinking. Also, check the paint package to confirm that it’s toxic-free and oven-safe.
Why Seal Acrylic Paint In Ceramic?
Acrylic paint is soft by default. So even if it displays good adhesion qualities with ceramic surfaces, it flakes and peels away quickly when consistently exposed to moisture.
For this reason, you should seal your acrylic paint on ceramic to increase its longevity, preventing paint from peeling and blending into your food or drink. ( that’s if your ceramic items are intended for eating or drinking )
Several products are available in the market to keep acrylic paint from premature peeling. One of them is acrylic sealants. You can use acrylic sealants to make your painted ceramic items last longer while also revealing the color saturation and the paint sheen.
How to Seal Acrylic Paint On a Ceramic Mug Or Plate
Sealing acrylic paint on a ceramic mug or plate offers many benefits: it enhances the color saturation and makes the painted mug and plate easier to clean.
You will need a food-safe sealant to seal acrylic paint on your ceramic mug or plate. Many options exist: some are available in spray form, whereas others need a paintbrush to apply.
Before discussing how to seal acrylic on your ceramic items, let’s see the recommended sealants for this project.
-
Krylon K01305 Gallery Series Artist Aerosol
Krylon K01305 comes in a compact aerosol and dries to form a moisture-resistant clear acrylic coating. This sealant is sprayable, meaning you won’t have issues with visible brush marks on your ceramic piece, and it dries within 10 minutes.
-
Liquitex Basics Matte Varnish
The Liquitex basic varnish offers your acrylic paint a matte finish, giving your ceramic mug or plate a less glossy texture. Nonetheless, you can blend it with a glossy varnish to offer varying sheen levels. The varnish doesn’t produce odors and dries to form a barrier that resists daily demands.
The products discussed above are some of the best sealers for your ceramic mugs and plates. Many other options have flooded the market, so be careful not to settle on a below-average product.
Lets now see how to seal a ceramic mug and plate through the steps below:
-
Sealing Acrylic Paint on a Ceramic Mug
 Before sealing your ceramic mug, you must bake it in an oven until enough time has passed, then let the mug cool as you prepare the sealer.
Begin by spreading down a newspaper or a cloth to protect your workspace from catching the sealer. If you worry about the newspaper flying away, tape it down and use more layers of newspaper if you’re messy.
Protect the areas you don’t plan to seal on your mug with painter’s tape. Then before applying your sealer, ensure the mug is completely dry to enhance adhesion.
After that, take your sealer, shake it vigorously and begin spraying your mug from a distance. You may want to shake the can occasionally during application to ensure the spray nozzle releases the sealer at a steady pressure.
It’s also wise to keep a rag handy for cleaning the spray nozzle during application.
Continue applying the sealer until the entire surface is coated. However, don’t spray the sealer inside the mug or around the top edge of the mug, where someone’s lips would contact the surface.
If you’re using a paintbrush for this project, ensure you apply long, even strokes without leaving noticeable brush marks. After sealing your ceramic mug, leave it to air dry. Some acrylic sealers take 10 to 15 minutes to dry to the touch, whereas others take longer.
-
Sealing Acrylic Paint On a Ceramic Plate
Sealing acrylic paint to ceramic plates resembles the steps above. Begin baking the plate in an oven, allow the plate to cool, then lay down newspapers before sealing.
You won’t need to wrap a painter’s tape to the ceramic plate, but be careful not to apply the sealer to the plate’s bottom. Spray the sealer around the plate to achieve full coverage. The trick is to spray at least 12 inches away from the object to avoid over-spraying on one spot.
How to Bake Acrylic Paint On Ceramic In the Oven
Baking acrylic paint on ceramic in the oven offers a thick, durable coating, resistant to chipping. Mastering how to bake the ceramic piece will help you avoid standard errors while baking.
So to help you with that, I have outlined how to bake a painted ceramic piece in the oven in easy steps. Check below for more insight.
Step 1: Let the Ceramic Piece Dry After Painting
Before baking your ceramic object in the oven, paint it with toxic-free acrylic paint. There are two delivery methods for painting your ceramic piece: spray paint or use a synthetic brush.
Whichever method you choose, ensure the paint layers dry completely and let the ceramic piece sit for 24 hours before baking.
You can touch the paint to examine if it’s dry. If it doesn’t come off, you’re safe to proceed to step two.
Step 2: Pre Heat the Oven
Putting a ceramic object in a preheated oven is a calamity recipe. Ceramic objects need to heat gradually to avoid breaking or shattering. So to avoid such, place your ceramic piece on a baking sheet and insert it in a cool oven. Set the oven temperature to 350 degrees Fahrenheit ( F ) and move on to step 3.
Step 3: Bake the Ceramic Piece
Once the oven temperature reaches 350 degrees Fahrenheit, set the timer to ring after 30 or 35 minutes, depending on the ceramic object size. Smaller pieces such as mugs take less time to bake.
Step 4: Allow It to Cool
After baking for thirty minutes, the timer should ring, alerting you to turn off the oven. Please don’t remove the ceramic piece immediately; instead, let it cool for a few hours to avoid breakage.
After that, your painted ceramic piece will be safe for use, and you can wash it without fearing paint peeling off. However, avoid using abrasive materials on your painted ceramic object and wait for 72 hours before using the baked pieces.
Is It Safe To Bake Acrylic Paint In The Oven?
It’s safe to bake acrylic paint in the oven but ensure the paint you use is non-toxic. I say this because when heated, acrylic paint produces a chemical that’s not good for one’s health if inhaled in large amounts.
However, you can prevent acrylic paint from releasing those dangerous fumes by allowing it to dry for 24 hours before baking it. This gives the toxic fumes enough time to come off your acrylic paint. Working in a well-ventilated space also saves you from breathing any toxic fumes after baking.
Is Acrylic Paint Dishwasher Safe?
Objects painted with acrylic can last for lengthy periods because acrylic paint offers a durable coating that resists elements. However, that doesn’t mean that acrylic paint is permanent. It will wear with time if not maintained properly. So is acrylic paint dishwasher safe?
Acrylic paint is dishwasher safe, but only if you bake the painted unit and seal it to keep it from peeling when exposed to moisture. If you plan to wash your baked acrylic paint object, do it infrequently and avoid using rough materials as the paint might come off easily.
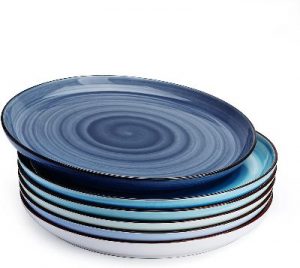
How Long Do You Bake a Ceramic Plate With Acrylic Paint?
Coating ceramic plates with acrylic paint make them more tolerant to daily demands while enhancing longevity. But even with the best acrylic paint, your ceramic plate will still suffer peeling issues if subjected to high moisture.
For that reason, people bake their painted ceramic plates to avoid untimely peeling issues.
However, one might wonder, how long do you bake a ceramic plate with acrylic paint?
A painted ceramic plate should bake for 3o to 35 minutes, and after that, cool for a few hours before removing it from the oven. A common mistake is to remove the ceramic immediately after baking.
This might burn your hands, forcing you to fall down the plate and break it. Also, opening the oven immediately after baking means you will inhale the paint fumes coming from the oven, causing health complications.
How Do You Make Painted Plates Food Safe?
Painting your eating plates is a great way to compliment your kitchen decor. It’s also a fun activity for all ages, allowing you to display your creativity. However, you should use effective and safe products when customizing your food-safe plate.
To make your painted plate food-safe, you must bake it in an oven or apply a food-safe sealer. But before that, make sure your plate is oven-safe.
If you’re not going to bake your painted plate, place it down on a drop cloth and ensure it’s completely dry. Take a food-sealer and shake it thoroughly. There are many food-safe sealers in local stores: some are sprayable, but I recommend you opt for the brush-on sealer.
Take your synthetic brush and dip it into the sealer. Use the brush to stir the sealer until all bubbles disappear. Doing this prevents the sealer from forming bubbles after sealing your painted plate.
Remove the brush and begin coating your painted plate until you cover the entire surface. If you’re not pleased with the color saturation of the first coat, apply a second one going in the opposite direction from the first coat.
This ensures uniform coverage without apparent brush marks. After that, let the sealer adhere and air dry for about 45 minutes before touching it. You can wait for 2 to 3 days before eating from your painted plate.
If you opt for a spray-on sealer, ensure you spray your painted plate from a distance. One trick you will find helpful is to keep your hand constantly moving while spraying and avoid focusing on one spot. This way, paint won’t accumulate on one area, causing premature cracking.
If you will bake your painted plate, ensure you set the timer to 35 minutes to avoid overheating the plate. It’s also wise not to use the oven for two days to allow the paint fumes to come out.
Tip
As stated above, don’t use non-oven safe plates in an oven. If the plate is not indicated oven-safe, it will create stress when exposed to rapid heating, causing cracks, shattering, or explosions. At worst, it can cause severe injury.
Can You Use a Microwave to Dry a Painted Ceramic Plate?
If you intend to make your painted ceramic plate dry faster, there are many better ways to avoid placing it in the microwave. Most paints will respond well to a few seconds in the microwave, but I don’t recommend this route.
So if you want to boost the drying time of your painted ceramic plates, use alternative methods such as a hairdryer. Be careful when using a hairdryer, as you might overheat the painted ceramic, causing cracks.
Also, set the hairdryer to the lowest setting and avoid blowing air too close to the plate. Otherwise, excess heat will introduce bubbles cracks and affect the paint color and quality.
Will Acrylic Paint Work On Glazed Ceramic?
Glazed ceramic objects can prove difficult for acrylic paint to grab hold of because of their waterproof nature. Even if you succeed in painting on a glazed ceramic surface, the acrylic paint will come off easily with time.
That means you should make the glazed ceramic surface suitable for painting. You can achieve that by creating a rough texture to which your acrylic paint will adhere.
Check out the tips below to learn this technique.
Things You Will Need
- Sandpaper.
- Cloth rag.
- Primer.
- Paintbrush.
- Acrylic paint.
Step 1: Sand the Surface
Before painting your glazed ceramic object, it’s wise to establish a rough surface that will have no adherence issues. You can perform that by slightly scuffing the topcoat with medium-grit sandpaper. This forms a textured surface that your acrylic paint will clutch onto quickly.
After sanding, wipe away the sanding dust as this can prevent the new paint from adhering as expected. A wet rag will work best for this step.
Step 2: Prime the Sanded Surface
After sanding, allow the glazed ceramic surface to air dry completely before priming. Once dry, take your primer and shake the can vigorously to dilute any bubbles that may transfer to the surface when painting.
Then take your synthetic paintbrush, soak it in the primer and start painting your glazed ceramic using uniform strokes in the same direction. This will give you a consistent pattern.
Allow the primer to dry for 40 minutes, then add a second coat if the first one doesn’t cover enough.
Step 3: Paint the Ceramic Surface
After the primer dries to the touch, take your can of paint, stir it to mix its pigments, insert your paintbrush, and start making your first coat similar to how you applied the primer. You should evenly apply the paint in thin coats to avoid overlaps and paint compiling in one area.
Wait for the first coat to dry according to the manufacturer’s recommendations, then add a second coat to conceal the imperfections made in the previous coat. Let the second coat dry accordingly, then apply an acrylic sealer to protect the glazed ceramic object against harsh elements.
How Do You Paint a Mug That Won’t Wash Off?
Painting allows you to get creative on distinguished surfaces. Some surfaces, such as coffee mugs, are susceptible to moisture, requiring high-quality paint to withstand that exposure.
However, painting alone doesn’t guarantee maximum protection. You will need protective sealers to offer your mug a resistant coating that will hold up to daily use.
In this guide, we go deep into the basics of this painting process. So read along to learn more!
Things You Will Need
- Mug ( white mugs work great )
- Rubbing alcohol.
- Cotton balls.
- Pens.
- Paint.
- Soft paintbrush.
- Sponge.
Step One: Always begin with cleaning your mug to remove any surface impurities that can disturb paint adhesion. You will need a soft sponge and soapy water for this step. Dip the sponge into a soapy water mixture and clean your mug properly.
After that, rinse the mug with clean water and dry it with a clean cloth.
Step Two: After preparing the mug, give it time to dry, then take your paintbrush and begin coating the mug with your preferred color. Use thin and even coats to achieve full coverage. The first coat will be too light, so you need a second coat to make the color appear more saturated.
If you make a slight mistake, insert the cotton swap into a can of rubbing alcohol, then wipe out the irregularities. Alternatively, you can scrap the unwanted paint with a scraper then repaint the area.
You can use a paint pen to decorate the surface for more beauty. Or you can add an image to the mug. It’s very simple to attach an image. All you need is to trim the image you want using small scissors, following the paper outline.
Next, place the trimmed image on a magazine page. Take a paintbrush and coat the plain side of your image with a decoupage medium. Make sure the decoupage doesn’t reach the edges of your image to avoid squeezing out when attaching to the mug.
Now place the image on either side of your mug and apply some pressure with your fingers to secure it. You can also use a pen to smooth down the photo to remove air bubbles. ( working from the middle of your image outward.) But do it carefully to avoid tearing the image.
Step Three: Allow your painted mug to dry for 24 hours, then add a coat of protective sealer. The sealer you use should have water resistance qualities to protect your mug from washing off. Use a similar painting technique to apply the sealer and permit each coat to dry fully for the best results.
Most people prefer heat-curing the painted mug in an oven so it won’t wash off. If you follow this route, ensure your product is oven-safe to avoid breakage when exposed to high temperatures.
Follow these easy steps, and you will have a nice customized mug that won’t wash off even in extreme moisture.
Similarly, people ask, how can you paint your mug with pens?
Note: Painting a mug with a pen uses similar techniques and procedures with a brush, only that you will need to make slight adjustments on the design outline. Here is how to do it:
Step 1: Sketch a Design Outline On Your Mug
Start with drawing a design of your choice on the mug’s surface using a pencil. Although this step is not essential for paint pens, it keeps your design clean and organized. However, be careful not to sketch the design on the mug’s lips. You can use painter’s tape to make vertical lines.
Step 2: Paint the First Coat On Your Mug
Next, you will need an oil-based paint maker to decorate your mug. Do this following the design you drew with your pencil or change it provided you don’t substitute the paint pen with a sharpie as it will wear down quickly.
Step 3: Add More Paint Layers
Continue adding more coats after the first paint layer dries until you reach your desired color, texture, and thickness. But be cautious not to mix the colors.
Step 4: Erase Any Mistakes With a Rubbing Alcohol
You will need an eraser to wipe away any leftover pencil markings. If you notice stray paint marks, wait for them to dry out before removing them. After that, dip a sponge in rubbing alcohol and dab at the dried-up paint until it disappears.
Ensure you squeeze out the sponge before using it, so it doesn’t drip. I also recommend you work slowly and dab gently to avoid mistakenly removing part of the design.
Step 5: Let the Mug Air Dry for at Least 24 Hours.
Place your mug on a newspaper and let it dry for 24 hours. Afterward, bake your mug in an oven set to 350 degrees Fahrenheit for 30 minutes, or seal it for a more professional look and maximum protection. After that, allow your mug to cure for 72 hours, then wash it with a regular sponge and soapy water.
Here’s How to Bake Acrylic Paint On Mugs:
Final Thoughts
Painting ceramic mugs and plates is fun and a good way to display your creativity skills. If done correctly, you will have nice plates and mugs that match your kitchen’s decor.
However, a dilemma arises when choosing the right paint for this project. Not all paints will stick to ceramic surfaces because of their sleek surface. That means you will need high-quality paints to coat your ceramic plate and mug. So…
Can You Bake Acrylic Paint On Ceramic Mugs and Plates?
Yes, you can bake acrylic paint on ceramic mugs and plates in your usual oven. Acrylic paint is non toxic so you don’t have to worry about any health implications. Baking acrylic paint on ceramic mugs and plates helps protect and offer a beautiful glossy touch.
The information in this guide can help you make the best decision when baking your ceramic items with acrylic paint. Meanwhile, thanks for your time, and don’t forget to share your thoughts in the comment section.
