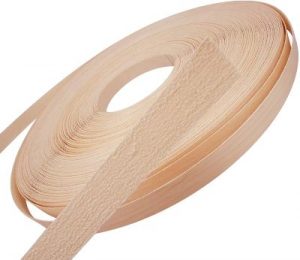
 You can best describe edge banding as a wonder strip that serves both aesthetic and functional purposes. Aesthetically, edge bands are great at covering the rough edges that may make a material unsightly. Functionally, it acts as a much-needed seal for your material and improves its resilience and durability. However, as much as you can paint over edge band, many people are still not clear on whether you can apply it over a painted surface. This article answers the question, can you edge band over paint?
Yes, you can. When banding over a painted surface, check to ensure that the adhesive on the edge band will adhere to the paint. Hot melt adhesives (mainly EVA and PUR) used in edge bands will adhere quite well to a well-prepared painted surface. However, strip off the paint and work with a raw surface if you want to take extra care.
You cannot overstate the importance of edge banding. This article will discuss how to apply edge bands of different materials over various surfaces and what options you have for painting over them.
Will Edge Banding Stick to Paint?
Yes, it can. Edging adhesive, also hot-melt glue is a type of thermoplastic adhesive. You can choose between two major hot melt adhesives, EVA (Ethylene Vinyl Acetate) adhesive and a PUR (polyurethane) based adhesive. Hot melt adhesives will adhere to a painted surface.
If the edge banding you plan to use utilizes a hot melt adhesive, it might be worth it to give it a try on a painted surface. However, remember to clean the painted surface thoroughly and allow it to dry before you attach the edge banding.
Nevertheless, if the paint is in rough condition and is peeling and chipping, the best way to proceed is by stripping it or sanding off all the damaged paint, then applying the edge banding. Also, if you want to err on the side of caution, you can choose to strip the paint off the edge you plan to band. If you are also using a glue-on edge band, this might be a good idea.
What Alternatives Are There to Edge Banding?
While it is arguably the most popular method, there are several other ways to cover plywood’s exposed edges. Following are some of the best alternatives you can use.
-
Wood Filler
Wood filler is one of the obvious ways you can use it to cover your plywood edges. A wood filler usually consists of pulverized wood byproducts suspended in a binder and dries hard. The goal when using wood filler is to create a smooth solid surface that you can sand down to hide the roughness of plywood.
So, how do you apply wood filler? It’s quite simple.
First, mix the filler up in its container until it has a uniform texture and color.
Then, you apply the filler using a putty knife. If you are using a petroleum-based filler, you must work fast since it hardens quickly. A water-based filler can stay wetter for longer and thus allow you more working time. It is also important to apply the filler conservatively. It is easy to assume that it would be easier to slather a large amount on your wood edge and then sand it off, but the product dries hard, and this can prove an uphill task.
After applying the filler, you can then smooth it out using your finger to press it deeper into any crevices then remove the excess.
After allowing the filler to dry for at least 30 minutes or up to an hour, use an oscillating sander to smooth it out and then finish with a fine-grit sandpaper. Use a tack cloth to wipe down the wood to eliminate any sanding dust before finishing or staining your wood as you prefer.
Below is a discussion of the pros and cons of using wood filler compared to edge banding.
Pros
- Easy to apply
- Cheaper than edge banding
- It gives a smoother finish
Cons
- Wood filler can be messy, especially when applied to a vertical surface
- It takes longer to dry
-
Solid Wood Trim
Another simple way to finish the edge of your plywood is by using wood strips. The strips of wood are glued and nailed to the plywood edge. You can also cover the nail holes using nail filler and then sand them to cover the edge.
While this process is more labor-intensive, it results in a stronger and more professional finish.
The cons and pros of using a solid wood trim are:
Pros
- Solid wood trim is more durable than a filling or an edge band.
- Solid wood is easier to stain to match the rest of the wood.
Cons
- More labor-intensive
- Solid wood is more costly than banding or filler.
-
Tongue and Groove
A popular method of covering the edge of the plywood is applying a piece of hardwood to the edge. When using the tongue and groove method, all you need to do is cut a groove into either the plywood or the hardwood.
Then cut a corresponding tongue centered and approximately a third of the thickness of the grooved material into the other material. Dry fit the two materials to ensure the fit is correct and if it is, apply glue to the grooved edge. Clamp the joint together until the glue has dried fully.
Some of the pros and cons of using this method are:
Pros
- You can add any edge detailing that you want.
- The joint is strong and durable.
Cons
- The joint is not perfectly seamless, and you may see it if you look up close.
- It can be time-consuming.
Do I Need Edge Banding for Painted Cabinets?
While paint will offer a certain level of protection and cover up any raw, exposed edges, it will wear out over time. You can choose to apply edge banding to your painted cabinets to provide that extra layer of protection. You can choose to add an extra seal on your cabinet edges using edge banding and protect the edges from the effects of moisture seeping.
You can also use edge bands as an aesthetic option to get a certain look to your cabinets. You can get edge band veneer in several wood types to match or contrast its environment.
The process of attaching edge banding to a painted cabinet is generally the same as when attaching to any other surface, with a few points to note.
- Check the cabinet edge for nails. Pass your finger along the edge of the cabinet to ensure no nails are sticking out. If these protruding nails are left in, they will show through the edge band and cause a weaker bond. Remove them using a nail punch.
- Use the edge band with hot melt adhesives. Hot melt adhesives will adhere properly to a prepared painted surface.
How Do You Edge a Band?
Edge banding covers up exposed sides of materials such as MDF or plywood. When done right, it transforms plywood edges that seem unsightly into something truly remarkable. Below are steps on how you can edge a band properly.
Step 1: Gather the tools and materials
Gathering all the necessary equipment and putting them within easy reach is guaranteed to make your work process faster and smoother. The things you will need to edge a band are:
- Edge banding veneer that matches the wood species you are using.
- A straight-edged ruler
- Contact cement glue or an iron
- Sandpaper
- Woodblock
- Measuring tape
- An edge trimmer
Step 2: Tidy up the edges.
A rough surface will prevent a strong bond from forming between the edge band and the plywood, resulting in loose banding. To smooth a rough surface, use some sanding paper to sand down the surface. To keep from rounding out any edges, you can screw a piece of wood to the sandpaper block to act as its guide.
Step 3: Prepare your banding strip.
Measure the edge length that you need to cover and cut off the corresponding length of edge banding. Ensure you add at least half an inch on either end so that you can trim it down to size when you are finished.
Step 4: Apply the edge banding.
When choosing edge banding, there are two primary types you can choose from. You can choose one whose adhesive backing you activate by heat (Iron on), i.e., using an iron, or edge banding adhesive that you attach using heavy-duty adhesive (Glue on), i.e., contact cement glue.
If you are gluing on the banding, first read and follow the instructions from the glue’s manufacturer. It is also good to use protective equipment such as gloves and work in a well-ventilated area.
First, cover the entire edge of the material with the adhesive. Then start securing the band carefully from one end to another as you press it down. Make sure to align your starting point correctly.
Once you have secured the edge banding into place, use a wood block to press it down firmly along its entire length. Pressing down the adhesive will ensure that you remove any trapped air and even out the adhesive beneath the banding.
Once you are confident in the adherence of your band, trim off the excess with an edge trimmer.
If you choose to use iron-on banding, the steps are also fairly easy to follow. You will also need to cut a strip of banding a bit longer than you require to allow for trimming. If you do not want to risk adhesive getting on your iron, you can buy a separate cheap iron for such applications.
Remove any water from your iron to prevent steaming and set the iron to the ‘cotton’ setting. Starting at one end, center the banding with the extra bit overhanging on both sides. With one hand keeping the banding centered, slowly move your iron along its length. Go slowly enough to melt the adhesive but not so slow that you scorch the wood.
A good starting point would be a rate of about 2 inches per second. If you misalign the banding, correcting it is as simple as ironing the band to soften it, peeling, and then repositioning it.
As with the glue-on banding, go over it with a woodblock a few times to ensure it adheres properly. Suppose you find any raised spots, heat them, and press them again. Then use an edge trimmer or utility knife to trim the excess banding off. You can also use a special edge banding tool to trim off any excess faster and cleaner.
Step 5: Finishing
After trimming the edges, they may remain sharp. Use fine-grit sandpaper at a slight angle to smooth out the edge. Do this carefully to prevent sanding through the banding.
Can You Paint White Edge Banding?
As long as the manufacturers sell the edge band as paintable, yes, you can paint it. If the white edge band is melamine, painting its surface is a great way to extend its life. As further explained below, the painting process is fairly simple.
Scuff up the surface with sandpaper, clean it off with a tack cloth, and apply the primer and paint in succession, allowing the needed drying time in between.
PVC edge bands also come pre-manufactured in different colors. However, if you want to change the color, you can also paint it in a process that we explain in detail below.
Can You Paint Iron On Edging Tape?
Yes, you can! Whether you want to paint it to match the rest of the material or give new life to old edge tape, painting is a reliable solution. If you use wood veneer and get banding that matches the rest of your material, the paint will take to the banding the same as it takes to the plywood.
Below is a guide on the steps to take to best paint your edging tape.
- Cleaning
Before you paint the edging tape surface, you will need to clean it properly. Paint does not adhere properly to surfaces that have grease and debris and will peel and lift after a short while.
Using a degreasing cleaner is a great way to clean the surface. Mix three tablespoons of dish soap with some water and use a barely damped cloth to clean the tape. Rinse the sponge/cloth frequently and allow the surface to dry.
- Sanding
Primer better adheres to a slightly rough surface, while edge tape is fairly smooth. Sanding is a great way to scuff the surface in preparation for primer.
Instead of using a power sander which runs a high risk of sanding right through the tape, you can use fine-grit sandpaper. Use light pressure along the tape’s length and a tack cloth to wipe away any remaining sanding dust.
- Priming
Primer is a preparatory undercoat applied before painting. It has several advantages, including providing better adhesion of paint to the surface, increasing the durability of the paint, and providing an additional layer of protection to the material you are painting.
Some interior paints work as a 2-in-1 with a primer included in the paint. Read the manual carefully to know if you will need a separate primer. Choose a primer compatible with your paint and both products that are compatible with the edge tape.
If your edge tape is of very thin wood, the best choice is an oil-based primer. If the tape is of vinyl, choose a primer specifically designed to stick to vinyl. Apply the primer to the tape’s surface and allow it to dry for the full recommended time, allowing some extra time if you are working on a humid day.
- Painting
There are several paint options you can choose from for your edge tape. For the best coverage, we recommend oil-based paints as they contain alkyds that work well with edge veneer.
However, they require more drying time and are not as easy to clean up as they need mineral spirits. You could also choose to use latex paints which hold up well after repeat cleaning and release fewer fumes than oil paint. Select paint that is compatible with your primer.
The number of coats of paint you apply is at your discretion, although two coats is a good place to start. Let the paint dry completely between coats. You can also lightly sand between the sand of coats for a smooth finish.
Is PVC Edge Banding Paintable?
Yes, it is! PVC is arguably the most popular edge banding material. It has numerous advantages and great characteristics, such as its durability, affordability, and the fact that it does not require finishing. One great advantage of PVC edge band is the ease of obtaining one paintable to whatever color you desire.
However, PVC edge banding is not the product to go for if you hope to use stain for coloring. When purchasing PVC banding, it is important to purposely choose a product whose description lists it as paintable to avoid disappointment.
Manufacturers make PVC with different colors and patterns that you can choose from if you do not want to go through the painting process.
So, how do you paint PVC? Conventional wisdom has a lot of people believing that you cannot paint PVC. However, it is only difficult to paint and not impossible. The major reason for this is the low surface energy of the PVC, which is lower than that of water and many paints.
However, you can paint PVC edge banding effectively with proper preparation and care. Several recently developed paints are specially formulated to adhere to PVC. The steps below will guide you to best paint your PVC edge banding if you want to adjust its color.
Step 1: Preparation.
Two basic actions are great for preparing a PVC band for painting. One is lightly sanding the surface. Sanding will help to remove any surface waxes. Work with sanding paper over a power sander to avoid wearing down the material too much—sand in all directions to avoid creating straight line striations.
The second preparation is to wipe down the surface with acetone. Although acetone is detrimental to PVC in large amounts over extended periods, wiping the PVC edge band with acetone has two main purposes.
It swells the surface, makes it slightly more porous, and disperses any surface wax from the manufacturing process, raising its surface energy.
Note: Acetone is extremely flammable, and you should not handle it in areas that may have open flames. Also, work in an area that is well ventilated.
Step 2: Protect the area around you
You could take the object you are painting outside to avoid making a mess and work in a well-ventilated space. If you cannot do this, lay plastic sheeting and newspapers around the area you are painting to protect it.
Step 3: Paint
When selecting paint, it is important to choose one that manufacturers have designed for use on PVC. These paints are formulated with a blend of polyurethane and acrylic and formulated with additives to reduce their surface energy, making them great for adhering to the PVC material.
Paint the PVC in thin, consistent coats, allowing it to dry between coats if you use more than one. Paint the number of coats necessary to get the color concentration you need.
Is Melamine Edging Tape Paintable?
Yes, it is. Melamine tape consists of paper covered with melamine resin, which is resistant to high temperatures, UV exposure, and water. If you plan to paint your melamine edge tape, it is important to choose a specifically labeled product as paintable.
Paintable melamine will also allow you to get the desired color on your edging tape, whether you want an exact match or a great contrast.
Painting melamine edging tape follows the same basic procedure as painting the other surfaces. However, ensure you use a primer that manufacturers have specially formulated for melamine or laminate wood.
Scuff the surface of the melamine band with some fine-grit sandpaper, then apply primer and paint, allowing the recommended drying time between each application.
Final Thoughts
When done well, edge banding will provide an aesthetically pleasing edge of your choice while offering protection to the edges of your material and increasing its longevity. Still, the question remains,
Can You Edge Band Over Paint?
Yes, you can! As long as you use the edge band with adhesives that stick to paint, such as hot melt adhesives, the band should hold over paint quite well.
I appreciate you for reading our article, and we hope that you have found it informative. Please leave your thoughts, comments, suggestions, and any questions in the comment section below.