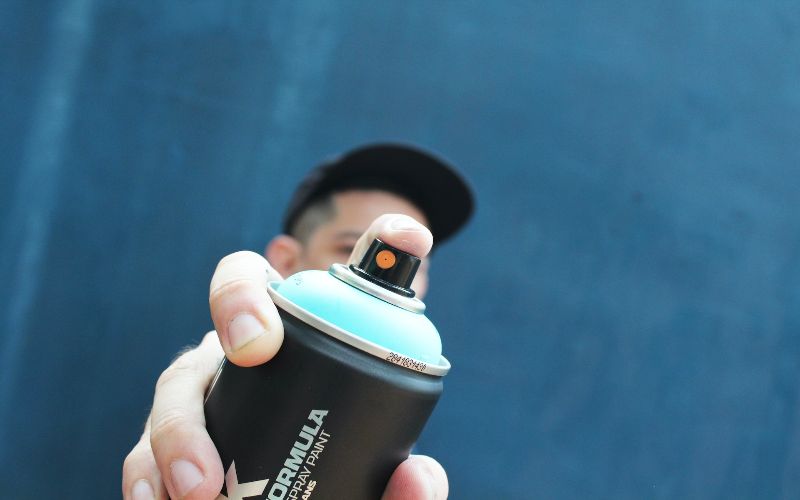
Nowadays, homeowners and DIYers have abandoned brush painting in favor of spray painting their projects.
Mostly, bristle brushes and rollers won’t bring to life your project as spray painting does, and considering that spray paints are highly versatile, you can utilize them on various surfaces.
However, you should wet sand your spray paint for a smooth finish. but how long before you can wet sand spray paint?
From my experience, the period differs based on the type of paint. But the recommended duration is roughly 30 minutes as most spray paints dry faster.
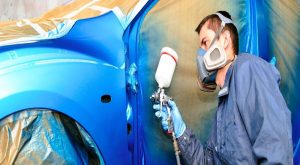
However, your paint must dry for 12 to 24 hours before you start sanding for the best results and with fewer mistakes, especially on cars.
Majority of the car painters I talk to prefer spraying late in the day so they can leave the spray paint to dry overnight before a rubdown.
Keep reading for more insight on spray paints and wet sanding.
How Long Should Paint Dry Before Wet Sanding?
Any painting job can enhance your project’s new look.
However, you need to wet sand your project to give it a masterly finish.
Despite the process being time-consuming, you will surely like the outcome.
In the process, you will not want to ruin the topcoat.
Therefore, don’t sand too deep to avoid repainting your project.
Sanding too hard merely adds to the cost since you will need more paint to recoat.
After you apply the initial coat, give your project ample time to dry to reveal the rough patches.
Usually, the drying time is set between 12 to 24 hours.
Allowing the surface to sit overnight will help for complete dryness.
After the duration, as mentioned earlier, you can now wet sand your surface for the typical options.
If necessary, add a touch of dish detergent to keep the abrasive papers free from clogging.
Tip: Use 600 t0 1500 grit sandpaper for demanding results.
How Long Should Rustoleum Spray Dry Before Sanding?
Sanding Rustoleum spray paint makes your painting surface attain a fine finish without scarring the surface.
However, you may fail to achieve your desired results if you decide to rush before the drying time is due.
Once you apply Rustoleum, give it enough time to cure before sanding.
Usually, at least one week is enough. Remember, the surface needs to dry entirely to reap the best results.
Tip: There is no need to sand between coats of Rustoleum spray. However, if the surface reveals any deformities, you can sand it.
Still, you will want to use a good sanding tool. Never try to wet sand Rustoleum with an electric sander.
The reason is, that water and electricity don’t blend. Suppose you try it; you will have to pay for it since electricity doesn’t forgive carelessness.
Can You Wet Sand Paint Before a Clear Coat?
The essence of applying a clear coat on any painted surface is to offer it enhanced protection.
However, can you wet sand paint before a clear coat?
Yes, you can wet sand paint before a clear coat to make the surface unwrinkled. This step is integral for most painting projects.
Suppose you wet sand your paint; remember to clean it with soap and water. Next, take your clear coat and spray.
Since a clear coat excels well on smooth surfaces, avoid scuffing the base beforehand.
Doing this promotes better adherence to the painted surface.
Note: The clear coat needs good maintenance. To execute this, avoid waxing it for nearly 30 days.
That gives the chemicals ample time to dry and evaporate entirely.
If the chemicals fail to evaporate, they can create bubbles in the paint. For this reason, the painting and sanding you did will be pointless.
Do You Wet Sand a Car After Painting?
The most rewarding form of paint correction for your car is wet sanding it.
If done properly, wet sanding your car can leave an impressive, smooth surface.
Before wet sanding, your car, ensure that you acquire a spray bottle that distributes a misty spray pattern.
Such bottles allow you to sand exactly when saturating your work surface with one hand.
In addition, you will similarly need good sandpapers rated for the job at hand.
It’s wise to execute the sanding task outdoors. For this reason, you will avoid running water with tiny whiffs of paint from staining the floor.
If left unattended on time, this can lead to strenuous clean-up once the water dries.
Suppose you own a garage with a proper drainage system; you can conduct your sanding projects inside. With all the basic supplies, feel free to send your projects.
To begin, use 1000-grit sandpaper to wet sand your car. This one involves back and forth movements instead of other sanding methods.
Even so, you must be careful not to exert much pressure on the sandpaper.
While sanding, you will want to move back and forth in one area as you add water often.
After that, repeat the process with another sandpaper grit. Then thoroughly rinse the entire car to peel off the lingering sanding dust.
When Can You Wet Sand Single Stage Paint?
Single-stage paint can be wet sanded.
Nonetheless, wet sanding single-stage paints pose the risk of losing UV protection. And that’s because the clear coat is embedded into the paint.
Therefore, before wet sanding single-stage paints, ensure you confer with the manufacturer.
The approved duration for wet sanding single-stage paint is after 24 hours.
You will need to choose a single-stage paint that encompasses a hardener. Such paints are bound to dry shortly and make sanding more effortless.
Suppose you decide to wet sand single-stage paint; make sure your color is not metallic. If you wet sand metallic color, you will distort the existing finish.
I suggest you use 1000-grit sandpaper.
Despite taking up much of your time, it restricts deeper scratches. Furthermore, it lessens the amount of paint you will peel off.
You will need to sand it to a point the entire orange peel is discarded. Then decide whether you want to continue buffing it or not.
How Many Coats of Spray Paint Is too Much?
Generally, you should use two to three coats of spray paint.
The coats, as mentioned above, are enough for full coverage. However, this rule has exceptions depending on the color, surface, and integrity of the paint you use.
It costs more to apply three or more coats on your surface. But the coat will endure three to five times longer than a single coat.
You don’t have to apply thick coats of spray paint as your surface will inevitably crack. Two to three light coats are better, unlike one heavy layer.
Try to get all the coats applied in less than an hour.
Tip: Merely two to three coats will work best. Adding more than four coats can result in bubbles and cracking on the surface.
Should I Sand Between Spray Paint Coats?
Spray painting surfaces can be strenuous, primarily if you don’t know how to apply smooth coats.
As such, a lack of prior experience will likely result in drops, runs, and imperfections.
Ideally, spray paints have a sheen that emphasizes the surface deformities such as dents when dry.
That tells you that before spraying the last coat of paint, you need to sand the surface.
After sanding, apply at least two coats of primer. In the process, you will need to sand between each coat for consistent results.
It’s better to apply the primer before sanding any surface; for instance, applying primer in woods before sanding raises the wood’s grain.
And as such, it brings about a rough-textured surface.
Tip: Suppose your last coat looks fine; you don’t have to sand between coats. Instead, just proceed with the paint job.
Why Is My Spray Paint Patchy?
There exist several aspects that make spray paint patchy after applying it.
Before applying your spray paint, shake the bottle thoroughly for the components to bind evenly.
Even when applying the spray paint, it’s good to shake the can periodically. It takes fewer coats to attain even coverage.
But be sure to stay for a while for the paint to dry, so you avoid forming pooling and patches.
Spray paint can result in a great loss, primarily if you don’t get it right. The other reason your spray paint is patchy is over spraying in one part.
You can evade this by doing smooth and even sprays and avoiding overlapping.
The above consistency prevents the paint from dripping and building up with time.
Drips can be strenuous to handle, so it’s better to stop them from occurring.
Also, spraying during extreme weather can make your spray paint patchy. Extreme temperatures can inflict crackles in your paint as it dries.
And since you will not want to experience that, it’s better to warm up your workspace after painting.
Not to mention, you should also watch out for your spraying distance.
Spraying from a close range can cause drips, while far away can result in a dotty surface.
Ideally, keeping a 12″ distance is ideal with spray paints. If in doubt, you can certify the spray distance printed at the back of the can.
Precautions to Prevent Spray Paint from Being Patchy
To avoid forming patches on your painted surface, you must comply with several things. Find out more in the guidelines below:
- Ensure you utilize the recommended spray gun or can of spray paint. Also, you should opt for the right paint rated for a specific material or surface.
- Before applying the paint, make certain that you mount the spray gun precisely.
- Begin by cleaning up the surface you intend to paint. You can perform this by wiping off dust and debris.
- Practice thinning your paint to obtain your desired outcome.
Tips on How to Fix Uneven Spray Paint
You will need a spray can or a spray gun to fix uneven spray paint. Other supplies to keep at hand include;
- New paint.
- Respirator.
- Cardboard.
- Sanding block.
- Alcohol.
- Wire brush.
- Trisodium phosphate.
- Dropcloth.
Step 1
First, surface preparation will set you ready for the job. Interestingly, surface prep varies based on your handling surface.
For instance:
Metal Surface
- Take your moist rag and clean the particles across the surface for metal surfaces.
- Then use a wire brush to scuff off the rust build-up on the surface.
- In case of any loose paint, use a recommended fine-grit sandpaper to remove it from the surface.
Plastic Surface
- Use a clean rag to remove the dirt on the surface.
- Wet sand the surface gently to peel off loose materials.
- Use alcohol to wipe down potential oils found on the surface.
Wood Surface
- With wood surfaces, using TSP will aid in peeling off paint coats that are already used.
- Create a smooth surface by sanding with either rough grit or fine-grit sandpaper.
Step 2
The next step is to use the control knob on the spray gun to adjust the pressure.
Check for the pattern smoothness by first adjusting the gun to the low-pressure setting.
And after that, try its effectiveness by spraying on a specific surface.
Tip: Suppose you come across gaps in your pattern; raise the spray gun’s pressure to a point you achieve a full pattern.
Step 3
You will want to keep a good painting distance in the third step. The distance oscillates based on the type of spray gun you use.
For instance, an HVLP spray gun calls for a 6 to 8 inches spraying distance.
In contrast, conventional guns need an 8 to 10-inch distance while spraying paint.
Step 4
Positioning yourself well can result in a good paint job. So rather than moving your wrist when painting, you will have to move the entire arm horizontally.
Still, the spray should remain perpendicular to the material you are working on.
Step 5
When recoating your surface, avoid spraying directly at the targeted surface.
Instead, it’s wise to start by spraying the surface sides as you glide your arms towards the main area.
Similarly, continue gliding and spraying towards the edges to deter excess build-up. You may also want to do it in a straight line for even coverage.
Step 6
You can never count on your paint job if you have not done the final check-up and touch-ups. Take your time to examine any potential imperfections.
If any, fix them up using fine-grit sandpaper to scuff the paint smooth. And then follow with reapplying the last coat once more.
Here’s a Video On How to Fix Blotchy Spray Paint:
How Many Layers of Clear Coats Should I Apply?
A clear coat is a protective coating that goes over your painted surface to help it endure heavy use. And not to forget, it also protects your surface from harsh UV rays.
In addition, clear coats also provide a rustic and glossy finish to surfaces. As such, it allows you to buff out any defects effortlessly.
Aim for 2 to 4 coats of clear coat to reap the most out of your surface. Suppose you apply various coats; I suggest you begin with light coats.
By doing so, you will avoid shrinkage that brings about cracks on the surface. Ensure you don’t smear excess coats, or else you will have an uneven finish.
Can You Use too Many Clear Coats?
Too many clear coats can make your painted surface go rough. Also, thick coats will amplify this fallout and look unimpressive after the close of your paint job.
How Long After the Base Coat Can I Wet Sand?
The estimated duration of wet sanding the base coat depends on many factors. They include the type of chemicals and the temp during the drying time.
Usually, it takes up to 4 to 5 hours to wet sand the base coat after spraying. But if your project is exposed to a heat source, you can reduce the time by half.
It will help if you wet sand early since most base coat products are bound to crumple if they stay long before repainting.
How Long Can You Wait Between Base Coat and Clear Coat?
The duration between the base coat and the clear coat fluctuates depending on the manufacturer.
It can range from 10 to 30 minutes. However, if the temp and humidity are not conducive, the duration might extend to nearly an hour.
You can determine if the base coat is dry to touch by using your fingers to test the smoothness.
If you touch the coat and your fingers don’t stick to it, it’s ready for clear coating.
Never surpass a day before clear coating. Waiting for so long will make the base coat dry excessively. A
nd this will give the clear coat a difficult time to hold upon it.
People also ask, can you sand the base coat before applying a clear coat? Indeed you can permit the base to dry enough and sand before adding a clear coat.
Why Is My Clear Coat Cracking
There are various reasons clear coats begin to crack shortly after being applied.
One of the prime reasons is environmental conditions. You will note that too much heat and humidity amid curing may result in deformities like cracking.
Similarly, spraying too many clear coats can make the coats harden and eventually crack.
Can Single Stage Paints be Clear Coated?
Yes, you can clear coat single stage paints. However, you need to wet sand the surface well to enhance better adhesion.
Can I Apply a Clear Coat Over Old Paint?
Suppose the existing paint is in good condition; you can apply your clear coat to it.
To begin, you will want to wash down the old clear coat with a grease remover and wax. Then follow with sanding it using 600 or 800 sandpaper.
After that, apply two to three coats of clear coat. And don’t forget to follow the brand’s dry time between coats.
After finishing your job, check for any defects, such as runs.
If any, confer with the manufacturer to know how long the drying time is before retouching the affected parts.
Why Does My Second Coat of Spray Paint Wrinkle?
A good sprayed-on paint surface results from thorough preparation, patience, and light coats of paint.
Suppose you rush any of the steps mentioned above; the expected glossy finish will languish into a wrinkled mess.
If it so happens, you must rush to peel off the paint and repaint your surface properly.
In this guide, we take a plunge into the causes of spray paint wrinkling after the second coat.
Heavy Coat
The good thing with spray paints is that applying them is effortless.
You don’t have to poke around searching for brushes and open cans that can tip mistakenly.
You might be persuaded to let out a heavy coat of paint due to the convenience of a spray paint bottle. But that’s not a good way of applying it.
As an alternative, you should apply spray paints in multiple thin coats. And not to forget, each coat should dry entirely before proceeding to the next coat.
If you go ahead to apply a heavy coat, the paint’s weight will exceed the ordinary and eventually wrinkle as it dries.
Insufficient Dry Time
If you don’t permit your initial coat to dry before applying the next one, wrinkling is ineludible.
As a result, the drying agents in the second coat will compromise the hard surface of the initial coat.
And that will modify it into an unstable surface. In this event, the topcoat crinkles since it forfeits adhesion to the gadget’s surface.
Surface Contamination
Surface contamination can inflict wrinkles on sprayed-on paint. Usually, spray paint dries well on a clean and well-arranged surface.
If there is any residue left out during prep, it can cause the spray paint to wrinkle as it dries.
You need to wipe out the paint, clean the surface, and later repaint it in such instances.
Incompatible Products
Paint formulations alter with different paints. Since not all products are compatible, ensure the primers, clear coats, and base coats you use are crafted to work jointly.
Why Does Spray Paint Crackle on Second Coat
Spray paint crackles due to high or low temp. Also, it may crackle due to painting too heavy coats at one go.
Too heavy coats cause the topcoat to dry, whereas the paint underneath is still wet. As such, the paint underneath moves to cause the coat to crack.
When in hot surroundings, the paint’s components evaporate, leading to cracks. At the same time, low temps impact how the paint holds up to the surface.
What Is the Best PSI to Spray Clear Coat?
Clearcoat requires adequate PSI for a better flow out. To be precise, 28 to 29 PSI is best for a clear coat.
How to Fix a Spray Paint Can That is Not Working
All DIYers who use spray can affirm that the cans often block with time.
So to bring your spray can back to life, you only need to remove the blockage. You can achieve that by using the following ideas:
-
Shake the Can Before Use
Most spray can have instructions printed on the back. So be sure to sift through the instructions before spray painting.
A common instruction is to shake paint in the can before you begin painting.
-
Carry the Can Upside Down
You may want to hold the can upside down to prevent blockage. In this position, the pressure will return to normal, allowing you to spray as usual.
-
Clean the Nozzle
If the solutions mentioned above fail to deliver, you can decide to give the nozzle a thorough cleaning.
You can perform this gently by placing the nozzle to a solution of lacquer cleaner.
Final Thoughts
Rough scratches usually degrade the dream of achieving a smooth sprayed-on surface. But fortunately, you can address this issue by wet sanding the spray paint.
The abraded surface gets lubricated by doing so, thus peeling off any scratches.
In the process, the water drives out finish particles to prevent the sandpaper from building up.
Remember that wet sanding trends should be back and forth.
Better still, you will need to avoid putting much hand pressure, as it can influence uneven sanding.
But the lingering question is…
How Long Before You Can Wet Sand Spray Paint?
Spray paints need roughly 30 minutes before you can execute wet sanding. But there can be a variation depending on the type of spray paint used.
Hopefully, you have enjoyed this post.
So, if you are still looking for more information on the subject, kindly drop your concerns in the comment section below, and we will respond shortly.