 Cubic Feet per Minute, or CFM in short, is the universal way of measuring airflow. In spray painting, it refers to the volume/amount of air moving through the ductwork of an air compressor per minute. The CFM rate of a compressor is vital because it directly affects how fast you apply the paint to the surface and the outcome of the coat once the paint cures. So, How Much CFM Is Needed to Paint a Car?
The volume of air you require to paint your car efficiently will depend on the output of your air compressor and the CFM rating of your spray gun. Different spray tools need different CFMs to produce the perfect finish – so, it is best to ensure that the compressor’s output and the gun’s requirements are in line.
I recommend using an air compressor that produces more air volume than the spray gun requires to keep the CFM steady, thus ensuring the consistent atomization of the paint as you work. For instance, you can use a compressor that produces about 6 CFM @ 40 PSI with a gun that requires 4 CFM to deliver the perfect paint job for your vehicle.
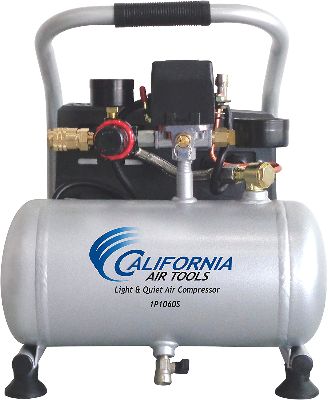
Can You Paint With a 6-Gallon Air Compressor?
You can use a 6-gallon air compressor to paint, but it will only work efficiently for small projects such as painting furniture or a small decorative piece. Spray guns require a continuous flow of compressed air; hence, they use a lot of air in a short time.
So, using a 6-gallon air compressor for a large project such as painting a house or a car will reduce the efficiency of the operation in a big way. First, your project will take longer to complete because the pressure will drop faster, meaning you will have to let the tank refill several times as you work.
Furthermore, small capacity air compressors tend to have low CFM; hence they do not maintain consistent pressure. The constant variance in the pressure and flow of paint will result in uneven coats, runs, and orange peel texture in the finish.
Even though we do not recommend small air compressors for medium-large painting projects, below are some actions you can take to assist you in getting away with painting using a 6-gallon air compressor.
- Use a Low Volume Low Pressure (LVLP) sprayer instead of a High Volume Low Pressure (HVLP) sprayer. The reason is that LVLP spray guns are perfect for finishing projects quickly, with minor overspray making them ideal for small paint projects. You can also use smaller paint guns compatible with small compressors even if they are HVLP because they do not require a lot of compressed air to run efficiently.
- Instead of painting, opt for airbrushing your pieces if you own a small air compressor because, like LVLP guns, airbrushes do not require a lot of air to run efficiently.
- You can also make the hose of your 6-gallon air compressor shorter to make it more efficient. A longer hose makes you lose air volume and pressure faster than a shorter one, so shortening it will make it easier for your compressor to keep up with the spray gun.
Does CFM Increase As PSI Decreases?
Yes, it does. Sometimes power tools like spray guns and power washers require an increase in CFM for them to function efficiently – so, taking some measures to increase the airflow may come in handy.
Every air compressor has a unique power rating that equals the PSI multiplied by the airflow rate (CFM). Even though these two variables are necessary for the compressor to function, the CFM rate determines how well it will perform in uninterrupted projects such as spray painting.
To make the compressor work better, you need to find a way to make the airflow more consistent without increasing the power, and one of the best ways to do that is by dialing down the output air pressure.
An air compressor operates by taking in air into a tank and pressurizing it. The compressor then forces the air through an opening in the tank, where the pressure builds up to a specified output PSI.
Once the tank gains pressure, you have a specific air volume until the machine kicks back to refill it. So, by reducing the output PSI, the pressure in the tank will be higher, and you should get more airflow to run your tools for longer.
Other Ways of Increasing the CFM of an Air Compressor
Apart from reducing the PSI, there are other ways of efficiently increasing the CFM of an air compressor to keep up with your project needs. These are:
- Connecting Two Similar Compressors
Connecting another air compressor of the same brand, model, and CFM to your current one will help double your current air flow rate without adding issues with control. You can link the two machines using a compressed airline and a T-piece air fitting; then, you can plug in your air tool directly on the T-piece.
Since you will be using compressors of the make and model, you won’t have to worry about synchronizing their pressure switches because the two machines will have similar cut-in and cut-out pressure pre-sets.
- Connecting two similar compressors but with different CFM
If buying a similar compressor to the one you have seems too expensive, I recommend buying a smaller one with a differing CFM. For instance, if your current compressor has a 10 CFM rate, you can purchase a smaller one with a 5 CFM rate and connect them to give you a continuous airflow at 15 CFM.
This approach will work the same way as the previous one, but ensure that you purchase compressors made by the same manufacturer to avoid problems. The reason for this is that every manufacturer tries to make their product different from the competition. So, you may find yourself having some issues with a pressure control or even problems connecting the two machines due to a difference in air outlets.
- Adding an air receiver tank to your compressor
Adding another air tank to your compressor will allow the machine to fill up both simultaneously, giving you far greater air storage. More air storage means that the air compressor’s motor will run for much longer before reaching its cut-out pressure, allowing you to use your tools continuously for longer durations than before.
Furthermore, a second tank will give your compressor more time to cool off. However, this extra cooling time will only work if your tool is not drawing more air than the system’s pump can generate.
How Many PSI Does It Take to Run a Paint Gun?
Since most paint guns run off an air compressor, you have an infinite range of PSI to choose from; however, you can’t just set any PSI and expect to have a perfect paint job. If you use too little air pressure, the paint will not atomize properly, and you will end up with a thick coat that cures with an orange peel effect.
Too much pressure, on the other hand, wastes material due to the excessive bounce-back of the product. So, how do you determine the fitting air pressure to run your paint gun?
Paint gun manufacturers often suggest an optimal PSI that can run their products efficiently. For instance, most HVLP guns have up to 40 PSI working pressure, while some of the best LVLP guns can attain a maximum pressure of 60 PSI. These factory recommendations usually work fine for the most part.
However, several variables may cause a need for change in PSI that the manufacturers cannot take into account. These include: the type of finish you’re applying, the amount of thinner you use, and temperature variations in your work area – liquid finishes thicken in cooler temperatures and will require more air pressure to atomize properly.
You can find out the best air pressure for your paint gun and the finish you intend to use by performing the simple test below.
- Start by opening all the gun’s controls to their maximum, then turn down the air pressure at the regulator to a figure way below what the manufacturer recommends.
- Next, lay brown cardboard or paper on a flat surface to use for testing. I recommend using a brown surface because the finish will show its pattern better than on a white surface.
- Spray a short burst of product onto the brown cardboard. With the first burst, you will get a narrow-width pattern with large noticeable dots around its edges.
- Increase the air pressure by 5 PSI, then spray another short burst. This time, the pattern will be a bit wider with smaller dots on the edges than the first one. Keep increasing the air pressure by 5 or 10 PSI, spraying short bursts onto the test surface after each raise. You will notice the pattern widening and the dots on the edges getting smaller.
- Once you reach a PSI that doesn’t widen the pattern or make the edge dots any smaller, you have achieved the best atomization possible for your paint gun. However, it is best not to use that pressure because you risk wasting product due to bounce-backs and blowbacks from the target. Instead, reduce the PSI to the previous setting or two settings down – that is the ideal setting for the viscosity of the product you are using in the current atmospheric conditions of your workspace.
Note: You will have to perform this test each time you change from one product to another, For example, when switching from paint to a clear topcoat. Furthermore, you must hold the paint gun at the same distance from the test surface for each burst to ensure the accuracy of the test.
What Does 12 CFM Mean?
When manufacturers rate the output of an air system at 12 CFM, it means that 12 cubic feet of airflow through the system per minute at a given PSI. 12 CFM is on the higher end of the airflow spectrum, and it is most likely the rate for a medium to a large-sized air compressor. A compressor with this rating can provide more air, ideal for running large applications such as dual sanding, needle scaling, and spraying large areas.
What Is a Good CFM Airflow?
A good CFM airflow of an air compressor refers to the unrestricted movement of air in the machine. It means that the compressor produces the exact volume of air that manufacturers intended for their product. If the CFM airflow is lower than the specifications, it indicates a problem within the system. Such issues are subtle, and the machine may appear to be working as it should.
They are usually hard to rectify, especially if they go unnoticed for a while, so it is vital to always check for even the slightest changes in the performance of your machine.
Below are some symptoms showing whether your air compressor needs maintenance, repair, or total replacement of parts or the whole system.
Tank takes longer to build air.
If you notice that your compressor takes more time than usual to build air in the tank, it may be a sign of a clogged intake filter. You may also notice that the compressor’s motor overheats and trips the thermal cut several times as you run your tools.
If you are experiencing these problems for the first time, remove the filter housing from the intake pump then run your compressor. If the machine runs without hindrance, then you know that the problem is in the air intake media.
You can find replacements for the intake media at your local supply store or a store that sells car parts. I recommend choosing intake filters that resemble the types used in air conditioners because they tend to last for longer.
The hose doesn’t convey air.
If you connect an air hose to your compressor, but no air passes through, the issue could be one of the following factors:
- The tank has no air, which is indicated by the pressure gauge in the tank reading zero.
- You may have accidentally set the pressure regulator to zero. If so, adjust the levels to within 20 PSI of the machine’s cut-out pressure.
- You fitted the discharge coupler with the wrong hose connector, thus blocking the airflow. The bad connection may have occurred if you recently replaced one of those parts without checking the Original Equipment Manufacturer (OEM) specifications.
Short bursts of air
If your compressor’s tank has sufficient air, but still generates little air pressure, check the readings on the gauge. If the reading is too low, you won’t get enough pressure to maximize airflow out of the tank. So check the specifications of your machine and adjust the gauge appropriately.
What Pressure Do You Spray Clearcoat?
The amount of pressure you will use to spray a clear coat on any surface will depend on the type of paint gun you have. Furthermore, it is always best to start with the manufacturer’s recommended pressure for the gun you purchase.
Usually, clear coats respond best to higher air pressure than base coats, so I suggest setting your pressure on the higher end of the factory recommended spectrum. Whenever I use my HVLP spray gun, I spray at 26-29 PSI, and I go for 20-25 PSI for my LVLP gun.
These pressure ranges allow for better atomization of the clear coat and better product flow-out without bounce-backs or orange-peel effects upon drying.
Note: the air pressure I’m referring to in this section is the pressure at the neck of your spray gun when you pull the trigger and not the air cap pressure.
How to spray the perfect clear coat
Application of clear coat to any surface is critical because it is the last thing you see on a paint job finish. So it is crucial to follow specific spraying techniques to ensure that the coat is flawless. Also, ensure that your base coat is completely dry before proceeding.
- Fill your spray gun with a product of your choice, select the appropriate pressure setting for your gun type, then hold it about 6 inches away from the surface.
- Pull the trigger and spray on the first layer of clear coat in even straight lines across the surface. If you go over a tilted area, tilt your gun as well to keep it parallel to the surface. To avoid the “ tiger-stripe “ effect, make sure to overlap each previous spray-pass by 50-75%. Be careful not to lay the product on too thick to shorten the drying time.
- Let the clearcoat dry for about 30 minutes to settle and set, then spray on a second coat using similar techniques as before. You can make the final layer thicker because it will have more time to dry.
- Let the surface sit undisturbed for one full day to let the finish set and cure correctly before touching or wiping it.
How Big Of An Air Compressor Do I Need For A LVLP Spray Gun?
Just like their names suggest, Low-Volume Low-Pressure spray guns utilize small air volumes at a low pressure to provide the perfect finish. They require less power and throughput than their High-Volume Low-Pressure counterparts; hence they can function well with any compressor type, including the small capacity ones for home use.
You can comfortably run an LVLP spray gun with a compressor that can deliver between 15-35 PSI of air pressure. Furthermore, an LVLP gun will run sufficiently at 5-8 CFM, which you can achieve with even the smallest compressor units.
How to select the best air compressor for spray painting
- Check the CFM
Spray painting is a task that requires large volumes of air to atomize or break up the paint for proper, consistent application. Most of the time, people think that air pressure determines how well the paint atomizes, but the consistency of airflow makes up a good compressor for spray painting.
You may need up to 20 CFM of air to run a quality HVLP spray gun, but you may not need such a high volume if you use a conventional spray gun.
Conventional spray guns require as little as 10 CFM of air to function correctly, and even though there are compressor options available to run them, they may not provide a good paint breakup to achieve a good quality finish.
I recommend an air compressor that can produce up to 30 CFM air to ensure that your painting task goes smoothly.
- Type of compressor
There are two kinds of air compressors commonly used by painters and other industrial workers. These are single-stage and 2-stage air compressors, and you will need the 2-stage air compressor to deliver sufficient CFM for spray painting.
A 2- stage can provide up to 4 CFM of air per hose power of the machine, which is higher and more preferred than a single-stage machine’s low 1 CFM per hose power.
So, if you intend to use your compressor for large projects such as painting a car or a house, purchase a 2 stage compressor with at least five hose power to ensure that you have enough air to finish the project smoothly.
Additionally, 2 stage air compressors give you more design choices than their counterparts. You can choose either a reciprocating compressor or a rotary screw compressor. Rotary screw air compressors require less maintenance which mainly involves oil and filter changes or oil-air separator changes; however, they do not deliver sufficient CFM per hose power.
On the other hand, Reciprocating compressors require more extensive and frequent maintenance but, they provide more CFM/hose power and are more durable than their counterparts.
What Size Air Compressor Do I Need for My Garage?
The size of the air compressor that you choose for your garage depends on the tools you want to run and how often you work in the garage. If your primary use of the compressor is short works like filling tires or inflating sports equipment, a 5-10 gallon compressor will work fine.
Suppose you regularly perform repairs or do DIY woodwork or metal projects. In that case, you can go for 10-20 gallon air compressors because they have sufficient power to run several air tools, provided they do not require too much power.
I recommend purchasing a full-size compressor if you intend to run pneumatic tools such as drills, hammer guns, and palm sanders daily. Manufacturers build full-size compressors with larger tanks of up to 30 gallons, and they attach powerful motors to help develop sufficient pressure more efficiently than smaller models.
Furthermore, full-size air compressors come in various shapes and sizes, and while they feature 20-gallon tanks or bigger, some are portable while you have to bolt others to the floor.
Other than use, other factors can guide you to choose a perfectly sized air compressor for your home garage. These are:
- Power
Most homes have 120 V outlets throughout the house, including the garage and those power outlets are perfect if you are running smaller-sized air compressors only.
Larger-sized compressors may need up to 230-240 V to power up, so if your activities require a larger compressor, you can get a certified electrician to rewire the outlets in your garage and add more power to run the compressor you need.
- Space and noise
Some compressors, especially single-stage compressors, produce a lot of noise that could cause problems with neighbors or affect the sleeping patterns of infants in your home.
So, if you plan on working till late, choose a 2 stage compressor or use a single-stage machine if you have a space in your garage that could muffle its sound. You can also soundproof your garage if the compressor you need for your projects is too noisy.
Conclusion
CFM or airflow rate is the most crucial variable when it comes to painting with a spray gun. It determines how long an air compressor can run your paint gun, and it also determines the outcome of the paint coat on your surface. Even though airflow is essential, you cannot use that variable alone when selecting the best air compressor for your painting projects. You also have to consider the air pressure (PSI) that the unit can deliver and the hose power to determine the perfect airflow to run your tools efficiently. So…
How Much CFM Is Needed to Paint a Car?
The CFM requirement of your spray gun is what will determine the CFM you will need to make the paint job on your car perfect. Every manufacturer recommends a specific CFM that will enable their brand to run efficiently, so it is vital to use an air compressor whose power specifications align with your spray gun.
I recommend using a compressor that offers an airflow rate a few digits higher than your gun’s actual requirements to ensure that the gun runs continuously for longer before the compressor cuts off to refill its air tank.
Additionally, if your air compressor cannot achieve the ideal airflow rate that you need for your painting project, I suggest reducing the air pressure to allow the CFM to rise to the perfect volume. You can also connect two similar compressors with equal CFM to double the airflow rate or add another air receiver tank to your compressor to give it more storage space for air.