Do you know how much does it cost to paint rims? This post has detailed answers to the question, so please read on for more!
Vehicles are an integral asset in today’s society. They’ve made our mobility easier to carry out our activities more efficiently.
Initially, the wheels were put as an afterthought when furnishing vehicles.
It’s not the case nowadays, as people often want their cars to roll on cool or flashy wheels.
It only takes painting the rims to adorn the wheels. So, how much does it cost you to paint rims?
Averagely, professional or company-based rim painting costs $100 to $200 per wheel. On the other hand, DIY or home-based rim painting costs $50 to $200.
The above are broadly sourced estimates as several variables and dynamics determine the costs.
Such variables include the rim size, paint brand/quality, paint application method & technique, etc.
Please stay with me as the next phase of this post will explain how the above factors affect the cost and calculations of the corresponding price ranges.
Other pertinent subheadings include:
- The procedure for painting car rims
- Whether vehicle body shops paint rims
- The cost of painting rims black
- Whether you need to sand the rims before painting
- How to estimate the cost of painting rims using simple calculations
- Approximate costs of painting rims using different paints
- How to accomplish a cost-effective rim painting project
I urge you to concentrate maximally throughout the article for the best experience, more so in the procedural aspects of the write-up.
First, let’s define a rim, differentiating it from wheel and tire.
What Is a Rim?
People often confuse three closely-associating terms, i.e., rim, wheel, and tire.
It often leads to mistaken identification of the three but thankfully, it’s not always too consequential. In that respect, what is a rim?
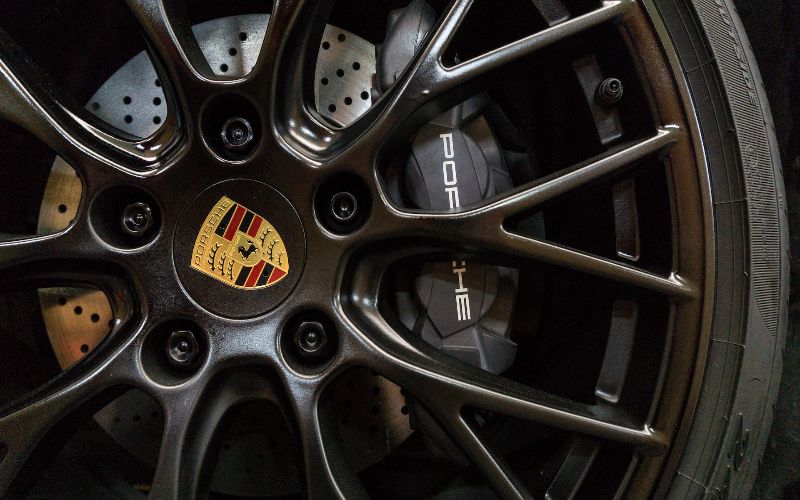
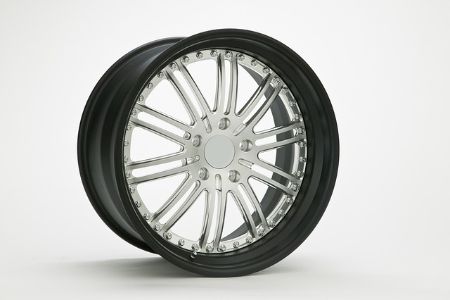
It is the outer part of a wheel bearing the tire.
It constitutes the exterior circular outline of the wheel upon which the inner edge of a tire is mounted on automobiles and bicycles.
The externally visible parts of the rim are its spokes, lug holes, outer lip, valve stem, and center bore.
The hidden part beneath the tire is the barrel. It contains the drop center, bead rests, and mounting humps.
On the other hand, the wheel is the entire rotating system attached to the axletree/axle.
The rim and the tire are all parts of the wheel. In many cases, the wheel and rim are used interchangeably.
The tire is an annular/circular component surrounding the wheel’s rim.
It transfers the vehicle’s weight to the ground and provides traction on the surface upon which the wheel rolls.
Automobile and bicycle tires are mostly pneumatically inflated rubber materials to provide flexible cushions.
They absorb shock as the wheel rolls over bumpy or rough terrains.
I’ve defined the wheel and tire above to help you tell them apart from the rims.
How to Paint Car Rims
Commercially painting your car rims, i.e., paying for the service of a professional, can prove too costly, especially when you’re financially pressed.
Thankfully, you can always opt for a DIY alternative. If you are in or ever find yourself in such a situation, use this guide on how to paint car rims:
Painting rims involves five main steps. They include cleaning/degreasing the wheel, sanding/smoothing the surface, cleaning with alcohol, priming, and painting.
The method works for all rim materials, whether chrome, steel, or aluminum alloy.
The process takes around 2 hours or slightly longer if you’re painting the spare wheel too. Here is the breakdown:
Requirements
- Torque wrench
- Jack
- Soap and water (preferably liquid soap)
- Abrasives: Sandpapers, flap wheel, and metal wire brush
- Safety gear: Thick rubber gloves, safety goggles, respirator, and earmuffs
- Sanding machine: an angle grinder, and a Dremel
- Rubbing alcohol
- Primer: Rust-Oleum Painter’s touch
- Spray paint: Rust-Oleum Trim & Bumper paint
- Index cards
Procedure
Here are the steps involved
Step 1: Cleaning/Degreasing
First, jack up the car and take the wheels off using the torque wrench.
Put soapy water in a spray bottle and spray it on the rims for cleaning. This initial cleaning removes grease and brake dust from the rims.
Use a sponge or a rag to scrub when cleaning.
You don’t have to go hard or be too detailed at this stage, as the next step (sanding) will take care of the remaining stains and rust.
Then, wipe the wheel with a dry rag and let it dry.
Step 2: Sanding
Old rims usually have scratches, gouges, rust, and other rough spots.
You need to sand them down to bare metal; otherwise, they will show through the paint if you ignore them.
The above step varies depending on the state of the wheel. Use handheld sandpapers if they have rough spots, scratches, or minor damages.
If the damages are more pronounced (gouges and extensive rusts), it’s best to use a metal wire brush mounted on an angle grinder alongside a flap wheel mounted on a Dremel.
First, put on all the safety gear to shield yourself against injuries.
The metal bristles on the wire brush usually shoot out when they hit rough patches; it’s always bad news when these get into your eyes.
Similarly, the dust from sanding is harmful when inhaled, as is the noise generated from the process.
Clamp the wire brush on the angle grinder and power it on.
If the rust or damage is widespread but superficial, use a fine wire brush, but if it goes deep into the metal, use a thick/firm metal wire brush.
Then, sand down the rusted wheel to bare metal; use the flap wheel and Dremel to get around curved spots on the spokes, lug holes, and the external wheel lip.
When sanding, start with coarse abrasives and climb to finer abrasives to make the surface smoother. Also, be careful not to hit the valve stem to avoid damaging it.
Use more pressure on steel rims as they are stronger than their aluminum and chrome counterparts.
Then vacuum or blow off the sanding dust. If you don’t have any air-pressurized machine, just wipe off the rim with paper towels or lint-free rags.
Step 3: Cleaning With Rubbing Alcohol
Vacuuming or wiping with a rag after sanding does not remove all the accumulated debris; that’s where cleaning with rubbing alcohol comes in.
Isopropyl alcohol is the best for the above task because it is an excellent solvent and evaporates/dries super fast.
Pour some isopropyl alcohol onto a microfiber rag or low-lint paper towel and wipe the entire reel.
Repeat the cleaning to a point where no stain shows when you wipe with a clean paper towel. At the said point, the wheel is ready for the next step, i.e., priming.
Step 4: Spraying the Primer
Spraying often produces overspray, which can easily land on surrounding objects.
For spray priming, look for an open spot away from your vehicle to avoid staining its body with the overspray.
Also, lay down a cardboard or carton box upon which you’ll spray the wheel. It prevents the primer and paints from discoloring or polluting the underlying ground.
The primer, and paint, by extension, must also not land on the tire! It should only go on the rim. But how do you go about this?
You can shield the tire by inserting index cards in the border between the tire and the rim; do this all around the wheel, ensuring they overlap.
The index cards are cheaply available on Amazon.com (AmazonBasics). Then, cover the still visible periphery of the tire with rags or old clothes.
Also, don’t forget to mask off the valve stem; the primer and paint can block or damage it irreversibly; use a painter’s tape for this or one of the fingertips of an old glove.
The above leaves only the rim’s face and outer lip exposed for priming and painting; there’s no chance of the primer or paint coming into contact with the tire.
The role of a primer is to make the metallic substrate “teeth,” making it more receptive to paint.
For the above undertaking, I recommend using the Rust-Oleum 2X Ultra-cover Primer! It has excellent etching properties, is affordable, and dries quickly.
Next, read the instructions printed on the primer can.
It lets you know how far you should hold the aerosol can from the rims, the drying times between coats, and other application techniques.
Then, immerse the Rust-Oleum primer can in warm water (90°-100°F or 32°-38°C) to activate the contents.
It mixes the primer for a more consistent spray pattern. Ensure you are working in a low-humidity, windless environment.
When spraying, it’s best to keep your hand in motion and hold down the nozzle as you go over the rim. Stop only after overlapping the primed surface.
Shake the spray can and apply the first coat lightly; let it dry for the specified time.
Then, lay down a second, moderate coat using the same technique as the first and let it dry appropriately.
Remember to shake the can regularly when spraying.
Afterward, spray a third heavy primer coat and allow it to dry. As this last coat dries, prepare for the next step (painting) by immersing its can in warm water.
It’s the same temperature ranges we used for the primer can above.
Step 5: Spraying the Paint
Spraying paint with a rattle can is similar to applying the primer discussed in the preceding segment.
So, I urge you to follow the same procedures and techniques discussed in the priming segment.
The similarities include initial paint warming, regular shaking, and application techniques (lay three coats starting from light to heavy).
It’s best to use paint from the same brand as the primer, as they are often congenial. Mixing up the brands could lead to incompatibility issues.
I recommend you use the Rust-Oleum Trim & Bumper paint for the above undertaking.
After you’ve applied the last coat, remove the index cards, valve stem wrapping, and rags covering the tire.
Then, let it dry for at least two hours before mounting it back and tightening the lug nuts.
Repeat the above steps for the remaining rims to match the wheels.
Here’s How to Paint Car Rims:
Can a Body Shop Paint Rims?
Automotive body shops carry out various repair, modification, and vehicle improvement tasks.
The wheels also form the parts of an automobile, but can a body shop paint rims?
Some car body shops paint rims, while others do not. It all depends on their portfolio or the range of services they offer.
The auto body shops have diversified to include wheel services, while the small and medium-sized ones mostly exclude wheel or rim works.
Professionally painting wheels in a body shop is more costly than doing it yourself.
That’s because it involves using expensive machines, mending any damages before painting, and complicated techniques like powder coating.
However, it has many perks, including improved longevity, better abrasion resistance, and stronger paint adhesion.
If you can’t find a body shop that works on wheels, I urge you to take your vehicle to a wheel services shop.
They’re definitely cut out for matters involving wheels, including rim painting.
How Much Does It Cost to Get Rims Painted Black?
Rims are available in many hues. However, the black and silver colors occupy the top spot regarding ubiquity.
They look stunningly beautiful on rims, combining perfectly with all car body colors.
I have a particular fondness for black. But how much does it cost to get the rims painted black?
Paying up for professional painting ranges from $200 to $1000 for the four rims.
If you want it painted black, the cost falls in between the lower limit and the median values of the above range, so it’s between $200 and $600 for a set of four wheels.
Pigments usually play a part in the overall cost of the paint.
It’s because of sourcing differences like source availability, ease of isolation, and refinement method before incorporation into the paint.
As a result, they are grouped into price points known as ‘series’= the lower series paints are cheaper than higher series paints.
Black falls in the lower series category (series 1 and 2) because it is widely available. It explains the low price of black paints.
Its sources are carbon-based (e.g., char and coke carbons), mineral-based (like iron oxide blacks and manganese oxide blacks), and animal-based (like ivory black).
Do You Have to Sand Rims Before Painting?
Any seasoned painter knows that sanding is a big nightmare. It’s always the most labor-intensive and time-consuming step of surface prepping.
It’s no different for rim painting. However, do you have to sand the rims before painting?
Absolutely yes! You must sand the rims before laying down paint. It helps in the following ways:
- It eliminates curb rash: curb rash means damage to the rims due to hitting curbs and other obstructions. It leaves scuff marks and, sometimes, gouges.
- Sanding removes rust, scratches, and other imperfections.
- It removes tough stains and grease that won’t respond to cleaning agents.
- Sanding roughens the rim a little bit for better paint reception/adherence.
- It makes the rim surface even by leveling off bumps and eliminating pits/furrows.
There are many types of abrasives for sanding rims, depending on the extent of damage/rust. I advise you to equip yourself with the following for successful sanding:
- Sandpapers: 400, 600, and 1000-grit. Hand-sand the metal using bare hands or wrap the abrasive on a sanding block
- Flap wheel: This will aid in sanding hard-to-reach parts of the rim. It’s often mounted on a rotary power tool like a Dremel to effect sanding.
- A metal wire brush: It’s an abrasive with stiff bristles for cleaning and preparing metallic substrates for painting.
You can purchase a round one and clamp it on an angle grinder for a more effective sanding.
How To Estimate The Cost To Paint Rims?
Knowing the overall cost of painting your car rims is essential before purchasing the paint and associated paraphernalia.
It helps you budget judiciously to avoid overbuying or underbuying. In this segment, I’ll show you how to estimate the cost to paint rims.
The costs depend on the size/surface area to be painted, the paint’s theoretical coverage, the number of coats you’ll use, and the paint brand.
Information on the rim size is usually engraved on the tire on edge connecting with the rim; it’s usually the last two digits, preceded by the letter ‘R’ denoting the rim.
So if you find information that reads 205/45R17, the rim size is 17.
If you don’t find it there or if the details are rubbed out due to wear, inspect the rim, especially the inner cavity.
You can obtain the particulars of paint spread rate/coverage by asking your dealer or looking up online. It’s always part of the product features.
The number of coats you need depends on the paint, but it’s ordinarily three coats.
Estimating the DIY cost per square foot is as follows:
A typical 16″ tire has 1.3963 square feet of the rim. So if you have an 18-inch rim, a simple cross-multiplication will give you its surface area. The illustration is as below:
18-inch surface area = (18 ✖ 1.3963) ➗ 16
Ans: 1.57o8 sq inches
Since you’ll be painting four rims, multiply the above answer by four: 1.5708 ✖ 4 = 6.28335 square feet.
The cost of one high-quality wheel spray paint is around $22.
Laying down three coats of the $22 paint for all four rims takes around three spray paint cans (11 or 12 fl oz). The total cost of the paint is calculated as follows:
$22 ✖ 3 cans = $ 66
It’s the same case for the primer, i.e., $22 ✖ 3 cans = $66
So both paint and primer costs $66 + $66 = $122
To obtain the cost per square foot for the 18″ tire is:
$122 ➗ 6.28335 = $19.4164
The professional/body shop cost per square foot is as below:
Professional rim painting charges around $200 per wheel, priming inclusive
Therefore, four wheels will cost $200 ✖ 4 = $800
The cost per square foot for the 18-inch rim is $800 ➗ 6.28335 = $127.3206
The above formulas only give rough estimates.
Other variable factors, like the surface area of the spokes and even the rattle can’s nozzle design, can influence changes in the amount of paint needed.
Subsequently, the costs will change.
Estimated Cost of Different Paint for Rims
There are many paint types for rims. They differ in constituents, quality, and working mechanisms; this makes their retail prices different.
This section gives insight into the estimated cost of the different paints for rims.
Plasti Dip
Plasti-dip is a form of sprayable rubber originally designed to coat tool handles. Nowadays, it is highly favored by vehicle owners for automotive body and rim coating.
It forms a durable, flexible, non-slip, and insulating rubber coating.
You need approximately four aerosol cans of plasti dip to complete a four-wheel rim-coating project. Each can retail at about $22, so the overall cost is $88.
Powder Coating
A powder coat is a type of paint applied in the form of free-flowing, powdered material using highly-mechanized equipment.
The powder is typically made of pigment and polyester.
An electromagnetic coil imparts a positive charge to the powdered paint. Correspondingly, the substrate (rim) is connected to a wire to give it a negative charge.
When you spray the powder, it’s attracted strongly to adhere and self-level on the substrate.
Afterward, it’s cured under heat in an oven or with UV rays. It liquefies the powder to a tough, elastic, plastic coating.
It’s usually challenging to powder-coat car rims as a DIY project.
The complex nature of the undertaking bears the trappings of high mechanization only attainable in automotive rim and bodywork companies.
Professional powder coating, as mentioned earlier, costs around $200 per wheel. The high cost stems from its near robotic technique.
Moreover, it involves removing the tire from the rims before painting so it coats the entire surface of the substrate.
The perks of the above method are that it forms a tougher, chip-resistant, and more durable coat than conventional painting.
Spray-on Truck Bedliner
The spray-on bed liner is one of two truck bed liners; the other is the drop-in truck bed liner. They are used to shield truck beds against impact and abrasion.
The spray-on version needs specified preparation to enable adherence to the bed.
It’s further divided into aromatic vs. aliphatic, hybrid vs. solvent-based, and polyurethane vs. polyurea formulations.
This makes the bedliner adaptable for other applications like bumpers, fenders, floorboards, and auto rims.
The cost for rim painting varies depending on the spray-on bed liner used.
The aromatic version is the least expensive and is primarily used for darker colors or black.
The aliphatic one is the best in terms of color variety; it can also produce metallic finishes.
It’s more expensive than aromatic because it contains pure polyurethane and is more stable under UV light.
However, the truck bed-liner spray paint is cheaper than plasti dip; a 32 fl oz can cost around $30, and two are more than enough for the four wheels.
So, that brings the total cost to around $60.
Special Spray Paint for Rims
There are spray paints specifically designed for wheels. An example is the Dupli-color Perfect Match Automotive spray paint, retailing at around $15 per can.
The paint comes in many colors, and you can use it to coat other automotive parts. It contains only eight fl oz of paint, so you need four cans for the four wheels.
The overall cost is $60.
How to Save Money When Painting Rims
Painting rims without a plan wastes time, labor, and money. Follow my lead as I show you how to save money when painting rims.
You need to map out the project from the rim size/type, through the durability profile of the paint, to the application technique.
There are lots of approaches to achieving a cost-effective rim painting project.
They include determining the amount of paint you’ll need before buying, purchasing the paint and primer in bulks and from the same brand.
Also you need to decide on doing the job yourself (DIY), watching online tutorials on wheel painting, etc.
Here are the explanations:
Determining the Amount of Paint You Need
The best way to determine the quantity of paint you’ll need for the project is through calculations; I’ve illustrated the methods in the “How To Estimate The Cost To Paint Rims” segment.
It’s best to buy a little more than the estimated values. It minimizes the chances of running out of paint.
Having a rough estimate of what you need prevents over-purchasing, thus saving money.
Doing It Yourself (DIY)
Professionally painting car rims cost around $150 to $250 per wheel; this translates to $600 to $1000 for the four wheels; that’s pretty damn expensive for some vehicle owners.
Fortunately, it’s not the end of the road (excuse the pun) for those seeking a cheaper alternative; it’s the DIY route!
For a four-wheel project, painting the rims costs between $50 to $200 when you do it yourself. You may wonder why the two approaches have a huge cost disparity.
Well, it’s because professional or body-shop rim painting is highly mechanized and uses modern techniques that are impractical for home-based/DIY painting, e.g., powder coating.
It makes the coating more hardwearing and chip-resistant. Labor costs also add to the already bank-breaking state of affairs.
Painting the rims yourself is quite forgiving regarding budgeting, and it also has a pretty decent durability profile.
If you’ve never painted a car rim or have little experience, you can use online resources to help you along.
Look for readable content in your search engine and watch Youtube videos for real-life demonstrations.
The online community also makes it easy to access and purchase primers and paints. For this, I recommend placing your orders online stores Amazon.
They are the poster boy for convenience as they let you choose from all the available options and then deliver whatever you order to your doorstep.
All of the above simplify rim-painting for the inexperienced and make it quite affordable.
Painting All the Rims In One Go
When you resolve to paint the rims for touch-up or adornment, I advise you to do so on all the wheels rather than painting one or two and leaving the others.
Painting all the rims together impels bulk purchases of primers and paints.
Plus, it comes with bonuses (like buy 3, get one free, and other paint-related gifts from the manufacturer).
It is more economical than constantly buying small amounts each time you need to paint a single rim. Moreover, four-wheel painting gives your car a uniform new look.
Painting Protocol and Proper Application Techniques
Follow all the established rim painting protocols I’ve highlighted in the procedural bit of how to paint car rims.
Some procedures, like repeated sanding and laying down multiple coats of primer and paint, are labor-intensive and take a lot of time.
But a long-term cost-benefit analysis shows that it is economical because it’s long-lasting.
Similarly, you should use the correct application techniques to promote its adhesion to the rims.
It entails warming up the paint, spraying from a suitable distance, hand movements & painting angles, and shaking the rattle can regularly.
All these instructions are printed on the paint and primer container or datasheets; I’ve also explained them in the preceding segments.
It makes for an inexpensive painting exercise in the sense of minimizing errors, so you won’t have to redo the project or revamp it frequently.
Purchasing Both Paint and Primer from the Same Brand
Paint and primer from a single brand are often compatible, so they’ll work harmoniously on a given substrate (the rims, in this case).
Using products from different brands could precipitate chemical reactions or outright paint rejection when the primer fails to receive paint.
It makes the project expensive as you have to start over using “agreeable” products.
The above point is not as salient as such, as it’s very rare for paint and primer to be incompatible. I’ve only put it here out of an abundance of caution.
When painting the rims, it rules out the possibility of encountering incompatibility-related adverse events.
Even as you target to save money when painting rims, don’t go overboard as to compromise the quality of your work.
Don’t cheap out on paints and primers, as it will negatively affect the outcome.
Remember also that doing the job yourself requires more time and effort, so I urge you to get a helping pair of hands from friends or family members.
They can help sand and clean other rims as you paint the first and second ones. It fast-tracks the project for timely completion.
Conclusion
To conclude, rims serve more than transmitting the automobile’s acceleration and braking instructions to the ground.
They are an integral part of the wheel that you can adorn with paint to express your mindset and improve the vehicle’s appeal. In that respect…
How Much Does It Cost to Paint Rims?
There’s no fixed cost for painting rims.
Rather, I have rough estimates whereby DIY or personally painting the rims costs $50 to $200, while professional or commercial rim painting goes for $100 to $200 per wheel.
The prices differ due to the application methods/techniques involved, paint quality, the rim size or type, etc.
Secondary influences may also drive up costs; they include labor requirements, the prevailing economic status, demand and supply forces, etc.
I’ve incisively explained how the said factors impact the costs in the top and middle segments of the article.
The above content also features the following related topics to advance and nourish your rim painting expertise:
- The how-to aspect of painting car rims
- Whether automobile body shops can paint rims
- The expected fee to get your vehicle rims painted black
- Is sanding the rims a prerequisite for painting them?
- Calculated approaches of how to estimate the cost of painting rims
- The price ranges of different paints for rims
- How to carry out a budget-friendly rim-painting undertaking
If you decide to take the DIY route, I advise you to follow the procedures I’ve highlighted without jumping any steps. Only then will you get successful outcomes.
The seemingly-pointless tasks, long sanding hours, and multiple primer & paint coats make the difference between a well-done painting job and shoddy work.
You can share your thoughts on what you’ve learned, your results, or any relevant tweaks to the above in the comments section.
Remember, no man is a reservoir of all knowledge in any field. I wish you the best outcome and a budget-friendly wheel-painting project.