 Pine wood is ubiquitous in the painting world. So much so that every novice or prospective painter is likely to begin or practice using pine. And it doesn’t end there; if you take a deep dive into painting, you’ll handle pine for the rest of your painting life. I’ve dedicated this article to demonstrating how to paint pine wood.
Painting pine wood is a stepwise process that involves meticulous preparation in the name of drying the wood, spot-priming the knots, sanding, and priming the entire pine surface.
Afterward, you can lay down paint on the pine wood. I’ve discussed all these steps in detail in this article. I’ve also defined pine wood and given the reasons for painting it.
Read on to uncover all that there is to know about pine wood.
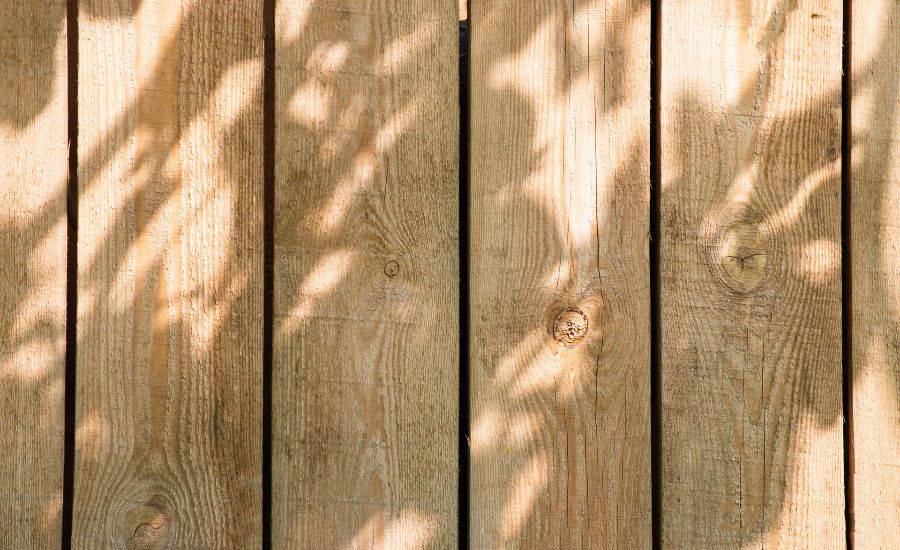
What Is Pine Wood?
Wood is an important material that traverses the construction realms. There are several types that include pine, oak, cedarwood, mahogany, etc. I’ve centered this article on pine, so what is pine wood?
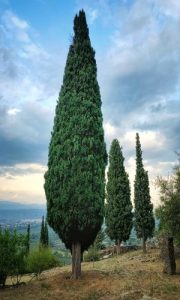
Pine is the most common tree species that belongs to the conifer family. It’s classified as softwood, and the tree grows in the hardiness zone 3 to 8 on well-drained, acidic soils. We obtain its wood by felling and processing pine trees into lumber.
The pine tree is ubiquitous, evergreen, and grows fast; this makes it an ideal construction material for professionals and DIYers. These qualities make pinewood affordable and fitting for standard carpentry works like window frames, furniture, roofs, panels, doors, and the like.
Bare pine wood is prone to decay and insect attack, so it better suits indoor construction projects. However, you can use the pinewood for outdoor projects when you treat it with agents like copper chromium arsenic, copper azole, ammonium compounds, and other preservatives. You can also paint pine for added protection.
Incidentally, pines also produce resins used to manufacture coatings, sealants, and turpentine; these are essential substances for painting wood.
Why Paint Pine Wood?
Bare pine wood looks alluring, firm, and good enough for construction, but people still coat or paint it. Why paint pine wood?
We paint pine wood to adorn it, make it waterproof, vermin-proof, prevent damage from sunlight, and improve your home’s curb appeal for sale.
The reasons for painting generally enhance the durability of the wood planks. Here is a detailed analysis of the importance of painting pine wood:
Vermin-Proof
Vermin include rodents (like rats), wood-eating worms (e.g., wood-boring beetles), and wood-eating insects (like termites). They eat up pine wood and compromise its structural integrity.
Paint is quite unpalatable to vermin; it smells bad, tastes horrible, and contains chemicals that are harmful to the pests. It also seals off the wood preventing it from attracting vermin.
Water-Proof
Water and bare pine wood make a substandard mix for your home. Water-soaked pine planks are prone to rot, stains, mildew growth, discoloration, weakened structure, and cold conditions.
Painting is the only management practice that eliminates these problems in one go.
The paint dries on the wood surface to form a compact film impervious to water. Furthermore, the paint forms a smooth coat that lets water skid off instead of accumulating on the pinewood surface.
Blocks Sunlight
Excessive sunlight/UV rays are pretty harmful to pine wood. They weaken the wood fibers and evaporate the water component that gives wood pine wood its structure; these lead to warping, fading, and brittleness.
Paint prevents all of the above by forming a shield over the wood. The paint achieves its shielding purpose by reflecting away excess rays and creating a physical barrier between the wood and sunlight.
Improved Appearance
Bare pine wood, in and of itself, looks beautiful, but you can add to its visual appeal by painting. Additionally, paints come in different colors that allow you to change or switch between shades. It gives you the flexibility of achieving different looks on the same pine wood surface.
The improved appearance point also comes in handy when you want to put your house up for sale. Painting the pinewood will improve its curb appeal to attract potential buyers and more profitable sales.
How Do You Prepare Pine for Painting?
The pine tree and its lumber is infamous for having knots that make them notoriously difficult to paint. However, the secret to successfully painting pine lies in the prep work; it has to be on point. So how do you prepare pine for painting?
The preparation procedure depends on whether the pine is treated or untreated. For treated pine, wait for four weeks for the treating agent to dry out.
Afterward, prepare the treated wood using the same procedure as untreated wood. The preparatory practices involve spot priming of knots, sanding, complete priming, and painting.
Below is how to go about the prep work in detail:
Drying Treated Lumber
Nowadays, most of the lumber we buy is treated. The treatment is done with chemicals that prevent the timber from rotting while in storage.
The one thing I discourage you from doing is painting treated pine right after purchase because the wood is always still wet with the treatment agent. This agent might react with the priming agents and paint, or it may compromise the adhesive power of the paint.
What you should do in this situation is wait for 3 to 4 weeks for the agents to dry out or evaporate. Afterward, you can execute the rest of the prepping procedures, as I’ll highlight.
Alternatively, you can buy older pieces of treated pine to avoid the month-long wait I’ve indicated above. More aged planks have had enough drying time, so you can proceed with other preparatory procedures.
Also, you can buy the treated lumber and kiln-dry them before prepping.
Wood Knots
As earlier-mentioned, pine usually has a lot of wood knots; you have to take care of them during the prepping process. What are these wood knots, and how do you handle them?
Knots are visible blemishes on wood planks; they are usually circular and of a darker shade than the surrounding plank. These imperfections form during tree growth; they are points at which branches connect to the stem or tree trunk.
The knots are exit points from which pinewood bleeds sap and resins that then show on poorly-painted wood; this can ruin the visual appeal of your workpiece.
You can only avoid the above situation by proper preparation before you paint. If I may coin a phrase, prevention is better than cure.
How to Cover Pine Knots Before Painting
The best way to cover pine knots is by priming the spots; I’d like to suggest an agent called the BIN Advanced Primer. It’s a shellac-based agent with the following properties and advantages:
- It blocks odors
- It blocks stains
- The agent sticks well on all surfaces
- The primer dries after only 45 minutes
- It seals knots
- It’s for interior and spot exterior projects
- It prevents wood from bleeding
Take a paintbrush and apply the shellac primer to the knotted spots. Let them dry and spot-prime the knots again with a second coat of the same primer. Let it dry again for 45 minutes.
The above are the two main procedures of preparing pine wood before painting.
How to Paint Pine
After all of the above prepping practices, I’ll show you how to paint pine. The process involves sanding the entire wood, priming, and painting.
Requirements
- 150-grit silicon-carbide sandpaper
- Primer: KILZ 2 All-Purpose Interior/Exterior Primer
- Synthetic bristles paintbrushes
- Safety gear: goggles, respirator, and latex gloves
- Paint: Majic Paints Diamond Hard Acrylic Enamel
- A joint compound: SHEETROCK All Purpose
- Water and empty containers
First, don the respirator, goggles, and a pair of gloves to avoid harmful exposure to paint and priming agents.
Take 150-grit silicon-carbide sandpaper; I find it handy because it grips the surface much better than other varieties. You can acquire this sandpaper from your local hardware store; it’s usually colored blue-gray.
The sanding, in this case, is for removing sharp edges; don’t do it too much; sand the spot-primed knots as well.
Vacuum the wood plank to remove the accumulated dust.
The pine is now ready for the first primer coat! I recommend the KILZ 2 all-purpose primer or the INSL-X STIX acrylic water-borne bonding primer. I’ve described their features in detail in the priming section of this article.
For the convenience of writing, let’s go with the KILZ 2 primer. Apply the primer to the pine surface and let it dry for 3 hours. Be sure to apply along the wood grain so that the paint can hold fast to the pine substrate.
Then, take the putty knife and fill up imperfections like holes and crevices using a joint compound. The best brand I know is the SHEETROCK All-Purpose joint compound.
I encourage filling after the first primer coat because it makes the defects prominent and easily identifiable; this way, you won’t miss any flaw or fault.
Let the filler dry for 1 hour before you proceed.
If bare wood still shows under the primer, do a second primer coat and let it dry for another 3 hours.
Then, lightly sand the primer and the joint compound using 220-grit sandpaper and vacuum off the gathered debris using a vacuum cleaner.
At this point, your pine is ready to receive paint! Open up the Diamond Hard Acrylic Enamel paint and pour it into an empty mixing container; if it’s too dense, add water and stir until you get your desired paint thickness.
Use the synthetic bristle paintbrush to apply the paint in the direction of the wood grain. Let it dry for 3 hours.
Afterward, apply a second coat of paint using the same procedure as the first. Let this coat dry for 3 hours too.
Do I Need to Prime Pine Wood Before Painting?
As I’ve highlighted, pinewood is a softwood usually laden with knots. So if I want better outcomes, do I need to prime pinewood before painting? A primer is a preparatory undercoat put on materials to prepare them to receive paint.
Yes! Perhaps more than any other wood type, pine wood needs priming before painting. As I’ll indicate in the next segment, there are numerous reasons and benefits for priming pine. You can use an oil-based primer, water-based primer, or shellac primer.
Why Prime Pine Wood?
The logic behind priming pine is:
To Improve Its Longevity
Pine is a less durable softwood, especially in damp conditions. Priming seals it against blighting agents, adding more years to your pine.
To Improve Paint Adhesion
Primer serves as a conduit to improve pine wood-paint bonding power. It’s because primer adheres to the bare wood better than the paint, and paint adheres to primer better than raw wood.
Conceals Knots
Primers, especially opaque ones, hide the knots that mottle the pine wood. The primer may not conceal it entirely, but it does an excellent job of making the spots less visible. Plus, the knots are almost invisible when you add paint on top.
Blocks Stains
A primer also masks stains already present on the pinewood, and it also shields/covers the pine against further staining from external sources.
Prevents Bleeding
Typically, pinewood is susceptible to heavy bleed-throughs. The bleeding is due to tannins, which are acidic chemicals in the wood sap.
The knots accelerate bleeding because they are good exit points for the tannins; the bleeding accentuates the knots. To counter all these, we have to spot-prime the knots first, then prime the entire wood plank before painting.
If you don’t prime pine before painting, the following will happen:
First, the wood won’t absorb paint evenly. The knotted parts absorb less paint than the rest of the wood; this makes the surface appear blotchy. Also, the paint’s water component (water-based paints) will raise the pine grain, make it swell, and damage it.
Secondly, the paint won’t bind firmly on the substrate. As a result, it won’t take long before it starts flaking and peeling off.
Third, the wood will have numerous conspicuous spots on it. It’s for the obvious reason that you did not spot-prime the knots in the first.
In a nutshell, if you fail to prime pine wood, your painting project will fail at every turn.
These are my picks for the best primer for pine:
KILZ 2 All-Purpose Interior/Exterior Primer
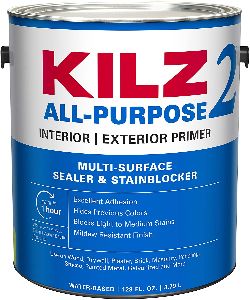 This is a water-based primer upon which you can apply a water-based paint or an oil-based paint. This primer is uniquely-designed to stick to surfaces where traditional oil-based or water-based primers won’t go.
You can use this primer on pine after spot-priming the knots. It seals the porous surfaces and enables the incoming paint to adhere firmly. You can apply it by brushing, rolling, or spraying. Other desirable features of the primer include:
- It’s suitable for interior and exterior surfaces
- The primer is durable
- It covers 300 to 400 square feet per gallon
- The primer comes at a pocket-friendly price
- It is easy to use
- You can use it on various surfaces like metals, wood, and masonry
INSL-X STIX Acrylic Water-Borne Bonding Primer
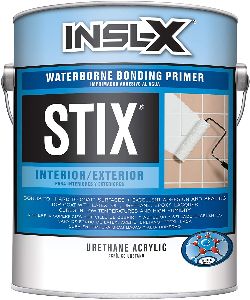 This is a premium water-based acrylic urethane product with unrivaled adhesion properties. The primer works virtually on all surfaces, including wood, PVC, glass, tiles, and metals.
It primes well for most paint types but is best for acrylic paint. It’s also perfect for exterior and interior surfaces. Additional worthwhile attributes are:
- The primer has a broad surface coverage of 300 to 400 square feet
- It has a low VOC content
- The primer bonds well to hard-to-paint surfaces enabling top coating with any product
- It’s easy to clean with soapy water
- The primer cures in temperatures as low as 35°Fahrenheit
What Is the Best Paint to Use On Pine Wood?
Mindful of its softwood classification and knotty nature, what is the best paint to use on pine wood? You need to use the best paint, even for the wood types that aren’t heavily dependent on paint.
It’s best to paint all kinds of timber for improved durability and visual appeal, make them waterproof, prevent mildew growth, etc.
There is no single paint type that’s best for pine wood. Each of them has benefits and pitfalls unique to itself so that one paint can rank high on a durability index and low on an eco-friendly scale.
Therefore, water-based paints (latex and acrylic formulas), oil paints, and shellac paints are all good for pine wood. You can only rank from best to worst based on the quality of a given brand.
The following are the best paints to use on pine wood, along with their features and advantages:
Water-Based Paints
Some of the best in this category include:
Rust-Oleum Milk Paint Finish
- It is available in numerous colors
- It’s perfect for interior pine wood projects
- The milk paint produces minimal odor and has a low VOC content
- It is cost-effective
- It’s easy to spread
- This paint restores the antiquated look of classical furniture
- The paint is easy to clean
- It has extensive coverage of up to 125 square feet per quart
- The paint dries to the touch in 30 mins and is ready for recoating in 2 hours
General Finishes Enduro Pigmented Poly
These are high-solid pigmented paints that are perfect for pine wood. They are stocked in black & white; custom colors are obtainable at your behest.
- It’s a satin sheen
- The paint dries fast for recoating
- It enables easy clean up
- This paint comes at a budget friendly price
- The paint has a built-in topcoat
- This paint is non-flammable
- It’s VOC compliant and low odor
Diamond Hard Acrylic Enamel by Majic Paints
- It’s available in various colors
- The paint is easy to spread on pine
- It’s perfect for both interior and exterior pine wood projects
- It maintains the white color throughout its lifetime on pine wood
- This paint is easy to clean using soapy water
- It is an all-purpose paint that works on surfaces like wood, metal, masonry, and glass
Painters’ Touch Premium Latex Paint by Rust-Oleum
- It has a low odor
- The paint confers enduring protection of pine wood
- It dries quickly (30 minutes), enabling faster project completion
- This paint has ample coverage (120 sq ft per quart)
- It’s a flat finish: minimizes defects like knots and cracks on the pine
Chalk-Style Paints
The sample best in this group include:
Country Chic Paint
- It has a vanilla color
- It’s suitable for both interior and exterior projects
- The paint gives your pine wood a matte finish
- This paint is eco-friendly: Low VOCs, no chemicals like formaldehyde and phthalates
- It only takes 30 minutes to dry for recoating
- You don’t need to prime pine wood before using this paint
Rust-Oleum Chalked Ultra Matte Paint
- The paint comes in a variety of colors
- It gives your pine wood a distressed, vintage look
- It is almost odorless
- The paint comes at a low cost
- This paint is suitable for interior pine surfaces
- It’s water-based and therefore easy to clean up
- The paint has a broad surface coverage, i.e., 150 square feet per quart
- It dries to the touch in just 30 minutes
- It only needs one coat
- It’s also environmentally friendly
The hitches with the water-based pains above are:
- You can only apply them using a synthetic brush
- They are not as durable as oil-based paints
- The paints don’t work as well as oil paints on exterior pine wood
Oil-Based Paints
The best brands in this grouping include:
Rust-Oleum Stops Rust Protective Enamel
- It has waterproof properties
- The paint dries to the touch in 4-6 hours
- This paint has superior coverage of up to 100 square feet per quart
- It has excellent resistance against scratches and chipping
- It’s a semi-gloss finish that leaves a subtle but classy look on pine wood
- It has superior durability
- You can use it on interior and exterior pine wood projects
Premium Oil Minwax Polyurethane
- It’s fast-drying (6 hours)
- The paint has a satin sheen
- It is waterproof
- The paint holds out against abrasion
- This paint is more durable than water-based paints
- Used for interior and exterior painting projects
- You can use either a synthetic or natural brush to apply this paint
The drawbacks of oil-based paints are:
- They turn yellow with age, thus changing the original color of pine wood
- They are harmful to the environment and human health because they release high levels of VOCs
- Oil paints take a long time to dry before recoating
- They require mineral spirits for thinning
- The paints are a little challenging to handle and apply
Can You Paint Pine Wood With Acrylic Paint?
If you want any wood to last an entire lifetime, you have to paint it. The wood variety and your desire dictate the type of paint you’ll use. That said, can you paint pine wood with acrylic paint?
You can! As mentioned earlier in this article, pine accepts several paint types ranging from water-based to oil-based. Acrylic paint falls under water-based paints, so I give you the green light to use it.
One of the best acrylic paint brands I know is the Diamond Hard Acrylic Enamel by Majic Paints; I’ve detailed it in the preceding segments of the article. You can take a look.
How Do You Paint Pine Furniture White Without Sanding?
Ask any experienced painter, “What is the most challenging painting step?” They are likely to say sanding! I couldn’t agree more. It’s therefore understandable to contemplate how to get around the sanding bit of painting.
To remain coherent with the article’s heading, let’s all think aloud: how do you paint pine furniture white without sanding?
There are several approaches to the above situation; I’ll start with my favorite and mention the others.
Using General Finishes Enduro White Poly
This water-based, high-solids, polyurethane paint sticks to substrates well without prior sanding. You only need to apply a General Finishes white undercoat before painting. The undercoat primes the pine wood surface enabling the white poly finish to bind even better.
Requirements
- Paint: General Finishes Enduro White Poly
- A white primer: Zinsser Bull’s Eye 123 All Surface Primer or Enduro White Undercoat
- HVLP spray gun or an airless sprayer
- Respirator
- Synthetic paintbrush
- Protective goggles
- A pair of gloves
Procedure
First, ventilate your working area and wear your safety gear.
Then, clean the pine wood surface with soapy water and wipe it off with a tack cloth; let it dry for 1 hour.
Next, open the Zinsser 123 all-surface primer can and apply the contents to the pine using a synthetic paintbrush. The primer I’ve mentioned is white; it will match the incoming white paint. Alternatively, use the Enduro White Undercoat if the above primer is inaccessible.
Let the primer dry for 1 hour.
Open up the General Finishes Enduro White Poly paint and stir thoroughly to form a uniform mixture.
If the paint is too thick, thin it using clean water; start from 5% and add a maximum of 10% volume of water in the paint. If you reside in hot and dry weather conditions, add the General Finishes dry-time extender and stir well before application; this lengthens the drying time for optimal binding.
If your abode is in a cool or more humid environment, use the General Finishes water-based accelerator to shorten the drying time; it lets the paint dry before it’s washed away in rainwater.
Pour the paint into a paint cup and adjust the spray gun tip size to between 1.2 to 2.0 mm. Test-spray it on a scrap pine wood plank before painting on the primary substrate.
You’re now ready to spray-paint!
Hold the HVLP spray gun perpendicularly (at right angles) to the pine wood surface and at a distance of 6 to 8 inches away; spray firmly. Ensure you maintain the said angle distance throughout the painting process to produce a uniformly-coated surface.
Be systematic when spray-painting to preclude leaving some wood parts unpainted or poorly painted. Remember to shake the HVLP paint cup/can regularly in the course of painting to maintain the consistency of the paint.
You need a meticulous approach so that all the aspects of the painting balance out; that way, you’ll get the best results.
Let the paint dry for 2 hours before recoating. Use the same procedure above to apply the second coat.
Allow the second coat to dry as you clean your working tools using soapy water.
Voila! You’ve painted your pine white without sanding.
Note: I’ve based all these drying times on the ideal conditions of 70°F and 50-70% relative humidity. The drying times may vary slightly due to temperature and humidity fluctuations.
That’s my best pick for painting pine wood white without sanding. Other methods are:
Using Chalked Paint
 Chalk paint was invented by Annie Sloan, a British artist, in 1990. She wanted something to apply to furniture without sanding and priming, so she developed this paint.
The worldwide appeal of chalk paint has led to many companies manufacturing it. Annie Sloan has trademarked the word “chalk paint” so other companies make it under different names like chalky finish, chalked paint, chalk-style paint, etc.; they are all technically the same.
To paint your pine white without sanding, I recommend Rust-Oleum Chalked Linen White Chalked Ultra Matte Paint.
Remember to seal chalk paint or similarly-named paints using chalk paint wax! It makes the finish less flaky by holding it in place.
Buy Chalk Paint Here
Using Milk Paint
In this category, I recommend Old Fashioned Milk Paint Snow White. It’s a premium product that’s relatively safe as it contains zero VOCs. The paint will give your pine wood a matte, white finish that looks picturesque. Plus, the color does not fade easily, thus maintaining the original look of your workpiece.
Using Fusion Mineral Paint
This premium product took ten years to develop and refine for furniture painting. It’s environmentally friendly, with low VOC content, has superior durability, and has a matte finish. One of its more desirable qualities is the possession of a built-in topcoat, making it a one-step application paint.
Conclusion
To conclude, woods are here to stay thanks to their universal use for furniture and the construction of buildings. Pine is among the most widespread woods; it also happens to be a softwood riddled with knots.
Since we cannot avoid pine, painting is the simplest way to sort out the above ‘imperfections’. That’s why I’ve centered this article on…
How to Paint Pine Wood
The painting process is as simple as it gets. I’ve discussed all the steps in detail up there. In summary, it entails drying treated pine, spot priming the knots, sanding, general priming, and lastly, painting. And if the pine isn’t treated, you can jump the drying stage.
I’ve also weighed in on the importance of painting pine wood and named the best paint brands to use.
After reading the above, you’ll be well acquainted with handling pine wood in every aspect and according to your desire.