Pressure-treated wood is less susceptible to rot, insect infestations, and in some cases, fire damage. Despite all the advantages, it can still absorb moisture, which eventually causes decay. Furthermore, pressure-treated wood has green or reddish-brown color tones, which some homeowners find repulsive. And upon constant exposure to UV rays, the colors eventually turn silver-grey – which is not better.
The usual way of covering imperfections and protecting regular lumber from water damage is by painting. This is why most people ask, can you paint pressure treated wood?
You can paint pressure-treated wood like regular lumber, but the catch is not to paint too soon after purchasing it.
Manufacturers ship treated wood while it’s still “wet,” so if you paint it immediately, the paint will lift and peel off the surface too soon.
If you want treated wood that you can paint as soon as it leaves the store, purchase the ones labeled as “kiln-dried.”
This article will discuss everything you must know about painting pressure-treated wood. I’ll explain how long you should let the lumber dry after purchasing and take you through the painting process step-by-step. But first, let’s learn more about pressure-treated wood.
What Is Pressure Treated Wood?
 Pressure-treated wood refers to lumber infused with preservative chemicals that allow it to fend off insects and fungi, which would cause it to rot. The wood often has a green tint or a reddish-brown hue; therefore, it’s not hard to recognize it.
After millers chop and size wood, they put it in a treatment chamber and apply hydraulic pressure to force chemicals into the timber structure. The pressure stays on until target saturation is achieved for the wood’s specific end-use.
Finally, a vacuum is applied again to extract excess preservative and push it back into storage.
There are several chemicals used to treat wood, the common ones being Chromated Copper Arsenate (CCA), Alkaline Copper Quarternary (ACQ), Borates, and Micronized Copper Azole (MCA).
CCA-treated wood was often used for all constructions, but the arsenic compound proved to be toxic. As a result, building departments slowly phased them out; hence it is difficult to find them in stores. However, you can still see them on old existing structures.
Types Of Pressure-Treated Wood
Pressure-treated lumber falls into three basic categories: Above-Ground, Ground-Contact, and heavy-duty treated wood. The differences between them stem from the chemical retention level of the wood, which is the amount of preservative that remains in it after treatment. The wood species and the number of preservatives pumped into them directly impact this factor.
The chemical preservatives penetrate more into the wood’s sapwood than the heartwood. Therefore, the species with more sapwood often have higher retention than those with less.
Trees like the southern yellow pine have more sapwood, so manufacturers prefer its lumber for treated wood to species like Douglas fir.
Even though the lumber may potentially retain a large volume of the chemical, the manufacturers sometimes limit it. They pump more preservatives into some batches than others creating varying retentions, which categorizes the treated wood. More preservative equals higher retention and vice versa.
-
Above-Ground Treated Wood
 This type of treated wood has low chemical retention; therefore, it is a little weak. It can fend off insects and prevent the wood from rotting, but it only to a slight degree – the chemicals in it wear away quicker; thus, they lose protection faster.
You must always use above-ground pressure-treated wood at a height no less than 6-inches away from the soil to make it durable. Soil contains most things that cause wood to deteriorate – insects, moisture, etc.
Therefore if it gets in contact with the ground, it will wear out even quicker. This type of wood works best in easily accessible places where you can maintain them or replace them as efficiently as possible.
-
Ground-Contact Pressure Treated Wood
Ground-contact treated wood can easily fend off the moisture and insects in the soil, and it can remain in perfect shape for up to 40 years without consistent maintenance.
This type of treated wood has the highest retention level; therefore, it is the strongest, and it is mainly used for projects less than 6-inches from the ground.
-
Heavy Duty or Heavy Duty Ground Contact
Heavy-duty timber contains almost triple the amount of preservative compared to above-ground lumber. It is the strongest of the three types because it can withstand the harshest possible conditions. Builders use this type of wood to support structures like sheds, barns, and even homes.
Why Choose Pressure Treated Wood?
I recommend treated wood because it lasts longer than all kinds of wood, and it actually “self maintains.” It kills insects and prevents fungi from sprouting on the wood surface.
Therefore, all you have to do is coat it with quality exterior latex paint to keep off moisture and protect the surface from UV damage. You can also stain the wood and then seal it to maintain the natural wood aesthetic.
Advantages of Pressure Treated Wood
-
It Is Durable
The biggest advantage of pressure-treated wood is its durability. The infused preservative gives it an edge over common wood, allowing it to fend off insects and prevent fungi and rot. These are the things that accelerate the deterioration of timber, so without them, the wood will last for decades.
-
Prevents Fungal Decay
The chemical preservatives in pressure-treated wood create a hostile environment that prevents fungi from growing. They keep the spores from forming roots in the timber structure, protecting the wood’s structural integrity.
-
Saves the Forest Resource
Pressure-treated wood is more eco-friendly than standard wood mainly because of its durability. Since the wood can last for decades without replacement, there is a significant reduction in the strain on forests.
The longer the wood remains in good condition, the lesser the need to cut down more trees for lumber.
-
It Is Versatile
This type of wood still has the versatility of natural wood; therefore, you can use it to build any structure you want. You can also stain or paint it in any color you like, making it easy for you to match it with existing structures around your home.
-
It Is Low Maintenance
The preservatives in pressure-treated wood will do all the work for you – fending off insects, preventing rot, etc. You must always take extra measures to keep off the damaging elements with untreated wood. Such tasks require a lot of labor and cost a lot which is an inconvenience.
Best Paints for Pressure Treated Wood
Here are some of the very best paints for pressure treated wood:
-
Exterior-Grade Latex paint
Exterior latex paints are the most suitable products to use on treated wood because they are water-based and grip the wood surface well.
Manufacturers do not use oils or harsh chemicals, which may react with the preservative chemicals in treated wood, causing the paint to resist the surface. In addition, they do not emit VOCs, which is a plus if you want to use them near people and animals.
Latex paints are affordable, and manufacturers create them in several colors; hence, you have many choices. You can quickly find a particular shade that fits your vision perfectly. If you cannot find one, the paint provider can customize a shade close to the one you need.
Latex paints also come in several finishes. They are all excellent, but I recommend using colors with a bit of shine for painting treated wood. Such finishes include satin, semi-gloss, and high gloss.
One of the main reasons for painting treated wood is to protect it from water damage, which is why I recommend shiny finishes. Glossy paints have a higher concentration of resins(binder) than pigment(color).
As a result, their coats dry harder and do not allow moisture to pass through. They are more durable than the other finishes and offer better moisture protection for the wood.
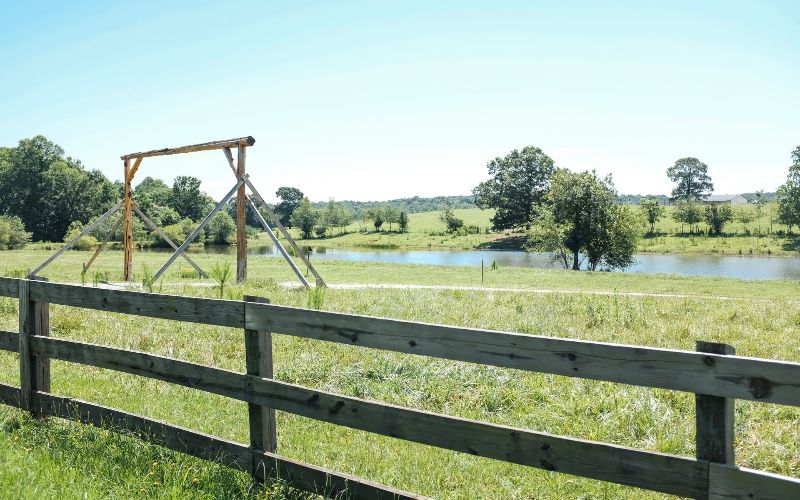
You can use exterior-grade latex paint to paint all your projects. You can use it on decks, fences, and even playground constructions without a problem.
-
Exterior Acrylic Paint
Acrylic paint is also water-based; therefore, you can use it as a substitution for latex paint. It is one of the most adaptable paint types, ideal for several surfaces, including treated wood.
You can work efficiently with acrylic paint because it requires little effort to apply. This type of paint has self-leveling properties, meaning it flows out evenly on the surface to smoothen.
Usually, you have to use precision not to leave brush marks on the surface, but with acrylic paint, you don’t have to worry about that.
Acrylic paint coats are also elastic, making them perfect for treated wood. Treated wood expands and contracts more than regular wood; therefore, the elasticity of acrylic paint allows it to move with the wood.
There will be no strain on the bond between the color and the surface; hence the paint coat won’t flake off the surface too soon.
When it comes to moisture protection, acrylic paint does a decent job. It is water-based; thus, you can easily clean it up with water. However, as the color dries, it becomes more waterproof. This feature makes it perfect for protecting treated wood from water damage.
-
Mineral Paint
Manufacturers make mineral paint using similar ingredients as other paint – Pigment, resin, and solvent. However, they make the pigments from natural earth minerals instead of the usual synthetic or inorganic particles.
These natural ingredients make mineral paint perfect for painting treated wood because they won’t have adverse reactions to the preservative chemicals.
The most significant upside of mineral paint is its breathability, unlike most paint types. Breathability means that even after the paint coat dries, it will still allow water vapor to pass through.
This feature is convenient for treated wood, especially those that aren’t properly dried. They will still have a way of losing moisture even after painting; hence your wood won’t warp.
In addition, the color of mineral paint does not fade as quickly as other paints. Most of the natural pigment ingredients used – like any earth oxide – are all UV stable, meaning they won’t fade when exposed to the rays continuously.
How to Prepare Pressure Treated Wood For Painting
-
Dry the Wood
The essential preparation step before painting pressure-treated wood is drying the wood. You see, treated wood leaves the treatment plant before it is fully dry; therefore, when you buy it, it is still damp.
If you paint it immediately, the paint won’t take, and you’ll be stuck doing retouches for a long time. You must allow treated wood to dry for at least 3 or 4 hours to ensure that the moisture content reaches a level suitable for painting.
You can ensure quick air drying by stacking the wood. The right way of stacking pressure-treated wood is by using stickers – small wood pieces slightly wider than your lumber.
They create spaces between the wood, allowing air to circulate freely through them to accelerate the drying. You can also use paint stirring sticks, provided they have the same thickness.
To stack the wood properly:
- Place the stickers on the ground under a wood piece. Ensure that you place one at each end of the board and space out the rest 40 inches apart throughout the plank length.
- Put stickers on top of that same piece of wood, spacing them out as you did before, then stack the next piece of timber. Keep doing this until you’ve stacked all the wood.
Stacking wood is easy, but how do you tell if the wood is dry enough?
The most accurate way of determining the moisture content of wood is by using a digital moisture meter. This device will give you accurate readings all across the wood board in a very short time. If you don’t own a moisture meter, you can perform the water test instead.
- Sprinkle some water on the wood.
- If the wood absorbs it, it is dry enough, but if it forms beads instead, the wood is too saturated, so it needs more time to dry.
If you don’t feel like waiting months to be able to paint, you can buy kiln-dried treated wood instead. This type of lumber is dried in an oven before being shipped to hardware stores.
It comes with a moisture content level suitable for painting; therefore, you can paint it immediately after purchase.
-
Clean the Wood
When you leave the wood to dry, dust and grime will settle and accumulate on its surface. These particles will interfere with paint adhesion; therefore, you must clean the wood before painting.
Cleaning pressure-treated wood is just like cleaning untreated lumber. You need a mild detergent, some water, and a nylon brush.
- Mix water with the detergent, then use the solution to clean the wood.
- Dip the brush into the mixture, then use it to scrub the wood surface. Keep washing the wood until all the dirt comes off, then rinse it with a damp cloth dipped in plain water.
- Finally, allow the wood to dry for 48 hours-1 a week to ensure no moisture remains.
Note:
- Avoid pouring water directly on the wood surface because you risk getting it too wet.
- Avoid using a pressure washer on pressure-treated wood because the high pressure may dilute the preservative in the cells near the surface or force water back into the wood fibers.
How to Paint Pressure Treated Wood
Here are the steps involved in the painting of pressure treated wood:
Step 1: Prime the Wood
I can’t emphasize enough how priming is essential for all painting projects. A primer will ensure that the paint adheres well to the surface, thus reducing the chances of peeling.
The primer will also hide the greenish color of pressure-treated wood; hence it will not show through the topcoat.
- Always choose a latex or acrylic bonding primer for outdoor use for best results.
- Use a paintbrush or a sprayer to apply the first coat of primer. If you cut the wood, ensure that you prime the cut sides too to protect them.
- Allow the first coat to dry as indicated on your product’s label, then sand it lightly with 220-grit sandpaper.
- Next, apply the second coat of primer, allow it to dry, then sand it in readiness for the topcoat.
Step 2: Apply the Paint
Always use high-quality exterior latex paint to color pressure-treated wood. It is compatible with treated timber, and it will stand up to the elements better. Also, apply 2-3 coats of paint for better protection.
A single coat may give the illusion of proper coverage because you primed the surface; however, it won’t last long. Moreover, one coat won’t be thick enough to fend off water and other damaging elements.
Like the primer, you can apply paint with either a brush or a sprayer, but I mostly recommend brushes for better control of the task. Brushes also lay thick layers to cover the surface adequately with fewer coats.
While painting:
- Only load ¼ inch of the paintbrush with paint instead of the whole bristle length. Loading the brush with little paint will allow you to apply thin coats that adhere well instead of one thick layer that will peel off soon.
- Use short brushstrokes and run them parallel to the wood grain and exert minimum pressure on the brush to avoid leaving ugly brush marks on the finish coat.
- Keep the edges wet as you paint to prevent lap marks.
- Let the first coat dry according to manufacturers’ instructions because waiting periods vary from brand to brand. Next, sand the coat lightly with 220-grit sandpaper to make the second one grip better.
- Apply the final coat like you applied the first one, then allow it to dry before using the painted piece. Waiting reduces the risk of ruining the paint job before it cures. Paint becomes rigid and strong after it cures; therefore, do not use the painted piece actively for at least 30 days to be safe.
Note:
Sanding is an essential step in painting wood, but I recommend that you avoid sanding your treated timber as much as possible. Sanding treated wood removes part of the preservative, and you want the wood to retain as much of it as possible.
Instead of sanding, always start painting pressure-treated wood with a bonding primer because it helps the paint adhere to all kinds of surfaces, even sleek ones like plastic.
How Long Should You Wait Before You Paint Pressure Treated Wood?
It is best to wait 3 months after purchasing pressure-treated wood before painting it. That period is enough for the timber to dry and accept paint without issues. However, this 3-month period is only enough in dry areas with low humidity.
If you work in a humid area, you may have to wait between 4 and 6 months for the wood to dry properly. The reason is that the air in humid regions is already saturated with moisture; therefore, it is even harder for the wood to dry.
All the time frames mentioned above are average estimates. The waiting periods will vary depending on several factors that affect pressure-treated wood’s dry time. Let’s discuss them in-depth.
-
The Treatment Time Frame
Knowing the treatment time frame of your wood will help you make accurate estimates of the waiting period. You will know if the wood is fresh out of the treatment plant or if it has had some time to dry in the lumber store.
You can check the tags on the wood or ask someone from the store to give you the details you need.
-
Where and How the Wood Is Stored
When buying the wood, remember to look at where the distributor stores the lumber and how they stack them. If the storage space is cool and dark, the wood will likely still be wet; therefore, you’ll have to wait 12 weeks before painting.
If they stack the wood with stickers, there is excellent airflow, so you won’t have to wait for long periods before painting. Unfortunately, most lumber stores stack treated wood in tight bundles, making the wood dry unevenly.
Consequently, you may find that some boards are drier than others; therefore, the waiting period before painting won’t be precise.
-
The Thickness of the Lumber
This factor is pretty straightforward. Thinner lumber will lose moisture faster than thick ones; therefore, you won’t have to wait for long before painting.
What Happens If You Paint Pressure Treated Wood Too Soon?
The Paint won’t Dry
When you paint pressure-treated wood before it dries, you’ll be locking moisture within the wood. Consequently, the moisture will wick up the paint because it has nowhere to escape. As a result, the paint coat won’t dry.
Paint that isn’t dry is a problem for two main reasons:
- First, since the paint coat hasn’t hardened yet, it is more likely to get dented or scratched off the wood.
- Second, the paint won’t take on the color intended by the manufacturer because it only looks as it should after the drying.
The Paint Will Peel
When you paint treated wood that is damp, the moisture in the wood will be like a barrier between the paint and the wood fibers. As a result, the paint won’t stick, and the coat will begin to peel off even before it cures.
Sometimes the paint will dry as expected and start peeling off after a few weeks. The reason for this is that as the board dries. Its size reduces a little.
That slight shrinkage weakens the bond between the paint and the wood surface causing it to peel. When this happiness, you’ll have to remove the color and start afresh.
The Wood Will Warp
As mentioned before, wood shrinks as it dries. That shrinkage is also the beginning of warping
The unpainted side of the wood will dry faster; hence, it will shrink more quickly than the painted side. Soon, the wood will begin to pull towards the shrinking side, causing it to curve, which we call warping.
Is It Better to Stain or Paint Pressure Treated Wood?
Whether you should paint or stain pressure-treated wood depends on how you want it to look and the level of moisture protection you want to give it.
Paint offers a pop of color from the dull green, and you have several choices. On the other hand, staining is better when you want the wood to maintain a more natural look.
Both methods of protecting pressure-treated wood have their advantages and disadvantages. You need to understand both to choose the one that works best for you. So let’s look at each in-depth.
Pros of Painting Pressure-Treated
- Painting is opaque, so it does a better job hiding the odd green color of treated wood. Moreover, you have several colors, so matching your wood to the surroundings is easy.
- Paint is a thick finish; therefore, it can fill the slight indentations on treated wood without needing wood putty first. Don’t get me wrong; paint can only fill tiny wood cracks. If there are any large cracks, you must repair them with wood putty first, then apply the paint to conceal the repaired area.
- Paint is easier to clean depending on its finish. I always advise painters to color their treated wood with glossy paints because they are durable and simple to clean with detergent and water.
- Paint offers better protection to the wood because it keeps moisture away and offers UV protection. Some products even produce odors that repel insects, making the treated wood even safer.
Cons of Painting Treated Wood
- Painting is a lifetime decision. Once you settle on painting treated wood, your best bet is to keep painting. You can remove paint if you want to stain instead, but the procedure is tasking; therefore, many painters choose to avoid it.
- Painting requires you to master some necessary techniques to make your job beautiful. Most new painters find it hard to achieve good results with treated wood on their first try.
Pros of Staining
- Wood stain is transparent; therefore, it allows the wood grain to show through. It preserves the natural beauty of wood.
- The stain doesn’t get slippery if you pour water on it. It gets absorbed into the wood fibers; therefore, the wood surface retains its natural texture.
- Stain is easier to apply than paint. You do not need masterful techniques to pull it off.
Cons of Staining
- Stain wears out faster than paint; therefore, the treated wood loses protection quicker. You will have to restrain consistently to maintain the wood.
- Wood stain is thinner than paint; hence it won’t fill the minor indentations in the wood when you apply it.
What Is the Green Stuff On Pressure Treated Wood?
The green color on treated wood stems primarily from the copper present in the infused preservative chemical. When the copper comes into contact with air, it oxidizes, causing it to turn green, which shows on the wood. Therefore the green color is more of a coincidence.
The shade of green will vary depending on the timber species. Light-colored woods will have a lighter shade, while dark brown woods will have a darker shade. The color will also differ depending on the chemicals used to make the wood preservative:
- Chromated Copper Arsenate – Light Green
- Copper Azole – Greenish Brown/light brown
- Alkaline Copper Quarternary – Olive or tan
- Borate – Retain Natural Wood color
- Oil-based preservatives – Dark
The green color puts many beginners off; hence they choose not to use pressure-treated wood. However, some people do not know that the color is not permanent.
When you leave treated wood outside for a while, the radiation from UV rays bleaches the wood. First, you will notice the green changing to a beautiful honey brown, and on continuous exposure, the wood becomes silver-grey.
If you don’t like the green color but still want to use treated wood, you can paint or stain the wood to get a color that sits well with you. If you don’t want to paint or stain, purchase brown, treated timber instead.
This type of treated wood uses the same chemicals, but manufacturers add a brown dye in the preservative. As a result, the wood comes out of the treatment chamber with timber’s traditional brown appearance.
Is Painted Pressure Treated Wood Safe for Vegetable Garden?
 Painted treated wood is only as safe as the paint used, so whenever you use painted timber in your garden, ensure that it’s painted with non-toxic water-based paint.
Most water-based paint labeled as “non-toxic” are natural paints, meaning they are free of petrochemical ingredients or use cleaned petrochemicals declared safe around food.
If you’re unsure if the paint you have is safe or you want to take precautions to protect your vegetables, below are some things you can do to help.
-
Use Beed Liners
A bed liner is a thick plastic sheeting that you put between the painted, treated wood and the garden soil. It will help provide a barrier between them, thus minimizing the risk of chemicals in the paint leaching into the soil and ruining your vegetables.
Avoid using non-porous plastic liners because they retain too much water, which may discourage the growth of essential micro-organisms. Too much water may also kill young vegetable shoots.
In addition, be careful not to poke holes into the liner during installation because those holes will allow chemicals to touch the soil.
-
Paint the Exterior Only
If you’re painting a wooden raised vegetable garden, you must ensure that the paint does not contaminate the soil. The best way to ensure that is by painting only one side of the garden – the exterior.
The outer side of the vegetable garden is never in direct contact with the soil; therefore, there is no risk of paint chemicals leaching into the soil. If you don’t want to leave the inside part bare, you can apply a natural wax to protect it.
-
Use Only Brushes to Paint the Wood.
Usually, painters use paint sprayers for painting because they allow one to cover large areas in a short time. However, I discourage you from using them when painting vegetable gardens because of the “splash” they produce.
One of the disadvantages of using paint sprayers is that most of the paint particles do not end up on the surface. They splash onto areas around the surface, so if you did not cover the areas well, you would be stuck doing paint clean-ups after the project.
It is easier to live with this minor setback when painting a house or a car, but the specs change when it comes to your vegetable garden. The splashes from the sprayer may settle on the garden soil or leaves of other plants near the garden.
As a result, you will notice the plant leaves yellowing over time, and if you don’t remedy the situation immediately, they will die.
For these reasons, I recommend only using paintbrushes when painting vegetable gardens. They offer better control of the painting process; hence there is less risk of contaminating the soil or the plants.
-
Seal the Paint.
Sealing paint on treated wood is necessary, especially when you don’t know the paint used. However, don’t just use any clear sealant.
I recommend using only natural wax or polycrylic clear coats for this purpose. These two products do not contain toxic compounds, making them safe for your vegetable garden.
-
Remove the plants Before Painting.
If you’re painting a garden with growing vegetables, transfer the plants carefully to another location before you begin painting. Removing the plants will prevent accidental paint spills and drips from harming them.
Conclusion
Pressure-treated wood has many functional advantages, but the preservation process leaves its appearance wanting. For this reason, homeowners try different methods to alter the appearance, which is why they often ask:
Can You Paint Pressure Treated Wood?
You can paint pressure-treated wood with good quality exterior latex paint or use mineral and acrylic paint as substitutes.
Before painting, always prime the wood with a latex bonding primer to help the paint adhere to the wood. Avoid sanding pressure-treated wood because you will scuff off part of the preservative.
If You must sand, ensure that you wear protective gear and work in a well-ventilated space to keep you from inhaling the chemical-filled dust.
I hope all the information in this article is clear and answers your questions. If you need clarification or have anything to share with the rest of us, please reach out in the comments section below.