Paints can be pretty confusing, both by name and appearance. Knowing their differences to the last detail is essential to pick the right one for your project. In this article, I’ll do a head-to-head on milk paint vs. chalk paint to remove all the ambiguities surrounding the two.
Let’s put them side by side and give them their identities by definition, uses, pros & cons, similarities, differences, etc. So, gear up for an exciting and informative discussion ahead. Let’s go!
What Is Milk Paint?
From the introduction above, what is milk paint?
It’s a non-toxic milk-borne paint made from milk and lime as the main components and pigments as excipients to give it color. In other formulations, it comprises borax and milk’s casein protein. The borax functions as a preservative and also activates the casein.
Uses of Milk Paint
Its usage dates from thousands of years back. Other paint types like acrylic and oil-based weren’t invented yet, so milk paint was the only one available.
Its use waned over time due to the advent of modern paints. However, a renewed interest in milk paint has led to its resurgence. The current applications of milk paints are:
- For decorative finishing
- For an eco-friendly painting
- To produce a chippy, distressed finish
- To preserve and restore antiquated sculptures and wood carvings
- To give surfaces intense color shades with low lusters
- For a mottled look on surfaces
- To make surfaces look vintage or old-fashioned in a charming way
What Is Chalk Paint?
 First, I want to be clear that chalk paint is a totally different product from chalkboard paint; keep this in mind. So what is chalk paint?
Annie Sloan, a British artist, author, and color expert, invented the above paint in 1990. It’s a water-based color treatment applied to surfaces like furniture, walls, fabric, floors, plaster, and glass.
The paint comprises a fine powder of calcium carbonate or plaster of Paris mixed with water; acrylic paint is added for pigmentation. Chalk paint requires a top coat to prevent flaking.
Following its invention in 1990, Annie Sloan registered the term chalk paint as a trademark; this means companies manufacturing the same product had to adopt different names like chalky finish and chalky paint.
It’s for legal and marketing purposes. It’s no surprise, therefore, that all chalk paints brands are sold under Annie Sloan as indicated on their labels.
Chalkboard paint isn’t part of this discussion, but I’ll define it to avoid confusion when purchasing chalk paint or similar products. It’s specialized paint that forms a chalkboard-like finish upon which you can write in the same fashion as the traditional blackboard or chalkboard.
Uses of Chalk Paint
- Used to achieve a vintage or shabby chic finish
- To give furniture rustic effects
- For decorative purposes
- Used to paint without priming and sanding
- Used to paint surfaces urgently
- For attaining a matte finish
- To create a textured old look
Milk Paint vs Chalk Paint vs Latex Paint
The wide variety of paints makes it pretty confusing to tell them apart. To add to this puzzle, many paints have similar characteristics, and it’s difficult to tell which is which, even to a trained eye. I’ll give you a detailed review of milk paint vs chalk paint vs latex paint in this segment.
The three paint types are similar in some aspects and different in others. They are alike in terms of the dispersion medium, color variety, and some uses.
The differences revolve around their dispersed phases, how to use them, what kind of projects to use them on, etc. Take a look at the analysis below:
Dispersion Medium
This simply means the solvent vehicle of the paint; all three paints have the same dispersion medium: water. We can therefore refer to them as water-based paints.
Paintbrush
We use synthetic paintbrushes to apply all of the above paint types. The synthetic brush suits these paints because its bristles do not absorb the water component of the paints. On the other hand, a natural brush leads to the wastage of the paints in question because it soaks them up.
Formulation
Both chalk paint and latex paint come in a liquefied formulation. Milk paint comes in powdered form, so you have to add water to yield liquid paint.
Shelf Life
Unused latex paint in a sealed container has a decades-long shelf life; chalk paint lasts five years under similar conditions.
Milk paint warrants a broader explanation because it has a few twists regarding its shelf life. Milk paint will last for over ten years if you store it in a powdered state. But if you formulate the milk paint with water, it can only last for three days in a viable state.
Formulated milk paint lasts for two weeks when you close the lid and store it in a refrigerator to throw you for another hoop.
For the above reason, manufacturers store milk paint in a powdered state and even sell it to customers in the same state for storage convenience.
Topcoat
Chalk paint needs a topcoat or clear coat to seal it and give it more durability. Milk paint doesn’t need a topcoat because it’s self-sealing and strong enough to withstand external damage.
Latex paint is similar to milk paint in this regard. Still, I recommend a top coat for milk and latex paint because it reinforces the paint and adds to the already excellent durability profile.
Painting Temperature and Humidity
All of these paints are water-based! Therefore, they have a similar optimal painting temperature ranging between 50⁰-85⁰ Fahrenheit.
They also match in terms of optimal relative humidity for painting, i.e., 40-50%.
Thinning Agents
Water is the thinning agent for all of the above paints. However, an agent known as floetrol also thins latex paint.
As far as similarities and differences are concerned, the ones that I’ve discussed are the most important. Let’s now head over to the pros and cons of the paints in question.
Milk Paint Pros
- It gives you room to create numerous color combinations
- The paint produces a matte finish that has an indigenous look
- It has no VOCs; therefore environmentally friendly and innocuous
- The paint can make a distressed and chippy look
- It is easy to apply
- The paint comes at an affordable price
- It is easy to clean up because it’s water-based
- It’s perfect for food-grade materials
Cons
- Once formulated into a solution, it has a short shelf life; around three days if not refrigerated and two weeks when you store and refrigerate in a Tupperware container.
- It has a lumpy texture; therefore, you need to power mix it. Hand mixing isn’t adequate and wastes time.
- The paint has a slight odor, resembling that of freshly-cut grass.
Chalk Paint Pros
- It only needs stirring before use
- It has no odor
- The paint has a short drying time, i.e., around 40 minutes
- It’s eco friendly with no VOCs
- The paint comes at a pocket-friendly price
- It’s easy to apply
- Chalk paint is easy to clean because it’s water-based
Cons
- It comes pre-mixed therefore, it’s not possible to customize colors
- The paint is so thin with very low viscosity
- This paint needs several coats to cover the underlying surface
- It can chip or flake excessively
Latex Paint Pros
- It has fast drying and curing times
- It’s easy to clean up and thin; because it’s water-based
- The paint is environmentally friendly and innocuous to human health
- Latex paint maintains its color on surfaces over a long period (it does not yellow)
- This paint does not chip, crack or peel on the substrate
- It is nonflammable
- The paint doesn’t emit strong odors
- It comes at pocket-friendly prices
Cons
- It needs priming before you lay down the paint
- The paint is unsuitable for high-traffic areas
- It’s not as durable as oil-based paint
- It takes a long time to cure; around 30 days
Is General Finishes Milk Paint a Chalk Paint?
True milk paint comprises lime, milk protein/casein, and coloring pigments, while chalk paint is calcium carbonate powder dissolved in water; the two are different!
However, some types of milk paint are so differently formulated from the original that they resemble chalk paint, e.g., general finishes milk paint. But is general finishes milk paint a chalk paint?
It’s not! GF milk paint and chalk paint are different paints in several aspects. First, GF milk paint is not the same as the original/true form of milk paint; it’s a present-day pre-mixed liquid paint with an acrylic base.
In actuality, GF milk paint shares more features with latex paint than it does with traditional/actual milk paint. In the case of GF milk paint vs Chalk paint, the differences and similarities are as I’ve highlighted below:
Similarities
- Both paints are water-based.
- They contain calcium carbonate fillers.
- Both give a low luster finish.
- They have excellent surface coverage.
- You can spray both paints with a medium-sized fluid tip or spray nozzle.
- Both paints don’t need a primer as they stick well to surfaces.
Differences
Composition: First, chalk style paint has more fillers than general finishes milk paint. Then, GF milk paint has a different resin system of higher quality than chalky paint.
As a result, GFMP costs more than chalked paint in terms of manufacturing and purchasing price.
Durability: GFMP is more durable than chalk paint; it’s due to GFMP’s higher resin component,
Wet distressing: The filler proportion and disparate resin system of chalk paint enable wet distressing within 12 to 24 hours. Milk paint holds tight onto the substrate immediately, leaving no room for wet distressing; you have to sand it down with sandpaper to distress. The GF milk paint won’t distress because it is not designed for that.
Topcoat/Sealer: Chalk paint needs a clearcoat or topcoat, e.g., wax, while GFMP doesn’t require a topcoat. It’s because chalk style paint is chippy and less durable, so it needs a cover to seal it in; GFMP can be used as an independent/stand-alone finish because it forms a smooth but hard and durable coat.
However, I recommend a top coat for GFMP if you are painting heavy-use furniture like kitchen cabinets and tabletops; it fortifies the paint to shield your furniture better.
Usage: Chalk paint is ideal for interior furniture, while GFMP suits exterior and interior furniture. Chalk paint does not suit exterior painting projects because it has weaker adhesive power and a scoured look; these make it vulnerable to harsh weather, water, and environmental elements.
Anyhow, you can use the chalk paint on external surfaces if you’re principally focused on a vintage/aged and less so about durability.
GFMP gives exemplary performance for outdoor applications because it’s more damage-proof and adheres firmly to substrates. Even without a top coat, it works pretty well! It’s self-sealing, in a manner of speaking.
Coverage and Finish: While both paints have better surface coverage than other paints, GFMP has the edge over chalk paint when you make a head-to-head comparison.
As for the finish, GF milk paint gives a smooth finish with minimal and sometimes no brush strokes. Chalk style paints leave a rough finish with a slightly high proportion of brush strokes.
Flow property: Chalk paint flows more than GF milk paint because the GFMP is thicker/more viscous than its chalk paint counterpart.
Surface Prepping: Chalk paint does not require sanding & priming before application; you can just paint it over existing paint. GF milk paint needs sanding, priming, or both, as the case may be before you apply; the primer serves as the binding agent between the GF paint and the substrate. It’s one of the reasons the general finishes paint sticks better to wood than chalk paint.
Yet, the priming and sanding bit is not absolutely needless for chalk paints! At times, the workpiece is too greasy and worn out to apply the chalk paint before sanding down and priming.
Is Milk Paint Good for Kitchen Cabinets?
 We prepare the food we eat in kitchens! Everything that forms a part of the kitchen or comes out of it must be free from substances that might lead to toxicity or food poisoning.
Painting kitchen furniture and equipment needs prior diligence on your side for safety. The paint type you use will impact the said safety, and so, is milk paint good for kitchen cabinets?
Yes! Milk paint is excellent for kitchen cabinets. The paint ticks all the checkboxes needed to fulfill the purpose in question; it protects the wooden cabinets, it improves the aesthetics of the kitchen, it makes the house wholesome, and it’s relatively harmless when consumed accidentally,
How to Paint Cabinets With Milk Paint
I’ve given a lot of information about milk paint up there; features, uses, pros, cons, and whatnot. This is the part where we do the actual painting so stay tuned as I guide you on how to paint cabinets with milk paint. Let’s get these hands dirty!
Requirements
- Milk paint powders
- Wood cleaner (clean slate, or Krud Kutter)
- Milk paint wax
- Mixing container
- Rounded tip paintbrush
- SurfPrep sander and foam abrasives
- Clean water
Procedure
First, remove all the detachable hardware from the kitchen cabinets.
Then, clean the surface with the wood cleaner; you can spray and wipe with a cotton cloth for convenience. Cleaning is vital because it enables the primer coats and paints to stick well.
Open the milk paint powders and pour them into a mixing container; you can mix two or more colors or use just one color according to your liking.
Add water to the milk paint powder(s) in the mixing vessel; use a mixing ratio of 1 part paint powder to one part water.
Note: Do not mix up the entire bag of milk paint powder with water in one go! Once you solvate milk paint powder, its shelf life is only two days.
Next, close the container tightly with a lid and shake thoroughly for 2 minutes to mix.
Let the mixture sit undisturbed for 15 minutes; this makes the mixture thicken up, and it also dissolves the powder to give a more consistent/homogeneous formulation.
During the 15-minute repose for the paint, attach the foam abrasives to the SurfPrep sander and sand the cabinets. I prefer SurfPrep sanding and foam abrasives because it enables you to sand superficially; you won’t eat much into the wooden substrate.
Alternatively, you can opt to hand-sand lightly with 220-grit sandpaper.
Sanding, in this case, is not meant to remove the existing paint! Its chief role is to roughen the finish a little bit so that the incoming milk paint has something to grasp. If you fail to sand, the new paint will easily chip off.
Remove the accumulated debris using a shop vacuum (commonly known as a shop vac) and wipe with a tack cloth.
Then, take the round-tip brush, dip it into the now ready paint and apply it to the workpiece. The significance of the round tip comes into play when you get to cabinet details like edges and recesses; a flat brush won’t cover all these.
Go back to the painted areas on your workpiece and paint again with longer brush strokes and more press. It balances out any color variations that might show up at the end of your project; these variations tend not to show when the paint is wet.
Also, watch out and catch any drips that may show in areas where you’ve applied too much paint; smooth over these drips with the brush.
Afterward, let the first coat dry for 3 hours. Meanwhile, wrap the round-tip brush in a plastic bag to prevent it from drying.
Then, apply the second coat of milk paint following the same procedure as the first. Let the cabinets dry again for 3 hours.
If you don’t want a distressed look, proceed to seal the painted surface with milk paint wax. But if you want a more distressed look, lightly scuff the surface using the SurfPrep sander and foam sanding pad. Then, vacuum off the dust using a shop vac, followed by wiping using a tack cloth.
When sealing with milk paint wax, redo the sealed areas with long brush strokes in the same direction to avoid brush marks.
Lastly, take a lint-free rag and rub off excess wax.
You’re good to go. You can now reattach the hardware and put the “brand new” cabinets into use.
Does Milk Paint Need a Top Coat?
A topcoat is a translucent or transparent film that’s applied over paint. The top coating comes among the last steps in painting, and it serves numerous roles.
When you look at modern paints, not all are top-coated; some are self-coating, while others are just left bare without a topcoat. In that respect, where does milk paint fall? And does it need a topcoat?
Milk paint needs a top coat, but it can still do without one. It requires a top coat for the following reasons:
- It protects the underlying paint from flaking
- To prevent the milk paint from washing off during cleaning
- It improves the luster of the milk paint
- It makes the milk paint more durable, especially in high-use areas like tabletops and cabinets
- To maintain the color tone of the milk paint
- It gives your surface a smoother finish
The following situations do not require a topcoat for milk paint:
- If you’re using the milk paint on interior surfaces: these do not need a top coat because the milk paint is sheltered from adverse environmental factors that wear down paint, e.g., rainfall, UV rays, and excess winds.
- If you want an antiquated look on your workpiece
- If you want your workpiece to have a distressed look
- If you’re not focused primarily on durability
- If you want a flat or low-luster sheen
What Is So Special About Chalk Paint?
The designation chalk paint, chalky finish, chalked paint, and related terms spark great curiosity and interest in prospective users. People always want to find out how this relatively new paint works, anything new it offers, what surfaces it suits, its affordability, etc. Therefore, what is so special about chalk paint?
The paint in question is special and unique in the following ways:
Drying time; The paint takes a remarkably short while to dry, around 40 minutes and 1 hour tops.
Sheen: It gives a low sheen finish (matte), making your furniture look unique and attractive.
Chippy/distressed look: It creates a chippy finish that makes the furniture appear old-fashioned but classy. Little wonder it’s used to restore antiquated works of art.
 Safeness and smell; The paint in question is non-toxic (eco-friendly) and odorless; isn’t this what we all wish for when using other paints?
Prepping: This paint doesn’t require surface prepping like other paints; simply lay it on top of the existing paint, and it will blend in seamlessly.
Ease of use: To be honest, chalk paint is the most straightforward and stress-free paint I’ve encountered in my painting experience. Plus, it’s so much fun using it that it’ll leave you longing for more paintwork when you’re done with your project. Has painting ever been this convenient?
Paint drips: The paints spread so very well and evenly that you’ll scarcely encounter drips.
Buy a Chalk Paint
Does Chalk Paint Scratch Easily?
As we’ve already discussed, chalk paint is suitable for distressing and achieving a vintage look. Does this mean chalk paint scratches easily?
If you compare it with other paints, chalk paint scratches and peels more quickly; but this is part of the art! The paint is meant to achieve a chippy, distressed look.
You’ll often find professionals and DIYers painting with a chalky finish and scuffing it a little bit afterward. It’s for the exact purpose of attaining that rustic charm appearance.
Conversely, the scoured nature of chalk paint becomes its pitfall when it goes overboard. This is even more profound when you need a more durable finish.
If you want a long-lasting, scratch-free chalk paint finish, you can do many things to achieve that. Read on to find the all-important solutions.
How to Keep Chalk Paint from Scratching Up Easily
In general, chalk paint is a weaker formula than the other paints, so it’s no surprise it is more inclined to scratch. In this segment, I’ll show you a few tricks on how to keep chalk paint from scratching up easily.
These are the solutions:
Chalk Paint Wax
Using wax is the simplest and quickest getaway from raspy chalk paint. The wax is strong, flexible, inert, and water-resistant; all these features constitute a formidable shield protecting the paint underneath from chipping off.
When applying the wax, use a wax brush for convenience; alternatively, you can use a cloth. The wax will slightly darken the paint, so be keen not to leave any parts of your workpiece paler.
If you apply too much wax, take a lint-free cloth and wipe off the excess. Just wipe lightly for a matte finish or wait for 24 hours for the wax to dry, then polish for a more shiny finish.
Applying More Coats
Applying more than one coat of chalky finish gives the paint additional structural strength on the substrate, lowering its propensity for scratching.
You can also use two coats of wax to seal the chalky paint.
Cleaning Frequency
Chalk paint is water-based! Frequent cleaning with soapy water weakens its adhesion to surfaces, exacerbating its already scratch-prone nature.
To reduce the cleaning frequency, ensure your workpiece is always in dust-free environments and handled with clean hands.
Surface Prepping
While it’s often the case that you don’t have to prep a surface before applying chalk paint, I hold the view that prepping determines the outcome of your finish.
If you want a durable, distress-free chalk paint finish, I recommend you prep by cleaning, sanding, and sealing/priming your workpiece before you get down to painting.
The prep work sets up your surface by increasing the bonding power and paint-substrate interaction. I should clarify that chalk paint still works on unprepared surfaces with reduced abrasion/scratch resistance.
Quality of Chalk Paint
This goes without saying; all good results are contingent on a class act input in the first! Chalk paint isn’t any different. Substandard chalky paints scratch and chip off at an unusually high magnitude and distort your furniture; this defeats the whole purpose of a rustic charm.
I advise you to use chalky finishes from recognized brands to avoid the misfortune I’ve just described above. These are some of the best brands of chalky paint products:
- Annie Sloan Chalk Paint
- Behr Chalk Decorative Paint
- KILZ Chalk Style Paint
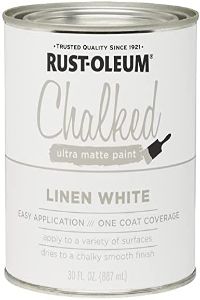
- Rust-Oleum Chalked Paint
- Retique It Chalk Furniture Paint
- Krylon Chalky Finish Paint
- Dixie Belle Chalk Finish Furniture Paint
Do You Need a Sealer Before Chalk Painting?
Sealers are applied on porous surfaces to make them leveled/non-porous; this avoids wastage of the incoming paint as it won’t soak into the substrate.
The sealer also functions as an adhesive medium between the paint and the wood underneath. That said, do you need a sealer before chalk painting?
Yes and No! The need for sealing before using chalk paint depends on the situation at hand. When your surface is greasy, warped, or overly porous, you’ll have to sand, seal, and prime it.
On the other hand, if there’s no severe damage to the workpiece or the surface is less porous, you can just use chalk paint over the existing paint.
Do You Need a Sealer Over Chalk Paint?
As I’ve said earlier, chalk paint has the dubious distinction of chipping off and giving a distressed look. It’s not entirely a negative attribute; some people like it that way. But what if your primary focus is a smooth and intact finish? Can you use a sealer over chalk paint?
Yes! If you want the chalk paint to last longer on your workpiece, seal it using an appropriate sealer or topcoat. The sealer is like a cover, and it dries to a hard film over the chalky finish.
I recommend this approach for those who don’t want the scoured/distressed appearance. There are numerous sealing agents, as I’ve shown you below:
The Best Sealing Agents for Chalk Paint
These are my picks of the most refined sealers for chalked paint:
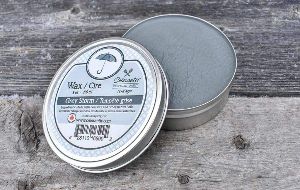
Wax
The wax is my go-to sealing agent for the paint in question. You can acquire one online or from local warehouses or hardware stores. You can apply the wax by brushing with a wax brush or using a cloth to rub it in.
If you want a lower-sheen finish like matte, apply the wax and just leave it; if you want a shiny finish, let the wax dry for 24 hours, then come back and polish it with a lint-free cloth. The waxes come in four primary colors, i.e., black, white, clear, dark/brown.
Pros
- It gives a smooth finish
- It has an excellent durability profile
- Wax forms a quasi-hard finish that’s perfect for showpieces
- Wax is water-resistant
- The finish is dust-resistant
- It won’t yellow over time
 Cons
Cons
- Waxes tend to darken chalk paint
- It takes longer to dry (24 hours); by contrast, chalk paint takes 40 minutes
Some of the best wax brands include:
- Annie Sloan Chalk Paint Wax
- Briwax
- Americana Decor Creme Wax
- Dixie Belle Best Dang Wax
- FolkArt Home Decor Wax
Polycrylic
This protective film is used as a sealant in woodworking projects; you can apply it as an undercoat or as a topcoat. The finish is water-based, so it matches up perfectly with chalk paint, which is also water-based. In this case, you need to let the chalk paint dry for 40 minutes, then apply the polycrylic.
This sealer protects the paint and furniture from damage by water, temperature variations, and repeated handling.
Pros
- It has a fast drying time, i.e., around 3 hours
- The sealer suits interior surfaces
- Polycrylic dries to a thin, hard film that’s good for high-traffic surfaces
- It’s scratch-resistant
- The polycrylic is easy to clean
 Cons
Cons
- The sealer is prone to brush strokes
The best brands of polyacrylics are:
- High-performance top coat
- Flat out flat
- Minwax polycrylic
- General Finishes Polyacrylic
Oils
Oils work best with milk paint but will make do with chalk paint. I recommend this as a last resort.
Pros
- It’s more durable
- Oils have good leveling properties
- It improves the luster of the chalk paint
- Oils are water-resistant
- It has excellent thermal expansion properties
Cons
- It takes a long time to dry (24 hours)
- It releases high levels of VOCs, which are harmful
- Oils are difficult to remove when doing makeovers
- It yellows over time
- Oils have a strong odor
Examples of oils used on chalky paint are:
- Miss Mustard Seed Hemp Oil
- FolkArt Finishing Oil
- Van’s all Natural Wood Finish
Glaze
A glaze is a translucent water-based coating that forms beautiful, decorative finishes like shabby chic, marbling, color washing, and burnishing. It’s used on top of chalky paints, milk paints, and water-based wood stains.
Pros
- It comes in a variety of colors
- It’s easy to remove or paint on glaze when remodeling
- Glazes are easy to apply
- It has a short drying time (30 minutes)
- Glazes are eco-friendly and harmless to humans
- It is relatively odorless
Cons
- The glaze is not durable
- It forms thin layers that barely protect the chalk paint on its bottom
- It washes off easily when cleaning
Examples of glaze include:
- Valspar Clear Mixing Glaze
- Krylon Triple-Thick Crystal Glaze
- Faux Finishing Glaze
- DecoArt Media Glaze
- General Finishes Water-based Glaze
How to Seal Chalk Paint
Most of the time, chalk paint requires a top coat to seal the surface from physical damage, heat-associated damage, water damage, and other damage.
There are different types of sealers, as we’ve seen above. From personal experience and clientele reviews, the best sealing agent is wax. I’ve set apart this section to show you how to seal chalk paint. Follow keenly, and you’ll be in the know.
Requirements
- Wax
- Wax brush
- Lint-free cloth
I prefer the clear one for the wax because it doesn’t hide the chalk paint underneath. It looks white in the container, but the coat is transparent upon application.
Procedure
First, ensure the chalk paint on your workpiece has dried adequately to receive the sealer.
Open up the wax sealer and rub/swab the wax brush in it.
Brush it repeatedly on the workpiece with long or short strokes, whichever suits you. Don’t put too much pressure on the brush when painting the wax; be gentle and easy.
As I’d pointed out earlier, the wax slightly darkens the paint. To stave off the darkening, go back with your wax brush and brush over areas with wax buildup.
Take the lint-free cloth and wipe the surface to remove excess wax. Let the wax sealer dry for 24 hours before using the furniture.
That’s all you need to do for a matte finish. If you want a lustrous finish, proceed as follows:
Let the wax dry for 24 hours.
Afterward, come in with a cotton cloth and polish the surface until the wax starts shining.
Conclusion
We’re done! You’re now good enough to differentiate milk paint from chalk paint in all their dimensions. To give you a rundown, I’ve highlighted their definitions, uses, similarities, differences, and all other aspects that matter—thumbs up for staying tuned and focused throughout the article.
All you’re left to do now is purchase and paint with delight, knowing that you are using the right paint and the correct procedure on your project.
Remember to disseminate this article and affiliated links widely so others can benefit; it’s always good to share good pickings.