Are you wondering whether you should paint driveway? Here’s what you should know!
Driveways are usually the quickest to weather because they get exposed to harsh outdoor conditions all year round.
On top of that, they catch fuel and oil spills regularly; therefore, they will chip and crack if you don’t give them the proper attention and protection.
When you hear anything concerning surface protection, painting is the first thing that comes to mind.
Painting protects surfaces and gives them a new and improved look, but will it work for a driveway? Can You Paint Over Driveway?
Yes, you can paint a driveway. Painting your driveway will prolong its life by slowing down chipping and cracking due to weather exposure.
Additionally, it will improve the visual appearance of your outdoors and make it easier to clean up the oil leaks and remove grease stains.
Remember, you will still use your driveway as usual even after painting, and the paint will still be exposed to harsh weather conditions.
Therefore you must select the strongest paint designed for the material used to construct your driveway.
I recommend using epoxy or masonry paints because they withstand harsh outdoor conditions better than regular paints.
You can also use a siloxane compound to coat the driveway without adding color.
This article will cover everything concerning painting a driveway, with a major focus on concrete driveways.
I’ll discuss the proper procedures for cleaning and painting the driveway and recommend the best products for the project.
I’ll also talk about the lifespan of a painted driveway and how much the project will cost.
But first, let’s define a driveway.
What Is a Driveway?
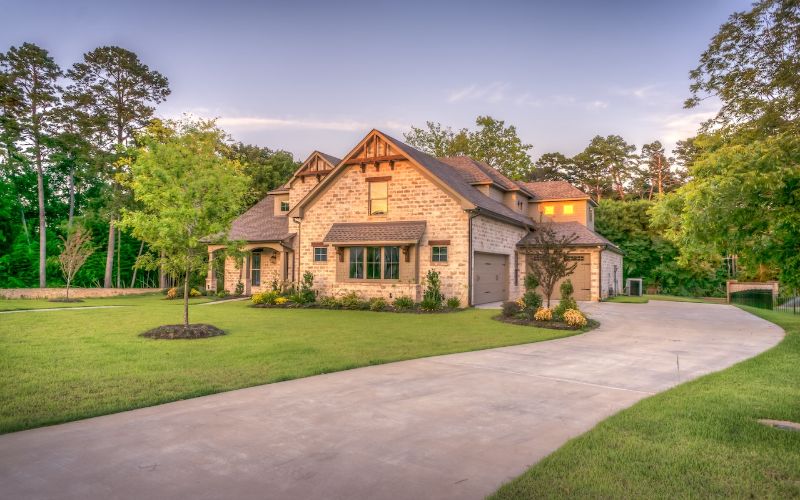
A driveway is a private path that leads from the main road to the front of a building or group of buildings.
People often construct them as trails to private garages, houses, carports, etc.
You can build a driveway using concrete, decorative brick, asphalt, gravel, cobblestone, block paving, and decomposed granite.
Driveways are usually designed to match the architectural style of connected buildings and houses.
Therefore, they are more of a decorative addition to the home’s exterior.
They also serve as an extra parking space if the regular parking or garage is full, thus keeping the main road clear for traffic.
Unlike public roads, driveways are owned and maintained by an individual or specific group.
For this reason, they are not snow-blown, resurfaced, or otherwise maintained by the government.
Additionally, they rarely have traffic lights, except those leading to commercial businesses and parks, because they tend to bear heavy traffic.
How Do You Clean Driveway Before Painting?
Cleaning your surface before painting is crucial because it will determine whether the paint will last or not.
When you start painting without cleaning, the dirt, debris, and grease will form a barrier between the paint and the surface.
As a result, the paint won’t adhere correctly, causing it to peel off too soon.
Even if the paint does not peel, it will bubble off different areas causing the finish to look ugly.
Knowing this, you cannot skip the cleaning step when painting your driveway because it is exposed to all kinds of dirt.
Moreover, you must do it thoroughly to remove all the dirt; otherwise, the paint won’t adhere in some areas causing your finish to look uneven.
So, how do you clean a driveway before painting?
Step 1: Move Your Vehicle Out of the Way
Before you start cleaning, you must ensure that there is nothing on the driveway that would hinder the process.
This means parking your car elsewhere for the project’s duration and moving planters aside to leave the driveway bare.
You can build a temporary shed for your items or ask a neighbor for parking space if they don’t mind.
Step 2: Remove Dirt and Leaves
Use a regular broom or a leaf blower to remove loose debris like twigs and leaves.
Push them to the driveway’s side, rake them into piles, and put them in a trash bag.
Do not leave the loose debris on the driveway side because the wind may blow them back, and you’ll be back to square one.
Also, ensure that you wear eye protection to prevent little specks from hurting you.
Step 3: Pressure-wash the Driveway
Sweeping removes the loose debris only, so you’ll need a pressure washer to remove stuck-on dirt.
For this step, ensure that you wear protective footwear with rubberized soles to prevent slipping.
- Hold the pressure washer with the nozzle pointing down at a 45-degree angle away from you.
- Turn it on, then spray down the driveway in side-to-side sweeping motions to clean it.
If you do not have a pressure washer, you can rent one from your local hardware store.
Alternatively, you can use a high-pressure garden hose to spray down and a stiff push broom to scrub the particularly stubborn dirt.
Note: Be careful when operating the pressure washer; only aim it at the driveway.
The high pressure can cause serious injury if you point it at people or damage things like paint if you aim at the side of your house.
Step 4: Remove Oil and Grease Stains
The pressure washer will remove stuck dirt, but it cannot eliminate oil and grease stains; therefore, you need a commercial degreaser to get the job done.
Manufacturers always label commercial degreasers as driveway cleaners, patio cleaners, or garage floor cleaners, and they are available online or at your local store.
- Pour the degreaser directly onto the stains and let it sit for 30 minutes, or as instructed on the product label.
- Next, use a stiff broom to scrub the stains until they come off, then rinse the driveway with a garden hose.
- Finally, allow the driveway to dry for 24 hours before proceeding.
How to Paint Driveway
After cleaning and drying your driveway, the next step is to prime and paint.
However, whether you prime and paint immediately will depend on the driveway’s condition.
You can paint a newly installed driveway or an old driveway in good condition soon after it dries.
On the other hand, you must repair an old driveway with cracks and dents before painting it for the finish to appear flawless.
The following is a step-by-step guide to repairing and painting your driveway.
If your driveway is in mint condition, you can skip the repair steps and jump straight to priming and painting.
Step 1: Repair Cracks on the Driveway
The cracks in your driveway will have some loose dirt and debris, which you must remove before filling them.
- Use a wire brush to eliminate the loose dirt from the cracks.
Move the brush along the gap length in long sweeping motions, ensuring you get to all the dirty spots.
If the crack has pieces of rock stuck in it, use a chisel and hammer to break them up before removing them with the wire brush.
- Once the cracks are clean, fill them with some repair caulk designed for the material used to construct your driveway.
- Squeeze some repair caulk into the crack, ensuring you overfill it slightly.
Overfilling will bring the caulk a little higher than the top of the crack, allowing you to spread it flush with the driveway.
- Use a putty knife’s edge to press the filler down until it lies even with the driveway.
If the compound is even with the surface, no one can tell where you did the repairs after painting.
- Allow the repair caulk to dry for 24 hours or as instructed on the product label before proceeding.
Waiting for 24 hours will allow you to add more caulk where needed before applying the paint.
But why would you need more caulk?
Sometimes, repair caulk shrinks as it dries, leaving the top of the crack open.
So if you had painted over wet caulk, the cracks would start to show up again as the caulk shrinks.
Step 2: Etch the Driveway
Acid etching is a must-do step, especially for concrete driveways.
It involves using a weakly concentrated acid to remove efflorescence from the surface.
Efflorescence is that white deposit of mineral salts that sits on the surface often caused by moisture moving up from the ground through the concrete.
If you paint over the efflorescence, the finish won’t turn out so well.
Acid etching also opens up the pores of the concrete.
It allows the primer to penetrate and block the spaces, preventing more moisture from coming up and causing efflorescence under the paint.
The three main etching products you can use are sulfamic acid, phosphoric acid, and muriatic acid (hydrochloric acid).
They have different strengths; therefore, you should select one based on your experience level.
- Sulfamic acid is the best for beginners and non-professionals because it is the safest to handle.
- Phosphoric acid is a little stronger, but beginners can still use it if they follow proper safety precautions.
- Muriatic acid is the most potent option, so I only recommend it to professionals or DIYers with enough painting experience.
Here’s how to etch the surface:
- Start by wearing acid-resistant rubber boots and gloves, a respirator to protect your lungs, and vapor-proof goggles for your eyes.
Also, wear full-bodied coveralls to protect your skin.
- Dilute the etching product as instructed on the label.
- Hose down the concrete to make it a little damp, but don’t let the water form puddles on the driveway.
Ensure that the concrete remains damp throughout this step to prevent the acid from drying on the surface.
- Sprinkle the diluted acid onto the driveway, then spread it with a push broom.
- Wait 10 minutes for the acid to lift off the efflorescence and etch the surface.
Afterward, rinse thoroughly with a hose before the acid dries.
If you leave the etcher on the surface for more than 10 minutes, you will destroy the concrete.
- After that, neutralize the surface with a mixture of baking soda or household ammonia and some water to prevent further reaction from the acid.
Pour the mixture on the surface, scrub it in, then rinse the driveway thoroughly with a garden hose.
- Allow the driveway to dry for 24 more hours before proceeding.
Note: Only use the acid etchers on concrete or brick driveways.
If you use it on an asphalt driveway, the acid will soften its binder system and eventually erode the material.
Step 3: Prime the Driveway
Tape off the sides of your home and the garage door to protect them from accidental paint splatters.
Afterward, use an acrylic or epoxy primer to seal the concrete’s pores and improve the paint’s adhesion to the driveway.
Step 4: Paint the Driveway
- Pour a little amount of masonry or epoxy paint into a paint tray.
Keep the main paint container close so you can reach it easily whenever you need to refill the paint tray.
- Use a masonry paintbrush to cut in the edges of the driveway.
I recommend masonry brushes instead of standard paint brushes because they are stronger and can withstand the rough texture of driveway materials.
- Next, use a roller to cover the rest of the driveway.
Ensure that you work in manageable squares, and maintain a wet edge to prevent lap marks from showing.
Also, start painting from the furthest point from the exit, working your way back to avoid stepping on wet paint.
- Allow the first coat to set for the time recommended on the product’s label before putting on a second coat.
You can walk on the driveway with bare feet after 24 hours and 72 hours to walk with your shoes.
However, you should wait seven days before driving on the freshly painted driveway to avoid lifting the paint.
Here’s a Video On How to Paint Driveway:
How Long Will a Painted Driveway Last?
A new, well-constructed driveway typically lasts 25-30 years without paint.
After painting, the lifespan increases by 5-10 years, depending on the quality of paint used and whether you followed the proper painting procedure.
Therefore, a painted driveway can last up to 40 years if you build and maintain it properly.
The times mentioned above are accurate estimates, but they are not set in stone.
You can take a few measures to extend the life of driveway paint, thereby increasing the service life of your painted driveway.
Most of these measures involve choosing the correct paints and maintenance products.
I’ll discuss them in depth to make the information clearer.
How to Make Driveway Paint Last Longer
-
Use High-Quality Paint
Paint quality is the most significant determinant of how long the finish will last on the driveway.
The higher the quality, the longer the paint will last.
Low-quality paints lack the necessary features to resist damage caused by impact and extreme weather conditions.
Hot tires lift them quickly, and aggregates like sand and gravel clinging to the tires will grind off the finish in a matter of weeks.
If you want your driveway finish to last for years, I recommend that you use masonry or epoxy paint.
These products are designed to withstand harsh outdoor conditions and dry into hard coats that won’t chip or peel off easily.
-
Apply No Less Than Two Coats
A single coat of paint may look okay on your driveway, but it will be too thin to offer lasting protection.
A thin coat of paint will crack and lose its color faster.
It won’t be able to stand up to the weight of the vehicles you drive on it, so it will chip off and expose the driveway material.
You should apply at least two coats of paint or even more if you want the layers to be thick.
Ensure that you apply each coat thinly and build up slowly until you are satisfied with the results.
Slowly building up the layers will allow the paint to dry properly and firmly, thus guaranteeing lasting protection for your driveway.
-
Avoid Using De-icing Chemicals
De-icing chemicals such as rock salt, calcium chloride, and ammonium sulfates perfectly remove snow and ice from the driveway during the cold seasons.
However, using them regularly or in large amounts can cause irreversible damage to your driveway.
For instance, if you have to de-ice your driveway every day because of heavy snow storms, some chemicals you use will remain on the surface.
After a while, the chemicals will build up and start eating away at the driveway paint.
Consequently, the paint will lose its strength and start chipping away, exposing the material underneath.
If you must melt ice on your driveway, I recommend using mild homemade mixtures such as hot water and vinegar or water and rubbing alcohol.
These combinations will melt the ice slowly, and you may have to shovel some of it manually.
However, they won’t affect the paint on your driveway.
Best Paint for Concrete Driveway
As we know, a driveway experiences the worst of all the worst environments.
It is exposed to all sorts of weather conditions, and above all, you drive and park on it daily.
So, when you decide to paint your driveway, you must ensure that you select a product that can withstand all those conditions without chipping or peeling.
Since there is an abundance of concrete paints on the market today, it can be a little challenging to know which one is best.
Therefore, I tested a couple of products and narrowed them down to the three best paints that would be perfect for your concrete driveway.
However, before I discuss the products on my list, I want to share the features I considered during my tests.
Things to Consider When Selecting Concrete Paint
Here are some of the key things to put under consideration:
-
Maintenance
While all concrete paints need maintenance, some require more care than others.
Therefore, always check the product’s label to see what kind of maintenance it requires, then determine whether it fits your lifestyle or not.
Some paints require regular waxing and polishing to keep them looking fresh, while others only need a good cleaning.
So, if it’s hard to fit a regular driveway clean-up into your schedule, you should go for a low-maintenance paint.
-
Finish
Concrete paints come in various finishes, including matte, satin, and gloss.
Whichever finish you choose will depend on personal preference or whatever matches the finish of your home’s exterior.
I recommend a satin finish for your concrete driveway for two main reasons.
First, it offers the durability of gloss paints without the extreme glare of a glossy finish.
Second, it hides surface imperfections like matte, which is a bonus for your curb appeal.
-
Durability
Most concrete paints require a retouch after a minimum of five years.
However, some paint manufacturers have created formulas lasting more than five years as long as you properly clean and prime the surface before painting.
So, again, check the product’s label to get an idea of how long the paint will last after application.
Rust-Oleum® Concrete & Garage Floor Paint + Primer
The Rust-Oleum® Concrete and Garage Floor Paint and Primer is a product designed for interior and exterior surfaces.
It comes ready to use, so you won’t waste time thinning it before applying.
This paint is an advanced acrylic formula that is strong enough to resist damage from motor oil, hot tires, grease, and gasoline.
Moreover, the resulting coat is hardwearing; thus, it can resist cracking and denting and won’t peel off too quickly.
Another great feature of this formula for driveways is its UV and weather resistance.
Its color won’t fade due to constant exposure to the elements, thus saving you the time and money you would have spent on repainting.
 This Rust-Oleum® formula boasts of being paint and primer in one.
Paint+primer means that one coat is enough to achieve a good finish.
You won’t have to prime the surface beforehand.
However, from my tests, I recommend priming first to ensure that the paint adheres to the concrete and remains there for years.
A gallon of this paint can cover approximately 350 square feet of smooth concrete.
However, if your driveway has rough material, you may need more than a gallon.
Furthermore, tool clean-up is easy with water and a mild detergent as long as you do it soon after finishing the project.
Pros
- It comes ready to use; therefore, no thinning is required.
- It resists lifting by hot tires.
- It resists staining from motor oil and grease.
- It does not fade from UV exposure.
Cons
The product says it is a paint and primer in one, but it weathers like any other paint if you don’t prime the surface first.
Check Latest Price
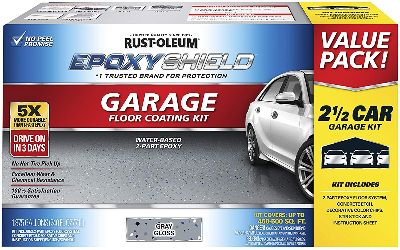
Rustoleum EPOXYSHIELD® Concrete and Garage Floor Coating
The EpoxyShield® Water-based Epoxy Garage Floor paint is a water-based epoxy coating designed for finishing new concrete surfaces or old concrete in pristine condition.
It is a two-component epoxy that is five times stronger than the numerous one-part epoxies on the market today.
This product is perfect for driveways because its coat is strong and durable.
It resists scratches and dents easily, and you won’t have to worry about hot tire pick-up.
It is also highly resistant to fading caused by UV exposure and protects the concrete from motor oil and antifreeze damage.
 This formula dries to the touch in 12-16 hours, but you must allow it at least 24 hours before subjecting it to regular foot traffic.
It is drive-on ready in three days, which is very little compared to other outdoor concrete paints.
Pros
- It is a 2-part epoxy; hence it is stronger than most paints.
- It resists UV and weather damage.
- It is ready to drive on in less than a week.
- It resists hot tire pick-up and staining from motor oil.
Cons
- It only functions properly on freshly poured concrete or concrete in good condition.
- You need lacquer thinner to clean your work tools.
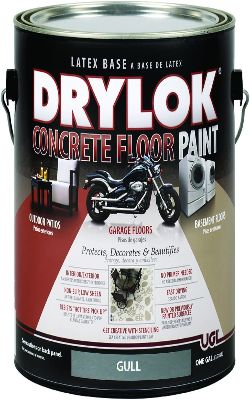
Drylok Concrete Floor Paint
The Drylock epoxy floor paint is a unique formula fortified by the advanced epoxy ester resin, guaranteeing extra durability and protection.
Being a one-part epoxy paint, it combines the unique strength of acrylic epoxy and the ease of ordinary paint application.
This product goes smoothly on surfaces like regular house paint while leaving a gorgeous semi-gloss finish.
Moreover, there are no strong odors to compromise your health or complicated mixing instructions before use.
This floor paint is known to have one of the highest levels of water resistance.
Its waterproofing feature can withstand heavy downpours of rain or snow, making it ideal for driveways.
It is also UV resistant, ensuring the color remains bright against the sun and constantly changing weather conditions.
The durability level of this product makes it one of the best choices when you want extreme protection for your concrete driveway.
 It resists damaging chemicals, gasoline stains, grease, oil, and hot tire pick-up.
You can cover 300 to 400 square feet of concrete with one gallon of this product.
Furthermore, it dries up within 4 hours, much quicker than most concrete paints.
Pros
- It resists chemical damage.
- It resists hot tire pick-up
- It dries quickly
- It is highly water-resistant
Cons
- Even though it dries quickly, you still need to leave it on for more than one week before driving on it. Otherwise, the paint will stick to your vehicle’s tires.
Do I Need to Prime Concrete Driveway Before Painting?
Yes, you do. Priming is the essential first step when painting concrete or any masonry surface.
It improves the paint’s bond to the concrete and provides a neutral color to paint over.
As a result, the paint finish will last longer, look better, and resist peeling for years.
Furthermore, a primer will allow you to achieve full coverage of your surface with fewer coats of paint.
One of the biggest causes of paint problems on concrete is efflorescence, the white powdery deposits that form on concrete and other masonry surfaces.
These deposits form when moisture rises from the ground below, carrying dissolved minerals from the soil and concrete.
Upon reaching the surface, the moisture dissolves, leaving behind a salt deposit, the white powder you see on concrete.
If you paint directly over this powder, the paint won’t stick, leaving you to deal with peeling issues in the future.
As usual, there are two ways to deal with any problem.
You can contain it after it happens or prevent it from happening in the first place.
In the case of efflorescence, you can remove it with an acid etch before painting or prime your new concrete to prevent it from forming.
But how does primer prevent efflorescence?
The moisture rises quickly through concrete because of the numerous pores on its structure.
So when you apply a primer, the product seeps into the pores and blocks them, preventing moisture from rising from below.
As a result, no more efflorescence.
Even though priming is essential, it does not mean you can purchase any primer and use it on your concrete driveway.
You must select products designed specifically for use on concrete surfaces for the best possible results.
You can use three types of concrete primers, depending on what you require for your project.
These are epoxy primers, polyurethane primers, and acrylic primers.
- Epoxy concrete primers are the most durable choice because manufacturers formulate them using only resin and hardeners.
You must measure equal proportions of the two components and mix them before applying them to the concrete.
However, there are some isolated cases where manufacturers create one-part epoxy primers.
These products come already mixed in the exact proportions needed, eliminating that mixing part of the process.
The formulation of epoxy concrete primers is powerful, allowing them to resist chemical attacks and other damaging work environments.
Therefore, They work best in industrial and commercial settings.
- Polyurethane primers, aka cementitious urethane primers, contain a portland cement element similar to the one used in concrete.
They differ significantly from the standard high-performance urethane topcoats and thin-film polyurethane clear coatings.
These primers expand and contract simultaneously with the concrete as weather conditions change, thanks to the Portland cement elements.
For this reason, they keep up their strong bond with the concrete all year round.
Moreover, they are more moisture tolerant making them ideal for preparing concrete surfaces in consistently damp areas such as food-processing plants.
- Acrylic primers are the most popular and affordable products on the market.
They are popular because they absorb into the concrete, sealing and bonding with it to create the perfect surface to paint.
As you shop, look for acrylic primers specified as “masonry” because manufacturers design them to prep concrete surfaces for painting.
They prevent lime burn, efflorescence, and discoloration, which are the most prominent issues with concrete surfaces.
How Much Does It Cost to Paint Driveway?
The cost of painting your driveway will range between $800-$1000; however, these figures could go higher or lower depending on a couple of factors.
Therefore, you must understand the full scope of the work required to determine a price specific to your driveway.
The three primary factors that will determine the overall cost of your project are:
- Size of your driveway
- Type of paint used
- Type of labor used (Professional/DIY)
Let’s look at each factor in depth to help guide you as you plan your project.
-
Size Of the Driveway
Professional painters often charge by square footage; their average rates range between $2 and $4.
These rates will vary based on the driveway’s condition and your home’s location.
If you want to know the total size of your driveway, start by measuring its length and width in linear feet.
Afterward, multiply the measurements to get the total square footage.
-
Type of Paint
The paint you select for your driveway will make or break your project.
In the case of driveways, the ideal paints are either epoxy or acrylic masonry paints.
Epoxy paints are hardwearing, and their superiority reflects in their cost.
You can find a gallon of quality water-based epoxy paint at $40 or $50, although some brands cost up to $70.
On the other hand, the cost of a gallon of acrylic masonry paint ranges from $20-$40.
So, if you choose epoxy paint, the price will e a few dollars higher than if you use masonry paint.
-
Type of Labor Used (Professional/DIY)
Professional painters often charge by the hour for their services, although you may find a select few that charge by the project.
The average cost per hour will range between $30 and $60, depending on your selected local service company.
If you hire professionals outside your area, you will have to include extra transportation costs, adding to their overall charges.
You can reduce the labor costs by painting the driveway yourself, but it will take you longer to finish the project.
Moreover, achieving the results that a professional painter will deliver on your own is pretty challenging, especially if you’re still an amateur.
Conclusion
Not only does a driveway provide parking space, but it also adds to your home’s curb appeal.
Like every part of your home’s exterior, the driveway gets exposed to various damaging elements, including harsh weather and UV rays.
As a result, it shows signs of wear much quicker.
To prevent signs of wear, you must protect your driveway, and painting is the first thing that comes to mind for most people. But.
Can You Paint Driveway?
Painting over your driveway is the best way to protect it from the elements and improve its appearance.
Furthermore, it will make cleaning up oil leaks and grease stains easier.
The best paints to use over your driveway, especially concrete driveways, are masonry and epoxy paints.
They can withstand extreme outdoor conditions without cracking, chipping, or peeling off.
They also retain their color all year round despite the constant UV exposure.
Before applying the paint, you must ensure that the driveway is clean and free from debris and grease.
You must also acid-wash the surface to remove efflorescence, then prime it to promote paint adhesion.
Thank you for reading this article, and I hope it will help you in your attempts to paint your driveway.
If you need clarification or have any tips to share from personal experience, feel free to reach out in the comments below.