Can I Use Concrete Primer On Wood? You are probably asking yourself this question especially if you have what could possibly be an alternative to wood primer like a concrete primer.
It’s not unusual to find it wasteful- to purchase fresh coating products to do minor paint repairs. And rightfully so, you would want to look for leftover products from previous projects that may work well for your new project.
Many argue that primers are the same and would work effectively regardless of the surface they are meant for, though that is not necessarily the truth, most primers are versatile. The versatility aspect of primers takes us back to our topic of discussion, Can I Use Concrete Primer On Wood?
You can use a concrete primer on wood, but not all concrete primers will produce good results. Acrylic concrete primers are the best alternative because they are versatile and economical.
It is easy to apply them on wood, and they remain flexible for more extended periods; therefore, you don’t have to fret about them cracking over time. Furthermore, they dry quicker than other types of concrete primers.
The epoxy concrete primers will provide a durable seal, but they are too rigid to expand and contract with the wood. They would crack faster, affecting the longevity of your color even if you used the best paint for wood.
Polyurethane concrete primers are flexible enough to expand and contract with wood but only to a degree. They contain a bit of portland cement in their formula; hence they move much slower than wood and eventually crack from the contrasting movement.
This post discusses different aspects of concrete primer and its versatility and application to different surfaces in this case wood. Keep reading for more information on the subject of discussion.
What Is Concrete Primer
 Concrete primer is the preparatory coating applied on concretes before concrete painting. It lays the proper foundation for painting and improves paint adhesion to give you a uniform finish for your surface.
Moreover, concrete primers cover stains and other marks that would otherwise show through paint and ruin your finish.
There are three main types of concrete primers you can choose from depending on what you need for your project. These are acrylic primers, epoxy primers, and polyurethane primers.
- Acrylic Primers are the most popular on the market, and I highly recommend that you make them your default primer whenever you paint concrete. They quickly absorb into concrete, sealing all pores and bonding with the substrate to create the perfect surface to color.
When shopping, look for acrylic primers labeled as “masonry.” Manufacturers design these products specifically to protect concrete surfaces against lime burn, efflorescence, and discoloration. You can use them on new unpainted concrete indoors or outdoors.
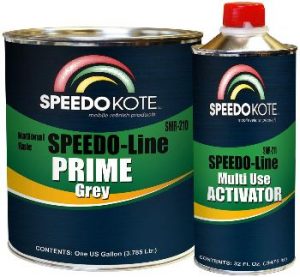
- Epoxy Concrete Primers are the most durable products on this list because their formulation mainly consists of resin and a hardener. Some manufacturers package their products with the exact ratios of resin and hardener needed for a single application. However, you have to measure the resin and hardener proportions yourself most of the time before you start priming.
The formulation of epoxy primers allows them to resist chemical attacks and other nasty work environments. Therefore, I recommend using them on concrete in industrial and commercial settings. Furthermore, I recommend using these primers before applying one-part epoxy paints on concrete for DIY projects.
- Polyurethane Primers are also known as cementitious urethane primers. They contain a portland cement component similar to the one used in concrete. As a result, they are different from the standard thin-film polyurethane clear coats and high-performance urethane topcoats.
Thanks to the Portland cement components, these primers expand and contract at a similar rate with concrete. Therefore, they maintain their strong bond with the surface even when exposed to drastic changes in temperature.
Unlike the other concrete primers, polyurethane primers are moisture tolerant; therefore, you can use them to prepare floors in consistently damp areas, such as food processing plants.
Concrete Primer Vs. Wood Primer
In this section, I’m going to shed more light on the similarity, differences, pros, and cons of concrete and wood primers. With this information, you will be better placed to know when and where to use each formula.
You will also be able to tell when to use a respective product as a substitute for the other.
Similarities
- Both concrete and wood primers are porosity-filling primers. They seep into the tiny pores on the substrate, filling them to provide a smooth and even surface to paint. Additionally, filling the pores prevents paint and other subsequent coating products from seeping into the substrate.
- Both types of primer are flexible. Manufacturers formulate them to expand and contract with their substrates when the temperature changes drastically.
- Both wood and concrete primers promote the adhesion of coatings to the substrates, and they do that by sticking to the surface better than the paint would. They act as a magnet between the paint and the substrate to ensure that the color does not peel or chip quickly.
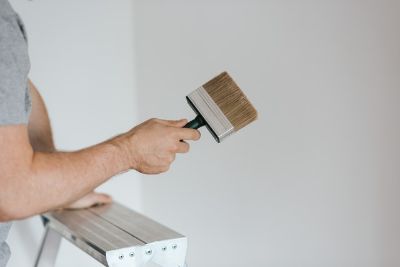
- Both types of primer are best applied using a brush to ensure accurate application and proper adhesion. Furthermore, you can use a paint roller to cover a wider area and achieve similar results.
Differences
- Concrete is often damp, so manufacturers formulate their primers as water-based or make some of them withstand application on moist surfaces. On the other hand, it is best for wood to remain dry to function at its best. Therefore, most of the best wood primers are oil-based or acrylic-based to keep moisture out completely.
Pros of Concrete Primer
- Some versions of concrete primers can stick to damp surfaces. These primers come in handy when contractors need to finish a project faster, and there’s no time to allow the concrete to cure fully.
- On top of improving paint adhesion, some concrete primers form a chemical bond within the concrete, thus keeping the structure durable for longer.
- Concrete primers are flexible; hence they move with the concrete as temperature changes. This allows them to maintain their bond with the surface ensuring that subsequent coatings do not crack or chip.
Cons of Concrete Primer
- Concrete primers are not versatile because manufacturers create them to suit the specific needs of concrete surfaces before painting. Even though you can apply concrete primers on some substrates, they will not perform as well as they perform on concrete.
Pros of Wood Primer
- Wood primers are versatile; hence you can use them to prepare several surfaces before painting – except metal. Metal surfaces are highly reactive and require specialized primers to prevent rusting.
- There are spray versions of wood primers that are best for small projects, and you can use them to finish your tasks faster. Furthermore, they produce smoother results than brushes and rollers.
- Wood primers expand and contract with the wood as the structure shifts with temperature changes.
Cons of Wood Primer
- There are no versions of wood primer that can stick to damp surfaces; therefore, you must ensure that your substrate has no moisture for them to work correctly.
- Wood primers only promote the adhesion and smoothness of a paint job – they do not form any chemical bond with the wood to boost its lifespan. You need to ensure that you follow all correct application procedures when applying wood primer so that the subsequent protective coatings may work adequately.
Concrete Primer Vs. Automotive Primer
 In this part, I’m going to give a comparison between concrete and automotive primer: Let’s have a look:
Similarities
The main similarity between concrete and automotive primers is functional. They both promote the adhesion of paint to their specific substrates and make the surface uniform to achieve optimal paint results.
Moreover, they provide further protection of the surface material when coupled with a quality top coat.
Differences
- Automotive primers have some filling properties. They flow into all the minor dents and scratches in car bodies, filling them to make the surface uniform.
On the other hand, concrete primers cannot fill the cracks and holes in concrete. You have to repair all the gaps with concrete filler before applying concrete primer for the surface to be uniform.
- Automotive primers have a runny consistency; hence you will need a paint sprayer to apply them correctly on surfaces. Moreover, the sprayer that you use has to be professional-level to deliver the paint evenly on the surface.
Alternately, concrete primers have a thicker consistency; hence you will achieve a more uniform coverage using paintbrushes or rollers. If you want to use a sprayer, you can thin them; however, getting the correct consistency is hard, so I recommend sticking to brushing and rolling.
- Automotive primers dry into a rigid film that keeps the body of cars safe from mechanical damages. On the other hand, concrete primers are more flexible to move with the surface as it expands and contracts. This feature allows them to maintain their bond with the substrate despite the constant temperature shifts.
- Automotive primers are more expensive compared to concrete primers. Vehicles require more rigid protective coatings, so manufacturers use pricey quality ingredients to make them. These ingredients are what make auto primers costly.
Pros of Concrete Primer
- They produce optimal results using paintbrushes and rollers. These tools give you better control of the task, and you will waste very little product.
- Brushes and rollers lift a lot of product from the container; hence they leave thicker coats. You will only require one or two coats of concrete primer to achieve great coverage.
Cons of Concrete Primer
- Concrete primers lack filling properties; hence you need more time to perform repairs before priming.
- Their thicker consistency makes them take a long time to dry properly.
Pros of Automotive primer
- They have filling properties, saving you time that you would otherwise need for repairs.
- Their runny consistency allows them to dry quickly between coats.
Cons of Automotive Primer
- The best way to apply them is by spraying, but it is very wasteful. A lot of the product will end up on surfaces other than the one you intend to paint.
- Runny consistency means they produce thin coats; therefore, you will need several layers of primer to achieve optimal coverage.
Concrete Primer Vs. Glass Primer
Let’s dive into the comparison between concrete and glass primer:
Similarities
- The primary similarity between concrete and glass primers is functional – they both promote paint adherence to surfaces and ensure the durability of the color.
Differences
- Most glass primers on the market are latex-based; therefore, they contain low volatile organic compounds. On the other hand, only acrylic concrete primers have low VOCs. The alternative types – epoxy and urethane – have many VOCs; hence they produce toxic fumes and odors as you use them.
- Most glass primers are bonding primers; therefore, they are highly viscous. Concrete primers also have a thick consistency, but they flow more easily than glass primers.
- Concrete primers work by filling the pores in the concrete to create a leveled surface to paint. Alternately, glass primers act as a magnet
between the paint and the glass to foster a bond between them. They adhere to the slick glass material giving the paint a better surface to grip.
Pros of Concrete Primer
- Since concrete primers flow more quickly, they are easier to lift and spread with brushes and rollers.
- Concrete primers are more affordable.
Cons of Concrete Primer
- The best concrete primers are not environmentally friendly because they contain high VOC levels.
- When using a concrete primer, you need to use a topcoat compatible with the type of primer you have. For example, if you choose an epoxy concrete primer, you must use epoxy paint to achieve optimal results.
Pros of Glass Primer
- Glass primers are environmentally friendly because of their low VOC levels.
- You only need to apply one coat of glass primer because it is super dense.
- Glass primers can accommodate any topcoat you choose – there is no need to match products to achieve great results.
Cons of Glass Primer
- The thick consistency of glass primers makes them difficult to apply. It is challenging to lift and spread them on surfaces with a brush.
- Glass primers are hard to find in local stores. You may need to pre-order them online days or weeks before you begin your painting projects.
- Glass primers are costly.
Epoxy Primer Vs. Self Etch Primer
Here’s the comparison between these two primers:
Similarities
- Auto repairers use epoxy and self-etch primers to prepare car bodies for painting. They provide corrosion protection and promote paint adhesion to bare metal. Moreover, you can top-coat them with a primer surfacer after a short drying time.
Differences
- Epoxy primers are twp part products – they come as a resin and hardener, which you must mix before applying it on the surface. On the other hand, self-etching primers are single products – manufacturers pre-mix all their ingredients, so they come ready to use.
- You can paint directly over epoxy primers because it provides enough corrosion protection by themselves. On the other hand, self-etching primers cannot slow down corrosion for a long time; therefore, you must put another high-build primer over them before painting.
- You can put auto body filler over epoxy primer; hence auto body repairers prefer using them when fixing extensive vehicle damages. Self-etching primers are best left for minor auto-body repairs because you cannot put the auto-body fillers on them.
Pros of Epoxy Primer
- Since you can put auto filler on top of epoxy primer, you don’t have to worry about your vehicle rusting as you do extensive repairs.
- You can leave epoxy primers uncoated for a long time without the risk of rust forming.
Cons of Epoxy Primer
- Epoxy primers are costly because they come as two co-dependent products.
- You must sand/roughen the bare metal before applying epoxy primers because they function by forming a mechanical bond with the metal.
- Epoxy primers take longer to cure.
- Epoxy primers take longer to apply because you need to sand the surface and mix the ingredients before application.
Pros of Self Etch Primer.
- Self etch primers require minimal surface preparation before application.
- They dry quickly.
- They are quicker to apply because there is no mixing of ingredients before application.
Cons of Self Etch Primer.
- You have to repair bare metal before applying self etch primers. For this reason, they are best for smaller repair jobs to minimize rust formation.
- The acid in self-etch primers sometimes causes paint problems like lifting and bubbling.
How to Apply Concrete Primer On Wood
- Start by sanding the wood with 100 grit sandpaper to roughen the surface and raise the wood grain to give the concrete primer something to grip. Ensure that you scuff along the wood grain, not across.
- Next, vacuum the sanding dust off the wood and wipe the surface with a clean cloth to ensure no dirt remains. It is essential to remove all the dust, or else it will interfere with the adhesion of the primer, causing it to lift off the surface sooner.
- Open a tin of concrete primer, then use a wooden stick to stir it carefully until it reaches a uniform consistency. Afterward, pour some primer into a paint tray or a separate paint container.
- Dip a paintbrush in the primer, then wipe off excess product on the side of the container. It is necessary to remove excess product from the brush because too much product will produce thicker layers that take too long to dry. It is better to apply several thin layers than one thick layer that will cause future paint problems.
- Apply the primer along the wood grain, ensuring that you spread it evenly over the surface. You can run the paintbrush across the grain to distribute the product; however, ensure that you finish by rerunning the brush along the grain to achieve a smooth, uniform finish.
- Allow the concrete primer to dry for a few hours before proceeding. Most primers dry to the touch within 2-8 hours, but I recommend following the suggestion on the manufacturer’s label for best results.
- Once the first coat dries, sand it with 180-grit or 220-grit sandpaper along the wood grain. If the wood grain is still visible, apply another coat of concrete primer following the same steps as you did for the first coat.
Here’s a Video On Concrete Primer Application:
Can I Use Any Primer On Wood?
You cannot use just any primer to prepare wood for painting. Different wood primers have different properties that make them unique and suitable for some situations more than others.
It is best to understand these unique properties to choose a primer that will work best for your project.
There are three main types of wood primers – water-based primers, oil-based primers, and shellac primers.
Water-Based Primers
Water-based primers have the thinnest consistency of the three. They are easy to mix and spread on the wood, but you will require 2-3 coats to get full coverage.
These primers dry the fastest, and often you can recoat them within one or two hours. You can manage to prime your wood and apply at least one coat of paint within one day, making them the most efficient products if you need to finish a project faster.
Water-based primers have the lowest concentration of VOCs dissolved in them, so they are the most environmentally friendly products on this list. Even though they do not produce harmful fumes, I still recommend using them in well-ventilated spaces.
These primers usually don’t require sanding between coats because they are so thin. However, I recommend using fine-grit sandpaper to sand them for the best results.
Best Used On:
- Interior wood surfaces
- Hardwoods such as oak and mahogany
Oil-Based Primers
Oil-based primers are much thicker than water-based products. They are also easy to apply and don’t require much effort to get full coverage.
On the downside, these primers take longer to dry and may need up to 24 hours before you can safely sand and recoat. However, some manufacturers formulate “fast-drying” oil-based primers that you can recoat in as little as two hours.
These products have high VOC concentrations making them less safe to use than their water-based counterparts. They produce toxic odors and fumes, so you will have to wear protective gear, including a respirator mask to shield you from the fumes.
Furthermore, always ensure that you use it outdoors or in a well-ventilated room.
Best Used On
- Exterior wood surfaces
- Softwoods such as pine and cedar
- Bare wood
- Previously painted wood
- MDF
Shellac-Based Primers
Shellac primers have the thickest consistency of all three primers. It takes little effort to acquire full coverage, usually requiring only one coat.
Because of their density, they take almost as long as oil-based primers to dry; therefore, you may have to wait for a full day before painting over it.
These primers have the highest VOC concentration; hence you will have to wear protective gear whenever you use them. You will also need to have plenty of ventilation in your work area or work outside if the pieces you’re painting are movable.
Shellac primers provide the best coverage for stains and odors and produce the best results when changing colors on previously painted wood.
Best Used On
- Exterior surfaces
- Stained woods
- Woods that produce tannins
- Previously painted woods
- Softwoods
- MDF
What Happens If I Don’t Prime Wood Before Painting?
Here are some of the effects of not priming your wooden structure before painting:
-
The Paint Will Peel
One of the primary functions of primers is to enhance the adhesion of paint to the wood’s surface. If you skip the primer, the paint coat will lift off the wood and start to peel in a short while. The peeling may begin before the paint dries to the touch or a few months after it has cured.
-
You Will Use More Paint
Wood is a porous material, so we apply primers to prevent it from absorbing water. When you paint without priming, the wood will soak up the moisture in the paint along with the pigment that gives it color.
As a result, you will have to apply more than the usual two coats of paint to achieve the exact color shade you want for the surface.
Even if you achieve the color you want, some spots on the wood will still appear more washed out than others. Moreover, the more layers of paint you apply, the thicker the coat becomes, making it easy to peel off the surface.
-
Stains and Wood Tannins Will Bleed Through the Paint
Some woods like redwood and cedar produce tannins that will bleed through paint and ruin your finish. You will never achieve a decent paint job without a primer to block them, no matter how many paint coats you apply.
-
It Will Be Hard to Revert to the Natural Wood’s Look
Sometimes painting wood is just a method of decorating it temporarily. After some time, you may crave the brown look of natural wood, so you will have to strip the paint to expose the bare wood.
If you didn’t prime the wood before painting, this task would be impossible because the paint will have soaked into the wood grain, tainting the natural look of wood.
What Happens If You Don’t Paint Over Primer?
If you don’t coat primer with paint, your surface will incur several damages and stains that may be impossible or hard to remove. For instance, if your surface is in an area with a lot of moisture, it will get water damage.
The reason is that the primer cannot prevent water and other damaging elements from getting to the surface.
The smell of smoke can also stick on the surface, especially if it is near the kitchen or in a smoking zone in your home. Pet odors may also cling to surfaces like walls, making your space smell terrible.
Additionally, primer is stickier than paint, so if you leave it uncoated, dust particles and other small debris in the atmosphere will cling to it, making the surface look dated. Furthermore, the particles will interfere with the adhesion of paint when you finally decide to coat the primer.
How Long Can You Leave Primer On Without Painting?
The longest you can leave primer unpainted is 30 days. After that period, the primer coat will begin to break down, and dust and other particles will cling to it. If you wait for more than 30 days, you will have to prime your surface again.
I recommend that you paint your primer as soon as it dries to the touch – that is in like 2-3 hours. If you are coloring a large surface like a wall and feel too tired to paint immediately, you can leave it bare for an entire day.
You can also safely leave some primers bare for up to one week without severe consequences, but it is not the best option if you want to achieve optimal paint results.
The exact time frames often vary from product to product. Usually, manufacturers include information about how long their brand of primer can remain uncoated without repercussions. Therefore, be sure to check the label on the primer you use.
Conclusion
It is okay to try and save money by using leftover coating products for new projects. This is especially true for surfaces with similar characteristics, such as concrete and wood.
The two materials are porous and require almost identical methods and coatings to prepare them for painting. Which is why you have at one point had questions like…
Can I Use Concrete Primer On Wood?
Acrylic concrete primers are the best alternative to use on wood because they are flexible and can move along with the wood as temperature changes. The other types of concrete primers – epoxy and urethane – can produce great immediate results but will crack over time because they are not as flexible as acrylic.
You can achieve optimal results on wood with concrete primer if you follow specific application steps. Start by sanding the wood to give it a “tooth” for the primer to grip, then apply the primer with a paintbrush or roller, following the wood grain.
You can achieve optimal coverage with one coat of primer but if the wood grain is still showing, sand the first coat with fine-grit sandpaper, then apply a second layer.
I hope this article answers all your questions. If you have any more questions or information to share, feel free to reach out to us in the comments section.