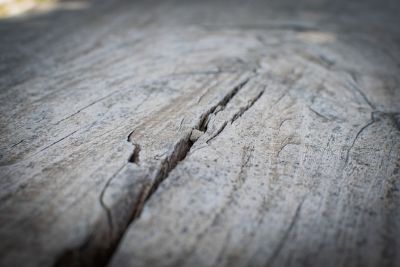
 Cracked wood and paint do not go well together. If you paint over wood with cracks or splits, your color will lift, leaving you with an unsightly finished project. Many factors such as changes in temperature, humidity, or the external force on wood can cause its fibers to separate, causing splits and cracks. It is essential to seal all the gaps on your wooden surfaces before applying paint to avoid the cost of repairs later. For this reason, I want to enlighten you on how to fill wood cracks before painting.
There are plenty of products that you can use to fill a cracked piece of wood, depending on the extent of the damage. Wood putty and wood filler are effective for covering wide cracks on unstained wood in indoor projects.
You can also use epoxy to cover larger cracks, especially in outdoor projects and if you need a quick fix, use a mixture of wood glue and sawdust to fill in tiny crevices. Once you blend in and sand your filler, no one will notice the patched area.
How Do You Prepare Cracked Wood For Painting?
Cracked wooden surfaces require some extra preparation before applying paint on them. Proper preparation will ensure that your final paint job looks smooth and clean, and the color will last for a long time. Here are a few steps to guide you when preparing your cracked wood for painting.
-
Step 1: Prepare Your Work Area.
Before you touch anything, you should ensure that you are working in an environment conducive to painting. Use plastic sheeting or drop cloths to cover the items near your workspace to avoid splashing paint on them.
If working in interior environments, ensure that the room is well ventilated to avoid inhaling excessive paint fumes. Also, wear coveralls and gloves to avoid splashing paint on yourself.
-
Step 2: Inspect the Entire Wood Surface.
Always inspect the entire surface of the wood you plan to paint to look for damages that may need repairing. Look for things like cracks, holes, broken boards, or gouges.
If your wood was stained or painted before, note the areas with patches of old paint or stains.
-
Step 3: Repair Any Damages On the Wood
Use wood putty or filler to fill in any nail holes, cracks, and gouges that are present. If possible, look for fast-drying fillers so you don’t have to wait very long before taking the next step.
For previously painted surfaces, scrape off the old paint using a scrub brush or a metal scraper. If your project is too large, you can scrape off the stain using a wire brush or a pressure washer.
Additionally, you can use chemical paint strippers to remove old paint; however, ensure that you read the manufacturer’s instructions for proper use if you choose to use chemicals.
-
Step 4: Sand the Surface Properly
Use handheld sandpaper or an electric sander for sanding your wooden surface. Start with rough grit sandpaper and as the surface becomes smoother, switch to sandpaper with a finer grit.
You should never skip the sanding step. Sanding roughs up the surface of the wood so that the primer and paint may adhere perfectly. It also evens out the wood, particularly after using wood putty or filler, leaving you with a smooth surface for applying paint.
Note: Always sand in a similar direction as the wood grain, and remember to wipe off all the sand dust and debris because paint cannot adhere to dirty surfaces.
-
Step 5: Apply Primer.
Always apply a primer before coloring your wood projects, and make sure that the primer you use is designed for your particular project (indoor or outdoor, new wood vs. previously painted wood, etc.)
Spread the primer in even thick layers allowing each layer to dry completely before applying another. If the primer layer feels bumpy or looks uneven, use fine-grit sandpaper to even out the surface before applying another coat.
Note: Read the product instructions to find out how long the primer will take to dry correctly.
Once you complete all the steps above (in that order), your wooden surface will be ready for painting.
How Do You Fill In Cracked Wood?
There are plenty of products that you can use to fill up cracks in your wood. Whether you choose wood putty, filler sticks, or epoxy, the steps for filling the gaps are almost the same.
So, how do you fill in cracked wood? Here are the three main ways to fill in the cracks on your wood.
-
Filling Cracks With Wood Putty Or Filler Sticks
Here are the steps involved:
Step 1: Choose a filler that matches the color of your wood.
Wood putty and filler sticks come in various colors, so pick one that blends well with the wood you are treating. If you can’t find the exact shade of your wood, buy different colored fillers and mix them to create different shades until you find one that blends appropriately.
If you wish to paint your wood after filling, make sure to look for a filler that indicates that the product is stainable. Stainable wood fillers will take on the color of the stain, leaving you with a smooth paint job.
Step 2: Apply the filler over the crack.
Use a putty knife or chisel to spread your filler over the crack on the wood or if you are using a filler stick, rub it over the gap. Keep applying the product until the crack overfills, and the material sticks out to ensure that the crack is filled up completely.
Make sure to use a putty knife or your fingers to flatten out the excess material before it dries out. You can also use a rug to smooth out the filler but, only if it is clean to avoid leaving debris on your surface.
Step 3: Let the filler dry.
The amount of time your filler needs to dry correctly will depend on the product you use, so check the manufacturer’s label for the recommended dry time. However, to be safe, leave the treated wood to dry for at least 8 hours or overnight to ensure the filler dries up completely.
Step 4: Sand down the excess filler.
At this point, even after smoothing out with a putty knife, some filler will still stand out. Use a plane or fine-grit sandpaper to blend the cracked area. Use sandpaper with a grit between 120 to 220 to wear away the filler until it is as flat against the wood as possible.
-
Using Wood Glue and Sawdust
Here are the steps involved:
Step 1: Get sawdust that matches the type and color of your wood.
The sawdust you use should closely match the wood you are treating because you’ll use it to cover the white wood glue. To ensure a perfect blend, get some sawdust from the wood you are using by sanding or sawing it. If you don’t have enough wood to spare for sawdust, you can buy some from your local home improvement store.
Step 2: Squeeze the wood glue into the crack.
Take your bottle of wood glue, press the nozzle against the crack then squeeze until the entire gap fills up with the adhesive. Consider using a syringe for tiny crevices to ensure the glue gets inside.
Step 3: Cover the glue with sawdust.
Take a lot of sawdust and layer it over the glue until it is covered completely. Run your fingers over the crack to make sure the glue holds the sawdust in place. This way, the sawdust hides the white of the adhesive from view, blending in perfectly with the rest of your wood.
It would be best to leave the glue overnight to make sure it dries properly, and the crack is hard to see. If the gap is still visible the next day, reapply the wood glue and sawdust combination or try a different filler.
Step 4: Sand down the glue
Carefully smooth down the treated area with fine-grit sandpaper until the filler is flat and unnoticeable.
-
Using Epoxy
Here are the steps involved:
Step 1: Protect yourself.
The fumes that emanate from epoxy can harm your health, so protect yourself by wearing a respirator mask before you start treating your wood with epoxy. Also, consider working outdoors or in a well-ventilated area where your pets and other family members aren’t present.
Step 2: Cover the crack with masking tape.
Epoxy works best for treating large cracks in wood compared to other fillers. So if the damage on your wood is too extensive that it goes through the wood, cover one side with masking tape. The tape will hold the filler in place long enough for it to solidify within the crack.
Note: If the crack doesn’t go through the wood, you can skip this step.
Step 3: Mix the epoxy components.
Epoxy has two components, a resin, and a hardener. Estimate how much you’ll need to fill the crack in your wood, then add them in equal portions to a bowl without mixing because the epoxy will harden immediately after the two components are combined.
Step 4: Add color to the epoxy.
The epoxy color will not match your wood, so find a wood-colored dye or powdered pigment that fits your project, then add a drop or a sprinkle to color your epoxy.
Quickly Stir to mix all the components, and after a few seconds, the mixture will turn into a paint-like substance meaning your epoxy is ready for use.
You can also add a scoop of coffee grounds to your epoxy to turn it black.
Step 5: Add the mixture into the crack.
Use the stirring spoon to transfer your filler into the crack. Most of the liquid will flow into the bottom, so if you don’t have enough resin to fill it, make some more until you have enough to fill the entire crack.
Step 6: Let it dry.
Epoxy dries fast, so in 2 to 4 hours, your wood will be ready. However, to be safe, leave it overnight to make sure it dries properly before sanding.
Step 7: Level the filler.
Cut the excess filler away with a putty knife before sanding it with fine-grit sandpaper to flatten the treated area.
What Do Professional Painters Use To Fill Nail Holes?
Many professional painters swear by spackling paste to fill in holes left behind by nails and screws.
Spackling paste, commonly known as spackle, is a putty made of gypsum powder and some binders. It’s used to patch up small cracks, holes, and other minor surface defects like dents on drywall, plaster, and sometimes wood.
This product is available in five different grades, each designed for specific applications. These are:
- Lightweight spackle. As the name suggests, this product is light and perfect for correcting minor imperfections such as fine cracks and tiny pinholes. On the downside, you can’t sand lightweight spackles, and it is only ideal for quick fixes.
- Vinyl spackle is thick, heavy, and ideal for holes and cracks up to ¾ inches deep. The trick to using vinyl spackle is applying it in layers while leaving some dry time in between the layers. This spackle sands well and doesn’t crumble because it contains vinyl.
- Standard spackle works on all types of surfaces to cover even the deepest holes you can think of without caving in.
- Epoxy spackle is an oil-based product used to fill small holes in wood. It is heavyweight and holds up well on wooden surfaces.
- Acrylic spackle, just like vinyl, is flexible and can be used on drywall, brick wall, wood, or plaster. It is perfect for covering large holes and dents without caving in.
That said, spackle seems just like any other regular filler. So why do professional painters prefer it to fill nail holes?
Because of the binding agent mixed in with the gypsum powder, spackle is more elastic hence less likely to crack or shrink when dry. It dries up faster than most fillers and doesn’t stand out after a paint job.
Additionally, the tub of spackle you purchase will last longer because you only need a small amount of spackle to do the job.
Can I Use Caulk Instead of Wood Filler?
No, you cannot. I recommend using caulk to seal the joints between surfaces and projects requiring waterproofing like sealing sinks, basins, or around windows.
Caulk shrinks over time, so using it to fill cracks and holes in wood will leave an ugly dent on your surface. Additionally, you cannot sand caulk, so it won’t blend with your wood if used as a filler.
Can You Paint Over Cracked Wood?
No, you can’t.
I recommend correctly preparing your cracked wood before applying paint to it. The project may look okay immediately after painting; however, the cracks will begin to show as the paint dries, leaving your project looking unpolished and unsightly.
Also, the presence of cracks on your surface will allow moisture in causing the paint to peel.
Will Paint Fill Cracks In Wood?
Paint is not heavy or sturdy enough to fill cracks in your wood. If you paint over the damages on your wood expecting the product to cover them, you’ll be disappointed.
Consider using proper wood fillers to treat your wooden surface before painting. This way, your paint job will look great and last for a long time.
How Do You Fill Small Cracks In Wood With Epoxy?
I recommend filling small cracks in wood with epoxy putty sticks. It is less messy, and you won’t have to use a lot to get the work done. Here’s how to do it:
- Clean your surface before applying epoxy putty to clear all debris or old paints and stains.
- Twist off the amount of putty you need, then mix it by kneading until it forms one uniform color (You can wet your fingers a little to make the mixing more manageable).
- Apply the epoxy over the cracks you want to cover, and once in place, smooth it with wet fingers or a wet putty knife to ensure it covers the gap adequately.
- Use a wet tool to remove any excess product before it dries completely, then let the epoxy cure.
- Once dry, sand it lightly with fine-grit sandpaper to blend it with your wood.
What Happens If You Paint Over Cracked Paint?
Painting over old cracked paint is a lazy approach to rejuvenating the look of a project and will cost you more than you know. If some paint on your wood has cracked, then it’s very likely that all other areas painted at the same time will incur some damages in the future.
Painting over the stripping color as a quick fix will work for a day or two; however, the underlying layers will keep cracking and end up ruining your newly painted surfaces.
Coloring over cracked paint will bring you extra losses that you can avoid if you prepare your wood correctly before applying a new coat.
Is Epoxy a Good Wood Filler?
Yes, it is. It is the most reliable wood filler that will ensure the structural integrity of your project remains intact for a long time.
Epoxy is an excellent product for filling up large cracks and repairing old damaged wood. It doesn’t shrink because there is no water or solvent to evaporate. Additionally, you can sand epoxy to blend in with your wood before painting over it.
Also, this product is stainable, so you can mix it with the colors and pigments of your choice to perfectly match your project.
What Kind of Epoxy Do You Use to Fill Wood?
Epoxy wood filler comes in two different forms – liquid form and putty. Liquid epoxy is excellent for filling large cracks and gaps in the wood, especially those that go through and through. The pourable liquid seeps into all the internal holes and gaps, filling them up completely.
On the other hand, Putty works better for holes and cracks on the outer surface of your wood. Once it dries, sand it down to match the shape of your project.
Can You Use Wood Filler For Large Gaps?
Yes, you can use wood filler to cover significant gaps; however, not all of them can maintain the integrity of your wood over time.
I recommend using epoxy wood fillers, powder fillers, or vinyl spackles to treat your wood. These three products are durable and immune to shrinkage upon drying.
How Do You Fill Large Gaps In Plywood?
Plywood is made by gluing thin sheets of wood veneer together to create a flat sheet of wood, and sometimes gaps may form between the sheets of wood or on the surface.
- Filling these gaps is easy using wood filler as follows:
- Using 80 grit sandpaper, sand the surface of the plywood to obtain some sawdust.
- Combine your wood filler with some of the sawdust in a container. Doing this will ensure that the filler matches the color of your plywood.
- Fill a syringe with the mixture.
- Lift the edge of one of the plywood sheets to insert the syringe over the gap, then inject the filler into the void. Make sure the product is level with the surface of the wood before gluing the two sheets back together, then let it dry.
- You can also fill minor gaps on the surface of the plywood using putty. Insert enough putty to cover the gap, smooth it out with a putty knife, then let it dry.
- Next, rub the surface with fine-grit sandpaper to blend the filled opening with the plywood, then wipe away the sawdust using a tack cloth.
Can You Paint Over Wood Filler?
Yes, it is possible to paint over wood filler. The process is similar to that of painting standard wood but with a few additional precautions.
First, make sure that the filler matches the color of your wood so that it may not stick out after the paint job. Also, only paint your wood after the filler dries up completely to avoid mixing it with the paint.
Conclusion
Painting is a protective step to ensure that your wooden structure lasts longer and, above all, remains attractive. Even so, you should ensure that your structure is in the best condition before you do your painting work. Cracks are some of the things that can compromise the integrity of your paint; that is why it’s important to know…
How to Fill Wood Cracks Before Painting
There are many products in the market that you can use to fill cracks on your wooden structures, such as decks, outdoor tables, benches, and a lot more. Some of these products include Wood fillers, filler sticks, wood glue, and more.
Until now, I hope you have learned a lot to help you fill the cracks on your wooden structure. If you have any questions, suggestions, or opinions, please share them with me in the comment section below.
