Can You Paint Over Venetian Plaster? That’s our question today. So, let’s dive into the discussion.
Anybody would want the greenest wall treatment for areas such as the kitchen, bathroom, and those prone to getting wet and of course, the best option is the Venetian plaster.
This product has a durable and versatile composition of materials such as cement, lime, and sand. With such materials, you rest assured that no moisture will accumulate inside the wall finish.
But since you’ll want to protect your walls while maintaining your home’s beauty, you must settle for the best protective coating possible which brings us back to can you paint over Venetian plaster?
Yes, you can paint over Venetian plaster! Painting is the best remedy for reclaiming your dull Venetian plaster. If you like to DIY, then this is the right opportunity to put your skills into action.
Before you can paint over your Venetian plaster, it is very important that you do proper surface preparation to ensure that there will be a solid bond between the paint and the surface of the Venetian plaster.
Preparation helps with the removal of surface imperfections such as dirt that may affect the paint. If you choose to seal your surface after, ensure that you use a water based sealer.
Painting over Venetian plaster will undoubtedly give you some of the most beautiful results. When you do it the right way, the luminance and texture of the plaster will be visible through the paint.
Though the paint will mask everything, it will add color and life to the surface of the Venetian plaster. What you’ll love most about the Venetian plaster is how it has been in existence for the longest time, but it’s not out of trend.
How Do You Paint Venetian Plaster?
Venetian plaster has an earthy, soft feel and look. Despite this, you may still want to paint over it. Here are a few easy steps you need.
Before this, let’s look at some of the things you’ll want to have for the process.
- Painter’s tape
- Primer
- Paint
- 80 grit sandpaper
- Paint tray
- Palm sander
- Paint sprayer
- A cup
- Clean towel
- Paintbrush
- 120 grit sandpaper
- Mineral spirits
Below Are the Steps Involved When Painting Venetian Plaster
Step 1: Skim Coat Over The Venetian Plaster
Before painting your plaster, ensure you check for common defects such as cracks, grease, and dust.
The best way of getting rid of any of the stated problems is skim coating the surface. Doing this will ensure you seal even the little holes.
After skim coating, allow the coat to set for some time.
Step 2: Do the Cleaning
For cleaning purposes, consider using about ¼ cup of mineral spirits. Dampen a lint-free cloth into the spirit before you can use it to rub against the wall gently.
After cleaning, get rid of any remaining layer of dust. If it has non, then you are ready for the next step.
Step 3: Sand With an 80-Grit Sandpaper
In this step, you’ll need to sand the surface with an 80 grit sandpaper attached to your palm sander.
Ensure you lightly sand all areas on your wall. Suppose the mineral spirit didn’t remove much of the stains. Please make use of this step to get rid of them entirely.
Afterward, you can wipe away all the residues using a damp cloth.
Step 4: Sand With the 120 Grit Sandpaper
The 80 grit sandpaper was not enough to make the surface smoother and more ready for painting.
Therefore, you’ll need the 120 grit sandpaper to get the job done. In addition, it will help to create a good texture for the paint to adhere to.
Step 5: Cover any Electrical Outlets or Switch Plates.
Mostly, your wall will have some electrical outlets or switches. And this is when the painter’s tape comes to play.
Also, remember to avoid messing your floor by spreading some drop cloths on it.
Step 6: Prime the surface
A primer is often an essential thing in painting most surfaces, and Venetian plaster is not an exception.
The paint tray is the ideal place to pour your few inches of quartz or alkyd primer. After this, you’ll need an edging brush to work around the painter’s tape.
A long-handled roller will work best for the rest of the wall. Ensure you properly make the application to get a thin and even coat.
When you’re done, allow the surface to dry as per the manufacturer’s instructions.
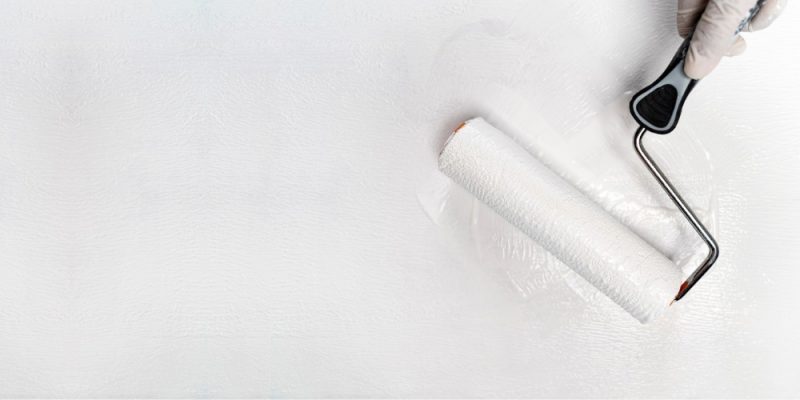
Step 7: Apply the Paint
You’ll need at least half of your paint tray filled with your paint of choice, preferably latex paint.
A clean edging brush will be ideal for painting around the painter’s trim. For the rest of the wall, consider using a clean long-handled roller.
Allow the surface to set and dry as per the manufacturer’s recommendation. Alternatively, you can choose to use the HVLP paint sprayers since they evenly paint the surface with less pressure.
Step 8: Remove the Painter’s Tape
I recommend doing this while the paint is yet to dry. It will help prevent damaging the painted surface since dried paint can easily pull up.
If you need to fix some small details, it’s best to use a small brush to prevent further damage.
Step 9: Add An Extra Coat (optional)
Suppose you find it necessary for an extra coat of paint. Ensure you do it after the first one has properly dried.
But it would help if you didn’t doubt your primer since it gives the paint an extra adhesion eliminating the need for the next layer of paint.
Can You Paint Over Polished Plaster?
Yes, you can effectively do this and get a well-finished surface. When painting, use 120 grit sandpaper to key up the plaster patches.
It would be wise to go for a trade quality contract Matte paint (like Dulux). Such paints are good at bonding over polished surfaces.
Tip: Water-based Zinsser primers can work well on plaster patches.
How to Create a Venetian Plaster Finish
If you want the best results, ensure you start by giving your wall proper preparation. Also, remember to protect your furniture.
Before we embark on the necessary steps, let’s check what we will need for the job.
- Flexible 10 cm steel trowel
- 100 grit sandpaper
- 400-600 grit sandpaper
- Deep-well paint tray
- Behr Venetian Plaster
- Optional Venetian plaster topcoat
Here are the necessary steps.
- Step 1
First, you’ll round the corners of your flexible steel trowel with 100 grit sandpaper. Doing this will help reduce the edge marks during application.
- Step 2
Load your steel trowel with the Behr Venetian Plaster before you can start with the top corner of your wall.
Ensure you hold your steel trowel at about 15 to 30 degrees angle with the wall. Use long and short random strokes to spread the plaster on your wall evenly.
Note: Don’t forget to wipe off your steel trowel regularly. It will help prevent the dry bits of the plaster from affecting your surface.
- Step 3
Here you’ll have to continue with the previous step until your wall is completely covered. Before you go for the second coat, allow the first coat to dry for at least 4 hours.
- Step 4
Starting from the same spot as with the first coat, apply a thin second coat. Do this while holding the steel trowel at a 30 to 60 degrees angle with the wall.
Continue with the application until the entire wall is covered.
Can You Change the Color of Venetian Plaster Walls?
Yes, you can, especially if you want it tonal in its coloring. However, if you need to add different colors and tones, ensure you have a faux finish.
How Can You Change the Color of Venetian Plaster Walls?
First, you’ll smoothen the drywall before sanding it down. The next step involves sealing the wall with a water primer.
After this, please choose your desired hue and use it to paint the base coat. Now, gently apply up to three coats of Venetian plaster.
Ensure the coats are very thin and random to let the undercoats show through. If you prefer burnishing the surface, do so with a stainless spackle blade.
Finally, a clear coat of wax will let you buff off the finished surface to your desired sheen.
Can You Paint Over Smooth Venetian Plaster?
Yes, you can if you do the surface preparation correctly. The reason is that smooth Venetian plaster has transparency, depth, and a glass-smooth texture.
Note: Call a professional to help cover roughly textured Venetian plaster to avoid damaging the walls.
How to Remove Venetian Plaster from Walls
When you’ll finally decide to remove the Venetian plaster from your walls, here are the steps you’ll require.
-
Step 1: Prepare the Working Area
You won’t want an untidy workspace even though removing plaster is a messy process. Therefore, laying a plastic dropcloth on the floor will be an ideal remedy.
Also, remember to remove all your furniture from the room.
Tip: If you want to prevent damage to your floors, ensure it has less exposure to moisture and staining agents with plastic.
-
Step 2: Strip the Wall With a Paint Stripper
Here, you’ll need a spray bottle filled with a paint stripper. Don’t just go for any stripper.
Instead, choose the one that can only remove two layers of paint at most. If you choose the wrong stripper, you might end up damaging your plaster.
Tip: You’re not supposed to start scrubbing immediately. Instead, begin by spraying a small area of your wall to test the effect.
Afterward, do the scrubbing gently, covering small patches at a time.
Note: Ensure you have proper ventilation, especially when working with chemical paint strippers. Also, it would help if you had a protective mask and eyewear.
-
Step 3: Remove the Wet Plaster
The best tool for removing the wet plaster is a spatula. For outstanding results, consider spraying the wall with water as you move along.
Even though this is the most tiresome part of the job, ensure you do it carefully to avoid creating deep gouges in the plaster or the drywall.
Note: Don’t go to the next area before scraping each layer of texture away from the previous one.
Step 4: Smooth the Wall
Once you’re done removing the Venetian plaster, it’s time to smooth the wall. Ensure you repair any gouges or dips before repainting.
I recommend filling over the wall’s surface or using a latex-based primer in the damaged areas. Now smoothen the surface using a spatula for an even finish.
Allow the primer or the fill some time to dry before sanding it down with a palm sander.
Finish up by wiping off the dust that resulted from sanding.
How Do I Apply Wax On Venetian Plaster
The main reason for a layer of wax on Venetian plaster is to offer protection for enhanced durability.
Below is how you can ensure you do the waxing properly.
Step 1: Allow the Plaster to Dry
The best time to apply the wax is after the Venetian plaster has dried for about 48 hours.
Step 2: Apply the Wax
A trowel or spatula is the ideal tool for this step. Before loading your spatula or trowel with wax, start by lightly burnishing the surface with the trowel.
The next thing will be gently spreading a thin layer of wax. Again, do the spreading properly, ensuring you obtain short strokes that are almost parallel to the surface.
Tip: When applying the wax, ensure the blade does not touch the wall.
For outstanding results, a very thin film will be necessary. Let the film dry before troweling over the second layer of wax.
Continue with the same process on the entire surface with overlapping patches. Finally, allow the surface to dry properly.
Step 3: Burnish the Finish
For this process, consider using a trowel. While rubbing the waxed surface, ensure the flat edge of the trowel is against the wall.
Here’s How to Wax Venetian Plaster:
Tip: Use the face of the trowel while burnishing since the edge can cause damage to the wall.
Rubbing in circles will make the surface have a high gloss. An electric polisher can easily play the trick, but you must be very careful with it.
Alternative Way of Applying the Wax
Apart from the above method, you can choose to use a sponge or a cotton cloth. When applying, ensure you add as many coats as possible until the plaster can’t take any more.
You must be extra careful to avoid forming stretches on the surface. If you notice any, rewax the area immediately for a perfect finish. When you’re done, use a non-woven cloth to polish the surface before buffing it with an electric polisher or another non-woven cloth.
Applying Sealant on Venetian Plaster
When applying the sealant, consider using a roller or a garden sprayer. The best option for the sealant is a solvent or water-based sealant.
After application, allow the surface to dry before adding a second coat. Also, remember to wipe off the excess sealant to avoid the formation of a white residue.
Suppose you choose to wax with iridescent powders. The first step should be to liquefy the wax. You can do this by stirring then adding the amount of powder required.
Adding an aged quality finish to the surface will create an elegant look. Color washing is the trick you need to accomplish this look.
But how can you make a color wash? Well, it’s straightforward. You only need water-based glazing liquid or acrylic colorant.
Consider using a rag or a paper towel for the color application. Ensure you make the application in sections, then wipe it off.
What if the surface is patchy? In such cases, the unique way out is to apply a water-based penetrating sealant before glazing the surface.
Types of Finishes Available for Venetian Plaster
-
Concrete Stucco
What’s best about this plaster is its natural look of polished concrete. As a result, the plaster is ideal for creating a contemporary urban style in commercial spaces.
-
Polished Stucco
This product has a composition of marble dust and slaked lime. When applying, you’ll need at least 3 – 4 coats before you layer the surface with specialty wax polish.
What you’ll enjoy most about this item is its admirable beauty. It’s also good in offering a luxurious feel.You can use this plaster in any room since it offers a glass-like luster that can bring out the richness of color.
-
Marmorino
This product is available in three categories: Naturale, Carrara, and Fine. Apart from being easier to finish, you’ll realize that Marmorino Fine is similar to polished Stucco.
The item is well known for producing a natural mineral look that offers a glossy finish with a smooth to touch texture.
In contrast, Marmorino Naturale produces a beautiful and refined finish. Thus, it reproduces the effect of natural marble.
Lastly, it’s the Marmorino Carrara which has a completely smooth texture. It also boasts a depth of color that resembles that of traditional Veneziano plaster.
-
Tonachino
The main compositions of this plaster are slaked lime, river sands, and polymer admixtures.
You’ll enjoy the easy application, durability, and great adhesion for both exterior and interior walls.
What’s more about Tonachino’s composition is the good filling power and water repellence that makes it naturally resistant to bacteria and mold.
Additionally, the plaster offers style with its warm, matt finish. Even better, the final result is a sand finish appearance and velvet-like texture.
Why You’ll Want to Use Venetian Plaster
- No toxic fumes.
- Mould and mildew resistant.
- You can remove the minor scuffs with mild detergent and a damp cloth.
- It looks like marble.
- Less expensive.
- Hides bumps and inconsistency in drywall.
- You can repair scuffs and blemishes in patches.
- It’s made of low-maintenance and durable products.
- The product is flexible as paint in application and maintenance.
Despite the above advantages, Venetian plaster has some drawbacks.
- It’s more costly than paint.
- In the case of aggregates on the plaster, you may have to replaster the entire wall.
Can I Paint Straight Onto Old Plaster?
No, you’ll have to start by applying a sealer, or else the new paint will not stick as per your expectations.
If you want to paint on old plaster, you’ll have to be very keen on the preparation work since such walls are more temperamental than drywalls.
How to Paint Onto Old Plaster
What you will require
- Primer
- Hammer
- Drop cloths
- Plaster patching compound
- Scraper
- Vacuum
- Clean cloths
- Mesh tape
- Putty knife
- Painter’s tape
- Paint pail
- Paint thinner
- Denatured alcohol
- Fine grit sanding block
You may want to follow the below steps to avoid doing future repairs.
Step 1: Prepare the Surface and the Working Area
- Ensure there is no furniture left near the walls.
- Cover the floor with drop cloths.
- Remove all pictures and switch outlet covers off the wall.
- Inspect the wall for any damaged areas.
- Use a scraper to remove any crumbled or flaking pieces.
- Spot prime the scraped areas for the patching compound to adhere.
Step 2: Fill Holes and Large Cracks
For this step, you’ll need a plaster patching compound for the holes and cracks. Again, a putty knife will help you do the work with ease.
You’ll start by covering the patched area with a piece of mesh tape. Then apply a thin layer of the patching compound over the tape using a putty knife.
Before sanding the patched areas (using a fine-grit sanding block), let them dry completely. You can now add the second layer of the patching compound.
Let the layer dry before sanding it down to get a smooth surface. Then use a vacuum cleaner or a clean cloth to remove the sanding dust.
Finish by washing the walls with soapy water and allowing them dry.
Step 3: Prime the Surface
Use a 2” angled paintbrush to apply the primer to all the hard to reach areas. For the rest of the wall, consider using a clean roller.
Let the primer dry for the recommended duration by the manufacturer. After it has completely dried, add a second layer, then let it dry again.
Step 4: Clean the Paintbrush and Paint Pail
If you used an oil-based primer, the best cleaning agent would be a paint thinner. On the other hand, you’ll need denatured alcohol for cleaning if you used shellac.
Step 5: Paint the Wall
After ensuring the paint pail is clean, fill it with your desired paint. Then, use a clean paintbrush for the unreachable areas and a roller to paint the remaining part of the wall.
Before applying the second coat of paint, allow the previous one to dry. Finally, allow the wall to dry completely before replacing all your wall hangings and outlet covers.
Here’s How to Save Old Plaster:
Tip
- A paint pole can extend the reach of a roller.
- Trisodium phosphate (TSP) is suitable for cleaning soldier walls.
- You can use latex primers, but alkyd primers offer the best results when used on plasters.
Warning
- Avoid sanding walls painted before 1978 since they might contain lead.
- Ventilate your working areas since paints and primers emit fumes.
- Solvent-based products are not VOC compliant in all areas.
Can You Sand Venetian Plaster?
Absolutely yes! But ensure you do it in small circular motions. You can do this using 400 grit sandpaper.
Next, wipe off the sanding dust using rags or a damp towel. Afterward, polish the surface with the same procedure using 600 grit sandpaper.
Note: The more you sand, the more contrast in color.
How to Remove Wax from Venetian Plaster?
The easiest way out is to use wax removers. Here are the two main wax removes that you can use.
- Water-based wax remover
Please use a clean cloth to make the application. Then let the surface dry for approximately 5 to 10 minutes before using plenty of clean water to remove the dissolved wax.
- Solvent-based wax
Use a lightly textured cloth for the application. First, ensure you scrub the surface until there is foam on it. Next, rinse up the wall with clean water and let it dry.
Do I Need to Prime Old Plaster Before Painting?
As stated before, you’ll have to prime your old plaster wall before painting for the paint to adhere to the surface properly.
Plaster walls are more susceptible to moisture compared to drywall. Therefore, they require high-quality primers.
They come with superior stain-blocking abilities that keep old stains from bleeding through to new paint. Oil-based primers remain the best primer option for old walls.
Should I PVA Plaster Before Painting?
No, it’s not necessary. PVA does not work well with paints.
Can You Repair Plaster?
Even though Venetian plaster walls are stronger than drywall materials, repairing them can be a real nightmare.
The reason is that cracks or nicks on the walls will cause the plaster’s aesthetics to diminish. It even becomes worse since the slightest discoloration will show through the plaster.
A remedy to this is by applying drywall to the damaged area.
How Long Does Venetian Plaster Last?
This product is very durable and can last for up to 400 years. What makes it long-lasting is how it’s made without any aggregates.
Hence it doesn’t fade or age. Besides, it’s very easy to clean.
The Difference Between Real Venetian Plaster and Venetian Plaster?
The Real Venetian plaster composes of limestone, pigment, and ground marble. With modified composition, this plaster is now called Traditional Venetian Plaster.
It’s mainly made of lime or gypsum. You can use it on laths and studs of a wall on interior or exterior sides.
Most of the Venetian plaster products today are made of synthetic materials. As a result, they have high pH levels that make them resistant to mold and other bacteria.
Here’s more you need to know about painting Venetian plaster:
Final Thoughts
In this article, you have seen how painting plays a major role in protecting and beautifying surfaces.
You have also come across various aspects of how to work with Venetian plaster. I want to emphasize that you must follow all the necessary steps when working with this plaster.
Also, ensure you topcoat your Venetian plaster wall with the correct product. Talking of top coating…
Can You Paint Over Venetian Plaster?
Yes, you can but ensure you follow the correct steps as per the manufacturer’s instructions. The manufacturer’s instructions are limited to the paint you are using.
The standard process of painting your Venetian plaster involves: checking the surface for defects such as cracks, grease, and more.
Repair the cracks follow by cleaning the surface. You should clean the surfaces with mineral spirits before sanding over your Venetian plaster.
Follow sanding by priming over the surface before you can apply your paint. If you follow these steps to the letter then you can be sure of a perfect finish for your projects.
Thanks for reading this article to this point. Even though I have included most of the points related to this topic, feel free to ask or post any observations in the comment section below.