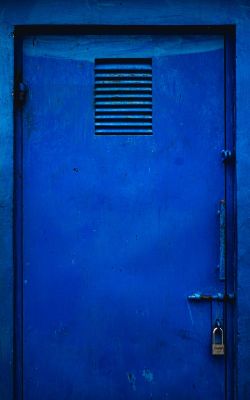
Galvanization is the gold standard by which corrosion protection for metal is measured. Galvanized surfaces prevent corrosion on metal by acting as a physical barrier and acting as a sacrificial anode, offering protection that can last for decades.
Despite this excellent protection, painting over galvanized metal is a great way to provide supplementary protection to surfaces in areas that accelerate corrosion, such as marine environments. This article focuses on how to paint galvanized metal for the best results.
While great for corrosion protection, the zinc layer on galvanized metal is not compatible with paint, and paint applied directly to this surface will peel and shed. However, this is not to say that you cannot paint a galvanized metal surface.
With adequate surface pretreatments and preparation, you can get paint that will adhere to the surface for a long time to come.
This article expounds on galvanization and how it interacts with paint, the best treatment methods for different galvanized surfaces, adequately preparing the surface, and the best painting methods.
What Is Galvanized Metal?
 In 142, French chemist Jacques Malouin presented a paper where he described how one could obtain a zinc coating on iron by dipping it in molten zinc.
However, it was not until 1836 that people started using this process after being patented by chemist Stanislas Sore. Stanilslas’ process has hardly changed throughout the years, and galvanization is one of the most widely used corrosion protection methods today. Manufacturers use over 600,000 tons of zinc for galvanization in North America alone.
But what exactly is galvanization? Galvanization is the process through which a protective coating of zinc is applied to a ferrous metal such as iron or steel to prevent corrosion of the substrate metal.
The zinc coating acts as a physical barrier and as a sacrificial anode, i.e., it is deliberately sacrificed to corrosion, leaving the rest of the substrate relatively free from corrosion.
Without being protected, steel will rust over time because of atmospheric conditions. The degree of rust depends on the surrounding environment and is more significant in high oxygen and moisture conditions.
While there are other methods of protecting your metal surfaces from corrosion, these methods are often unreliable and non-durable, making galvanization such an attractive corrosion protection method.
One of the best and most used processes is called hot-dip galvanization. The simplified hot-dip galvanization process is as below.
- Before being dipped into zinc, the workers clean the metal by dipping it into a bath of caustic cleaner that removes all grease, oil, and dirt. It is then dipped into a rinsing water bath and a pickling bath with a diluted solution of about 10% hydrochloric or sulfuric acid to remove any rust and mill scale.
- After the pickling bath, the metal is rinsed in water and maintained in a flux solution ready for galvanization.
- The steel or iron is then dipped into a pool of molten zinc at around 460 degrees Celsius. This bath begins a bond between the zinc and the metal. After removing the metal from the bath, it will react to being exposed to the atmosphere and form zinc oxide, which reacts with the carbon (iv) oxide to form zinc carbonate- the final protective coat.
You can quickly identify a metal that has gone through this process due to the presence of a crystalline-like pattern, sometimes referred to as ‘spangle’ on the metal surface. Other notable advantages of galvanization include
- Longevity- subject to the environment exposed to the steel, galvanized steel can have a life expectancy of about 75 years. Also, since galvanized metals have a low maintenance schedule, you can save costs in the long term.
- Galvanization offers one of the lowest life cycle costs among all protective coating techniques. Other corrosion prevention methods have seen significant cost increases that are even greater once you add the cost of frequent inspection and maintenance.
- Low initial cost- Besides the low life cycle costs, galvanized metal has a lower initial cost than most other methods since it is ready to use immediately after delivery. You do not need any additional surface preparation or inspection costs on your end.
- Galvanization is among the most effective methods of providing corrosion protection to metal. To understand its effectiveness, look at it this way, one ton of zinc coating will save approximately 20 to 30 tons of iron from destruction by corrosion. A galvanized coating will protect your steel surface in three major ways.
- It creates a physical barrier that keeps the outermost surface from getting exposed to atmospheric conditions that cause and accelerate corrosion. This coat has at least seven times the strength of organic pain coats.
- The galvanized coat will corrode slowly and preferentially to the substrate metal by acting as a sacrificial coating. It will sacrifice itself to corrosion before allowing your metal to rust.
- Preventing sideways creep- If the galvanized coating is compromised and the underlying metal is compromised, the zinc coating will help limit the amount of damage and prevent a type of corrosion known as sideways creep.
Sideways creep is caused by the accumulation of rust deposits on the bare metal that spread across and underneath the paint film.
If untreated, it will cause the peeling and breakdown of the coats of paint. Galvanizing your metal surface is an excellent way to prevent this type of deterioration.
- Sustainability- Repeated maintenance of steel structures has a high environmental impact, which is lower in the case of galvanization’s long-term protection.
- A galvanized metal surface can withstand UV radiation without suffering damage.
- A surface that went through the hot-dip method will not incur damage during transportation and handling.
Why Paint Galvanized Metal?
If galvanized metal surfaces offer such substantial protection from short-term and long-term corrosion effects, the next logical question would be, why do we need to paint a galvanized surface at all?
Certain environmental elements such as the natural acidity of rain, sulfur dioxide in the air, and other reactive substances can reduce the lifespan of galvanized metals.
Salty environments and salty locations will also reduce the lifetime of galvanized metals as seawater has a high electrical conductivity that accelerates the corrosion rate by converting the zinc to zinc chloride, which is soluble and washes away.
A clear example is how galvanized car frames corrode faster in cold climates because of road salt. Painting galvanized metal surfaces offers the distinct advantage of stretching their longevity even further.
Although galvanized surfaces have an extraordinarily long lifespan, supplementary measures such as painting can significantly extend that in the aforementioned cases.
Apart from supplementary protection, the zinc coating on galvanized metal is not exactly the height of aesthetic appeal. Painting such surfaces is a great way to increase the surface’s appeal and achieve other purposes such as camouflage.
How to Paint Galvanized Metal? Step By Step Guide
While galvanized metal offers superior protection, its smooth, zinc-coated finish can present a challenge to paint. The comprehensive guide below will help you achieve the best results when painting galvanized metal.
Step 1: Clean and Degrease the Surface
You can start cleaning the galvanized surface by using a chemical degreaser. Without affecting the zinc coating, a degreaser will help eliminate grime, grease, and other debris.
Spray this solution over the galvanized surface and then use a clean and lint-free cloth to scrub the surface clean. If the surface you want to paint has been exposed to the elements, cleaning it will help to eliminate any organic components from the surface.
Generally, you can break down cleaning recommendations based on the galvanized surface you are dealing with. No major cleaning is necessary if you have a newly galvanized surface with no grease or dirt and only a few hydroxides and zinc oxides.
If the surface is partially weathered, you must remove the surface oxide, hydroxide film, and other debris. If the surface is fully weathered, it will require minimal cleaning, such as a warm-water power wash to eliminate any contaminants.
Keep in mind that any method used is ultimately to clean the zinc surface and not remove it.
Step 2: Surface Pretreatment
There are four commonly used methods for surface pretreatment that provide a suitably prepared surface for applying paint: T wash, using etch primers, sweep blasting, and weathering.
- T Wash
T-Wash is a modified zinc phosphate solution with copper salts. This method is ideal for metal surfaces where weathering would take too long and blasting is not an option. It is generally considered the best pretreatment method for galvanized metal surfaces.
A black or dark grey discoloration will result on the surface after applying the T wash on areas not cleaned adequately. These discolored areas will need to be cleaned and treated again.
When using T wash, it is crucial not to allow it to pool on horizontal surfaces as this may prevent maximum adhesion of the coat of paint. You can remove any excess T-wash using water.
It is also important to note that there are several variations in the composition of T- wash; hence it is vital to consult the supplier to find out the composition of the solution you buy.
The general composition for this solution is 9% phosphoric acid, 16.5% ethylcellulose, 16.5% methylated spirits, and 1% copper carbonate.
- Etch Primers
Etch primers are also a successful surface pretreatment method. They work best on older and weathered galvanized surfaces. However, the one disadvantage that etch primers have is that there is no visible color change like there is with T-Wash.
Therefore, it is impossible to have complete surety that the galvanized surface has reacted with the primer. We will discuss more on the use of primers below.
- Blasting
Also known as sweep or shot blasting, this is a mechanical method of surface preparation that professional users favor. It involves using carborundum powder or fine copper slag with a blast pressure of at most 2.7 bar to ensure that only the minimum amount of oxide comes off.
The zinc becomes slightly abraded to improve paint adhesion. Blasting should be done very carefully, especially on areas with thicker zinc coatings, to prevent damaging it, and you should not use angular iron blasting grit under any circumstances.
However efficient this method is, it may not always be possible to use it, as it may not be cost-effective for smaller-scale projects.
- Weathering
Weathering is best used and most effective on a galvanized surface exposed to the atmosphere for about six months. Exposing these galvanized surfaces to the atmosphere allows elements such as UV light, rain, and wind to remove contaminants.
You can then use abrasive pads or a stiff brush to remove any loose adherent materials on the surface and ensure that the bright zinc of the surface does not return.
However effective it is, you should not use weathering in areas where chloride levels are high, like marine environments.
Step 3: Prime the Surface
Primers are essential in helping the topcoat, and the coats of paint adhere to the galvanized surface. While you can use primers without first using T Wash, you must do the cleaning and the primer application to the highest standard possible.
We recommend using a latex-based primer, working in small sections to get even coverage throughout. Ensure that there are no gaps that may cause a problem during painting.
If the metal surface is for exterior use, we recommend buying a multi-purpose primer designed for outdoor use. If the metal surface will face rough outdoor conditions, you might need to upgrade further to an epoxy primer with high performance.
Epoxy primers will offer a semi-permanent and is resistant to scratching and peeling.
Before applying the paint, allow the primer to dry completely, which may take anywhere from two to six hours, depending on the primer you use.
Run your finger over the primed surface to check if the paint is dry enough to paint over. If it feels tacky to touch, allow it to dry longer. Do not apply paint over wet primer as it will not adhere properly.
Step 4: Paint the Surface
The type of paint you use on galvanized metal depends on many factors, such as the service environment and the method of application. Before using paint over galvanized metal, it is essential to ensure that the paint is compatible with the galvanized metal.
Checking compatibility is vital since different chemical characteristics for the same paint types may have different reactions with galvanized surfaces.
Standard latex paint for outdoor use will work well. However, avoid using alkyd-based paints on galvanized metal since the enamels in the paint can react with the zinc finish leading to poor adhesion.
Use long, precise strokes to apply the paint, making sure to get into all the crooks and crannies. A roller may be a better tool if you plan to paint a really broad surface.
After the base coat dries completely, go in with a second coat of paint. Two coats will usually be enough for most surfaces. Ensure that the first coat is dry entirely before applying the second coat.
It generally takes approximately three to four hours before you can use another coat of paint. Avoid handling any wet paint as you may leave behind smudges that may sully the work.
Although the latex paint may dry in hours, it may take them several weeks to fully cure. Avoid subjecting the metal to stress and wear until it fully cures.
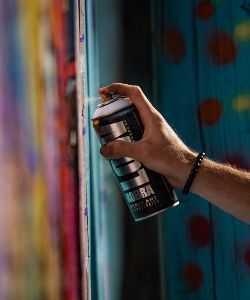
Can You Spray Paint Galvanized Metal?
Yes, you can! Cold-galvanizing spray paints have a zinc content that is compatible with galvanized surfaces. However, the topcoats of regular spray paints may not adhere to the surface.
One disadvantage of using cold galvanizing spray paints may be the limitation in terms of color options. You can also use acrylic latex paint as it will adhere to galvanized steel with minimal preparation.
Spray paint, also known as aerosol paint, comes in a pressurized, sealed container and is released in an aerosol spray, unlike the other traditional painting methods such as rollers and brushes.
Spraying the paint on leaves behind a smooth and even coat. Since you are working on galvanized metal, it is essential not to choose an alkyd-based paint as the enamels in the paint may react with the zinc finish leading to poor adhesion.
How to Spray Paint Galvanized Metal?
 Below is a comprehensive guide on how to spray paint galvanized metal to get that smooth, even coating.
Step 1: Gather the Needed Materials
The equipment for spray painting includes spray paint, cleaning and degreasing solutions, a clean, dry cloth, painters/ masking tape, and plastic sheeting.
Spread the sheeting around the area you are painting to ensure that the paint does not stain your floors and walls. You can also apply painter’s tape to mark the places you want to paint clearly.
Personal Protective Equipment is also another must-have when working with spray paint. Some of the essential PPEs we recommend using include protective goggles for the eyes, single-use nitrile gloves, and respiratory protective equipment.
Step 2: Prepare the Surface
As mentioned above, surface preparation is vital when painting any surface. For galvanized metal, you can start by cleaning the surface with a chemical degreaser to remove any grease and grime without removing the zinc coating.
You can also use the surface pretreatment methods discussed above to ensure proper paint adhesion, i.e., T-wash, etch primers, blasting, and weathering.
Step 3: Apply Primer
Before you go ahead and paint the surface, ensure that you apply primer, as this will help with paint adhesion. Choose a primer compatible with the galvanized surface and the paint you plan to use.
Upgrade the primer to a multi-purpose one if you will expose your metal surface to the elements. We recommend using a latex-based primer if you plan on using acrylic latex paint.
Step 4: Paint the Surface
When spray painting, the technique you use determines how smooth the final product is. Start the paint flow on an area you have masked instead of the site you intend to paint since aerosols tend to discharge blobs of paint that look unappealing.
Do not go in for a heavy coat of paint; instead, apply light enough coats to keep the paint from running, but not too thin that the paint gives a “dry” finish. An optimum distance between the can and the surface is about 30 cm.
Allow the first coat of paint to dry before you apply another coat. If you plan to use another finish such as lacquer, matte the final coat of paint down first with a fine abrasive paper, then apply the lacquer.
Should You Prime Galvanized Metal Before Painting?
Yes, you should! Priming is an essential step when painting any material, and you should not skip it when working with galvanized metal.
Primer will provide a stable base surface for applying the paint, especially if the paint does not adhere well to galvanized metal. If the surface will often stay exposed to moisture, the need for primer is even more pressing to prevent water from seeping through and accelerating the corrosion process.
Primers for metal may also have additional materials that give added protection against corrosion.
What Kind of Primer Do You Use On Galvanized Metal?
Use primers that are for use on galvanized metal. Additionally, the primer should also be compatible with the paint that you plan to apply over it. If you are unsure, you can speak to the retailers or check the manufacturer’s page or manual to confirm.
Rust-preventing primers are also available to go the extra mile to protect the surface from corrosion. These primers are especially useful when the metal surface is exposed to the elements or in areas with high chloride levels (that accelerate corrosion), such as marine environments.
How to Prime Galvanized Metal Before Painting
As mentioned above, a primer will prevent paint from flaking off and peeling away after it dries. Here is how to best prime galvanized metal.
Step 1: Prepare Your Working Space and Gather the Needed Equipment
Start by using a plastic sheet to cover the area you want to paint, especially if you plan to spray paint the metal. You can brush the paint on or use a roller, but we recommend spraying to get a nice even coat.
Find a properly ventilated space, non-humid, and has a temperature of about 70 degrees Fahrenheit. In humid conditions, the primer will bubble, and the primer will take a much longer time to dry in cold temperatures.
You will need primer, personal protective equipment, a clean, dry rag, and a compressed air sprayer to spray the paint.
Step 2: Clean the Surface
Mildew, dust, grease, grime, and other debris will keep the primer from adhering to the galvanized surface. Use a chemical degreaser to clean the surface to ensure that you remove all debris.
Allow the surface to dry while you fill your pressure sprayer with primer. Test spray a piece of cardboard to know how close to the surface you should spray for the best results.
Step 3: Apply the Primer
Start spraying the surface with even strokes while avoiding lingering in one place for too long. The thickness of the coat should be enough to cover the metal surface fully.
If you apply too thin a coat, you can always go back and respray the area. However, if you use a coat that is too thick, you may need to wipe the area clean and start again, so be careful with the application rate.
You can also add a second coat of primer if, by your judgment, one coat is not enough, though you should be careful as a running primer is much more difficult to remove if you have already applied another coat.
Step 4: Allow the Primer to Dry
The primer should be entirely dry before applying the paint, which may take two to six hours. Run the pad of your finger over the surface to test if it is completely dry. If it still feels tacky, allow it some more time to dry.
Does Self Etching Primer Work On Galvanized Metal?
Self-etching primer is a primer for application on fiberglass and metal surfaces. This primer contains zinc and phosphoric acid that etches the surface and gives the surface a slightly rough texture that is easier for the primer to adhere to. It etches and primes the surface in one coat.
On a galvanized coating, you can use etch primers. However, they have a disadvantage over other surface preparation methods. When used, there is no visible color change, so you can never be completely confident that the whole surface has reacted with the primer.
Do You Have to Sand Metal Before Painting?
We recommend sanding metal surfaces before applying the primer and paint. Sanding the surface will help smooth out uneven areas and dull the surface to help the primer adhere. You can start sanding with 120 grit sandpaper and then work your way through finer grade sandpapers up to 320 grit.
If you are working on large surfaces, you can use a sanding block to get even pressure. After sanding the surface, use a tack cloth to wipe down the surface, remove the sanding dust, and follow up by applying primer immediately.
How to Prepare Metal for Painting
Metal surfaces are common in many homes, from pipes, gutters, gates, window frames, and other metal fixtures indoors and outdoors. If these metal surfaces are starting to look weathered, a fresh coat of paint is one of the best ways to rejuvenate them.
In any painting job, especially with metal, adequate surface preparation will make all the difference in the quality and durability of your coat of paint. Even the most premium paints will not last on a poorly prepped surface.
Below is a comprehensive guide on preparing your metal surface for painting.
Step 1: Gather the Needed Equipment and Materials
Put all the materials and tools you will need together to stay focused on the task at hand and not wander around looking for them when you begin working. Some of the items you will need include:
- Rust remover and mineral spirits (optional)
- Acetone
- Scuffing pads
- A wire brush
- A natural bristle paintbrush
- Personal Protective Equipment (goggles, earplugs, respirator)
Apart from getting the needed materials, you also need to set up and prepare the space where you will be working. Working around rust and paint may be hazardous to your health, so choosing a well-ventilated area to work in is essential.
If the metal piece is portable, we recommend doing the paint job outdoors. You can also place a drop sheet underneath your project to catch any stray paint drops.
Step 2: Remove Any Rust and Old Paint from the Metal Surface
If you had already painted the surface before, we strongly recommend removing the old coat of paint before applying a new one.
Use the wire brush or sandpaper to strip any paint and rust from the metal, wiping away the dust and paint particles with a tack cloth or damp cloth. If the surface you are removing paint from is large, you can also use a drill with a wire brush attachment to strip it away.
If the rust has deeply penetrated the surface, you can use an appropriate rust remover, following the instructions provided by the manufacturer.
Step 3: Clean the Surface
Even if the surface looks clean to your eyes, make sure that you clean the surface again before you paint. Use a damp cloth to wipe the rust and paint dust from the surface, discard that, and then use a fresh cloth to thoroughly wipe down the surface, ensuring that you get all dirt, grime, and grease. The surface must be clean, or the paint will peel off shortly after painting.
Apart from wiping the surface down, you can use a pressure washer to clean areas that have an excessive build-up of mildew, mold, and other debris and mineral spirits to clean up stubborn grease.
Step 4: Sand the Surface
After removing any rust and cleaning the surface, sand the entire surface and smooth out any uneven areas. Dulling the surface will also help the adherence of the primer to the surface.
You can start sanding with 120-grit sandpaper and continue to finer grit ones up to 320 grit. If you are working on an expansive surface, you can use a sanding block to help you get even pressure when sanding.
Wipe down the surface with a tack cloth to remove all sanding dust and immediately apply the first coat of primer.
Step 5: Prime the Surface
Primer is a preparatory coat that you apply on the surface you want to paint to enhance paint adhesion and improve the final look of the paint. The type of primer you use will depend on the type of paint you plan to use and the metal you plan to paint. Below are some factors to consider when applying primer to a metal surface.
- You can test whether a surface is ferrous using a magnet. If the magnet sticks to the surface, it is ferrous, and if the magnet does not stick to the surface, it is non-ferrous. If the surface is ferrous, use a rust-inhibitive primer. If the surface is non-ferrous, you can proceed to use a galvanized metal primer.
- We recommend avoiding latex or water-based primers in situations where you often expose the metal to moisture. The moisture will soak through the primer quickly, necessitating another coat of paint.
- If you are working with metal that already has rust, apply a coat of zinc chromate primer first before you apply your regular primer. Zinc chromate is usually used closest to the metal surface to protect it from rust as it is a corrosive resistant substance.
When dealing with metal surfaces, we also recommend that you apply at least two coats of primer as metal is susceptible to oxidation. Doing this will significantly counter the effects of time and exposure to environmental conditions on the surface.
Here’s How to Prepare Metal for Painting:
Can You Paint Galvanized Metal With Chalk Paint?
Chalk paint is a decorative, water-based paint that gives a matte, chalky finish. Unlike high-gloss paint, a matte finish has no sheen and instead has a flat look.
Despite its similar nomenclature to chalkboard paint, they are not the same. Annie Sloan invented chalk paint in 1990 and registered the name as a trademark.
You can paint galvanized metal with water-based paints such as chalk paint. However, ensure you confirm with the manufacturer that the paint is suitable for galvanized metal. Before you buy and apply chalk paint, here are some factors that you can consider:
- Surface specifications- One of the many reasons chalk paint is so popular is that you can apply it to most surfaces with little to no preparation. Before you buy the chalk paint, ensure that it is compatible with the letter with the surface you are going to paint, which in this case, is a galvanized metal surface. You can use some chalk paint brands on metal surfaces, while some are not compatible with metal.
- The ingredients- Before you choose chalk paint, ensure that you read the fine print of the ingredient list. Ensure that the formula you choose is non-toxic and odor-free; and healthy for the environment and you.
- Application method- Most chalk paint enthusiasts advocate using a flexible long bristle brush to apply chalk paint to have traces of the brushstrokes in the matte finish. However, if you do not want to see brushstrokes on your surface, you can use a foam roller.
- Sealing- We recommend sealing a chalk paint finish using protective wax to protect it from wear and tear, especially in areas with high traffic. However, if you want to maintain the surface’s matte look, you can leave it bare and allow it to develop a natural patina over time.
Final Thoughts
Painting galvanized metal is an excellent way to add an extra layer of security and protection to your metal surfaces. It prolongs the already considerable life offered by galvanization to make it, so you don’t have to worry about your metal surfaces for a good long while. The focus remains on,
How to Paint Galvanized Metal
With the proper surface treatment and preparation, and compatible paints and primer, painting galvanized metal surfaces follows the same basic procedure as painting any other metal surface.
We appreciate you reading our article and hope that it has been informative. Please feel free to leave any comments, questions, and recommendations in our comment section below.
