These substances have an acidic component in their formula that functions to corrode or abrade substrates. The etched substrate forms a textured surface for paint or any topcoat to grip.
The primer named above is meant for smooth/burnished surfaces like metal, aluminum, and fiberglass. Typically, paint won’t adhere to these substances when you apply it directly; the self-etching primer slightly scours the surface to give the paint something to bite on.
In this article, I’ll dwell majorly on self-etching primers. Some of its aspects that I’ll discuss are its uses, how to apply it, and the distinguishing features from other types of primers. I’ll also mention a few products that work best in pertinence to everyday presenting situations.
Let’s kick off by defining a primer as below:
What Is Primer?
 A primer is a type of undercoat. It’s a prep coat put on surfaces to set them up for painting. These surfaces include wood, metal, plastic, fiberglass, aluminum, masonry, etc.
The act of laying down a primer as a lead-up to painting is known as priming; it improves the adhesion of paint, enhancing the protection and durability of the material underneath.
Primer is an umbrella term encompassing the regular primer, self-etching primer, epoxy primer, and similarly-functioning agents.
Most primers comprise a solvent, synthetic resin, and an additive agent; some contain polyethylene for improved durability.
How does a Self-Etching Primer Work?
It’s quite impressive how a self-etching primer prevents rust and corrosion. But looking at it under a microscope, how does a self-etching primer work?
The primer comprises zinc, polyvinyl butyral resins, and an acid. The acid etches/corrodes the metal surface, butyral resins help the primer bond to the substrate, providing strength.
The zinc component deposits on the acid-etched substrate to form a shield; this cover seals environmental elements from accessing the primed material. That’s its mechanism for rust prevention.
If physical damage occurs to the point of exposing the metal underneath, the zinc component will oxidize in place of the substrate (steel or iron). In this case, the zinc works as a sacrificial element to prevent rusting.
What Is the Difference Between Self Etching Primer and Regular Primer?
As we’ve seen above, there are numerous types of primers. In line with the article, let’s juxtapose some of them against the self-etching primer. What is the difference between self-etching primer and regular primer?
The primers in question vary in their makeup formulas and finishing features. It, in turn, leads to different drying times, application techniques, purchasing costs, type of substrate, sealing, and paint overlay.
Here is an analytical review of the differences I’ve just mentioned:
Dry time
There are three dry time levels, i.e., dry to the touch, dry for recoating/painting, and totally dry/cure time. Here, I’ll refer to dry time before painting.
Water-based regular primers take 3 hours to dry for recoating or paint application, while the oil-based regular primers take 24 hours.
Self-etching primers dry for recoating or painting after 30 minutes.
Primer Application
Self-etching primers are simpler to apply for the following reasons:
- They usually come in spray cans: you simply press on the nozzle to let the paint out
- Most of the time, you only need to lay down a single coat
- You apply it in thin coats
Regular primers are challenging to apply because:
- Many come in cans/buckets: so you have to apportion them into smaller containers and even thin them before applying with a paintbrush.
- It’s a high-build primer, meaning it goes thick on surfaces; this calls for a more detailed application.
- It requires two or more coats which consume time.
I should point out the following, however:
Some regular primers come in spray cans; these are not meant for reconstitution or thinning as they are ready-made for application.
The easy part of self-etching ends in the primer application; the subsequent practices are tricky. It’s because you have to wet-sand the surface before applying paint. You’ll need to add an epoxy primer over the self-etching primer in some instances.
Primer Formula
The above refers to what constitutes the primers. A regular primer comprises a solvent, synthetic resins, and an additive agent.Â
The synthetic resin protects against corrosion; The solvent solubilizes the additives and resins so that the paint can exist in solution form. It adjusts the curing properties, flow, and stability of the primer.
The solvent is also volatile; it evaporates, leaving other primer components to carry out their functions. Additives promote the paint’s production, storage, and performance features, e.g., non-marring and anti-mold features.
Self-etching primers contain polyvinyl butyral resins, phosphoric acid, and zinc. Some contain chromic acid or sulfuric acid in place of phosphoric acid.
The butyral resins enable adhesion to metal, flexibility, and toughness. Then, the phosphoric acid component corrodes the metal as it deposits zinc on the surface—all the above result in a scoured and rust-free surface for the paint to grasp.
The Type of Paint
We use regular primers to prepare surfaces for paints meant for lumber, masonry, canvas, and floors.
Self-etching primers are used to prepare metallic surfaces for painting. The metals include steel, aluminum, iron, brass, etc. We find them on automobiles, airplanes, building construction materials, etc.
Costs
Cost refers to the market price of the primers in question.
Regular primers will typically cost higher than self-etching primers. The former usually comes in quarts contained in cans, while the latter is usually sold in spray cans. Here, the difference in cost is due to quantities, i.e., regular primer is sold in higher amounts than its self-etch counterpart.
However, if you calculate the surface coverage relative to cost, the self-etch primer will cost more to cover a given surface area compared to regular primer.
Sealing Properties
Regular primer is a high-build primer; therefore, it’s good at filling up and sealing porous surfaces on substrates. Self-etching primer is a low-build primer designed to corrode/scour surfaces rather than fill pores and cracks.
The regular primer is better at sealing than a self-etching primer from the above.
Protective Properties
Both primers confer protection to the underlying substrate; the difference lies in the degree of protection. That said, a regular primer provides more protection than a self-etching primer. Take a look at the explanation below:
The only protective role of a self-etch primer is rust prevention; the zinc component of the formula galvanizes your metallic workpiece to prevent exposure to moisture and water. As you may know, moisture and water are vital ingredients for rust on metals.
Regular primers, especially shellac, have a major involvement in protection. They spread thick on surfaces and, in the event, prevent moisture and oils from bleeding out.
They also block stains, so you won’t see them. Lastly, they shield the substrate from excessive UV rays, i.e., the thick spread blocks sunlight from reaching the primed material.
Type of Material to Be Primed
Self-etching primers are suited for steel, iron, aluminum, and other metal surfaces.
Regular primers are best suited for materials such as wood, concrete, bricks, stonewalls, baseboards, etc.Â
A significant difference to note is that the self-etching primer is limited to metals and their congeners; you can’t use it on wood and masonry.
Using it on wood and masonry will destroy them because it’s caustic, i.e. it corrodes surfaces. Additionally, the primer does not seal pores and crevices on the workpiece as it only spreads thinly (a low-build primer).
On the other hand, you can use a regular primer on metals: it won’t be as effective as a self-etch primer. The regular primer doesn’t have caustic properties, therefore, it will not scour the metal and stick properly, but you can make do with it.
To put the above statements differently, using a regular primer on metal isn’t as consequential as using a self-etch primer on wood and masonry!
Anti-Rust Properties
Self-etching primers are the best when it comes to preventing metals from rusting. Regular primers also prevent rust, but to a lesser degree than their self-etching counterparts.
How to Apply Self-Etching Primer
We’ve already looked at the feasibility between self-etching and regular primers with various surfaces. I’ll now proceed to the ‘action’ part to show you how to apply self-etching primer.
The process involves repairing defects on the metal, removing the existing rust, and applying the first primer coat, then the second primer coat. Even for priming, you have to prepare your surface well so that the primer can get good reception. The details are as below:
Requirements
- Gloves: Lanon PVC Coated Chemical Resistant Gloves
- Respirator,Â
- Protective clothing
- Self-etch primer: PBE Professional Self-Etching Primer by Seymour
- UV repair patch
- Clean water
- Baking powder
Procedure
First, repair any defects on the metal using a UV repair patch or by welding as needed. You can also seek repair services from locally-based metal works and fabrication companies. The point here is to ensure you start when your workpiece is in the best condition.
Ensure you ventilate or aerate your working space and put on all the safety gear (respirator, Goggles, and a pair of gloves). I recommend the Lanon PVC Coated Chemical Resistant Gloves; they are heavy-duty, elbow-length, and resistant to acids, alkali & oils.
To remove any existing rust, mix some baking powder in water to form a paste, apply the paste over the rusted area, and let it sit for an hour.
Then, scrub it using a scrubbing pad or brush, followed by water cleaning.
Cleaning is done in accordance with the presenting situation. For instance, if your workpiece has grease, use degreasing agents; if it has chemical stains, use the most appropriate chemical removal agents when cleaning. Let it dry in readiness for the next step.
Take the self-etch primer and shake its can well before use. I recommend the PBE Professional Self-Etching Primer by Seymour. In the next segment, I’ll justify why I consider it the best of its kind. Let’s get done with this procedural bit first.
Hold the primer can 10-12 inches away from your workpiece and press firmly on the plunger cap/nozzle. Maintain this distance throughout the primer application process.
Maintain also the pressure with which you’re pressing the plunger cap/nozzle. The primer won’t land uniformly on the metal substrate if you change the distance or spraying pressure.
Let the primer dry for 30 minutes.
Apply a second coat of primer using the same procedure as the first. Two coats should be enough, but you can lay a 3rd coat as needed.
You can now paint over the surface.
Best Self-Etching Primer
There are many self-etch primers out there; some are excellent, others are average, and some are substandard. This section will show you the best self-etching primer and some of its outstanding features.
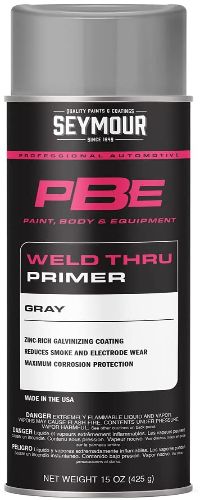 The PBE Professional Self-Etching Primer by Seymour is my best self-etching primer. You may have predicted my answer rightly because I’d already pledged up there to justify why this primer is the best. These are the reasons, features, and advantages of using the said primer:
- It contains zinc which shields underlying metal surfaces from damage
- The zinc metal protects the substrate even when it is scratched
- It’s rust-resistant
- The primer is VOC compliant
- It has an excellent durability profile
- This primer is easy to use
- It comes at an affordable price relative to its efficiency
Caution: As with other self-etch primers, this product is highly flammable. Therefore, I advise you to avoid open flames when using it. You should also store it in a cool and dry environment after usage.
The manufacturer has reiterated all these cautions and advisory caveats on the product’s container.
How to Apply Regular Primer
To complete the comparisons circle between the two primers, I’ll now take you through how to apply a regular primer.
Regular primer has different packaging from the self-etching primer. They also contain different constituents. This means the application tools and protocols differ.
The difference is not total, as there are a few similarities here and there. The process involves cleaning, repairing the damaged parts of your workpiece using a filler compound, mixing, applying the regular primer, and cleaning up.
I’ll use wood as the substrate/workpiece for this demonstration.
Requirements
- Regular primer: INSL-X Stix Acrylic Bonding Primer
- Paintbrush
- Filler compound: MINWAX Wood Putty
- Clean water
- Empty cans
- Putty knife
- Sandpaper
- Safety gear (full-face respirator and rubber gloves)
Procedure
Ventilate your working environment and put on the safety gear.
Next, clean your workpiece and let it dry as you identify divots and imperfections.
Then take a putty knife and smear the filler compound into the divots and holes; one of the best wood fillers that I recommend is the MINWAX Wood Putty. It’s a first-grade due to the following attributes:
- It works on bare, stained, painted, and finished wood
- The filler is easy to use, and you don’t need to sand it
- It comes at an affordable price
- This filler color matches most wood types
- The caulk is non-hardening and bonds perfectly to wood
Let the filler dry for 6 hours before you begin priming.
We’ve come to the priming part. Here, I prescribe the INSL-X Stix Acrylic Bonding Primer; it has the following desirable features:
- It’s a premium caliber acrylic-urethane primer
- It bonds well to wood and many other surfaces like plastic, PVC, glass, and masonry
- The primer has low VOC levels and is easy to clean using soapy water
- This primer has a broad coverage of 300-400 square feet per gallon
- It can be top-coated with almost all paint products
- You can thin it using water
- The product still cures at low temperatures; as low as 35â°F
Open the INSL-X Stix primer can and stir it using a mixing stick until it reaches a homogeneous consistency.
Apportion some of it into an empty can/container and put the lid back on the INSL-X container. If the primer is too thick, add water to thin it.
Ensure you cover your workbench and floor with a drop cloth to avoid accidental spills on unwanted areas.
Take the paintbrush and dip it in the primer; dip only the lower half of the bristles.Â
Wipe the excess primer against the side of the container and apply it to the wooden workpiece; apply along the wood grain for better bonding.
Let the primer dry for 4 hours. Meanwhile, wash the paintbrush and stirring stick in water and wipe off the bristles with a dry cloth.
Then, light-sand the primer with fine-grit sandpaper (180 or 220 grit).Â
Wipe off or vacuum away the accumulated debris.
Apply a second layer if the wood grain remains visible after the first primer coat and light-sanding. Follow the same procedure above to lay down the second coat.
Let the regular primer dry for 4 hours in readiness for the next step, i.e., painting.
When to Use Regular Primer
Primer usage varies across the painting world due to differences in the substrate material and the incoming paint formulation. Let’s discuss the situations when to use regular primer.
Regular primer is the best choice when your workpiece material is wood, clay/bricks, concrete floors, drywalls, and other masonry.
While you can use a regular primer on metallic and glass surfaces, it’s not the ideal option. In this case, it’s befitting to use a self-etching primer.
The regular primer is itself categorized into water-based, oil-based, and shellac primers. Their usages also vary based on prevailing circumstances. Case in point, look at the following circumstances:
Drying Time: If you’re time-pressed and you want a primer that dries quickly before recoating or painting, a water-based or a shellac primer will serve you best. You can finish your priming and painting in 24 hours using these primers.
An oil-based primer and paint can take up to 4 days for completion; the days extend further if you are laying multiple coats.
Durability: If you want a more durable primer coat, opt for an oil-based regular primer. If you’re not a fan of oil-based primers, I recommend water-based enamel primers or enamel shellac primers; they last considerably long but still not to the level of oil-based primers.
Environmental-Friendly Index: Water-based and shellac primers are eco-friendly with low VOC levels. Oil-based primers release higher levels of VOCs, which are noxious to the environment and cause respiratory problems in humans. If you have a history of respiratory illnesses or you’re an environmentalist (like myself), I urge you to avoid the oil-based route.
Usability and Clean-up: If you want a regular primer that’s easy to use and clean, go for water-based or shellac varieties. Oil-based regular primers require mineral spirits for thinning and clean-up! They are also not as easy to use as the other regular primers.
When to Use Self Etching Primer
Let’s go ahead and look at when to use self-etching primer.
We use the above primer on metallic surfaces like steel, aluminum, iron, brass, etc. Besides metals, self-etch primers work well on glass surfaces like fiberglass and composite glass; they also work well on ceramics.
The self-etch primers work perfectly on the above substrates because it scours their surfaces to make them more receptive to paint. Using a regular primer on these materials won’t adhere well, and the incoming paint will be less effective.
Metals are prone to rust. It’s best to use a self-etch primer when you want to prevent your workpiece from rusting or external corrosion. The self-etch primer contains zinc which guards against rusting.
Best Technique for Priming Using a Spray Can
It looks so easy on the eyes that you cannot imagine getting the spraying technique wrong when you see a spraying can. Well, spraying using a spray can is not as straightforward as it seems.
You have to use the correct method to work the paint into the substrate for better outcomes. Buckle up for a brief discussion on the best technique for priming using a spray can.
I’ve already discussed the prepping practices that lead up to priming. Two of these practices have a direct bearing on proper spraying techniques. They are ventilation and putting on safety gear.
A properly-aerated environment will notch up your painting technique to a professional level. Your working environment should also be windless/calm as the excess wind can blow the aerosol away from its target.
Putting on safety gear is another preparatory practice that leads to a good spraying technique. Wearing a full-face respirator prevents contact and entry into the body through the eyes, nose, and mouth.
Wearing gloves helps you to avoid skin contact with the spray can contents. Primers like the self-etch contain acidic components that are stinging/caustic to the body. Some primers also contain stubborn chemicals that make them difficult to wash off when they get on your fingers.
Before spraying, shake the spray can thoroughly to homogenize the primer contents. Shake this can regularly in the course of an application for assured uniformity.
Always hold the spray can 10 to 12 inches from the workpiece for better adherence. Any closer runs the risk of primer drips and runs. If you have it beyond the stated range, you risk wasting the primer as most of it will dissipate into the surrounding air.
A second and worse consequence of spraying from far away is the primer will land in unintended areas, e.g., it may land on walls or floor while your intended target is wood.
When spraying the primer, keep moving the can in side to side motions. Start moving the can along the workpiece a second before you let out any spray, and stop spraying before you stop moving. To be succinct, spray only when you’re moving your hand!Â
If you keep the can still when spraying, lots of bad things happen:
- Drips will form and streak along your workpiece
- The primer will concentrate more at the point of impact and less so on the periphery
- It wastes time and the primer as you’ll only cover in small segments
Remember to limit your hand movement to sideways motion; the other distance between the spray can and the substrate must remain within the 10 to 12 inches range to achieve uniform coat thickness.
Another technique is to ensure you overlap each spray-painted section until you’re done with the entire surface. This technique makes your work look seamless, and the primer will spread evenly on your workpiece.
If you keep jumping some parts when spraying, the primer will apply in uneven stripes on the substrate.
Next, avoid spraying in thick coats on the substrate. Otherwise, the primer won’t dry and cure well. It is better, way better, to apply a single thin coat, let it dry, and then lay down a second thin coat than using a single thick coat that won’t dry well.
I understand it could be a tad bit tedious, but don’t fail the patience test; it pays to follow the correct technique to the latter.
Another one: use the spray can when it’s upright as much as possible. The worst and rather illogical spray can position is upside down! Don’t attempt that; it’s wrong in every sense. Any other orientation compromises the uniformity of the released aerosol.
Lastly, I’d like to remind you that practice makes perfect! The more you prime or spray paint using a spray can, the easier and more natural it will feel.
What Is the Difference Between Self Etching Primer and Epoxy Primer?
We’ve already drawn comparisons between self-etching primer and regular primer; the two have wide-ranging differences. A second, more closely-related primer to the self-etch is the epoxy primer; some people go as far as using the two terms interchangeably.
What is the difference between self-etching primer and epoxy primer?
The differences revolve around user-friendliness, usage, substrates, chemical constituents, induction time, packaging, the scale of operation, etc. Here is the breakdown:
Uses
Epoxy primers have a more versatile usage than self-etching primers. You can use the former on bare metal, wood, concrete and stone walls.
Self-etching primers are predominantly meant for metallic substrates, i.e., steel, iron, aluminum, etc.
Another variation in usage is you can apply an epoxy primer on top of a self-etch primer, but not the other way round. In this scenario, the self-etching primer scours the substrate then the epoxy primer fills up evens out dents so the incoming paint can lay smoothly.
Chemical Constituents
As I had mentioned in detail, the self-etching primer comprises polyvinyl butyral resins, zinc, and an acid (phosphoric, chromic, or sulfuric acid). Epoxy primer has a different chemical composition: it contains epoxy resins and co-reactants/hardeners.Â
The epoxy resins are also called polyepoxides; they are reactive polymers containing epoxide groups.
The hardeners/catalysts include alcohols, polyfunctional amines, phenols, and mercaptans; these react with the epoxy resins to form a thermosetting polymer with excellent mechanical properties and chemical resistance.
That’s how the epoxy primer and paint materialize and work.
Packaging
Self etch primer comes in spray cans from where you can press on the trigger/actuator to release the primer in atomized form. The self-etch does not come in paint cans therefore, you can’t apply them using a paint roller or a paintbrush.
Epoxy primer comes in two containers labeled part A and B. Part A contains the resin while part B contains the hardener; you have to mix the two before applying the primer.
The mixing ratio of resin to hardener is 2:1. The application tools for this packaging will have to include a paintbrush or paint roller and a mixing paddle.
However, it’s important to note that some epoxy primers come in spray cans. These have the resins and catalysts premixed and ready for use. The application process for these is the same as that of the self-etching primer.
Induction Time
After mixing part A and part B epoxy primer, you should let it sit for about 30 minutes before application; this duration is termed “sweat-in time” or “induction time.” This period enables the resins and catalysts to interact extensively, and the cross-linking occurs to completion.
A self-etching primer does not have induction time; you only need to shake it before use. All of its constituents come in a single container (the spray can), and it’s often ready to use.
Ease of Use
A self-etch primer is more user-friendly than an epoxy primer. It’s because you apply it in thin coats, and it dries faster between coats.
You apply an epoxy primer in thick coats, and it takes considerably longer than self-etching primer to dry. On the upside, the epoxy does a better sealing and filling job than the self-etch primer.
Therefore, the epoxy primer can hide substrate imperfections in stark contrast to the self-etching primer.
What Is the Best Self-Etching Primer for Bare Metal?
If you set out to look for one, you’ll find countless self-etching primers out there. I’ll save you the trouble; what is the best self-etching primer for bare metal?
As indicated in this article, my best brand of self-etching primer is the PBE Professional Self-Etching Primer by Seymour. It has some of the best qualities to kick off your bare metal to a successful painting project.
If I juxtapose this primer with the foundation of a building, they essentially play the same role.
Remember, the foundation of a building determines the integrity of everything that follows; if the foundation is poorly set up, the rest of the building will crumble.
It’s the same script with self-etch primers; they influence the outcome of an entire painting project, so you have to get it right from the quality of the primer to the application protocols.
The self-etch primer that I just mentioned (PBE Professional…) works so well, and I can attest to that from personal experience and clientele reviews.
Buy Self Etching Primer
Automotive Self Etching Primer
 The term automotive denotes motor vehicles, i.e., cars, buses, trucks, and even airplanes. These machines also need to be painted, and at this point of the article, you all know the prelude to a successful painting project is a first-rate primer.
Look no further for an automotive self-etching primer; I got you covered.
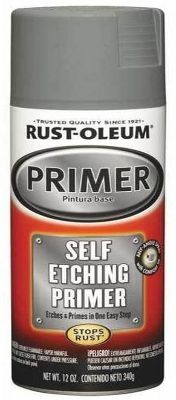
There are a handful of excellent automotive primers and brands to match, but I give props to the PRIMRSPRY Auto Self Etch by Rust-Oleum. This self-etch primer works so well that I’ve literally had to look for faults to dispel its “too good to be true” qualities; I’ve found none yet.
Buy Self Etching Primer
Some of its distinguishing characteristics pivot on:
Durability: The primer is no mean feat when it comes to longevity; it actually has a five-star rating on this from customer reviews.
Usability: This primer is easy to use. After wet-sanding and cleaning the automotive surface, all you need to do is shake the spray can and release the contents. The self-etch does the rest!
Top-coating: You can topcoat the primer named above with several paint types; it readily accepts them. This universal compatibility is courtesy of the adeptly-compounded formulas. That’s quite telling of the brains behind its innovation; I’ll leave that to your reckoning.
Cost: This is the best part; this primer is quite affordable for what it accomplishes. I’m even prompted to think it costs less than its output, but that’s a discussion for another day.
All I can say is the manufacturers and designers made this in the clientele’s best interest and with minimal financial pursuits.
Conclusion
I believe I’ve extensively covered the article’s title, and you can now define what a self-etching primer is. I’ve also drawn comparisons with other primers like the regular primer and epoxy primer to remove all the equivocations surrounding
What Is Self Etching Primer
This review has a framework of careful research and evidence-based accounts. I urge you to read it carefully and purchase the products herein; they’ll see you through a faultless painting journey.
Winston Churchill is quoted to have said, “My tastes are simple; I am easily satisfied with the best.” That’s what this is all about, and you’ll find the very best in this review. Don’t forget to recommend to others and give your all-important feedback.
