The flexibility of acrylic paints brings the best out of painting art. But can you sand acrylic paint during your projects?
Yes! You can sand acrylic paint on wood, metals, and plexiglass surfaces.
Normally, if you are going to sand acrylic paint, ensure that you are using fine-grit sandpaper and be less aggressive with the sanding.
Instances where sanding acrylic paint becomes necessary to include when you intend to repair a mistake, texturize, or add effects to your project.
You should note that before sanding any acrylic paint, you must allow it enough time to cure.
Acrylic paints boast a quick dry time, plus their chemical-based nature makes them more elastic than their counterparts.
Due to their fast dry time, you can use many layers without muddying the colors.
It is not a new thing to sand paint, especially if you want to improve its adhesion with subsequent finishes.
As I mentioned, the common acrylic paint surfaces that need to be sanded include wood, metal, acrylic gesso prime, and the rest.
How to Sand an Acrylic Painting

There exist many reasons why you ought to sand your acrylic paint.
But the prime reason is to peel off blotchy textures and streaks in the paint.
Sanding acrylic paint enhances the overall look, provided you do it correctly.
Sanding acrylic paint is a scheme that seems easy to mimic, but you might easily mess up if you don’t get it right.
Before sanding any surface, one must understand what surfaces are suitable for sanding.
Therefore conducting sufficient research can help you bypass wasting much time and energy.
As a DIYer, sanding your acrylic surfaces is handy when smoothing out bumps to attain your desired effect.
And with the help of these guidelines, your task will be relatively simple.
Check out below:
Tip: Ensure your acrylic paint is dry to the touch to avoid ruining the acrylic prematurely.
It will help if you wear your face mask for your safety. Also, if you sand between each coat, be sure not to inhale the paint dust.
Supplies You Will Need
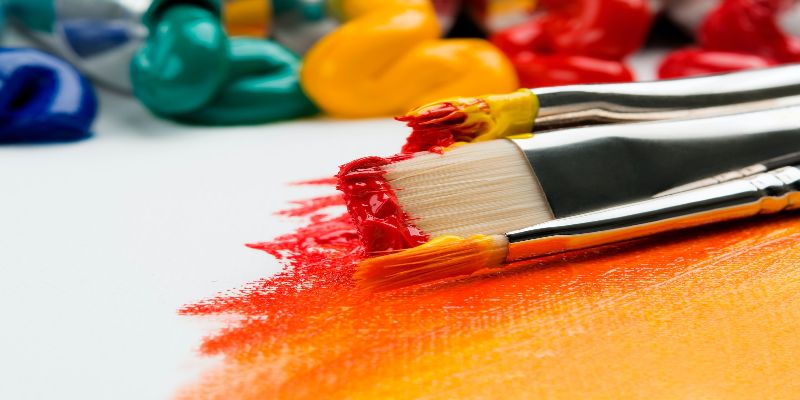
- Acrylic paint.
- Fine grit sandpaper.
- Canvas.
- Wood.
- Metal.
Step 1
When painting acrylic surfaces, you risk forming uneven textures. For this reason, sanding becomes a requisite step to enhance the look.
But before you even reach for your sandpaper, ensure the painted surface is dry. You can predetermine if your acrylic paint is dry by touching it.
If it doesn’t feel sticky, then you are good to go.
Take your fine-grit sandpaper and use it to peel off the visible imperfections.
Remember, before sanding; you must sprinkle water on the painted surface.
Doing this helps to prevent forming acrylic dust which may pose a health threat once inhaled.
Alternatively, you may want to saturate the sandpaper before using it.
Step 2
Next, use the fine-grit sandpaper to modify and control the acrylic paint texture. You will want to use circular motions to get a masterly finish.
In addition, if you want to give the paint an appealing look, sand down the acrylic gently.
Sanding too much might mess with the paint’s look, which will be a calamity recipe to fix it up.
Step 3
The next step is to try to come up with special effects based on your liking. You can distress your acrylic paint to establish a rustic look.
You will need 100 to 120 fine-grit sandpaper to obtain the most demanding results.
Tip: Never use rough-grit sandpapers. Such options can ravage your painting project primarily if used vigorously.
Here’s a Video On Sanding Acrylic Painting:
How Long Should Acrylic Paint Dry Before Sanding?
Since everyone is rushing to achieve a decent look on acrylic surfaces, most people tend to sand acrylic prematurely.
However, doing this is an inevitable way of ruining your acrylic paint on the surface.
Therefore, letting your acrylic paint dry is paramount before you begin sanding the surface.
Usually, it’s easy to determine if the paint is dry by touching it using your fingertips. If the area you want to sand is hard, you can begin standing.
In contrast, give it ample time to dry if it seems soft before you begin sanding. The estimated drying time is between 30 minutes to 45 minutes.
Do You Need to Sand Between Coats of Acrylic Paints?
Sanding between coats of acrylic paints is overly subjective.
Even if it’s not a must, sanding between coats will enhance the outcome of the project you are undertaking.
For instance, if the previous coat has major defects, sanding will bring it back to life.
Can You Sand Acrylic Paint on Wood?
Acrylic paint is a better pick on wood surfaces. And that’s what begs the question, can you sand acrylic paint on wood?
Most probably, the answer is yes. Sanding acrylic paint on wood promotes better paint adhesion and offers a smooth look after drying.
How Do You Smooth Out Acrylic Paint?
There are many ways to apply acrylic paint on surfaces, including brushes and rollers.
Even after painting, you will need to ensure that you work on a smooth surface to get the very best finish out of your project.
So how do you smooth out acrylic paint? Here are the right steps to get the work done.
Step 1
In the painting of a rough surface, it’s wise to use a good acrylic gesso to fix the dents.
After applying the gesso, sand between each coat to smoothen the surface. Wipe clean the surface after sanding.
You may want to apply extra coats of gesso for extra smoothness in your project.
Step 2
Use a soft brush for this particular step. Remember, the texture of your brush determines how streaky your acrylic paint becomes.
Interestingly, hog hair bristle brushes don’t excel well with acrylic paints.
Instead, it’s better to use a soft synthetic Taklon brush. Such brushes are very smooth, but the integrity of their results is outstanding.
Additionally, it offers good strokes.
Expensive brushes are not the best options, but you will want to avoid the cheap ones as they tend to lose hair easily.
Furthermore, cheap options will likely stick to your paint.
Step 3
To create a smooth sheen on your acrylic, it’s good to use opaque paint. Such products are bound to use lesser coats, eliminating the risk of streaking.
In contrast, transparent options need multiple coats for full coverage. You will likely get ridges and streaks in your painting project.
However, suppose you intend to use a transparent color, consider putting in a little dark color. Doing this makes the paint more opaque.
Alternatively, you may want to do underpainting which gives the clear paint a base.
Tips:
- Ensure you use good sandpaper that’s not too harsh.
- If you notice any stubborn streak, use a little pressure to sand it down.
- You will need a high-quality paintbrush when painting with acrylic paint. Such options are easy to control and last a lifetime.
- If necessary, use a flow improver. These products are designed to lessen the viscosity of acrylic paint.
Can You Use Sandpaper on Acrylic Paints?
Yes, you can use sandpaper on acrylic paints. But, you can only get the best results if you use sandpaper rated for the job.
You don’t just use any sandpaper. So, fine-grit sandpaper will do the trick.
Tip: While sanding, use less pressure to avoid messing with the surface.
How Do You Make Acrylic Paint Look Like Enamel?
Acrylic paints are a favorite of most DIYers nowadays. Despite their prevalence, acrylic paints lack a natural high gloss sheen.
For this reason, you need to add a glass-like look to acrylic for it to seem like enamel.
You can customize your fine acrylic paint to create a brushless, glossy surface.
But you will have to take extra steps, which I have shared in the guidelines below.
Step 1: Use Thin Paints
If you want your acrylic to resemble enamel, you should use thin paints. In this case, you will want to opt for paints designed with a thin consistency.
For instance, I suggest you go for acrylic paints with highly saturated colors.
Such options boast a thin consistency and provide a smooth application free from visible brushstrokes and rough texture.
Step 2: Change the Paint
With this method, you will need to customize your acrylic paint. You can perform this by putting in thin mediums to create a thinner color mixture.
Products like Golden’s GAC500 or GAC100 will excel well in this case. You can add them in thick paints to thin them, despite the color becoming less intense.
Therefore, start with thin paints to achieve the best outcomes. In addition, it pays to add at least 15% of the retarder to the solution to slow down drying.
As such, you will have sufficient time to execute smoother applications.
Step 3: Apply the Paint Smoothly
It is wise to use a soft wide flat brush to distribute even strokes of paint or mixtures to the surface in this step.
In the process, consider spreading the paint thinly while focusing on small areas at a time.
You will want to avoid creating more texture as you apply the paint mixture. So avoid positioning the brush at a 90-degree angle or erect to the surface.
Instead, I suggest you keep your brush set at a low angle to your surface. With this option, you can apply smooth strokes.
Step 4: Layer the Paint
The next thing you can do is to alternate the coats of paint with a medium.
Alternatively, you may want to add a light coat of pure paint color that is not diluted on your surface and leave it to dry.
You will not want to add water or medium to the paint color as you’ll mess with its concentration.
Suppose you are using thicker paint; it’s wise to sand smooth after drying.
Once the paint color layer is dry enough, smear a thin layer of undiluted gloss acrylic medium.
Then permit it to dry before applying another coat of paint color.
You may want to repeat the same thing as often as possible until each layer is dry before proceeding.
If your paint color layers keep up brushstrokes, wait for it to dry, then sand each layer.
It’s better to use water while sanding to prevent sanded dust from getting airborne.
After that, wipe down the sanded areas with a soft cloth when still wet.
Step 5: Pour the Paint
The last step is to add a little paint color to a polished pouring medium. Then follow by applying the mixture to your surface by pouring.
Doing this keeps off brushstrokes exactly when establishing a decent enamel look.
Not forget, spray the newly poured sheet lightly with alcohol shortly. You will have staved off bubbles from establishing on the surface.
What to Put Over Acrylic to Make It Glossy
As a DIYer, you have options for finishing acrylic paint to make it glossy. You can use several products to make your acrylic look glossy.
But, you must be careful when choosing the ideal product, considering the many available options.
Suppose you mistakenly settle on a fake product; you will count on losses. Products not rated for acrylic paints can irritate your painted surface as it ages.
To help, I recommend you opt for a glossy acrylic medium as an alternative to blending a glossy varnish with the paint.
A glossy acrylic medium builds a high gloss surface that will exhibit color on any painted surface.
What you have to do is to blend the gloss medium with the paint. Then follow with painting as usual. Once you are done, the paint will dry to a glossy finish.
Tip: you can achieve a more glossy finish using a high gloss varnish after the paint is dry.
Can I paint Over Cracked Acrylic Paint?
Acrylic paints remain an option for most painting devotees as opposed to oil paints.
The only problem with acrylic is that If you lack experience, then cracking is inevitable.
Cracking in acrylic paint mainly occurs due to the top layer drying quicker than the one underneath.
Other reasons that foster cracking in acrylic include painting consistency, environmental variables, etc.
The topmost layer establishes a skin and begins to harden and stretch while the bottom layer fumbles to dry.
In the process, the top layer virtually cracks. Therefore, avoid painting over it since the paint will probably peel off due to insufficient adhesion.
Suppose you want to wipe out the paint; you must use a non-abrasive sponge.
Also, as you rub the surface encircling the cracking, it’s wise to do it under a running tap.
There are many ways to prevent cracking on acrylic paints. They include:
-
Avoid Putting More than 30% of Water Into the Paint
A binder in acrylic paints offers the paint good adhesive qualities by tying up the polymers.
So, adding excessive water undermines the binder and brings about cracking.
-
Add a Medium
Various mediums integrate a binder. You’ll confer with your manufacturer to determine which option will thwart the cracking.
-
Use High Quality Paints
High-quality paints accept mediums without interfering with the paint’s default color.
Such quality paints come from reputable brands such as Winsor, Newton, Liquitex, and much more.
The brands mentioned above are known to produce artistic products over the years.
-
Avoid High Temp
The oscillation in temperature can result in cracking. Try not to work in overly hot spaces as you paint.
Not to mention, mounting fans to aid in quick-drying can also cause cracking in acrylic paints. That’s because the top layer of acrylic paint dries too fast.
-
Apply Thick Coats
Applying thick coats of paint is likely to enhance cracking over time.
So if you want to avoid this, try applying thin coats rather than a single thick coat.
Can You Sand Acrylic Paint Off a Canvas?
Acrylic paint is perceived to be the easiest paint for amateurs.
But, the prime issue with acrylic is the quick dry time which is both a benefit and a downside.
Peeling off acrylic paint that has dried on canvas is nearly impossible.
And that tells you that thorough prep is needed to wipe out the paint from the canvas.
So suppose you intend to mend a painting mistake or strip the whole surface for reuse; the job is tiresome.
And mind you, it doesn’t promise better outcomes, primarily if you don’t get it right.
You can use proven skills and correct solvents to sand off acrylic paint from canvas.
Not to forget, you have to be cautious when handling chemical solvents.
The list below demonstrates how to sand off acrylic paints from the canvas. Keep reading for more details.
-
Use an Appropriate Solvent
You can use many inexpensive solvents to strip acrylic paint from the canvas. Common options include mineral spirits, turpentine, and rubbing alcohol.
Regardless of the solvents you purchase, ensure your workspace is properly ventilated. Ideally, it’s best to work outdoors, free from heat sources.
Don’t forget to wear glasses and gloves.
-
Spot Clean the Acrylic Paint
If you want to remove a small portion of the paint from canvas, it’s good to spot clean a specific area with a solvent.
Doing this is better than painting over the surface you want to mend.
Dip a soft rag into your solvent and soak the solvent in the paint area you want to sand off.
Leave the surface to absorb the solvent for nearly 30 minutes. And after the due time, scuff off the subdued paint using a putty knife.
Alternatively, you can use an old toothbrush and still obtain the same objective.
-
Strip the Whole Canvas
If you want to wipe down all the paint from the canvas, you may want to soak the entire canvas in your solvent.
Look for a container that is large enough to accommodate the canvas. For instance, a storage container can fit the canvas.
Next, put enough solvent in the container until it reaches 1″ up the sides.
You then insert the canvas inside with the painted surface facing downwards. Then let the canvas absorb the solvent for merely an hour.
After an hour, withdraw the canvas from the solvent. And then, take your putty knife and scrape off the softened paint as much as possible.
Wipe down any lingering fragments of paint with a clean rag.
If the paint still lingers on the canvas, I suggest you repeat the process to the point where the paint disappears.
Then lastly, clean the canvas with a solution of hot water and soap. You will need to use a rag and, after that, leave the canvas to dry completely.
-
Apply Prime to the Canvas
After stripping off your canvas, the existing gesso coats will likely peel off. It’s, therefore, integral to reprime the canvas.
You can perform this by adding 3 to 4 layers of gesso using a wide paintbrush.
It’s even better to allow ample time between each coat for the gesso to dry before going next.
Also, you need to alternate the direction of strokes between each coat.
How Do You Fix Bumps on Acrylic Paints?
Painting with acrylic is a good idea, given that it dries very fast.
The problem with this trait is that your acrylic might get lumpy, and you are not done painting.
So then, how do you fix the bumps in such instances? This guide introduces some remedies you can employ to help you sort the bumps.
Steps
The first step is to get your 220 grit sandpaper since it’s preferred for acrylic painting. Then, use sandpaper to go over the visible bumps gradually.
It would help if you were careful not to add extra pressure as you might peel off the paint.
As you proceed, you will realize the bumps are narrowing down and possibly fading away.
Ensure that you sand the surface evenly and consistently over the bumps so the painting can appear uniform.
The process will take up much time depending on the bumps present on the surface. But you just have to endure to reap the best.
Lastly, you will need to repaint the sanded-down area. And if necessary, use a darker color to attain extra coverage.
How Do You Make Acrylic Paint Look Like Ceramic?
Customizing your acrylic paint to look like ceramic is relatively easy. The good thing with acrylic is that you won’t need many materials.
You will only need acrylic paint, a container, baking powder, a plastic spoon, and a paintbrush.
Ideally, any container, pottery, bottle, or planter will do the trick.
To begin, you will want to rinse your container to ensure you start with a clean surface.
Next, pour your acrylic paint into the container and squeeze in some acrylic gloss medium. Then take a spoonful of baking powder and add it to the mixture.
Use a paintbrush to stir the mixture until the paint texture becomes thick.
In the process, you should catch a glimpse of bubbles as the baking powder blends with the acrylic paint.
Can You Reuse Canvas With Acrylic Paint?
Canvas remains the commonest painting medium owing to its flexible surface. You can reuse canvas by peeling off the existing acrylic paint.
The easiest way is to soak the canvas in rubbing alcohol, and the acrylic paint will become loose.
Can You Revive Dried Acrylic Paint?
Acrylic paint is a versatile option for a myriad of painting projects. However, it can go bad if not stored as per the instructions.
At times, suppose your acrylic dries; you can revive it by soaking the dried acrylic paint in warm water.
However, you will have to add a small amount of water at a time. By doing this, you will evade thinning down the paint excessively.
Final Thoughts
Sanding acrylic paints serves to correct mistakes and add effects to your painted surface. The process takes time to perfect, but you don’t have to worry as it’s normal.
In addition, the moment you get accustomed to this project, you will love the job.
Regardless of the procedures involved, most DIYers still want to know,
Can You Sand Acrylic Paint?
Yes, you can sand acrylic paint. But a few aspects determine whether you should sand acrylic paint or not.
For instance, when you plan to mend minor mistakes, then sanding may not be integral.
Remember, the sandpaper and your technique will determine if the process will succeed.
Thanks for using up your time to sift through this guide. If there aren’t any suggestions, we can meet in the next one.