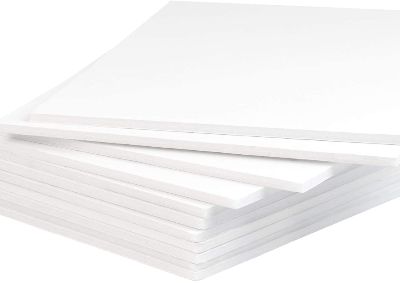
 Foam board is arguably the most versatile modeling product due to its lightweight design and ease of designing 3-D structures. For this reason, architects rely on its versatility to construct various models of their liking. Craft devotees similarly employ it for practical uses. This product comes with white outer layers, which need to be finished to enhance the look. But can you paint a foam board?
Yes, you can paint foam board to hide its white outer layers and enhance its appearance. Additionally, you must use spray paint since it never leaves streaks once applied. Also, spray painting foam boards grants you many color options.
For best outcomes, sand down the edges before painting. This way, you will not leave behind visible white spots on the surface. Let’s now delve into further details regarding foam board.
What Paint Can be Used on a Foam Board?
As an artist, you should keep in mind that a foam board has a pillow-like center that is susceptible to damage when exposed to UV light. It can be worsened by punctures and dents as the top layer can’t withstand high traffic. Lacquers and solvents can as well erode the center of this product.
Therefore, having this in mind can be a true game-changer when choosing the right paint for your project. So what paint can be used on foam board?
Ideally, acrylic paint is the best paint to use on foam board. That’s because it does not need to be mixed with solvents like oil paints. What’s more? Acrylic paint is fast-drying, reliable, and holds up well on whichever surface. More so, it boasts an even sheen which means you won’t need a base coat during application.
Tip
It’s wise not to go for oil-based paints, given that they integrate dangerous chemicals that could damage your foam board. Also, oil paints dry slowly and are likely to peel off the surface once applied.
What are the Advantages and Disadvantages of a Foam Board?
As spoken of earlier, foam board is a flexible material with numerous uses and comes in distinct colors. Besides that, it comes along with drawbacks which I have discussed in this guide. Continue reading to find out.
Advantages.
- The Foam board is non-toxic.
- This material is relatively versatile.
- You can foge it with a craft knife to achieve your desired shape.
- The fact that it’s acid-free means it provides an ideal surface for photographs adhesion.
- The Foam board is recyclable.
- It can endure high temperatures.
- Foam boards have a good impact resistance.
Disadvantages
- The surface is relatively common with shedding over time.
How Long Does Foam Board Last?
Due to its rigid construction and excellent water resistance, a foam board can endure roughly 100 years. You can also count more on this offer if you install it correctly.
What Can You Do When a Foam Board Gets Wet?
The foam board you use on the exterior foundation of your house is often susceptible to getting wet. Therefore, the trajectory to follow when your foam board gets wet will fluctuate based on the type of material you use.
So, to salvage a damp foam board, begin by assessing the spot with the issue. Then examine whether the foam board is damp due to condensation, moisture build-up, flooding, or a leak.
Based on the extent of the structural wetness, you can dry the affected spot with a towel or let it evaporate. What’s even better? You can mount fans or a dehumidifier against the damp area to expedite the drying process.
Ideally, if the foam board is too wet, you can uninstall it to remedy it effortlessly.
What Is the Strongest Foam Board?
Many experts attest that the MightyCore foam board is the strongest and most versatile foam board product. I say this because it’s incredibly durable, easy to work with, plus it’s an ideal choice for numerous projects.
Is Blue Board Moisture Resistant?
Blue boards are partly water-resistant but not waterproof. Preferably, you should not use a blue board for damp applications.
How Do You Paint Foam Board Without Warping?
Foam board warping can be a nuisance amid your paint job. However, you can deter such occurrences by following the steps I have highlighted below.
Step 1: Priming
If you plan to paint your foam board without warping, you have to start by priming it. If you disregard this step, the paint will soak up in the surface, resulting in warping, forming less vibrant colors, or peeling off over time.
You will want to use gesso as your preferred primer as it offers a textured coat for your paint to hold up well. Also, this formula improves your foam board’s protection against moisture.
So pick your flat paintbrush, soak It in the primer, and apply the first coat on the foam board. You will need to do multiple thin layers using long and vertical strokes for an even look.
Once the first coat dries, go on with a second coat but this time, apply the primer in the opposite direction. This way, you will achieve a smooth texture. After that, wait for 24 hours for the primer to dry, then proceed with a third coat if necessary.
Step 2: Sand the surface (optional)
Using gesso as a primer leaves a rough surface for your new paint to stick to effortlessly. But if you feel the surface is too harsh for your painting, it’s wise to do some light sanding. With this step, you will need 500 grit sandpaper to form a smooth surface by gently rubbing it back and forth on your primed foam board.
With merely a few strokes, you will be done balancing the protruding lines and bumps.
Tip
Avoid scrubbing the sandpaper too hard as you may damage the surface.
Step 3: Painting
By now, you should be set to paint. First, take your preferred paintbrush, roller, or sponge. Next, dip it into the paint, then apply the first coat. Doing so gives you the flexibility to regulate how much paint you use.
Next, use your roller to flatten the paint evenly on the surface without disregarding any spot. Then pull back for the paint to dry before moving forward.
After the first coat dries, administer a second coat for a solid color. And remember, the more layers you apply, the more vibrant your paint job looks.
By following this trajectory, your foam board won’t warp as you paint.
Can You Spray Paint a Foam Board?
Spray paint is an ideal option when painting a foam board. However, you should avoid spraying the inner layer since some solvents in spray paint can melt down the foam. Additionally, it would help if you sprayed paint your foam board in a well-ventilated area to avoid inhaling its toxic fumes.
Find out how to spray paint your foam board in the procedures below:
Materials needed
- Spray paint.
- Gloves.
- A face mask.
- Sheet of a newspaper.
Step 1: Prepare your workspace.
As with most paint jobs, surface preparation is the key to the mission success of your project. So take your time to prepare your workspace before painting. You can start by covering the floor with a sheet of newspaper to prevent paint from splitting all over. Open the windows for sufficient airflow, then wear your face mask and gloves.
Step 2
Once your surface is well-prepped, take your spray paint and shake it thoroughly to enclose the pigments, which separate with time. This way, the pigments in the paint rejoin for an even consistency.
After that, hold your spray paint nearly 12″ parallel to your foam board and begin to spray the paint lightly. If you spray so close, the paint might pool and bring about warping. Make sure you spray the paint in circular motions across the foam board lightly.
Tip
Avoid spraying a given section of the foam board more than twice. Oversaturation can also result in warping.
After two or more hours, spray an additional coat of paint using a different color for more discrepancy. After that, let the surface dry to the touch ahead of placing anything on it.
How Do You Seal the Edges of Foam Board?
A foam board is arguably the best long-lasting material used by most DIY workers. Many artists also favor this product in their projects due to its incredible longevity and ability to hold up to extreme traffic.
Even though a foam board is designed to withstand harsh elements for a while, it is a known fact that its edges are prone to degradation. For this reason, foam board edges demand sealing, which saves them from degradation and guarantees their long-term performance.
However, you don’t just utilize any sealant on this project. That means you will need to opt for the best sealer since many duplicates have flooded the market.
Don’t worry; this guide will show the best sealer to use on your foam board edges. Additionally, you will learn how to seal the foam board’s edges using the procedures highlighted below.
The first step is to smoothen the jagged edges by taking off all the little imperfections protruding from the sides.
After attaining a clear edge, take some Elmer’s glue and carefully drag it on your foam board edges. You will want to do it quick enough so that you flatten it with a brush before it dries. After that, wait for the glue to adhere and dry to the touch. Then proceed with multiple coats.
Once you’re done, remove any excess and let the foam board dry. Your edges will now be fully sealed, so there is no more porous surface.
Ideally, you can also use hot glue to seal your foam edges as it offers better protection and dries harder. In addition, it also eliminates any concern of degradation.
How Do You Cut Foam Panels?
Foam board insulation can be used for many applications due to its incredible strength and unparalleled durability. Ideally, it’s interesting to know that you can shape this product to come up with distinct designs of your liking.
Most people use a hot knife cutting tool to shape a foam board because it rarely chips it. Nonetheless, builders opt for a utility knife or a saw to shape the foam board. Check out the steps below:
Firstly, you have to decide whether to cut the foam board with a saw or a knife. Once you agree on the method you want, you can start displaying your DIY skills.
If using a knife, begin by laying your foam board on the surface you won’t bother disfiguring with knife cuts. Then measure out the spots you intend to cut and draw a line using a felt tip marker. Once you have drawn the line, make subsequent cuts along the line to a point the knife paves all the way and the panels separate.
On the other hand, if you are using a saw to cut the foam board, begin by marking the cut line on the barking. After that, support the sheet to lift it off the line, then set the blade to full cutting depth and cut the board. In the process, you will have to wear your goggles to protect your eyes from the tiny foam pieces.
Tip
Suppose you want to cut curves; it’s better to use a jigsaw as a circular saw does not fit in that field. Even better, you can use a wood cutting blade at maximum speed for optimal results.
How Do You Flatten a Painted Foam Board?
Foam board being a lightweight material, it’s often susceptible to warping. If you always experience this issue, don’t worry, as there are several ways you can use to flatten the affected spot.
In this article, I have highlighted the easiest method of flattening the painted foam board. Keep reading to learn how.
To flatten your painted foam board, start by placing your foam board on a level surface. Ensure the warped surface faces down, so the bumpy surface elevates.
Next, pour a glass of water into a dish, take a smooth paintbrush and use it to saturate the back of the foam board. As you saturate the warped foam board, place one hand in the middle of the foam board to apply a little pressure downwards.
After you’re done saturating the foam board, take a blow dryer, turn it on and program it to the medium setting. Next, hold your foam board piece down exactly when drying the saturated side with the blow dryer. Take a few minutes to dry the board, then pull back to ascertain if the foam board has restored its original shape. If not, repeat the process to a point the foam board straightens.
Alternatively, you can place an object with a flat bottom on top of the warped foam board for a few days. After that, you will find your warped foam has retained its shape.
How Do You Prepare EVA Foam for Painting?
As with other foam products, EVA foam can also be painted to give it a more appealing look and custom color. The good thing with EVA foam is you don’t have to use a primer, but you will have another alternative to give you a thick base to smooth out the foam’s texture.
Ideally, the mod podge can strengthen the foam or simply use white glue to seal the foam.
So to paint EVA foam, apply the first coat using a decent brush. Spread the paint all over the foam, and be sure not to leave behind any bumps.
After that, let the previous layer dry, then come up with a second coat. You will want to be careful not to apply too much paint on one spot than others. Also, as you paint, move your brush in a circular motion to help hide the deformities established in the first coat.
After that, pull back, watch out for any imperfections and mend them, if any.
Can You Paint on Black Foam Board?
Crafters commonly use black foam boards to create spectacular designs. The great lightweight design and smooth surface offer plenty of space for you to display your creativity. In addition, it’s suitable for anything, be it business presentations, school or craft displays. But can you paint on a black foam board?
Yes, you can paint on a black foam board, but you must watch for a few things before initiating the paint job. For instance, most black foam boards are bound to melt when painted with incorrect paint.
So it’s of paramount importance to factor in the paint type before painting on black foam board. The best paint to use on black foam board is water-based acrylic or latex paint. Such options dry quickly, endure a lifetime, plus they adhere to any surface effortlessly.
Can You Paint Elmer’s Foam Board?
Elmer’s foam board is undoubtedly a durable choice for crafts, art, framing, school projects, and mounting. Its smooth surface adheres well to markers, adhesives, etc. Not to mention, Elmer’s foam board brags a sturdy design that withstands denting, crushing, and other high impacts. However, the question is, can you paint Elmer’s foam board?
Yes, it’s possible to paint over Elmer’s foam board but assuming you’ve opted for the correct paint rated for its surface. Usually, all water-based paints work well with this product.
Is a Foam Board Better than a Gatorboard?
Both foam board and gatorboard are feasible signage solutions that outshine in lightweight versatility. Even if they encompass a foam core, slight differences make one option outdo the other.
For instance, a foam board is designed to hold up to heavy impact, unlike a gatorboard that breaks when exposed to too much impact. However, that doesn’t mean that a gatorboard can’t be used on worthwhile projects. This product uses its lightweight design to fold easily for designers to create professional logos, directories, and product displays.
So if you intend to launch a restaurant, a gatorboard can make for an ideal portable menu.
How Thick is Elmer’s Foam Board?
As spoken of earlier, Elmer’s foam board is a lightweight gadget, but it’s incredibly strong for durability. Its surface works well with paints, glues, markers, and other adhesives. Not to forget, Elmer’s foam board features a ½” thick acid-free surface that holds up to many mediums.
It has a strong bond that helps deter separation, whereas the resilient polystyrene foam core leaps back after cutting for an even look and endures high impact. For extra peace of mind, Elmer’s foam board is free from toxic solutions such as CFCs.
What Is the Difference Between Pink and Blue Foam Board?
There are mainly two foam board products in today’s market: pink and blue foam boards. The two are crafted with polystyrene resin and function virtually the same. Both have an insulating value of 5 in every inch of thickness and integrate similar chemical components.
Nonetheless, blue foam boards are crafted by Dow Chemical Co. In contrast, pink foam boards are made by Owens Corning company. Essentially, blue foam boards boast a rigid surface that enhances their strength. And that’s why it outshines the pink foam board.
On the other hand, pink foam boards are also handy in some projects. For instance, you can use pink boards to offer insulation in projects with a close connection between the board and the contiguous surface.
How to Paint PVC Foam Board
PVC foam board has great strength, incredible durability, and it’s also chemical resistant. Additionally, its lightweight design means cutting it is relatively easy for all DIY enthusiasts. But how about painting this product?
Painting PVC foam board is overly easy provided you follow the procedures provided. I’ll show you how easily you can paint a PVC foam board in the steps highlighted below.
Step 1
The first step involves the preparation of your PVC foam board. You can’t merely apply a coat of paint and call it a day. The paint is likely to peel off with time, plus it won’t stay long. So you must start by wiping clean the PVC surface with a rag moistened in mild dish detergent and hot water.
You do this to peel off all the dirt and oil that could ravage the paint’s final finish. After cleaning the PVC board, take a clean, dry rag and wipe it clean.
Step 2
Once your PVC board is clean, sand it with 220 grit sandpaper to peel off all the glossy surfaces. Doing so creates a textured surface where the paint and primer will latch onto effortlessly. Use minimal pressure not to damage your entire PVC board.
After sanding, take a damp cloth and wipe down the lingering sanding dust established on the surface. Alternatively, you can use a blow dryer to drive off the dust, assuming you have worn your face mask.
If your PVC board is already dull, avoid this step.
Step 3
Once your PVC board dries, pass on a coat of primer using a stiff natural bristle brush. The primer aids in facilitating better paint adherence, plus it seals all imperfections such as discoloration on the surface. Ideally, I would suggest you use KILZ primer as it’s meant to hold up well on almost all surfaces.
The initial coat should dry by an hour. After you are certain that the initial coat has dried, apply another coat of primer in long and even strokes. Give the surface ample time to dry, then go on with a third coat if necessary.
Step 4
Using fine-grit sandpaper, repeat sanding the surface for a more professional appearance. But don’t forget to wipe down the lingering sanding dust using a tack cloth.
Step 5
Considering that your PVC board is fully primed and ready, it’s ripe time to paint it. Take your tin of acrylic paint and shake it well for nearly a minute. Next, take a foam brush, moisten it in the paint and start rolling the first coat of paint in long even strokes.
You can also use an electric paint sprayer or a roller based on your liking. But a foam brush and a roller are better picks as they help deter visible brush strokes.
After the first, pull back and wait for the paint to dry. Afterward, repeat the painting with long strokes covering the left-out spots in the previous coat. Then let the paint dry again.
Step 6
After your last layer of paint dries, it’s now time to seal it. Apply your sealer on the PVC board, then let it cure slowly. Sealing the paint will give your PVC board extra protection against high demands, plus it offers an easy-to-clean surface.
Do You Need to Prime a PVC Board?
Even though it’s not integral, it’s necessary to prime your PVC board as it aids in paint adherence. However, some people skip this step depending on the PVC board’s texture.
Final Thoughts
From the insights in this article, a foam board can be used in various applications based on your project type. However, the remaining question is…
Can You Paint a Foam Board?
Yes, similar to other foam products, a foam board is too paintable. All you need is proper surface preparation, and you’ll get the job done in a few minutes.
Thanks for sifting through this guide. Drop any suggestions in the comment section. In the meantime, take pleasure in your paint job.