Having your car retain its original look does not have to be delegated to professionals. It’s interesting to know that you can handle this DIY task effortlessly, provided you have the essential supplies. So whether you plan to deal with rust spots, flaws, or revamp your entire vehicle’s look, a fresh coat of paint and the correct tools are necessary. Still, it would help if you primed your car before painting to enhance better paint adhesion. It still leads to this question, do I need to sand primer before painting a car?
Yes, sanding over primer before painting your car is necessary. You do this because, frequently, priming brings about dips and uneven texture on your surface. Still, sanding primer ensures that you utilize fewer coats of paint. So by lightly sanding it, you’ll create a fine surface where paint grabs hold.
Keep reading as this article establishes the essence of sanding primer before painting your car.
How Long Can Primer Sit Before Painting a Car?
Primers serve as a bonding agent for most painting projects. In addition, a primer establishes a base and aids in preparing uneven surfaces for paint. So anytime you use a primer, you lessen the odds of paint peeling or chipping over time.
But have you always wondered how long a primer could stay before painting your car? Ideally, most primers can hold up to a surface for nearly 24 hours, the recommended duration.
But some extend up to 30 days before painting your car. It’s worth mentioning that this duration fluctuates based on the primer type, how long it takes to dry, environmental factors, and eventually the surface you’re priming.
Can I Paint My Car Without Priming?
Most painting projects call for thorough preparations upfront, and painting your car is not an exception. While it’s somewhat possible to paint your car without priming, much can go wrong, and the outcomes won’t turn out so great.
Applying a coat of primer before painting allows the newly installed paint to stick better. And by doing so, you’ll achieve vibrant colors, and future peeling issues won’t be in the equation.
What Happens If You Don’t Sand Primer Before Painting?
 Sanding primer before painting helps level out imperfections exactly when promoting adhesion by establishing rough ridges for the paint to grab onto.
Ideally, using the right sandpaper is a benefit you can count on since it will tackle the project effortlessly. Regardless, what happens if you fail to sand primer before painting?
Failing to sand primer before painting can result in a blotchy surface, making the paint hard to stick.
How Many Coats of Automotive Primer Do I Need?
Without an automotive primer as a buffer, the paint you plan to install on your surface won’t adhere well. As a result, you will encounter future peeling issues, flaking, just like rust. So then, how many coats of automotive primer do I need?
Usually, two to three coats are sufficient, depending on how bare your surface is.
What Happens If You Paint Over Primer too Soon?
Painting is arguably the core of most refinishing projects by DIYers. While painting might seem a straightforward task even for those with prior experience, much can go wrong in the process. To be precise, painting over primer too soon is one of the mishaps that often occur amid a paint job.
Therefore, what happens if you paint your primer too soon? Painting over primer too soon can tarnish your entire paint job. I say this because the paint is meant to stick to dry primer.
If not, the paint will fall down the surface with time. Even if the paint adheres, it will degrade over time due to poor adhesion.
When Is a Primer Not Needed?
Primers are integral undercoats, given that they aid in fixing up the unlevel surfaces. In that respect, DIYers rely on primers to cultivate a more adhesive surface.
However, these mediums are not usually necessary in all painting projects. For instance, priming is not necessary if you plan to paint from one color to an identical color.
What Is the Difference Between Automotive Primer and Sealer?
Automotive primer and sealer are common terms in painting processes. These two formulas are often used interchangeably, but slight traits distinguish them in performance.
Firstly, automotive primer is administered directly to a bare substrate to enhance excellent adhesion ability. Usually, a good automotive primer will hide, seal, and bond surfaces to establish a great foundation for topcoats.
On the other hand, sealers are used as primer replacement, or you can apply them before priming. This formula acts similar to primers but has a unique feature that makes it a better pick. With this formula, you can recondition outmoded surfaces that are inappropriate for painting.
Can Primer Be Used as Paint?
The default purpose of primer is to bond, seal porous surfaces, and address other surface imperfections prior to painting. In that respect, you can’t leave a primer without a top coat of paint as it will deteriorate with time. Similarly, you can’t use primer as a paint replacement.
How to Prime Your Car Before Painting?
Thanks to various brands that manufacture primers, we can now offer paint something to hold up to for an impressive finish. Painting your car enhances the overall look and increases its resale value, but it’s integral to pass over a coat of primer before painting.
In this guide, I’ll take you through the procedures involved in this straightforward DIY task.
Supplies Needed
- Paper tarp and other covering.
- Masking tape.
- Wax remover or grease.
- Fine grit sandpaper.
- Primer.
- Dust mask and eye goggles.
- Putty.
- Car washing and cleaning materials.
Step 1: Peel off the dirt
As with most paint jobs, dirt removal is essential to promote better primer adhesion. So begin by giving your car a thorough cleaning to peel down any dirt and grime on your car’s surface. This way, your primer won’t have a hard time holding up to the surface.
Take a cleaning material, load it with regular liquid soap and dampen it in water. After that, wipe your car clean, not disregarding the confined areas. For the stubborn dirt that’s troublesome to peel down, use a grease or wax remover. These two supplies will wash off the stuck-on dirt with ease.
Step 2: Sand your car
Once you are done cleaning your car, it is paramount to sand down potential rough areas. With this step, you will need to employ tough grit sandpaper to tackle the tough spots.
But in small areas, you will need the typical fine-grit sandpaper. In the process, you will want to examine for potential holes or dips on your car’s surface. If any, fill them up with putty, then sand the problem area for even coverage.
Step 3: Allow your car to dry
Next, leave your car to sit for a few hours before reaching for your primer. It’s wise to know that primer works best on dry surfaces. So ample dry time will enhance better adhesion for your painting project.
Still, you will want to get rid of dust from settling on your car by mounting a wire from the car frame to a beached object close to the car.
Step 4: Mask the areas you don’t want to be primed and painted
Before you start priming, ensure you seal all areas you don’t plan paint or primer to spill onto. Use papers to cover all the mirrors, chrome, windows, just as in other areas.
Still, you will want to tape down the edges with masking tape. But suppose you mistakenly go over the edge, peel the paper away, and you won’t encounter any issues.
Step 5: Priming
By now, you should be ready to prime your car. But before commencing, ensure your skin isn’t exposed. Ensure the primer you opt for is an exterior primer, as interior primers are not a better pick in such a project. Still, you will want to wear your eye goggles and face mask to avoid Inhaling the primer.
Not to mention, if you are working in an enclosed space, be sure to keep all windows open for sufficient airflow. After you are fully prepared, start spraying the primer on your car at a distance of nearly 40 km away.
This way, you will have greater control of the amount of primer you administer on your surface.
Ensure you don’t overspray in one spot than others, as this will cause the primer to fail to dry and eventually crack. Just do multiple light coats on the entire surface in a circular motion.
After covering a large surface area, it’s wise to pause, pull back and ascertain that you are doing a commendable job. If you notice any mishaps, fix them up and proceed to apply multiple coats of primer. Once you are through, let the primer dry to the touch, then move on to the next step.
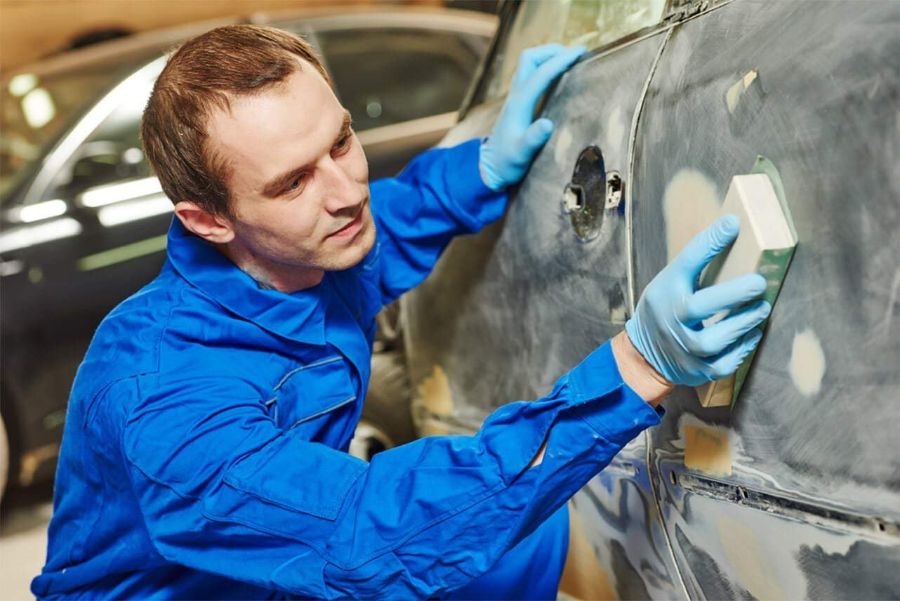
Step 6: Sand your car again.
Frequently, applying primer results in mounds or dips on your surface. Luckily, you can address this issue by smoothing out the problem area with a fine-grit sandpaper. Ensure you apply minimal pressure to the sandpaper not to erase the entire primer.
I recommend using fine-grit sandpaper in this step. After sanding, let the surface dry as you await painting.
Can You Paint Directly Over Self Etching Primer?
Self-etching primer is a rust preventive coating rated for use on bare metal. So can you paint directly over self-etching primer? It’s possible to paint directly over self-etching primer, but only if you put a surfacer over it to create a barrier between the primer and the paint. This way, you won’t encounter any bonding issues.
What Happens If You Paint Your Car Without Priming?
Most DIYers are bound to bypass priming when painting their cars, but this is not feasible. Primer and paint are distinct materials that execute different functions.
So bypassing the priming process can result in various undesirable outcomes. Ideally, you will recognize the consequences instantly, but some won’t be apparent until the close of your paint job.
So what happens if you bypass priming?
- Poor paint adhesion
Skipping the priming step means you are risking paint peeling off your car’s surface due to poor adhesion. This can even be worse in humid conditions. You may realize the paint is wearing off when you wipe down dirt on the surface.
Additionally, if your paint is a bright color, attempting to clean it makes it look dirtier. This might make you convict the paint’s quality you used, but the reality is you bypassed priming.
- Blotches
Priming helps to seal the surface imperfections. So bypassing this integral step means you will easily catch a glimpse of surface irregularities such as scars and rough areas. This effect will be more conspicuous primarily if you use bright paint.
What Type of Primer Do I Use to Paint my Car?
As spoken of earlier, priming is an integral step in most painting jobs. Therefore, whether you plan to tackle minor touch-ups or paint your entire car, priming is a must before bedding in a top coat of paint. But which option do I use to paint my car?
Considering the numerous primers that have flooded the market, finding an option that suits your needs can be somewhat difficult. You will need a primer that brags excellent corrosion protection and permits maximum paint adhesion.
Ideally, I recommend an epoxy primer for your car. This option is fit for large paint jobs, small touch-ups, rust protection, and so much more.
Using an epoxy mixer is relatively easy as it doesn’t require experience to mix it, plus it offers the optimum blend of paint adherence. Its dry time is unparalleled, making it commonplace for home mechanics. Besides this formula, here are other options you may consider worth it.
- Urethane Primer Surfacer
This option doesn’t offer the best corrosion resistance. And for this reason, it’s used in conjunction with fillers to mend minor touch-ups over a secondary base primer.
- Polyester Primer
Polyester primer is arguably the best filling spray primer on the market today. It’s mainly used to fill minor patches exactly when enhancing a good bonding surface. Regardless, this primer is prone to cracking over time, and it’s a little bit brittle.
- Urethane Sealer
Urethane sealer is primarily used as a tough adhesive layer for paint to hold onto. Even though it lacks filler capabilities, it’s ideal for painting an entire vehicle in good condition.
- Acid Etch Primer
Acid etch is a basic car primer used in conjunction with a rust preventative primer for optimal results. It dries much quicker than its prevalent counterparts once applied, and that’s why it’s commonly used in auto shops to lessen the repair time.
In addition, it works great on bare metal, eliminating the essence of metal conditioner. However, you need to topcoat it with a secondary primer.
- Enamel primer
Enamel primers are pocket-friendly options, and they boast a good level of corrosion-resistant abilities. If you encounter budget constraints, this option suits you best.
- Moisture Cure Urethane Primer
This option fulfills different functions: it’s good for paint adhesion, hard repair jobs, rust protection, and so much more. Not to mention, it cures quickly, making it commonplace for DIYers.
Will Primer Fill In Scratches In Car?
Some irregularities like scratches, chips and other surface imperfections are unavoidable in any paint job. The car scratches sometimes are too small for you to notice.
But what you should know is even the tiniest scratch is worth rusting. Therefore, you should never disregard your car scratches and surrender yourself to the maintenance cost of your car.
So will primer fill in scratches in the car? Yes, the responsibility of primer is to hide the surface imperfections, and in this case, a scratch isn’t an exception.
It’s wise to apply a coat of primer over scratches on your car before painting. If you leave the scratches to prevail, the imperfections will show through after painting, and I bet it’s something you won’t like.
How Do You Smooth Touch Up Paint on a Car?
Usually, any paint job has its ups and downs. You might have fixed a small repair on your car with touch-up paint. But the outcome doesn’t impress you.
The best way to address the clumpy touch-up paint is by smoothing it out to look as new as possible. I know hiring an intellectual to do it for you attracts extra money, but you’ll get the job done with minimal expense with these professional tips below.
Step 1: Remove the extra touch-up paint.
The first step is to peel down the excess touch-up paint. Usually, the excess touch-up paint is a result of poor application technique. So use your preferred method of removal to bring down the loose touch-up.
Ideally, I recommend sanding the loose touch-up paint with fine-grit sandpaper. Just soak your sandpaper in water, then gently sand the touch-up paint.
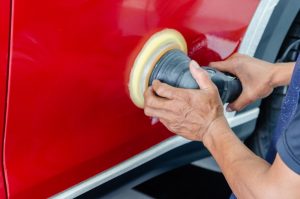
Step 2: Use a paint correction compound
After sanding, use an electric buffer to reveal the underneath layer of paint. Take a few drops of a rubbing compound, apply it on the applicator pad then position it onto the problem area. Ensure you set the buffer at a higher speed for optimal results.
How Do You Fix Scratched Car Primer?
Scratched car primer is caused by several aspects, including accidents, rocks and road debris, improper washing, and the rest. It’s important to address the scratches on your car to deter the establishment of rust which can be costly to fix up once developed.
The good news is that despite scratches being a common issue with cars, you can take the necessary steps to prevent and handle them once they materialize. Check out these useful tips highlighted below, and learn how to fix car primer scratches yourself.
Step 1: Preparation
The first step is to prepare how you will mend the problem area. Start by assessing the scratch depth and determine if it’s a paint scratch, clear coat scratch, or a primer scratch. Watch out for signs and take a look at the stringency of the scratch. Once you are done, reach for the proper tools for the scratch type.
Step 2: Clean the Scratch
After assessing the scratch, take a clean rag, saturate it in a water mixture and automotive soap, then clean the problem area. The essence of doing that is to get a clear sight of the scratch. You then use water to wash off the automotive soap and let the scratch dry.
Step 3: Peel down rust if any
Before fixing the scratch, remove rust, if any, using 120 grit sandpaper. If not, the rust will spread and continue to damage your car paint.
Tip
Avoid fixing the scratches under daylight. Instead, you should execute your job in a shadier place like a garage. This way, the scratch is safe from sunlight while it is still sensitive.
Step 4: Apply primer.
Next, apply an automotive primer to penetrate the affected area while enhancing a good surface for the paint to grab hold. After that, allow the primer to dry on the scratched area, then move on to the next step.
Step 5: Apply a fresh coat of paint
Once you are certain that the primer is dry enough, take a new paint that matches your vehicle’s color and apply it on the primed surface. The means of applying the paint are based on the severity of the scratch. If it’s a small area, use thin coats but if the problem area is deep, apply a thick coat evenly.
Step 6: Apply a Clearcoat
After the initial paint coat dries, proceed to apply a clear coat of dry paint. Be cautious when spraying a clear coat considering That it comes in a spray bottle. For that, you might over spray mistakenly, making the texture appear uneven.
After passing a clear coat over the dry paint, dab the spot with a clean cloth to ascertain that the texture is relatively smooth.
After that, let the surface dry before applying a polishing compound. You should settle for a high-quality polish to guarantee lasting smoothness for the initially scratched primer. Also, the polish will make your finishing look professional and reveal the beauty of your car’s paint.
Step 7: Clean the car.
Lastly, you can now wash your car using a clean solution blended with a bucket of water. After cleaning, rinse your car with clean water and wipe it clean with a dry towel.
Will Touch Up Paint Blend in on Car?
Touch-up seems to be a straightforward task, but it can be daunting, primarily when matching the new paint with the factory paint. Nonetheless, you can handle this task effortlessly, provided you get it right. Once you’re done, the touch-up paint should blend acceptably with the default paint.
For the touch-up paint to blend as expected, clean the surface and use less paint.
How Do You Blend Touch Up Paint on a Car?
Blending the touch-up paint is quite easy if you follow the necessary steps. Let’s delve into the integral steps required.
First, mask off areas you don’t want the paint to spill onto. Next, scuff off the touch-up area with 600 grit sandpaper. Next, take a clean cloth and peel down the lingering sanding dust.
Then move on to spray a coat of primer. As usual, the primer should dry to the touch before bedding in a coat of paint.
After the primer dries, you now paint over the primer from one end to the other. This way, your paint will appear more transparent as it meshes into the existing paint. After that, allow 30 minutes of drying time between each coat. Then go on with multiple coats if necessary.
Once you are through, mask off the taped areas and let your paint dry gradually.
Here’s How to Blend Touch Up Paint On a Car:
How Can I Darken the Touch Up Paint on My Car?
The default color of your car embodies your taste, and you’ll do all it takes to maintain its new look. However, several disfiguring aspects can mess up your car’s default color, and you’ll have no option other than applying touch-up paint to your car.
It’s interesting to know that you can darken the touch-up paint on your car, but any act of digression can mess with the entire process. So take your time to avoid the common mishaps.
When you plan to darken the touch-up paint, ensure you adjust the spray distance. Keep your spray gun roughly 20 inches away from the surface, and aim to apply light coats in a circular motion. This way, you’ll have the freedom to darken the touch-up paint or lighten it based on your liking.
How Can You Tell Blend Paint on a Car?
Blending paint on a car is a good way of reviving its default color. But without prior experience, much can go astray, and the imperfections will show through afterward.
Ideally, you can tell blend paint on a car by watching out for a suspicious spot on the car that appears unevenly painted. Usually, it looks a bit shiny than the entire existing paint.
Final Thoughts
We have seen the essence of sanding primer and how straightforward the task is. Regardless, DIYers are usually unsure whether the entire process is integral, considering it’s somewhat tiresome. And for that, it brings into question…
Do I Need to Sand Primer Before Painting a Car?
Yes, sanding primer before painting is not an option but a must. With that, the paint will have an easy time sticking to your car’s surface.
At this point, I believe you have learned a great deal about sanding a primer before painting a car. And, you will find it easier to go through your car painting steps without complications.
Do you have a question, suggestion, or opinion that you would love to share with me? I hope so, kindly feel free to share it with me in the comment section below.