Many beginner and professional painters love acrylic paint. It can adhere to several surfaces, including wood, metal, fabric, and glass, with quick and minimal preparations.
Furthermore, it comes in many colors, and you can mix them to create different shades. Of all materials, most people are more concerned with painting plastic.
Many home decors and machinery parts are made using plastic and require protection like any other material. But can you use acrylic paint on plastic?
Yes, You can use acrylic paint to customize plastic materials. However, you must use specific preparation procedures and products to get the paint to adhere.
You must always start by cleaning the plastic to remove any grease or dirt on the plastic. Then sand the surface of the plastic to roughen the texture.
Afterward, apply a bonding primer to get the acrylic paint to stick to the sleek plastic surface.
Finally, apply a clear coat to seal and protect the finish and maintain its luster for a long time.
In this article, I’ll go in-depth into everything you need to know regarding using acrylic paint on plastic.
I’ll explain why it is essential to prime the plastic and seal the acrylic paint after it dries.
I will also list a few of my favorite primers and sealers for plastic on the market today. But first, let’s discuss a few basics about acrylic paint.
What Is Acrylic Paint?
Acrylic paint is a protective and decorative coating developed in Germany in 1934.
It is a formula that combines acrylic resin and color pigment, then suspends it in an acrylic polymer solution.
The resulting product has the combined qualities of watercolor and oil paints with the added advantage of being water-soluble.
To understand acrylic paint more in-depth, you must first know its ingredients and what they contribute to its general features.
So, here’s a quick breakdown of Acrylic Paint Ingredients.
- Pigments are the components that give acrylic paint its color.
Paint manufacturers mainly sourced them from natural sources, but today you can also use synthetic versions created in factories.
The amount of pigment in paint directly affects its coverage ability. The more pigment, the more opaque the paint and the better it will cover surfaces.
More pigment also causes the paint to have a thicker consistency.
You may think that all you need to customize a surface is pigment. However, pigment particles cannot stick to surfaces on their own.
- Binders are the components that make sure that the pigments remain fast on the surface after painting. They bond with the pigments and form a colored film on the substrate.
The quality of binders used to make paint directly affects its durability and protective strength. The better the quality, the longer the finish will stay.
In the case of acrylic paint, manufacturers use Acrylic binders, which are on the higher end of the quality spectrum.
They ensure that the paint remains flexible while being scrub-resistant.
- The vehicle/Base is the liquid component that carries the pigments and binders. In acrylic paint, the vehicle used is water, thus making acrylic paints water-based.
Once you apply the paint onto a surface, the water base will evaporate, leaving behind a strong polymer film.
This dry film is a combination of pigment and binder, and it is the finish we see after painting.
The ingredients mentioned above are the basic components that make up acrylic paint.
However, there are other additives that manufacturers add to improve the effectiveness of the paint. Some of the popular additives include
- Buffers to stabilize and maintain the paint’s PH levels.
- Surfactants to make the paint dry quicker.
- Preservatives to prevent microorganisms from flourishing.
Types and Grades of Acrylic Paint
There are several types and grades of acrylic paints despite their formulas having similar ingredients.
The different types of acrylics differ by consistency, while the different grades differ by quality. Let’s look at each of them in depth to understand better.
Types of Acrylic Paint
- Heavy-bodied acrylic paints are thick and have a similar texture to soft butter. They are the best choice if you paint on coarse surfaces such as stones or rough canvas.
Additionally, their heavy consistency allows you to make peaks and maintain brushstrokes, which are handy when using the impasto technique.
Heavy body acrylics are popular among painters who like the heavy body similar to oil paint but are looking for a quicker drying product.
- Soft-bodied Acrylic Paints have a thinner consistency, similar to that of yogurt. Their texture is smoother and self-levels better than the heavy body variety.
These acrylic types are ideal for painting techniques that require continuous brush movements.
Their self-leveling nature allows them to flow freely on the substrate, smoothening brush marks in the process.
- Fluid Acrylic Paints come packed in bottles and have a flowy consistency like double cream.
Their flowy nature makes them ideal for brushing and spraying. You can also use them to achieve a staining effect on your work.
- Acrylic inks have the most fluid consistency and dry into a gloss finish.
They contain fine pigments that give them intense colors and allow you to use them with a paintbrush, an airbrush, or a paint pen.
Grades of Acrylic Paint
- Professional-Grade Acrylic Paints are the highest-quality acrylics on the market.
Manufacturers use the highest quality pigments and binders to make them, giving them an edge over other acrylics.
Additionally, these paints have vibrant colors that remain on the surface for a long time without fading.
Professional acrylics tend to be the most expensive because of the higher quality ingredients in their formula. However, the prices vary from brand to brand by a few dollars.
- Artist-Grade Acrylic Paints are also high quality and use the best ingredients available. However, manufacturers make them a little cheaper by using more binders in their formulas.
The extra binder gives these paints a little more sheen than the professional acrylics. It doesn’t affect the paint’s color or causes the finish to look any less professional.
- Student-Grade Acrylic paints are of lower quality and the cheapest of all acrylic grades.
Their formula contains more binder than pigment and uses mediums and fillers to give the coating more body.
These added ingredients make student acrylics more usable but also affect opacity and saturation.
For instance, you may notice that some become chalky when they dry, while others require several coats to achieve full coverage.
Student-grade acrylic paints are ideal for beginners, but even professionals can use them when working with a tight budget.
Should You Prime Plastic Before Applying Acrylic Paint?
Yes. You should always prime plastic before applying acrylic paint because the primer is what will help the acrylic paint adhere.
As we know, plastic is sleek and non-porous. This means its surface does not have the necessary features to hold on to paint.
So when you apply paint directly onto plastic, the paint film will be easy to scratch and peel off. This is where the primer comes in.
A good plastic primer will act as a magnet between the plastic and the acrylic paint. It will make the plastic more receptive to paint by giving its sleek surface some texture.
As a result, the paint will have a firmer grip, and you wouldn’t have to worry about peeling later.
The main reason for priming plastic may be to help the acrylic paint adhere.
However, plastic primers have additional functions that help make every project come out flawless.
Here are some of the additional advantages of using a primer before painting plastic:
- A primer will give the surface a neutral color. When you use a primer, you notice that it becomes grey or white after it dries.
These two colors are neutral; hence when you paint over them, the paint will retain its actual color.
- A primer will hide stains that are on the surface. It could be a nicotine stain or a marking that just won’t come off, no matter how hard you scrub.
This stain-blocking function also comes in handy when painting a colored plastic with a highly contrasting color.
The primer will stop the plastic’s actual color from showing through the paint.
- A primer will level the surface to make the finish look smooth.
Sometimes the plastic’s surface may have minor scuffs or slight dents that are hard to notice with the naked eye.
These imperfections may seem minor, but they will stand out after applying the paint, making the finish look uneven.
A quality primer will fill out these imperfections, creating a smooth surface for painting.
What Happens If You Don’t Prime Plastic Before Painting?
Here’s what’s likely to happen:
-
The Paint Will Peel
If you paint plastic without priming it correctly, the paint will lift and start to peel after some time. The peeling could happen before the paint dries or weeks after it cures.
I mentioned earlier that primer improves paint adhesion. So without it, the color will lose its grip, hence the peeling.
Also, improper adhesion makes it hard to clean your painted plastic without mishaps. You will notice the paint film detaching from the surface whenever you wipe it.
-
You Will Have to Apply Several Coats
If you do not prime the plastic, you will have to apply more than the two standard coats of paint to achieve your desired finish.
This is especially true when you paint a highly stained or dark-colored plastic with a lighter color.
Since there is no primer film to block the unwanted colors/stains, they will show through the paint coats. Therefore, you’ll be forced to apply more coats to hide them properly.
Rules to Follow When Priming Plastic Surfaces
- Wash the plastic properly to get rid of dirt and grease before priming.
If you apply primer on a dirty surface, the debris will prevent the product from adhering to the plastic properly.
As a result, you will experience countless paint failures even if you use the best plastic primer available.
- Avoid using old primers to avoid putting expired products on your plastic.
If you have cans of primer sitting in storage for more than a year, you must assess their quality and consistency before using them. And how do you do that?
- Open the old primer can and then concentrate on its smell. If the product has a sharp stink, it is spoiled, and you should dispose of it properly.
If there is no smell, stir the contents of the container lightly to re-mix the solids at the bottom with the liquid on top.
If the solids are detached like in coagulated milk, it’s time to buy a new batch of primer.
- Use quality painting tools and techniques when applying primer. The more precise you are during the priming step, the better your results after painting.
- Apply two coats of primer to prepare the surface adequately. Also, ensure that the first coat dries properly before applying the next one to avoid problems with damp paint.
- Sand in between the primer coats to improve their adhesion to each other. The better the primer adheres, the longer the paint will last.
Best Primer for Plastic
Some of the very best primer for plastic are:
-
KRYLON ColorMaster Ultra Flat Primer
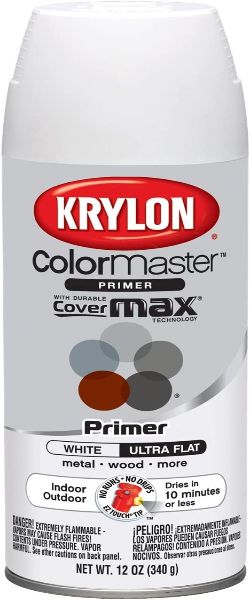 The KRYLON ColorMaster primer is a versatile formula that you can use on several surfaces, including plastic, metal, and wood.
It has a high concentration of solids; therefore, it is very thick and dries into a flat, texturized film.
The texture of the film gives the paint a better grip on the sleek plastic surface, allowing it to stay on for longer.
The high solids concentration also gives this primer excellent weather ability.
It can withstand constant temperature changes and resist moisture, allowing you to use it freely indoors or outdoors.
This primer dries in as little as 10 minutes, allowing you to resume painting immediately.
It comes in several neutral colors, including clear, in case you don’t need a base color.
Furthermore, the manufacturers fitted the spray cans with a special spray tip that prevents runs and drips. As a result, the finish will always come out flawless.
The biggest downside of this KRYLON ColorMaster Primer is that it has a thick consistency. As a result, it can obscure some of the finer decor details on the surface.
Pros
- It dries quickly
- It is highly texturized
- You can use it on indoor or outdoor surfaces
- It has fitted technology that prevents runs and drips
- It comes in several colors
- It is affordable
Cons
- It has an odor
- Its thickness can obscure some details.
-
Zinsser Bulls Eye 1-2-3 All Surface Primer
 The Bulls Eye 1-2-3 is a water-based formula that seals surfaces more uniformly than oil-based formulas.
It dries quickly and is ready for the top coat within one hour, meaning you will have little downtime during projects.
The most popular feature of this product is its ability to stick to all surfaces without sanding.
These surfaces include even sleek and hard-to-paint ones like plastic and metal.
Furthermore, it has excellent stain-blocking capabilities; therefore, you won’t have to worry about the original color of your plastic from showing through the paint.
Unlike most primers, you only need a single coat of Zinsser’s Bulls Eye to achieve full coverage. You get excellent protection for interior and exterior surfaces with one coat.
Moreover, you can use this primer with any top coat, including acrylic paint.
Pros
- It dries quickly
- You only need a single coat for full coverage.
- It can stick to plastic without sanding.
- It has excellent stain-blocking abilities.
Cons
- It is more costly than the KRYLON.
How to Paint Plastic With Acrylic Paint
Painting plastic with acrylic paint involves very few easy steps. First, you must clean and sand the plastic to prepare it for coating.
Afterward, you prime, paint, and then seal the surface in that order.
You must perform the steps in that order to achieve the best results. So let’s dive deeper into each of these steps and see how to perform them correctly.
Step 1: Set Up Your Workspace
Before you begin, you must ensure that you have everything at arm’s length.
Keep your paint, primer, and painting tools close to you, so you don’t have to leave the workstation whenever you need something.
- Ensure that the space has enough ventilation to circulate fresh air. Also, wear goggles, a respiratory mask, and coveralls to protect yourself from paint fumes and stains.
Step 2: Clean the Plastic
Cleaning is the most crucial step because it removes the dirt and grease that interfere with the paint’s adhesion.
All you need is soap and warm water, and you’re good to go.
- Mix warm water and mild soap in a large container to clean the solution.
- Next, dip a clean cloth in the mixture, wring out excess liquid then wipe the plastic thoroughly. Ensure that you remove all dirt and grease with a grease remover if necessary.
- Afterward, rinse the plastic with clean water, then dry it with a microfiber towel.
Step 3: Roughen the Surface
Plastic has a slippery surface that doesn’t allow the paint to grip easily.
So, you must make it a little rough to give it a bit of “tooth.” The best way to make it rough is to use rubbing alcohol and sandpaper.
- Pour some rubbing alcohol onto a cloth, then wipe the plastic surface to remove its sheen.
This step will also remove any oils you left behind when you touched the plastic with bare hands.
- Afterward, use fine-grit sandpaper to scuff up the plastic a little. Be careful not to press too hard while sanding, or you’ll leave deep gouges in the plastic.
- Finally, Wipe the plastic with a clean damp towel to get rid of all dust. You can also rewash it with soap and water, provided you dry it properly afterward.
Step 4: Apply Primer
Primer is essential for the acrylic paint to adhere, so do not skip this step.
- Use painter’s tape to mask off any plastic parts you do not want to paint.
The tape will maintain clean, defined lines between the painted and unpainted areas of the surface.
- Afterward, spray one coat of bonding primer on all the areas you want to paint. You can also use the brush-on primers if you prefer brushing to spraying.
- Allow the first layer of primer to dry as instructed on the product’s label before applying a second one.
If you use a brush-on primer, ensure that you sand between each coat for the best results.
Step 4: Apply the Acrylic Paint
After the primer dries, you can apply acrylic paint in any color or sheen you want. And, as with the primer, You can use brush-on acrylic paint or the spray variety.
If you’re using brush-on acrylics:
- Dip a paintbrush into the paint, ensuring you only cover 1/4 inch of the brush tip. Picking up a little paint at a time will allow you to apply thinner coats as required.
- Carefully apply the paint in long even strokes, not leaving brush marks behind.
If you spill the paint accidentally or notice any drips, correct them before the paint dries. Remember, acrylic paint becomes impervious to water after it dries.
Therefore, cleaning up messes immediately will prevent accidents from becoming permanent.
- Allow the first paint coat to dry as instructed on the product label before applying the second one.
- You can apply two or more coats as you desire; however, two coats are almost always enough.
If you’re using spray-on acrylics:
- Shake the spray paint can vigorously to combine the paint ingredients and ensure a smooth consistency.
Afterward, test it with a quick spray on a piece of paper or scrap plastic to ensure the sprayer has no blockage.
- Next, hold the spray can about eight inches from the surface, then spray a thin layer of paint on it. Use quick back-and-forth motions and overlap each spray to keep the coat consistent.
- Allow the first coat to dry, then follow up with two more coats for solid coverage.
Here’s a Video On How to Paint Plastic With Acrylic Paint:
Best Acrylic Paint for Plastic
They are:
-
KRYLON COLORmaxx Spray Paint and Primer
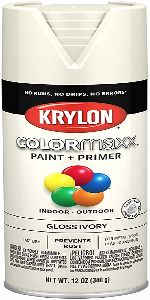 The KRYLON COLORmaxx paint and primer is a thick product that delivers premium coverage and excellent durability.
It contains additives that make it highly adhesive, allowing you to apply it on hard-to-paint surfaces such as plastic, metal, and ceramics.
This product comes in many brilliant, trendy colors and a variety of sheens to fit any style.
The manufacturers also fitted it with fade resistance technology to keep the colors vibrant for as long as possible.
In addition, this spray paint has an easy-push spray tip that allows you to spray in all directions – even upside down.
It dries to the touch in 20 minutes or less depending on the surrounding conditions. To top it all up, you can use it to paint surfaces both indoors and outdoors.
Pros
- It dries quickly.
- It comes in several colors and sheens
- Its thick formula delivers premium coverage
- It is fade-resistant
- You can spray it in all directions
- You can use it indoors or outdoors
Cons
- Even though it is a paint and primer, it doesn’t stick to sleek surfaces without a primer.
-
KRYLON FUSION All-In-One Spray Paint and Primer
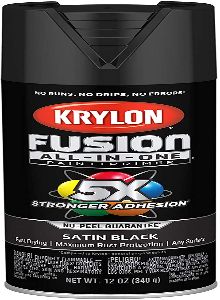
The KRYLON FUSION all-in-one is a great paint for plastic because of its excellent adhesion and durability.
In addition, you do not need to sand or prime the surface to make it stick. Therefore, it is the perfect choice for beginners.
This all-purpose spray paint comes in several colors and sheens.
Its formula also contains fade-resistance technology, allowing you to use it indoors and outdoors.
Furthermore, It has rust protection making it perfect for painting plastics attached to metal.
The best thing about this product is its quick drying time.
It dries to the touch in 20 minutes, and you can safely handle your painted items after an hour.
Furthermore, you can spray it at any angle without worrying about drips and runs.
Pros
- Excellent adhesion to plastic and other hard-to-paint surfaces
- It does not fade
- You can use it indoors or outdoors
- It dries quickly
- It comes in several sheens and colors
- It requires minimal surface preparation
Cons
- This paint is a little too thin for paint and primer. You will need to apply several coats to achieve full coverage.
-
RUSTOLEUM Painter’s Touch 2X Ultra Cover Paint and Primer
 The Painter’s Touch 2X Ultra is an oil-based formula that is ideal for use on all interior and exterior surfaces.
It can stick to plastic, metal, masonry, and even unglazed ceramics. It is a durable product that resists chips, thus providing long-lasting protection for all your surfaces.
This paint+primer is thick, offering excellent coverage with 2-3 coats. It also flows out evenly, hiding minor chips and cracks on the surface.
Furthermore, it dries to the touch in 20 minutes, ensuring minimal downtime between painting sessions.
The Painter’s Touch 2X Ultra comes in a 12-ounce aerosol can that can cover up to 12 sq ft. It also has a comfort spray tip that allows you to spray at any angle, including upside down.
Pros
- It resists chips
- It offers excellent coverage with a few coats.
- It dries in 20 minutes.
- You can spray it in any direction
- It comes in various colors and finishes
Cons
- This paint is costly.
How to Seal Acrylic Paint On Plastic
Painting plastic with acrylic paint is easy enough. However, the most important thing is getting the color to remain on the surface.
Sure, you can finish painting your item and leave the finish as it is. However, the color will be exposed and degrade pretty quickly.
The best way to prevent or at least delay the degradation of acrylic paint is by sealing it after it dries.
A sealing coat will be the barrier between the paint and damaging elements, keeping it from cracking and fading over time.
Additionally, the sealant will also make the paint color pop even more.
The best time to apply the sealant is immediately after the acrylic paint dries. I recommend using a clear polymer varnish or this step to achieve the best results.
Here’s the detailed procedure on how to seal acrylic paint on plastic.
Step 1: Clean the Painted Plastic
When you leave the final coat of paint to dry, dust and debris will settle on the surface. You may not see the particles with the naked eye, but they will be there.
For this reason, you must clean the painted plastic before applying the finishing coat.
Otherwise, the dust will get trapped between the paint and the sealer, ruining the finish. It will also interfere with the adhesion of the coat, which is no better.
- If you apply the sealer precisely 24-48 hours after applying the paint, the dust may not be embedded too deep on the surface.
Therefore, you can brush it lightly with a soft paintbrush, and you’re good to go.
- However, if you let the paint sit for longer, say a week or so, it is better to wipe the surface lightly with a damp cloth for the best results.
Step 2: Apply the Sealer
Most paint manufacturers package clear acrylic sealers in aerosol cans. However, you can also find some brush-on versions if you prefer a more hands-on method.
The way you apply the sealer is similar to how you apply the paint and primer.
- Apply a thin layer of clear sealer over the acrylic paint and let it dry according to the Product’s label.
Ensure that the film dries completely before applying a second coat.
If you apply another coat before the first one dries, your finish will have an orange-peel effect.
Alternative Methods of Sealing Acrylic Paint On Plastic
Other than clear acrylic sealers, there are other alternatives you can use to make your acrylic finish last longer.
These alternatives often work but do not last as long as the acrylic sealers.
Therefore, I recommend you only use them on painted plastics that you do not touch or use all the time.
- Mod Podge
Mod Podge is a glue usually used for decoupage art. However, you can also use it as a primer and sealer for acrylic paint on plastic.
This product is relatively thick and dries hard; therefore, it can protect your acrylic paint for a long while.
To protect acrylic paint with mod podge, dip a sponge in the product, then apply it over the dried paint.
Ensure that you spread it evenly to ensure that it all dries at the same time.
After the first layer dries, repeat the process.
Note: Unlike regular acrylic sealers, you will need up to five coats of mod podge to seal acrylic paint efficiently.
- Puzzle Glue
Puzzle glue has similar protective properties as mod podge. However, it dries completely clear, making its finish appear glossier and more robust than mod podge.
Using puzzle glue is just the same as using mod podge. All you need to do is apply about five thin layers over dried acrylic paint to protect it.
Remember, you must let each layer dry before applying the next one.
After applying the last layer, you must allow the glue to dry for about five hours before you touch or move your painted plastic piece.
- Elmer’s Glue
Elmer’s glue, aka PVA glue, is also a viable alternative for sealing acrylic paint on plastic. It dries into a firm film that prevents the acrylic paint from chipping.
However, unlike the other sealers, Elmer’s glue is slightly opaque, which will obscure the paint’s color.
For this reason, I recommend using Elmer’s glue on pieces where the paint’s actual color is not that important.
To use Elmer’s glue over dried acrylic paint, you must first mix it with some water. Diluting it will make the glue thinner and, therefore, easier to apply.
A mixture of 2 parts glue and one part water will always get the job done.
On the downside, Elmer’s glue will turn yellow as it ages, tarnishing the paint color simultaneously.
For this reason, I recommend using it with a lacquer spray to prevent yellowing.
Best Acrylic Paint Sealer for Plastic
These acrylic sealers are:
-
MOD PODGE Acrylic Spray Sealer
 The MOD PODGE Clear Acrylic Sealer is a perfect choice if you want your acrylic finish to pop.
It dries into a transparent and glossy film that would brighten the color of any fading acrylic.
You can use this sealer on multiple surfaces, including plastic, canvas, wood, and metal.
Moreover, it comes in a conveniently sized package that makes it easy to carry around.
The downside of this spray sealer is that it is highly flammable and emits an irritating vapor as it dries.
Therefore, you must use it in a well-ventilated area and keep it away from open flames.
Pros
- It provides a clear glossy finish.
- You can use it on several surfaces, including plastic and canvas.
- It makes the color of acrylics pop.
Cons
- It emits irritating fumes.
- It is highly flammable.
-
RUST-OLEUM Universal All Surface Clear Topcoat Spray
The RUST-OLEUM Universal All Surface Cleat Topcoat is an oil-based formula with excellent adhesion and durability.
It dries into a hard coat that resists chipping, offering long-lasting protection for acrylic paint.
Furthermore, this product is UV-resistant; therefore, it is the best choice for preventing acrylic paint from fading.
This clear topcoat dries to the touch in 30 minutes, and you can use your painted item in 90 minutes.
In addition, you can use it to protect painted surfaces indoors and outdoors, thanks to its superior weather resistance.
This product comes in an aerosol can with “any-angle” spray technology.
It also has a comfortable cap design that allows you to paint hard-to-reach areas without finger fatigue.
Pros
- It resists chipping
- It is UV and rust-resistant.
- It dries in 30 minutes.
- You can use it indoors and outdoors
- Its package has a comfortable cap design
Cons
- It is a bit costly
How to Make Acrylic Paint Dry Faster On Plastic
Acrylic paint takes between 30 minutes and one hour to dry, which is quicker than most paints on the market today.
It requires minimal downtime between painting sessions, allowing you to finish your project faster.
Despite the quick drying time, some projects or situations may require an even quicker turnaround.
You may want to finish a project faster, or you may want last-minute customizations to blend in with the finish.
Whatever the reason, you will need the acrylic paint to dry faster.
You can do the following things to dry your acrylic paint in half the usual time.
-
Apply Thin Layers
One of the basic rules of painting is that thin layers dry faster than thick layers. Here’s why.
Acrylic paint only dries after the solvent in its formula evaporates.
So, if the layer is thin, the solvent at the bottom will travel a short distance through the paint film before reaching the air. As a result, the paint will dry quickly.
On the other hand, the solvent will travel a longer distance if the paint film is thick.
Consequently, it will take longer to evaporate, causing the paint to remain tacky for a long time.
The same rule applies when you apply too many coats of paint. Even if you apply thin coats, putting on too many will slow the drying process. Why is that?
When painting any surface, we often recoat it as soon as the previous coat dries to the touch.
However, the paint isn’t fully dry at this stage, so you must wait a couple of days for the finish to cure completely.
When you apply too many coats, the solvent will take longer to evaporate, causing the finish to dry slowly.
Therefore, you must always apply thin coats when using acrylic paint to ensure a quick dry time.
-
Increase the Temperature In Your WorkSpace
One of the factors that affect the dry time of paint is temperature.
Acrylic paint requires a standard 70℉ for the solvents in its formula to evaporate at a normal rate.
However, if you increased the temperature a little, the solvents would evaporate faster, thus quickening the dry time.
If the temperature drops below 65℉, the solvents in the acrylic paint will evaporate more slowly.
As a result, the applied coat will remain wet until the temperature rises again.
If the temperature is way below the standard 70℉, you can raise it using your home heating system.
Simply set the temperature a few degrees above the standard requirement, and your finish will dry quickly.
-
Lower the Humidity In Your WorkSpace
We often overlook humidity, but it significantly influences the drying time of acrylic paint and other coating products.
When the humidity is high, there’s a lot of moisture in the atmosphere.
The high water content makes it hard for the air to absorb the solvents as they evaporate from the paint.
Consequently, the acrylic paint coat will remain tacky for up to three hours longer than the usual drying time.
On the other hand, low humidity means there’s very little moisture in the atmosphere.
Therefore, the air will absorb the evaporating solvents much quicker, causing the paint to dry faster.
So, if you want to hasten the drying time of acrylic paint, you must maintain the humidity at a level lower than the standard 50%.
You can wait for the humidity to go low or install a dehumidifier in your workspace to lower it faster.
-
Apply Direct Heat
If you do not own a dehumidifier or a home heating system, you can apply heat directly onto the painted surface to dry the paint.
Direct heat means using a blow drier or a heat gun. These two gadgets can get the job done, especially if you’re drying a small item or a small area of a larger item.
All you have to do is point the heat gun or blow drier at the area you want to dry. Ensure that you keep the gadget at least 10 inches away from the painted plastic.
This way, You will avoid burning the paint and the plastic surface. Also, do not dry one area for too long or risk burning the paint and the surface.
-
Purchase a Fast-Drying Acrylic Paint
Fast-drying acrylic paints are the best choice if you don’t want the hassle of altering temperature and humidity.
They have additives that make them dry quicker than the standard one hour.
If you purchase quick-drying paint, you must also improve your painting game.
Quick-drying acrylics are more challenging to apply because they tend to dry before you fix all mistakes.
Therefore, your reflexes as you paint should be sharper if you want the finish to come out flawless.
Conclusion
Acrylic paint is the most popular surface coating because it sticks to all materials.
Furthermore, you do not need to do a lot of surface prep to make it adhere. But is acrylic paint good enough to stick to hard-to-paint surfaces?
Can You Use Acrylic Paint On Plastic?
Acrylic paint will work wonderfully on plastic if you prepare the surface properly.
You must use isopropyl alcohol to dull the plastic’s sheen, then apply a primer to help the paint stick.
After applying the paint, seal it with a transparent acrylic polymer to make it last longer.
You can use mod podge or puzzle glue as alternative sealers if you do not have a transparent acrylic polymer.
Make sure the acrylic paint is fully dry before applying the sealer. Otherwise, you risk smudging it and ruining the finish.
Thank you for reading this article, and I hope it has clarified everything concerning acrylic paint on plastic.
If you need me to clarify anything, please don’t hesitate to reach out in the comments below.