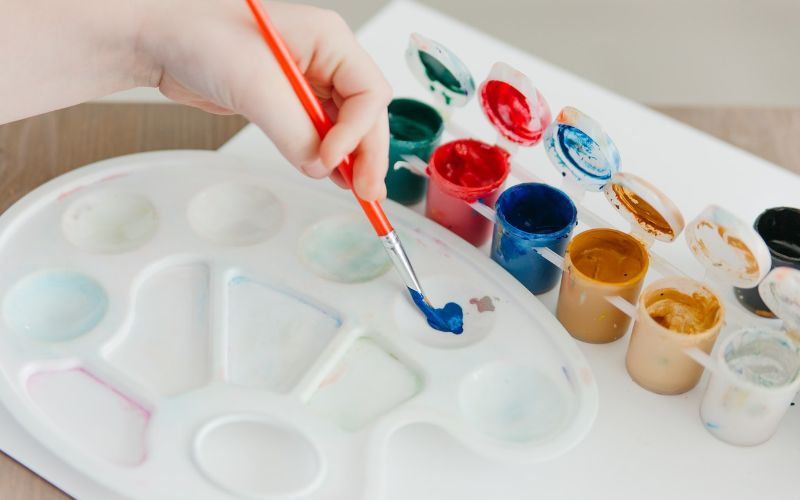
Rubber is a very tough and versatile material. It comes in many forms, including footwear, floor mats, car tires, and hoses.
However, some rubber items have a dull appearance. As a result, people everywhere look for affordable methods of customizing rubber.
The universal way of customizing any item is to paint it. But will the same solution work on rubber? Can You Paint Rubber?
Yes, you can paint rubber. However, the paint you choose and the type of rubber you have will determine how long the color will last.
Paint lasts longer on harder rubbers because they do not bend. Therefore there is minimal chance of the paint coat cracking.
Regarding paint, acrylic and marine paints are the best for rubber because of their flexibility.
They can move in sync with the rubber as it expands and contracts due to temperature changes. As a result, they do not crack easily.
You can also use removable rubber paints if you want the customization to be temporary.
These paints are also durable and flexible, but you can peel them off easily when ready for a change.
In this article, I’ll discuss each paint type for rubber individually.
I’ll also explain simple painting procedures for different rubber items. But first, let’s talk a little bit more about rubber.
What Is Rubber?
Rubber is a polymer that can stretch and shrink, allowing it to take any form.
It can be extruded, rolled into sheets, or injection-molded, depending on the item you want to create.
Rubber started becoming popular around 1000 B.C.E among the central and southern Americans.
The people harvested it straight from rubber trees and used it to waterproof clothing and tools.
It became such a sought-after material that it stirred up a lot of interest among the folk in the Americas.
In the early 1800s, Charles Marie de la Condamine, a French explorer, sent a rubber sample back to Europe.
It proved to be a very effective material, making it a high-demand product in a short time.
The demand was so high that the natural rubber trees could not produce enough rubber to satisfy everybody’s needs.
Consequently, people started looking for ways to make more of it.
In 1910, Sergei Vasiljevic, a Russian scientist, developed the first synthetic rubber.
Consequently, synthesized rubber became popular, especially since it was cheaper than the rubber harvested from trees.
Types of Rubber
There are two types of rubber; Natural Rubber and Synthetic rubber. Their main difference is that one occurs naturally, while the other is produced in factories.
Let’s look at each of them in depth to help you understand better.
-
Natural Rubber
Natural rubber comes from a milky, runny liquid that oozes from certain plants when you cut into them. This runny liquid is what we commonly refer to as latex.
There are more than 200 plants worldwide that produce latex.
Take common dandelions, for instance. When you snap off their stems, you will see latex dripping from the fresh cut.
In theory, you could use the latex from dandelions to make rubber. However, you would need a massive load of them to make enough rubber for a project.
Although many plants produce latex, 99% of the world’s natural rubber comes from a tree species called Hevea brasiliensis.
It is the tree that we commonly refer to as the rubber tree.
Mature rubber trees can be tapped regularly and yield at least one cup of latex every two days.
Afterward, manufacturers process and compact the latex into bricks before shipping them to stores.
Other than bricks, sometimes the manufacturers roll the processed latex into sheets and then smoke them to prevent mold growth.
Afterward, you can use the treated rubber to make a wide range of products, including pacifiers, surgical gloves, car tires, kids’ toys, etc.
-
Synthetic Rubber
Synthetic rubber is made in chemical plants using petrochemicals as their base. The most common synthetic rubber known today is called Polychloroprene, aka Neoprene.
Manufacturers make it by reacting acetylene and hydrochloric acid to form an elastic substance similar to natural rubber.
Another common synthetic rubber is Emulsion Styrene-Butadiene Rubber (E-SBR). It is the rubber used worldwide to make vehicle tires.
Rubber manufacturers use various types of polymers to make synthetic rubber. Every polymer always has a specific feature that it adds to the rubber.
For this reason, synthetic rubbers tend to have different properties.
-
Properties of Rubber
Rubber is resistant to extreme temperatures and abrasions caused by scratches. In addition, it can resist damage caused by chemicals and oils.
Regarding its physical state, rubber is very stretchy but tough simultaneously.
It can also be as hard as wood or malleable as a cloth. These favorable properties are what make rubber the versatile material that it is.
Pros and Cons of Painting Rubber
Pros
The biggest advantage of painting rubber is that the paint will last as long as you follow the correct painting procedure.
You must clean the rubber, sand it, and prime it before applying the paint. These steps are easy to follow; even an amateur painter can do it.
Cons
- Paint tends to crack on rubber. Because of its elastic nature, the coating that you put on rubber will stretch with the material.
Eventually, the tension will be too great, causing the paint film to start cracking in different areas.
Flexible paints like acrylic and marine paints can minimize the chances of cracks. However, these flexible paints will wrinkle if you overstretch the rubber.
- Removing paint from rubber is difficult. Once you paint rubber, removing the paint is tough if you change your mind.
You could counter this problem by using removable paint. However, sometimes even removing the peel-off coatings can be quite challenging.
- You cannot use your painted items actively unless it is temporary paint. When you paint a rubber item, the best thing to do is use it as decor.
If you use the item actively, you risk stretching the rubber and causing the paint to start cracking.
If you must use the painted object, restrict the usage to a minimum to prolong the paint’s life.
Types of Paint for Rubber
Since rubber has many unique qualities, you must select a paint that can accommodate all its features. The most important feature to consider is its elasticity.
Since rubber can stretch in all directions, you must ensure that the paint you select is flexible.
A flexible coating will move in sync with the rubber, thus reducing the chances of premature peeling and chipping.
Below is a list of all the types of paint that provide lasting finishes on rubber surfaces.
-
Acrylic Paint
Acrylic paint is a very popular paint that is mainly used for crafts. It adheres well to many surfaces, and its dry film is flexible – the perfect combination for use on rubber.
In addition, it comes in several colors, so you have endless choices.
On the downside, this type of paint is not the most durable. Therefore, it is only perfect for indoor rubber surfaces or items you do not use frequently.
If you want lasting results with acrylic paint, you must apply at least two coats and seal the finish with an acrylic sealer.
The sealer may not help the acrylic paint withstand outdoor weather, but it will make the finish last longer.
-
Marine Paint
Marine paint is the ideal choice if you are after a more durable finish. It is the paint customarily used on nearshore structures and swimming pools.
This paint type can withstand even the harshest outdoor conditions without flaking off prematurely.
It bonds well to rubber without the help of a primer, and you do not need to apply a sealer to make it last.
Marine paint is the perfect choice if you’re painting rubber items that are outdoors or constantly exposed to moisture.
-
Exterior Paint
Any paint made specifically for outdoor use is also a great option if you want a durable finish on rubber.
These paints do not fade when exposed to UV rays and can stand up to extreme rains and winds.
In addition, they are flexible to allow them to withstand the constantly fluctuating temperatures outdoors.
These features make Exterior paints an ideal choice for customizing rubber.
However, unlike marine paints, you must always start with a primer whenever you use exterior paint.
The primer will improve the adhesion of the coating, making the finish even more durable.
This paint is best for painting all kinds of rubber, from old car tires to rubber boots.
-
Removable Paint
Removable rubber paints are the ideal choice if you want the finish to be temporary.
It adheres to rubber just like ordinary paint, but you can easily peel it off after it dries.
The best thing about removable paint is that it will remain on the object for as long as you want without incurring any damage.
IT will not peel or crack until you peel it off deliberately.
Best Paint for Rubber
Worry not if you feel a little overwhelmed by the many paint choices. Below is a short list of some of the best paints that work excellently on rubber.
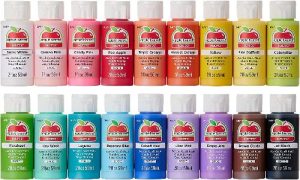
Apple Barrel Acrylic Paint Set-(Best Acrylic Paint For Rubber)
The Apple Barrel acrylic paint is an ideal choice if you are painting rubber arts and crafts.
It is an 18-piece paint set with a wide variety of colors, including pewter grey, Fuschia, and flag red.
Each color in this paint set dries into a brilliant matte finish. Moreover, this paint is fully opaque, allowing you to achieve full coverage with only two coats.
You can apply this paint on rubber using a paintbrush, a stamp, or a sponge if the item is too small. You can also clean the tools easily with some soap and water.
However, you must clean before the acrylic paint dries, or the task will become more difficult.
To top it all off, this paint comes in small bottles that are easy to open and squeeze, making it ideal for kids and adults.
Pros
- It adheres to rubber without much surface prep
- It has a brilliant matte finish
- It comes in 18 unique color
- It is easy to clean up with soap and water
- It is easy to apply
Cons
- You must clean up messed before the paint hardens.
- This paint set is not suitable for large surfaces.
TOTAL BOAT Wet Edge Topside Paint For Boats- (Best Marine Paint For Rubber )
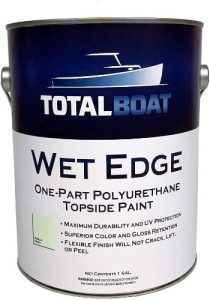
This TOTALBOAT wet-edge marine paint is ideal if you want a permanent finish on rubber.
It dries into a beautiful finish that is chemical resistant and can resist scratches and chipping.
In addition, it has excellent UV protection that allows the finish to retain its perfect color and gloss for a long time.
This paint is ideal for rubber surfaces because it is flexible.
Therefore, it can withstand constant temperature fluctuations without losing its grip on the surface.
It is also easy to apply with a brush or a roller; however, I recommend using both for the best results.
If you are painting a small item or want to finish quickly, you can spray this paint onto the rubber.
On the downside, this paint produces a strong odor as it dries. Therefore, I recommend using it on outdoor surfaces or on items you use regularly.
Also, wear protective gear to keep away paint stains and fumes.
Pros
- It is highly durable
- It is flexible
- It is easy to apply
- It retains its color and gloss for a long time
Cons
- It produces a foul odor as it dries
- It is costly
RUSTOLEUM Automotive Peel Spray Coating-(
Best Spray Paint For Rubber)
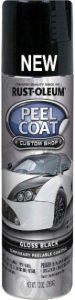
This Rustoleum Spray Paint is a temporary rubber coating that allows you to customize your surface as often as you want.
The manufacturers formulated it to let you easily peel the coat off without scratching your surface.
This product dries to the touch in just 20 minutes, allowing you to finish projects quickly. The small aerosol can cover up to 8 sq ft with at least five light coats.
In addition, its dry coat provides a matte finish that you can wash without it peeling off prematurely.
The best thing about this paint is that it will remain on the surface until you are ready for a change.
You won’t have to worry about the finish getting ruined before you enjoy it fully.
Pros
- It is easy to apply
- It is durable
- It dries quickly
- It stays on until you are ready to peel
Cons
- Sometimes the paint is difficult to peel off.
How to Paint Rubber Without Cracking
One of the biggest problems painters deal with is cracking paint on rubber.
You may use the right type of paint and follow the correct painting procedure and still experience these problems.
On the bright side, you can do a few things to minimize the cracks before they appear.
So, here are a few tips and tricks on how to paint rubber without cracking.
- Ensure that you allow every paint coat to dry before applying the next one.
If you put on a fresh coat before the previous one dries, the finish will wrinkle, increasing the chances of cracks appearing.
- Use coarse grit sandpaper to roughen firm rubber items to enhance the bond between the surface and the paint.
If the paint has nothing to grip, it will start to peel and crack in different areas.
- If you want to modify your rubber items, let that be the first thing you do.
If you cut, drill or move the item after painting, the actions will stretch the rubber, causing the paint to crack.
- Apply the paint in thin coats to allow it to dry thoroughly. If you apply the coats too thickly, they will not dry properly, and that’s the biggest cause of cracks and wrinkles.
How to Spray Paint Rubber Boots
Rubber boots are the most practical footwear for wet weather and other activities like gardening. However, this does not mean you have to let them be boring.
Follow the easy steps below to add a splash of color to your old or new rubber boots.
Step 1: Set Up Your WorkSpace
Since you will be using spray paint, I recommend that you set up your workspace outdoors. This will help prevent the paint overspray from staining valuable items.
- Build a temporary shed to keep off the wind that may blow the paint onto surfaces that you don’t want to paint
- Put down a tarp or old newspapers to catch any stray paint drips.
- Finally, ensure that you wear a respiratory mask to protect yourself from the paint fumes. Also, wear gloves and coveralls to protect your skin and clothes from paint stains.
Step 2: Clean and Prep the Boots
If your boots are brand new, you can do a little wipe-down, and you are good to go.
However, If you have used them before, you must clean them thoroughly to prevent dirt from ruining the finish.
- Mix some soap and warm water to make a cleaning solution.
- Next, use a coarse brush to scrub the boots thoroughly. Ensure you focus on the sole areas because they tend to hide the most dirt.
- Afterward, rinse the boots, then allow them to dry before proceeding.
Step 3: Sand the Boots
Since most rubber boots have a smooth surface, you must make them rough to give the coating products something to grip.
- Use coarse grit sandpaper to scuff the surface lightly. Ensure you use little pressure to avoid leaving deep scratches on the boots.
- Afterward, wipe off the sanding dust with a damp towel, then allow it to dry.
- After drying, use painter’s tape to mask off areas you do not want to paint. However, you can skip this step if you’re going to color the boots fully.
Step 4: Spray Paint the Boots
You can use any spray paint you like for this step. However, I recommend using spray formulas that combine paint and primer in one product.
You can also purchase the paint and primers separately if you prefer it that way.
- Shake the spray paint vigorously until you feel the rattle ball moving freely within the container. Continue shaking the can for at least one minute to ensure that the paint and the propellant mix sufficiently.
- Next, hold the spray can about 10 inches from the rubber boot and spray in short bursts. Ensure that you spray in controlled back-and-forth motions to prevent drips from forming.
- Allow the first coat to dry as instructed on the product’s instructions, then apply more coats as you deem necessary.
- Afterward, allow the paint to cure for about 24-48 hours before wearing your boots.
Here’s How to Spray Paint Rubber Boots:
How to Paint Rubber Tire
The steps involved in painting rubber tire are as follows:
Step 1: Clean the Tires
The one thing that leads to paint failure is a dirty surface. And as we know, tires often pick up a lot of dirt, grease, and grime.
Therefore, before you begin, you must remove all the dirt with soap and water.
- Make a cleaning solution by mixing soap and some warm water. If the tires are too greasy, mix equal parts of Trisodium Phosphate and water to make a stronger cleaning solution.
- Use a coarse bristle brush to scrub the tires, ensuring you get into the cracks and tread.
- Afterward, rinse the tires with a lot of running water, allowing them to dry. Ensure that the surface is completely dry before proceeding to avoid problems.
Step 2: Sand the Tires
Before applying any product on the tires, you must sand them with coarse grit sandpaper.
Sanding will roughen the tire surface, giving the coating products some tooth to grip.
- As you sand, use minimum pressure, or you will end up with large scratches on the tires. These scratches will be hard to hide, showing up more vividly once the paint dries.
- Afterward, wipe the tires with a damp tack cloth to remove the sanding grit and dust.
- Ensure that the tire dries completely before proceeding.
Step 3: Prime the Tires
After the tire dries, you must apply a primer before applying the paint.
The primer will improve the bond between the coating and the rubber tires, making the finish last longer.
For this step, you can use a roller, a paintbrush, or a sprayer. However, I recommend using them altogether for the best results.
- Start by using a roller to apply the primer.
- Afterward, use a paintbrush to color the hard-to-reach areas; if that does not work, use a sprayer. Ensure that you pick up very little product and apply a thin coat, so it dries evenly.
- Allow the first primer coat to dry for the duration on the product label before applying a second one.
Step 4: Paint the Tires
After the second primer coat dries, your tires are ready to paint. You can use any color and sheen level according to your liking.
- Use the same application techniques that you used with the primer to get a smooth finish.
- Allow the paint to dry for 48 hours before moving or using the tires.
Note:
- If you want to cut or drill holes in the tires, do it before cleaning them. This will ensure that no debris from the cutting remains.
- If you use a light color like white, you will need more than the standard two coats of paint to entirely hide the black color of the tires.
Conclusion
Rubber is a very important material that has been around for a long time.
Its elasticity and tough nature make it versatile enough to make a wide array of items, including shoes, toys, vehicle tires, gloves, and caps.
Besides everyday objects, rubber also makes great mechanical parts such as gaskets, seals, and belts.
Even though it has all these uses and excellent features, rubber has a dull appearance.
For this reason, people have been looking for ways to customize it, especially with paint. But the question remains…
Can You Paint Rubber?
It is possible to paint rubber, but the project’s success depends on two things. You must choose the right paint type and follow precise painting steps.
The best rubber paint types are acrylic, marine, exterior, and removable paints.
These paints are flexible; therefore, they can match the elasticity of the rubber without cracking or wrinkling.
Before applying these paints, you must clean the rubber and then sand it a little to give the color something to grip.
Afterward, you must use a primer to improve the paint’s adhesion further.
You can skip the priming step using spray paint+primer, removable paint, or marine paint. These products can stick to the primer without much help.
Therefore the primer is merely added security for the finish.
Thank you for reading this article, and I hope it has cleared up the confusion about painting rubber.
If you have more information to share or questions concerning this subject, feel free to reach out in the comments section below.