MDF is a versatile building material and has been an alternative to solid wood for years.
It offers absolute strength and durability; best of all, it is more affordable than natural wood.
For this reason, MDF makes excellent cabinets, shelves, furniture, door frames, and flooring materials.
Even though MDF boards are strong and durable, they do not have unique grain patterns or colors like natural wood.
This problem often pushes painters to use surface coatings like paint to customize their MDF items. But what is the best paint for MDF board and cabinets?
The best paint to use on MDF boards and cabinets is oil-based paint.
This paint type uses natural or synthetic oils as its base, providing more rigid and durable protection for the boards.
In addition, the formula of oil-based paints does not contain any moisture; therefore, there is no risk of your MDF board swelling and warping as you paint it.
Before applying the oil-based paint on MDF, seal the board with a solvent-based primer or a primer explicitly made for MDF.
These primers are fully compatible with oil-based paints, guaranteeing a long-lasting finish.
If you use a standard latex primer on MDF, the wood fibers will absorb the moisture in the product causing pre-mature damage to the surface.
Knowing the best paint to use on MDF is useful. However, you must also understand proper application procedures to guarantee the best finish results.
In this article, I’ll discuss all the proper painting steps and products to use on MDF. But before we dive in, let’s understand a little more about MDF.
What Is MDF Board?
Medium-Density fiberboard (MDF) is one of the most versatile and affordable types of engineered wood.
Manufacturers make it by gluing wood fibers together using synthetic adhesive.
The resulting material is strong, stable, and can be used as an alternative to wood in some projects.
The MDF manufacturing process begins by breaking down wood residues like slabs, trimmings, and shavings into wood fibers.
Next, the manufacturers drain all moisture from the fibers before mixing them with wax and a synthetic resin adhesive.
Finally, they apply high temperature and pressure to the mixture to create the building boards.
The wood residues used to make MDF can be either from softwood or hardwood species.
It does not matter whether you combine the species or use them individually as long as their relative densities are close.
Characteristics of MDF
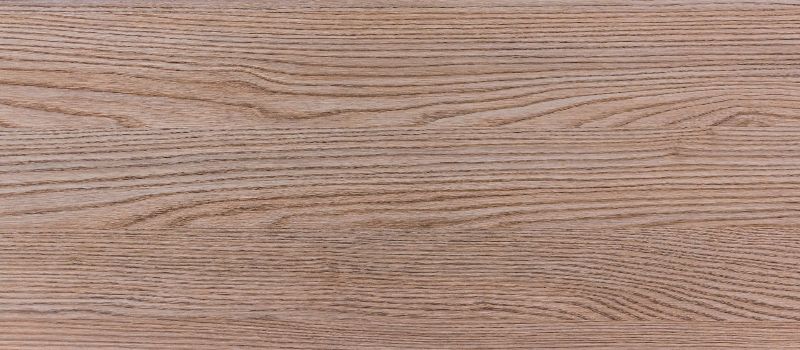
MDF boards are usually dark brown or tan; retailers sell them in either 1/2-inch or 3/4-inch thick sheets. Unlike natural wood, they do not have knots or rings on their surface.
For this reason, MDF boards have a uniform appearance that remains consistent even if you cut them at different angles.
This uniform appearance is the feature that makes MDF so popular.
The other thing that makes builders favor MDF is how easy it is to attach the boards. You can join them quickly using adhesives like PVA glue, plastic resins, or epoxies.
In addition, you can use the dowelling method to attach the pieces if you want to give your MDF items more edge.
If you want hardware that will hold the pieces together for longer, I recommend using typical composite wood fasteners.
The best ones on the market today are T-nuts and pan-head machine screws.
You can also use standard sheet-metal screws as alternatives, provided they have a coarse thread pitch.
Like any other building material, MDF has a few disadvantageous characteristics. For one, MDF boards are highly porous, just like natural wood.
Therefore, they tend to absorb even the smallest amounts of moisture that lands on their surface.
When they absorb too much water, the wood fibers become weak and begin to detach. Eventually, the MDF board will swell, warp out of shape, and break.
The other drawback of MDF boards is that they are not entirely isotropic. This means that some of their physical properties will vary when tested in different areas or directions.
For instance, all MDF boards are strong and stable on their faces but tend to weaken towards the edges.
Therefore, you must be extra careful when working on the edges to avoid accidentally ruining the board.
An excellent example of this drawback is what happens when you install fasteners.
The MDF will remain stable when you put the fasteners on the face of the board close to the middle.
However, the board will crack a little when you install the screws too close to the edge.
So, to avoid mishaps, you must always drill pilot holes on the edges before putting in the screws.
Types of MDF Boards
There are three primary types of MDF boards differentiated by their densities. These are lightweight MDF, standard-grade MDF, and High-Density MDF.
- Lightweight MDF weighs the least of all MDF boards because it has few loosely packed wood fibers.
In addition, manufacturers use very little adhesive to make it; hence its surface appears soft and brittle.
- Standard Grade MDF is the basic type of MDF you can find in any lumber retail store.
It contains just the right amount of wood fibers and adhesive; therefore, it presents all the standard features you look for in MDF – excellent strength, density, and durability.
- High-Density MDF is the strongest and most durable type of MDF.
It has more wood fibers that are closely packed together, allowing it to withstand pressure from all angles.
Manufacturers also use better-quality wood residues to make high-density MDF; thus, it retains a smooth and clean finish for a long time.
Besides the three primary MDFs, you can also find some specialized MDF boards in stores.
These boards have a few extra perks that make them stronger and better at resisting moisture and fire damage.
The two main types of specialized MDF are fire-retardant and moisture-resistant MDF.
- Fire Retardant MDF is infused with chemicals that reduce the flammability of the wood fibers.
It does not catch fire easily, and if it does, the fire will not spread as quickly as usual.
For this reason, this MDF type is best used in areas like the kitchen where open flames are a regular thing.
You can identify fire retardant MDF boards with a red or blue stamp at the board’s edge.
- On the other hand, moisture-resistant MDF uses paraffin wax and a moisture-repellant resin to beat water damage. T
he resin allows you to use the boards in areas with high humidity or high chances of surface wetting—for instance, kitchens and bathrooms.
On the downside, moisture-resistant MDF is not fully waterproof; therefore, you cannot submerge it in water.
The board will also fall apart if you use it in areas where it is likely to get fully wet – for instance, outside in the rain.
What Is Wood Cabinets
Wood cabinets are the most classic storage features in any kitchen, bathroom, or living room.
They pair well with any decor style, whether you stain the wood or maintain its natural appearance.
Manufacturers often use solid wood to make wood cabinets. Therefore, it is normal for the cabinets to have the strengths and weaknesses of solid wood.
For instance, wood cabinets will last longer than cabinets made from composite materials like MDF or plywood.
However, they can still swell and warp easily when the slightest change in moisture content occurs.
For this reason, millers always finish the wood on all sides before shipping it to retail stores.
If you purchase unfinished cabinetry, you must apply the finishes on-site as soon as possible to prevent damage.
Since wood is expensive, manufacturers sometimes use natural wood veneers over a substrate like plywood to make the cabinets.
The veneers give homeowners a full wood-decor experience without breaking the bank.
In addition, veneered cabinets tend to be more stable than solid lumber, even when there’s a drastic change in humidity levels.
When you look at wood cabinets, you will notice that they all have a unique appearance.
Whether it’s the color or grain pattern, you won’t find cabinets that look alike unless they’re made from the same wood species.
That said, let us look at some of the most popular wood types that make the best cabinets.
Popular Wood Species For Making Wood Cabinets
These woods are:
- Cherry Wood
Cherry wood cabinets are ideal for homeowners who want more traditional-looking decor.
Moreover, they are durable and hard-wearing enough to withstand knocks and resist denting.
Cherry wood is known for its naturally rich and dark color that varies between a pale red and a deep yellow. However, the color tends to darken as it ages.
For this reason, it is best to stain cherry cabinets to maintain the color’s uniformity.
- Red Oak Wood
Red oak is also strong, durable, and a pretty pocket-friendly building material. It has a signature red color and pronounced grain patterns ideal for traditional cabinet styles.
The red oak is perfect for making stock, semi-custom, or custom-made wood cabinets.
- White Oak Wood
The white oak is as durable as its red cousin but is a bit stronger and more durable.
It has a more golden color tone with a subtle grain pattern; however, you can paint or stain it to match it with your decor.
This wood comes already quarter-sawn for making custom cabinetry.
- Hard Maple Wood
The hard maple wood is light-colored and has a fine grain pattern. It is as strong and durable as oak but less dense and a little more costly.
This wood is a popular choice for making semi-custom and custom-made cabinetry.
In addition, you can stain it to make the fine grain pop or dress it with a clear natural finish for a light, contemporary look.
- Hickory Wood
Hickory wood has a grain pattern similar to oak, but its color is significantly lighter. It has a pale yellow color that you can stain to achieve a darker look.
However, the light tones often look better with a clear, natural finish. This wood is perfect for making custom or semi-custom cabinetry with a rustic farmhouse-style appearance.
- Pinewood
Pine is the most popular softwood species used for cabinetry. It is pale yellow, and you can stain it to darken the color as you desire.
Pinewood makes strong and durable cabinets like the other woods on this list. However, its surface is quite soft; therefore, it dents very easily.
Best Paint for MDF board and Cabinets
MDF is challenging to paint, especially since it doesn’t readily accept all types of paint.
If you use the wrong paint, you will ruin the surface instead of improving its appearance.
Oil-based and 100% acrylic paints are the best products to apply on MDF boards and cabinets.
Each has unique properties that guarantee thorough coverage and protection for your MDF surfaces. Let’s start with oil-based paint.
-
Oil-Based Paint
I recommend making oil-based paint your first choice for MDF for several reasons. First, this paint type does not have water in its formula.
Manufacturers use drying oils as the vehicle for the pigment instead of water – which is more common lately.
As we know, MDF is highly porous and tends to absorb all moisture that touches its surface. This includes even the little water in coating products like paint.
When the surface becomes saturated with water, it swells and eventually warps out of shape.
In worst-case scenarios, the excess moisture could cause the MDF board to break.
So, using paint without water in its formula will guarantee no damage to the MDF.
Additionally, oil-based paint is water-resistant, which is perfect because it will repel moisture and keep the MDF from damage.
Another characteristic that makes oil-based paint perfect for MDF is its durability. This coating dries into a hard film that doesn’t scratch or dent easily.
Moreover, it adheres more firmly to the surface than other paints. Therefore, it can withstand frequent contact, making it the best-suited product for MDF cabinets.
On the downside, oil-based paint produces toxic fumes; therefore, you must wear a respiratory mask to protect yourself as you work.
Additionally, the paint emits a foul odor as it dries, and the odor can linger for up to three days before subsiding.
Therefore you must ensure that your work area is well-ventilated and remains that way until the paint dries.
-
100% Acrylic Paint
Acrylic paint also works on MDF because it doesn’t have water in its formula.
Manufacturers suspend pigments in an acrylic polymer solution instead of water, making 100% acrylic paint a chemical-based paint.
Remember, there’s a big difference between acrylic paint and acrylic-latex paint.
The acrylic-latex variety uses water as the pigment vehicle instead of an acrylic polymer.
So, if you apply this water-based paint on MDF, the board will absorb the water in the paint and incur damages.
If you want to purchase acrylic paint for MDF, make sure it’s labeled as “100 Acrylic”.
Besides the lack of water in its formula, 100% acrylic paint becomes water-resistant as it dries.
This is ideal for MDF boards and cabinets because it guarantees thorough moisture protection.
In addition, it dries quickly, taking between 30 minutes to 1 hour, depending on the brand.
This short duration ensures minimal downtime between painting sessions. Therefore you will finish all your projects quickly.
On the downside, acrylic paint is not as durable as oil-based paints.
Its coats are too soft; therefore, I recommend you restrict its use to indoor items and items you do not use frequently.
Best Paint For MDF Board and Cabinets
They are:
-
RUST-OLEUM Stops-Rust Protective Enamel
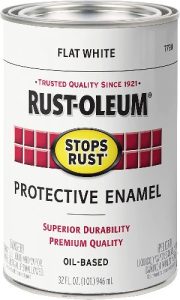 The RUST-OLEUM stops rust is a superior-quality product that offers exceptional durability. It is an oil-based formula; therefore, it is perfect for MDF.
The best thing about this product is its superior adhesion. It sticks so firmly to the surface that it won’t come off when you scratch or hit it hard.
In addition, it dries into a hard coat that effectively resists abrasion. Therefore it guarantees total protection for your MDF boards and cabinets.
You can find this RUST-OLEUM enamel in up to 75 colors and any sheen you prefer – matte, satin, gloss, and semi-gloss.
In addition, this product resists fading even if you leave your item in the sun for long hours.
You don’t have to worry about applying too many coats when it comes to coverage.
The RUST-OLEUM protective enamel is thick and opaque, giving it an excellent hide with a few coats. In addition, you can use it both indoors and outdoors.
On the downside, this product takes up to 4 hours to dry properly. This duration is too long, especially when working on a rush project. Moreover, you require harsh chemicals like turpentine to clean your tools after using this product.
Pros
- It is oil-based hence perfect for MDF
- It doesn’t chip or peel off easily.
- It is weather and corrosion resistant
- It comes in several colors
- It retains its original color and sheen for a long time
- It covers large areas with few coats
Cons
- It takes too long to dry.
- It produces paint fumes and a foul odor.
- You require harsh chemicals to clean tools and accidental spills.
-
Liquitex BASICS Acrylic Paint Set
 The Liquitex BASICS is the best acrylic product to use on MDF. It uses high-quality pigments that disperse easily and offer excellent color brightness.
In addition, the colors of this product do not fade or change as the finish ages.
The best thing about the Liquitex BASICS is its adjustable opacities. You can add a medium or mix different colors and use it as an undertone, tint, or shade.
In addition, all the colors in this Liquitex set are highly opaque in their raw form. Therefore, you will only need a few coats to achieve full coverage.
This product is versatile and can stick to many materials, including composite wood. It also dries very quickly, requiring as little as 30 minutes to dry to the touch.
Moreover, this acrylic paint becomes water-resistant when it dries, offering more moisture protection for MDF.
On the downside, this acrylic paint is not as durable; therefore, you cannot use it on items that you use daily.
It produces soft coats that you can easily scratch off with enough force.
Moreover, this product comes in small quantities; hence it is only best for small painting projects.
Pros
- It dries quickly
- It adheres well to MDF
- It comes in several colors
- You can adjust the opacity of the colors as you desire
- It becomes water-resistant after it dries
Cons
- The final coat is easy to scratch or dent
- It only comes in small quantities.
-
RUST-OLEUM Painters Touch 2X Ultra Cover Paint and Primer
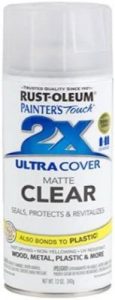 The RUST-OLEUM PAinter’s touch is an oil-based spray formula that works excellently on several surfaces, including MDF.
It provides a durable hard coat that can resist abrasions and accidental chipping for a long time.
Consequently, it guarantees your MDF surfaces long-lasting protection.
This paint is unlike other oil-based formulas because it produces little to no odor.
Moreover, it dries to the touch in 20 minutes, which is way shorter than the usual 3-4 hours.
This spray paint and primer is thick; thus, it offers you excellent hide with very few coats. One aerosol container can cover up to 12 square feet with the standard two coats.
However, you can apply a single coat and still get good coverage.
Pros
- It dries quicker than standard oil-based formulas.
- The thick formula offers excellent coverage with few coats
- It has no odor
- It is durable and scratch resistant
Cons
- It is a little expensive.
- The paint claims to be paint and primer in one; however, you must start with a primer to make it adhere better.
How Do You Prep MDF Cabinets for Painting?
Painting MDF cabinets can be pretty challenging, especially if you’re a novice or have never worked with MDF.
However, the task becomes much easier with the proper guidance and constant practice.
So, follow the step-by-step guide below to prepare MDF cabinets for painting, and get the best finish results.
Step 1: Prepare Your Work Area
- Before starting any project, you must ensure that your work environment is properly prepared.
Start by opening the doors and windows to let in fresh air, then run a fan slowly to maintain air circulation.
Ventilation is crucial since you’ll be working with oil-based paint, which produces a lot of fumes and odor. Y
ou can also build a temporary workshed outside if you do not want the paint fumes to be too overwhelming.
- Put down a tarp or old clothes to catch accidental spills and drops. This step will also make it easier to clean your surroundings after work.
- Next, wear protective gear like coveralls, gloves, goggles, and a respirator mask. These items will prevent MDF dust and paint fumes from irritating your lungs.
They will also protect your skin and clothes from paint stains.
- Finally, gather all your painting supplies in one place close to your workstation.
This way, you won’t have to walk around whenever you need a clean tool or a fresh can of paint.
Step 2: Disassemble the MDF Cabinets
You must clear your cabinets and disassemble them before painting. If you paint before disassembly, you will miss some spots or cover your walls with paint stains.
- Use a screwdriver or another appropriate tool to remove the cabinet doors and drawers from their frames.
- Rip off a piece of painter’s tape, write a number or a letter on it, then put it on the removed door or drawer.
Afterward, put another piece of tape with the same label on the frame where you removed the door.
Labeling is important because it will show you where to fix the components after the project.
- Also, put all the hardware, like knobs and hinges, in plastic bags and label them accordingly.
Step 3: Seal the Edges of the MDF
The edges of MDF cause the most significant problems when painting. As we know, MDF is generally porous.
However, the edges are more porous than the surface and will suck up all the paint if you paint over them directly.
So before you start, you must seal the edges with a drywall/joint compound.
- Use your fingers or a putty knife to apply the joint compound on the edges. Make sure to fill all the gaping holes to avoid mishaps later.
- Allow the compound to dry as instructed on the product’s label instructions.
Other than joint compound, you can also use PVA glue or an acrylic sealer to seal the edges of MDF.
Ensure that the products you use are not water-based, and you are good to go.
Step 4: Sand the MDF
After the joint compound dries, put on a mask and goggles, then sand it down to make it flush with the surface.
- Use medium-grit sandpaper and moderate pressure to avoid taking off too much of the joint compound. Proceed to sand the edges until they become smooth and even.
- After finishing the edges, lightly sand both faces of the MDF. This time, with fine-grit sandpaper to avoid leaving deep gouges on the surface.
- Sanding the MDF and sealer will produce a lot of fine dust. You must remove it, or else it will interfere with the adhesion of your coating products.
- Use a hand vacuum to suck up all the dust, then use a clean cloth to wipe off any remaining dust. Remember, MDF and moisture do not mix, so do not wet the cloth before wiping.
Step 5: Prime the Surface
Priming is the most crucial step for preparing MDF for painting. It will ensure better and more even paint coverage by sealing the pores in the material.
The primer will also hide any blemishes on the MDF surface, preventing them from showing through the paint finish.
Ensure that you use solvent-based primer because the water-based variety will cause the MDF to swell.
Look for a product that has an “MDF primer” or “Composite-wood primer” specification on its label to be on the safe side.
I also urge you to avoid multi-purpose primers on MDF because they may not provide the desired finish results.
Depending on your preference, you can apply the primer using a paintbrush, roller, or sprayer.
I recommend using a roller and brush combination to help you achieve a smoother and even finish.
The combination will also give you access to hard-to-reach corners without much hassle.
- Pour your primer onto a paint tray or a wide-mouthed container.
- Dip 1/4 of the paintbrush tip into the product, let the excess product drip off, then apply it to the MDF.
- Apply the primer in long and even strokes, ensuring that you overlap them to avoid missing spots. Also, apply thin coats to ensure that they dry quickly and evenly.
- Allow the first coat to dry as the product label instructs, and then sand it lightly before applying a second one.
- After the final coat of primer dries, your MDF cabinets are ready to paint.
Note:
- The first coat of primer will be very thin, and you may even see the MDF’s color peaking through it.
This, however, is normal, and the color will stop showing when you apply the second coat of paint.
- Some MDF boards come pre-primed, and some experts say you can paint directly over them.
However, I recommend applying at least one primer coat over pre-primed MDF for better finish results.
How to Paint MDF
After the final primer coat dries, you can use a roller, brush, or paint sprayer to apply the paint.
I recommend using a brush-roller combination for the best painting control and a sprayer if you want to finish quicker.
How to Paint MDF With a Brush and a Roller
- Start by putting the paint in a large container or tray to give you easier access.
- Use an angled brush to apply the paint in tight corners and along the edges of the MDF board. If you notice paint pooling in some areas, use the tip of the brush to feather it.
After painting the edges, use a roller to paint the larger surfaces of the MDF.
- Coat the roller with as little paint as possible, then apply it to the surface.
- Use a W-shaped pattern to apply the product until you can’t see the primer anymore.
Afterward, go back over the painted areas lightly to remove bumps and smooth the paint coat.
- Apply two coats of paint, then allow them to dry completely – for up to 24 hours. Afterward, flip the MDF board and paint the other side following the same procedure.
Here’s How to Paint MDF Using Roller:
How to Paint MDF With a Sprayer
The best paint for MDF is oil-based paint, but it is too thick to put directly in a paint sprayer.
Therefore, you must thin it with paint thinners or turpentine to make it less viscous.
Ensure that you use three parts paint and 1 part thinner to avoid making the paint too runny.
If thinning the paint seems like too much hassle, you can purchase oil-based aerosol paints instead. These products come already mixed and ready to use.
Once you have prepared your paint or have your aerosol ready, follow the steps below to apply the paint.
- Start by testing the sprayer on a scrap piece of MDF or any other surface you don’t use.
Testing will reveal whether the spray stream is steady or needs adjustment. Once you establish a steady stream, you can start spraying.
- Hold the sprayer about 8 inches from the surface, then press the nozzle to release the paint.
Ensure that you maintain the same distance between the surface and the sprayer to ensure that the coats are even.
- Spray in back-and-forth motions, overlapping each pass by at least 1/2 of the spray pattern to avoid missing any spots.
- Apply two coats of paint or the number recommended by the manufacturer for proper coverage.
Also, allow each coat to dry properly before applying the next one for the best results.
Here’s How to Spray Paint MDF:
How to Paint MDF Cabinets and Shelves
There are three primary ways to paint MDF boards and cabinets. You can paint using a paintbrush, a sprayer, or a roller.
Each painting method/tool has some perks that give it an edge over the others. They all also have some setbacks you must account for as you work.
So, In this section, we’ll discuss each painting method in depth to help you select the best one for your project.
-
Using a Paintbrush
Applying paint using a brush is the oldest and most common method of painting.
Painters prefer it because brushes give you better control of the painting process, allowing you to apply even coats.
In addition, painters of all skills can use brushes to paint because the process is easy to learn.
In addition to control, paintbrushes give you access to all hard-to-reach areas on your MDF items.
It allows you to reach tight corners and maneuver curves to produce the smoothest finish possible.
On the downside, paintbrushes tend to leave marks in the finish if you do not know the proper painting techniques.
Moreover, it is tiresome, thus restricting you to smaller projects.
-
Using a Paint Roller
Paint rolling is quite similar to brushing; however, it is a much quicker painting method.
It works perfectly for large surfaces like walls and flooring or smaller spaces like cabinet drawers and doors.
Unlike paintbrushes, paint rollers cannot reach tight corners or maneuver corners smoothly.
For this reason, it is always best to use rollers and brushes together for every project. You use the brush to cut corners and the roller to paint the large faces.
On the downside, rollers can leave bubbles and other blemishes if you don’t know how to use them properly.
Additionally, you need a paint tray for rollers because they do not fit in paint containers.
-
Using a Paint Sprayer
 Spraying paint onto MDF is a more modern method of application. It is the fastest method, allowing you to finish projects in half the usual time.
Moreover, spray paints tend to dry faster than standard brush-on paints.
The best thing about spraying is that it produces a consistent and smooth finish.
All properly spray-painted surfaces always look like they have a professional finish.
Also, spraying allows easy access to all hidden areas and tight corners without hassle.
On the downside, spraying only works best when done by a professional painter or an experienced homeowner.
It requires you to buy or rent expensive spraying equipment, especially for large-scale projects.
Moreover, spray painting requires a lot of preparation before application.
You must mix the paint appropriately and condition the sprayer to produce an even mist – all these preps require skill.
What Kind of Roller to Use for Painting MDF
When selecting a roller for painting MDF, there are three main features to consider. You must understand the roller’s cover size and material and nap thickness.
These features correlate to the substrate in different ways. If you get them right during purchase, all your MDF projects will run smoothly.
-
Cover Material
There are four types of cover materials for paint rollers; synthetic fibers, natural fibers, blended fibers, and microfibers.
For MDF, I recommend natural, blended, or microfiber cover materials.
- Natural fiber roller covers are primarily made from mohair or lamb’s wool. They are suitable for oil-based paints, which are ideal for MDF.
- The blended-fiber roller covers have a mixture of natural and synthetic fibers.
Manufacturers made them that way to give painters an “all-purpose roller,” These work well will oil-based paints and high-gloss latex paints.
Moreover, they provide the best results on porous surfaces such as MDF.
- Microfiber roller covers work with all paints and provide the smoothest finishes on all surfaces, including MDF.
They hold three times more paint than standard covers and are ideal for trims, cabinets, and doors.
-
Cover Size
Like many tools, paint rollers come in different sizes to fit different project sizes.
You need a small roller for small and tight spots and a larger one for more open spaces like walls and floors.
The best roller size for painting MDF is s 4-inch roller. This size is ideal for small furnishings, cabinet doors, frames, and wide trim, usually made using MDF.
-
Nap thickness
A roller “nap” refers to the thickness of the fibers on the roller cover. The more texture the surface has, the thicker the roller nap should be.
Since MDF has a smooth surface, you need a 1/4-inch thick nap to get the best results.
You can also use a 3/4-inch or a 1-inch nap because they work well on semi-rough surfaces like wood.
Can You Paint MDF With Latex Paint?
I do not recommend using latex paint on MDF because it has a water base. Since MDF is porous, it will absorb the water in the paint and cause the finish to be patchy.
You may apply several coats of paint to cover the first few absorbed ones. However, the finish will still not appear as good as the manufacturer intended.
If you’ve primed the MDF with a solvent- or oil-based primer, you may get away with using latex paint.
However, you must ensure that you cover all areas of the surface adequately, including the edges.
Any bare spot will begin your MDF troubles if they touch the latex paint.
How Do You Seal MDF Board?
The porosity of MDF makes it susceptible to water damage.
So, the first thing that homeowners always want to know is how to seal the material and make it water-resistant.
You can use three primary products to seal MDF boards; Paint, lacquer, and varathane. Let’s discuss them in depth to understand better.
-
Paint
Paint is the most common product you can use to seal MDF boards, and oil-based paint is the best.
These products are often moisture-resistant; hence, they guarantee protection for the MDF board.
Moreover, they come in many colors and sheens, allowing you to decorate and protect the surface at the same time.
-
Lacquer
Lacquer is the second most popular sealer for MDF surfaces. It penetrates the microscopic fibers of the material and hardens to form an impenetrable barrier.
One coat of lacquer can seal MDF, but only temporarily. If you want a longer-lasting seal, sand the first coat, then apply a second one for extra protection.
-
Varathane
Varathane is a stronger and more durable sealant for MDF. It works best on MDF items that will be outside and exposed to harsh weather constantly.
When you purchase varathane, ensure that the product contains UV protection to give the surface a little protection from the sun.
I do not recommend using varathane to seal MDF products indoors or close to food storage and dining areas.
Conclusion
Home builders and painters use MDF boards in many projects as a substitute for wood. They use MDF to make furniture, cabinets, doors, trims, frames, etc.
As the use of this engineered wood rises, so does the need to customize it. MDF does not have natural wood’s unique colors and grain patterns.
Moreover, it is highly porous and prone to moisture damage. Therefore, homeowners turn to the one thing that protects and decorates simultaneously – paint.
But the question remains…
What Is the Best Paint for MDF Board and Cabinets?
Oil-based paint will provide the best finish on MDF surfaces. It provides a rigid, water-resistant cover that protects the MDF from getting water damage.
However, you must always start with a solvent-based primer to improve the adhesion of the oil-based paint. Without the primer, the finish will peel off sooner than expected.
You can also use 100% acrylic paint on MDF; however, you must know that it is not as durable as oil-based paints.
Acrylic paint can quickly come off if you scratch it hard enough. Therefore, it is best to restrict its use to indoor items or items you do not use frequently.
If you want the acrylic paint to last longer, you must seal it after it dries.
Thank you for reading this article, and I hope I’ve answered all your questions concerning the best paint for MDF boards and Cabinets.
Please contact me in the comments section below if you need me to clarify anything.