A paint primer functions best when you allow it to work as it should. It needs a clean surface, a suitable surface, proper application technique, and, more importantly, it needs enough drying time. In that regard, how long does paint primer take to dry?
Most latex primers or water-based primers have a drying time of between 30 minutes to 1 hour. The time stated is drying to touch and not curing. Water based primer would need up to 24 hours or more to cure depending on the prevailing environmental conditions.
Oil Based Paint Primers have a drying time range of 10 to 24 hours before applying a second primer coat or paint coat. The paint application window is 72 hours; this is the maximum time within which you should lay down paint after priming. The touch-dry times for primers are shorter, i.e., 30 minutes to 4 hours.
After you’ve applied the primer, let your workpiece sit undisturbed until it dries well enough to accept the incoming paint. If you put in paint too soon, it will easily form streaks and peel off. It becomes costly in the long run as you have to start over your priming and painting project.
In this writeup, I’ll give detailed accounts of different aspects of paint primers, including the definition, types of primers, primer drying times, and how to apply a primer on various surfaces.
I urge you to read on, and in the end, you’ll be up to date with the latest developments regarding primers.
What Is Primer?
 Primers are preparatory coats put on surfaces before painting. The primer helps seal, prepare and protect the said surface in readiness for painting. It also improves the adhesion of paints to surfaces, augmenting their durability.
A real-life analogy of a primer is the foundation of a building. Before you construct a building, you must lay a foundation upon which the building will stand. Likewise, a primer makes surfaces receptive to paint.
Primers are applied to the exterior and interior surfaces before laying down paint. Primers also extend the surface coverage of paints leading to a smooth finish.
From the above prelude, it’s pretty apparent the primer plays an integral role in painting. To coin a phrase, “Painting without a primer is like building without foundation.”
Types of Primers
There are three conventional types of primers and one relatively new one. The three major ones are oil-based, latex, and shellac primers; the new one is called self-priming coating. The four primers have varying properties which determine their uses.
All primers have advantages and drawbacks. If you use a primer for its intended purpose, you’ll benefit overwhelmingly that you won’t even notice the downsides.
On the contrary, if you use a primer wrongfully, its disadvantages will be more prominent than the advantages, and this will be the harbinger of trouble for your wood or concrete surface.
I’ll now take a deep dive into the four types of primers:
Oil-based Primer
An oil-based primer comprises oil as its principal base; it’s also known as alkyd primer. The primer suits both exterior and interior applications.
The primer is particularly meant for woodworks, including dry wood, new & bare wood, painted wood, etc. You can also use it on metal surfaces.
This primer is ideal for oil-based and latex paints, meaning it lays ground or preps the surface for the two mentioned paints.
Paints expand and contract on surfaces, especially in regions of frequent temperature fluctuations. Oil-based primers attain flexibility after drying and curing; this gives the paint room to expand and contract without creasing.
Thinning is the addition of solvents to lower the viscosity of primers and paints. If an oil-based primer is too thick to apply, use mineral turpentine to thin it. Similarly, use mineral turpentine to clean up primer spills.
Oil-based primers are good at suppressing stains so that they won’t show through the paint. They conceal stains like nicotine, ink, and crayon marks.
The primer mentioned above arrests cracking, blistering, and peeling of paint from surfaces.
The primer also prevents tannins from seeping out to the surface of the wood. Woods such as oak and chestnut produce tannins.
The primer has a few pitfalls as well:
It takes an awfully long time to dry completely (a minimum of 24 hours). The long drying time leads to long waits before applying the paint or any topcoat.
It releases considerably high quantities of Volatile Organic Compounds, known popularly by the acronym VOCs. Most VOCs aren’t toxic in the short term, but they chronically, cause respiratory problems.
That’s why I recommend you to wear all protective gear at all times when applying primers and paint by extension. The protective gear includes a face mask, a pair of gloves, goggles, and protective clothing.
The last setback is that the primer is not ideal for masonry. I, therefore, advise you not to use it on brick or stone materials, like concrete surfaces.
Latex Primer
These are water-based primers perfect for priming bare, drywalls for painting. Compared to oil-based primers, they dry faster, are more flexible, and are less splintery; this makes them more resistant to cracking and peeling.
Latex primers are also great for prepping bricks and stones (concrete surfaces), galvanized metals, and softwoods (like cedar and pine).
The primer is suitable for drywall as it levels the wallboard surface and the joint substances applied to it; it also evens out renovated or patched parts.
Moreover, the above primer covers stains from crayon, smoke, lipstick, etc., but not as effectively as shellac and oil-based primers.
Since latex primer is water-based, it is soluble in water and thus easy to clean using soap or detergents and water.
Formulation of the primer is with little to zero VOCs; this presents a healthier option than shellac and oil-based primers.
It’s apparent from all the above that latex has a wide range of use and in fact, is the widest of the four wood primers that I’ll discuss.
Shellac Primer
Shellac is a highly-viscous substance that is produced by specific bugs on trees in Thailand and India. Harvested shellac is processed into flakes, then dissolved in alcohol. The resulting mixture is called liquid shellac; this is a robust natural primer that’s used on wood.
The following are the functions of shellac primer on timber:
- It’s used to seal a sanded surface in preparation for painting.
- The primer is used to hide stains, to block high-gloss varnish, odor-blocker, and tannin-blocker.
- Shellac seals out water vapor to prevent your workpiece from soaking.
- This primer conceals severe smoke and water damage on wood surfaces.
All of the above uses improve the durability of your workpiece. The primer works best on wood surfaces, but it’s also suitable for plastic, metal, and even plaster.
Shellac primer is highly adhesive and dries fast; 20 minutes touch-dry and 45 minutes to dry for recoating. The fast drying time is convenient as you don’t have to wait for long before recoating. Incidentally, the curing time is also short, i.e., about three days.
You can paint over shellac primer with both latex and oil-based paints.
The fault with shellac primer is it’s not as resourceful as oil or latex primers and emits more fumes. It also needs thinning using denatured alcohol for easy application and clean-ups.
Self-Priming Coating
The above is not a primer per se; it’s a mixture of primer and paint. I’ve added it to this article because it does what other primers do. Most professionals consider it more of a paint than a primer.
The good thing about this coating is it saves time and is more economical than the other primers. It’s because you apply the primer & paint in one go; no need for initial priming and long waits for the dry time before painting.
The self-priming coat is perfect for:
- Painting new and drywalls.
- Painting interiors.
- Repainting with the same color
The self-priming coat has fast drying times, i.e., 1 hour to be touch=dry and about 8 hours to be receptive for a second coat.
Paint and primer in one have pitfalls too: first, there’s a high risk of wood bleeding when the coat doesn’t adhere well. If it so happens, you have to buy primer and paint separately and start the wood painting project anew. Secondly, this agent is a tad costly compared to other finishes.
Why Should I Prime Before Painting?
 After using a primer, you’ll paint over it after all, and the paint will hide the primer; and you keep wondering, why should I prime before painting?
Priming plays numerous roles to ensure your painting project becomes a success story. Below are some of the significance of priming:
- It fills voids, gaps, and crevices on floors or walls, creating a smooth surface for paint to lay.
- A primer functions as a go-between agent for the workpiece and the paint. The primer binds to the wood/floor surface on the underside and paint on the top side. It leads to firmer paint adhesion.
- The primer gets entrenched into your workpiece to protect it from damage.
- Priming also improves the longevity of paint on a surface.
- A primer spruces up an old-looking surface by prepping it for a new and appealing paint finish.
How Long Does Primer Take to Dry On Wood?
Wood primers are for prepping wood surfaces; this means you have to add another coat, e.g., paint or topcoat, to finish your workpiece. Before you apply a new coat, it’s crucial to let the primer dry and adhere in readiness for the paint. In that regard, how long does primer take to dry on wood?
The four primers I’ve mentioned above have different drying times on wood. These are the drying times:
Oil-based primer: It takes 10 hours to dry to touch and 24 hours to dry before applying paint.
Latex primer: Takes 30 minutes to dry to touch and 4 hours to dry in readiness for painting or recoating.
Shellac primer: It takes 20 minutes to dry to touch and 45 minutes before applying paint.
Self-priming coating: This has the primer and paint formulated into one solution. The recoating time between coats of paint is 24 hours.
How Long Does Primer Take to Dry on Metals?
Following application, how long does primer take to dry on metals?
You need to prep a metal surface before applying paint; it’s what a metal primer does precisely. These primers are different from wood primers because metallic surfaces react with chemicals from wood primers.
The most common metal primers take 24 hours to dry but have a 72-hour window to apply paint.
How Long Does Primer Take to Dry on Concrete?
Concrete primers are designed to soak up into the floor and fill up cracks & crevices; this creates a surface where the incoming paint adheres easily. After application, the primer has to dry before you put in paint. At this point, the enigma is, how long does primer take to dry on concrete?
Concrete primers need not less than 8 hours to dry before applying paint. The paint application window is no more than 48 hours. It means you should put in the paint before 48 hours elapse.
Painting professionals and weather experts estimated the above drying times at 50% humidity and 70º Fahrenheit. Lower temperatures and higher relative humidity prolong drying times.
How Do You Know If Primer Is Dry?
As you’ve seen above, different primers have different drying times. Primer drying times enable you to know when the surface is ready for painting and the time beyond which you should not apply paint. So, how do you know if primer is dry?
The most straightforward way is to keep on probing if the painted surface is dry to the touch. Do this manually using a finger that lightly touches the floor or wall. If the primer doesn’t feel gummy or stick on your finger, then it is dry. Otherwise, it’s wet.
How Do You Prime Wood?
From the forest, you have to process the trees into lumber for convenience. Processed wood also requires painting before usage for improved durability. The painting has a buildup or priming process that enhances its work. In this segment, I’ll detail how to prime wood for painting.
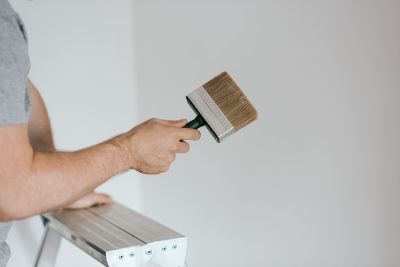
First, painters use primers under pigmented or colored finishes like lacquer and paint. The type of topcoat determines the kind of primer so that you can use oil-based, shellac, or water-based primer to match your paint.
Materials needed
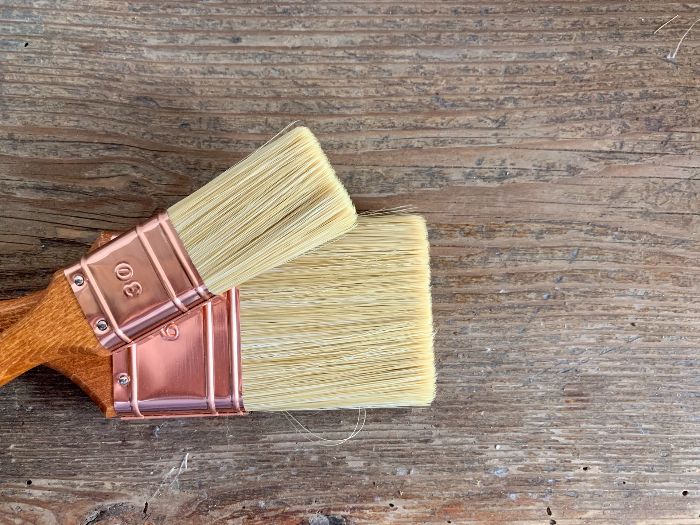
- Paintbrushes
- Sandpapers
- Primer
- A rag
- Turpentine
Procedure
- Sand the wood surface using coarse-grit sandpaper (80 to 100 grits); ensure you sand along the grain.
- Dust off debris from your workpiece.
- Open the primer and stir it using a mixing stick until the contents mix up consistently.
- Pour the primer into a tray or wide container from which you’ll paint.
- Add turpentine into the tray and mix to thin the primer. You don’t need to use a thinner if you’re using a new can of primer, but if you had used the primer previously, you need to thin it to lower viscosity.
- Plunge the paintbrush into the primer and rub out the excess against the wall or sides of the tray.
- Apply the primer along the wood grain and spread it evenly. The primer seals off the pores and covers the wood grains, making the surface even.
- Let your workpiece stand undisturbed for 24 hours; this enables the primer to dry.
- Clean up the mixing stick and paintbrush using the turpentine. Then, wipe the two with a dry piece of cloth.
- If the wood surface isn’t sufficiently covered, repeat the above priming procedure for a second primer coat.
Note: When stirring primer and mixing with a thinner, do so on a waste piece of wood; this prevents paint spillage on your working station.
How Do You Prime Metal?
Priming is vital for setting up metal for painting. The primer provides a suitable surface for the paint to adhere well. In that respect, how do you prime metal?
Here is how to go about priming metal:
Requirements
- TSP substitute (eg, borax containing agent)
- Spray bottle
- Clean rags
- Protective goggles
- A pair of gloves
- A respiratory mask
Procedure
Before you begin, ventilate your working area and wear all the protective gear.
Then, dilute the TSP sub with water by mixing in the ratio 1:5, respectively. TSP means TriSodium Phosphate. The borax-containing agents form highly-potent solutions that degrease and clean surfaces. I advise against TSP-containing agents because they may react with the metal and weaken it.
Transfer the resulting solution to a spray bottle.
Spray the cleaning agent all over the metal surface and wipe with one of the rags. Repeat the spraying and wiping three times to take off all the grease and stain from the metal. When the metal feels squeaky to the touch, rest assured it’s clean.
Let the metal dry for at least 3 hours in readiness for painting.
There’s an alternative procedure for priming metal. It’s as shown below:
Items
- Epoxy primers (part A & part B)
- Mixing container
- Spray gun
- Safety goggles
- A pair of gloves
- A protective face mask or respirator
Procedure
As usual, ventilate your working area and put on all the protective gear.
Then, clean up your metal surface with water and let it dry.
Then, pour the part A epoxy primer and part B epoxy catalyst into the mixing container and stir.
When the solution mixes homogeneously, hook the container onto a spray gun.
Next, spray the clean metal surface with the primer and ensure you cover all the sections.
Let the primer dry for 10 to 24 hours before you apply paint.
Note: Do not use water-based primers on metal surfaces! The high moisture content accelerates rusting, especially for iron-made metals.
Here’s How to Prime Metal:
How Do You Prime Concrete?
Like all other construction materials, concrete requires painting so that it can last long. Priming a concrete wall or floor before painting is as essential as it gets; it makes the floor receptive to the incoming paint.
Follow the guide below for priming concrete:
Items Required
- A pressure washer
- A primer
- Rubber gloves
- Goggles
- Protective clothing
- Stiff-bristled broom and brush
- A push roller
- A bucket
Methodology
First and foremost, ventilate the working room and wear protective gear.
Then, clean the surface to free it from dirt and contaminants. Do the cleaning by first sweeping with the broom then washing with a pressure washer. Let the floor dry.
Meanwhile, mix the concrete primer with water 1:1 inside the bucket. The mixing ratio does not have to be 1:1; I urge you to read and follow the manufacturer’s specifications on this.
The proper mixing technique is adding water to the primer, not the other way round; use an electric drill or a stirring paddle to mix.
Next, pour the primer on the clean concrete and spread it using a push roller. When laying, work the primer into the floor’s substrate for proper adhesion. If there is a leftover primer on the floor, blot it away using a spongy rag.
Let the primer dry for 24 hours before you apply paint. If the initial primer isn’t adequate, repeat the primer application procedure above before you paint.
Here’s a Video On How to Prepare Concrete for Painting:
How Many Coats Of Primer Do I Need?
Priming is one of the most vital preliminaries to painting; you know that already. It’s crucial to get the priming right so that everything else falls into place. The pressure to succeed in priming may lead you to utter the soliloquy, how many coats of primer do I need?
Different situations call for different numbers of primer coats. In some instances, you need only one coat, and some require two, others 3. You need four primer coats on rare occasions; I’ve actually never encountered any.
Follow this lead to find out what situations need what number of primers.
When to Use a Single Primer Coat
The convenience of time and money is the most precious thing anybody could ever ask for, notwithstanding your profession. I consider single-coat priming the most convenient of all. It’s because it keeps costs low and saves time.
When there is a slight color change on your workpiece, you use one coat for glossy paint, stains, green board, gypsum panel, painted wood, bare wood, and paint & primer in one.
Slight color change: minimal color changes on your workpiece are imperceptible, especially from afar. A single coat of primer followed by paint will suffice to hide the color change.
Glossy paint: If you previously painted your wall or floor with latex or oil-based paints, you must apply at least one coat of primer before repainting. If you paint directly over the old paint without priming, it won’t bond with the floor, and the paint will peel off.
Stains: If the spots on your workpiece are in a sparse distribution and are not so clear, you only need one primer coat. Also, if the primer is good at hiding stains, a single coat is enough.
Green board: A green board is water-resistant drywall. It’s used in kitchens, bathrooms, swimming pools, and other areas prone to water buildup. You only need a single primer coat before painting as the wall is already impervious to water.
Gypsum panel: The gypsum panel is also known as drywall; you need to prime it before painting. It only needs one primer coat for the paint to bond perfectly.
Painted wood: When planning to paint on a previously painted wood, you need to remove the old paint, sand it down, and apply at least a single primer coat before applying the new paint.
Bare wood: An unpainted wood is easier to handle during priming than painted wood. You only need to sand, as needed, followed by one primer coat; it will be sufficient to receive the new paint.
Paint & primer in one: this is also called a self-priming coat. As you may have guessed, it already contains a primer, so there’s no need to apply more than one additional primer coat. The self-priming paint does not need priming in some instances, but to be on the safe side, add one primer coat to avert any bonding issues.
When to Use Two Primer Coats
Painting over dark hues: When you want to paint over and hide dark color shades like maroon and brown, use 2 two primer coats before painting. It makes it easier for the incoming paint to conceal the hue underneath.
Stains: If your wall or wood floor has heavy stains that are conspicuous, you have to use double or triple primer coats to conceal the said stains completely.
Defective surfaces: If your workpiece is filled with cracks crevices and has a coarse texture, you need two or three primer coats to fill up the defects. It lays the perfect groundwork for paint application by leveling the surface.
Intuition: Intuition entails instincts or just acting on a hunch. At times when you examine your workpiece after a single primer coat, you feel like it’s just not enough to do the trick. If you think so, add another second coat of primer until it feels comfortable to lay down paint.
Conclusion
Wherever you hear the word prime, what comes to mind? Top-quality, best, first-class, etc. A paint primer holds the same importance as the “prime” word itself; you have to apply it to achieve a top-quality paint finish.
The priming process must be correct, i.e., from application technique, primer-workpiece compatibility, to primer drying time. This article primarily focuses on the drying times, which I’ve discussed above. In summary,
How Long Does Paint Primer Take to Dry?
As I’ve highlighted, there’s no pinpoint drying time as the paint primers differ in terms of composition, the workpiece materials, and environmental conditions.
My inferred drying time is a range (10-24 hours) that encompasses all types of primers; this time represents the duration before which you shouldn’t apply paint.
The touch-dry time range is 30 minutes to 4 hours; it’s the time before which you should not touch the paint.
After priming, the application window is 72 hours; it’s the time beyond which you should not apply paint.
Primer drying times dominate this article. Still, I’ve thrown in other related topics on primers such as types of primers, application methodology for different surfaces, how many primer coats you need, among others.
I’m confident this will be of great help if you read it all through because I’ve tried and tested most of this content. Remember to extend the benefits to your friends, colleagues, and neighbors by sharing and recommending this read. Peace out.