Glass paint is suitable for various artworks involving float glass surfaces. It laminates walls, cabinets, and counter areas, and you can use it on tempered glass. However, painters ask if it is prudent to use the product in areas with excess heat levels. In other words, Is Glass Paint Heat Resistant?
Glass paint is heat resistant up to 350 degrees Fahrenheit or 180 degrees celsius. It forms a tight and permanent bond with the surface, making it ideal for kitchens and other demanding spaces. In addition, you can have it on office glass surfaces to control heat and prevent delamination or fading.
That said, let us delve into an in-depth discussion on what the product is, how to handle it for the best outcome, and some of the differences between acrylic paint and glass paint.
What Is Glass Paint?
Glass paint is a unique formula that bonds directly to glass surfaces, and unlike regular paint, it modifies the material to deliver permanent adhesion. In addition, once the paint cures, it will not peel, fade, or chip, even in high humidity areas.
The formula is suitable for materials like glass backsplash and tabletops. Moreover, it features a 350 degrees Fahrenheit heat resistance level. Thus, you can use it in bathrooms, kitchens, and other demanding environments.
Additionally, glass paint controls heat, light, and visibility in office settings without delaminating, fading, or discoloring. It also transforms ordinary glass surfaces into artworks, and you can utilize them to laminate counter areas, walls, and cabinet faces.
On top of that, the product is safe for tempered glass surfaces, and you can tint it to match the color pattern or palette of virtually any major paint brand. Hence, you are sure of a perfect color match with other standard paints.
Glass paint is UV resistant and will not delaminate or fade, despite direct sunlight exposure. More so, the finish will perform for ten years plus once you adhere to the manufacturer’s instructions.
The formula delivers exceptional coverage of about $1 per square foot for glass and non-porous materials. In addition, it needs no special application tools to give a professional finish and cleans up easily with paint thinners.
Additionally, glass paint comes in low VOC water-based and oil-based formulations. Therefore, you can use it comfortably and safely for indoor applications.
The product also makes an excellent alternative to more pricey, traditional frosted glass.
And while genuine frosted glass is mechanically or chemically created and offers perfect light transmission and privacy, it is pretty expensive. Thus, you are better off working with glass paint.
What Makes Glass Paint Heat Resistant?
Glass paint bonds directly on glass surfaces and is resistant to 350 degrees Fahrenheit. It controls light, visibility, and heat in office and home settings. So, you can use it in demanding spaces like kitchens and bathrooms without discoloring or delaminating.
Also, the product delivers a permanent bond with the glass and even modifies it to enhance the long-lasting link. Therefore, it will not peel, chip, or fade in highly humid conditions.
How to Paint Glass
Painting on glass is a perfect holiday activity for DIYers and a fun way to brighten your house if you are a homeowner. In addition, the finish delivers a smooth surface and lets light through to give radiant and breathtaking designs.
But it is prudent to follow the recommended application procedure for a perfect outcome. So, check out this segment for some tips.
-
Choose the Most Suitable Paint and Brushes
 It is advisable to use enamel paint for a long-lasting project. Fortunately, we have multiple enamel formula types that deliver various final appearances. Also, all the available brands will be set on the surface perfectly and remain on the glass for a long time.
The main enamel paint types include gloss enamel paints and frosted glass paints. Gloss enamel formulas deliver the thickest coat and a more opaque finish, while products provide a much lighter finish.
You can also get acrylic paint and gesso for a finished and matte appearance. Gesso is a white powder and binder combination that makes surfaces easy to paint. So, use it to create a base coat for acrylic paint to give an opaque finished glass surface.
Also, remember that gesso and acrylic paints are most suitable for glasses, bottles, and other containers with varying shapes. In addition, painting with these formulas looks very similar to painted canvas.
Consider using water-based glass paints and a glass liner to get a simple, stained glass look. Glass liner or lead delivers a dark and solid pattern, allowing you to fill the surface with colorful and translucent paints.
Additionally, building and coloring an outline in sections creates unique, see-through colors that resemble a stained glass window. However, it is advisable to trace the design’s shape before using the glass liner.
This way, you can easily paint over or wash off the marker instead of getting rid of it.
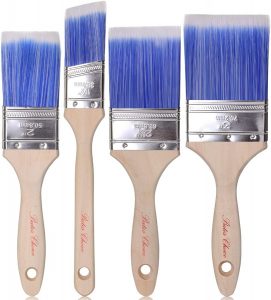
Ensure that you get the correct paintbrush for your design. Also, while it is okay to use any paint applicator or brush for your glass surface, it may change the design’s final appearance. So, here are a few brushes you can choose from for your work.
- Paintbrushes with synthetic bristles are perfect for smaller and intricate designs. They leave visible brush marks, delivering more homemade and rustic vibes.
- Natural bristle brushes will deliver a more smooth and uniform coverage. They work excellently for painting base coats for the entire glass surface.
- Applicator sponges provide a textured and even paint coat across the glass surface. In addition, you can use them to cover the entire glass or deliver a slightly frosted look.
Finally, ensure that you get the correct paintbrush size for the painting job. Broader and flat brushes suit overall coats, whereas narrower and smaller ones work best for delicate patterns.
-
Prepare the Surface
First, clean the glass with warm water and soap to remove any fingerprints and oil. This way, you’ll facilitate proper adhesion and a flawless finish. Also, be careful when drying the glass to avoid having more grease or fingerprints on the surface.
Luckily, you can wear latex gloves when washing the glass. They will keep you from transferring oils from your skin to the surface. In addition, use some rubbing alcohol on a cotton cloth for a more thorough clean.
Next, it is prudent to tape off any areas that come in contact with your mouth. Although some glass paint brands are non-toxic, some may chip off with repeated use. So, cover the top inch with masking tape.
In addition, you can use tape to cover areas you do not intend to paint. Try making angled lines across the glass and paint across them to deliver more funky and transparent designs.
Apply a base coat for all-over color. Lightly soak the brush’s tip into the paint and cover the entire glass surface. You can also use one or two gesso coats for the opaque finish’s initial base coat.
Let the gesso dry and cover it with one or two paint layers. Then, move directly to outlining the final design. However, it is okay to skip this stage when you only want to add slight decorations to clear glass.
Lastly, allow the base coat to dry for at least one hour. Wait until it dries to the touch before adding paint to prevent colors of more intricate designs from bleeding into the first layer. Also, some enamel paints will require you to give the surface five to seven days to dry.
-
Apply the Paint
Outline the design on the glass and use a marker to transfer the design to the surface. Then, have a starting point and carefully trace the design. Also, don’t worry about ruining the pattern with the marker, as it is easy to wash off.
Alternatively, you can use a glass liner. Follow the same method to outline the design on the glass. In addition, lightly squeeze the bottle when moving over the liner to lay it down well and deliver an accurate pattern.
Utilize a stencil on the inside of the glass instead of drawing on the outside. Then, transfer it to a piece of paper and hold it on the inside of the glass. This way, you’ll get a clear guide to apply paint over.
Begin painting the surface with one color and ensure that you load some paint on the paintbrush. Also, start on the brush’s furthest side and apply the paint to the chosen areas.
Use a paper towel to lift the finish from the wet surface or a paint thinner to dissolve the finish if you make a mistake. In addition, it is best to use light strokes and apply more pressure as it is easier to add paint than remove it.
On top of that, clean the paintbrush to remove leftover paint, dip it into some water and swirl it around. Then, dry the brush on scrap paper before applying the next paint color. However, please have some paint thinner for enamel paints to get an accurate result.
It is okay to pick another color to spice up your painting project. Load some paint to a clean, dry paintbrush and continue painting. But be careful to avoid blending the paint with other colors still drying on the surface.
Alternatively, you can wait for one color to dry before adding the next if you are worried about messing up an intricate design. One hour should be enough and keep you from making minor mistakes.
Paint the second coat when you want the colors to stand out. But first, evaluate the first coats once they dry and check their color for vibrancy and brightness. Then, use the above strategies to add the second coat for a more visual design.
Also, ensure that you use the same color for the second layer. A more transparent hue will give a slightly muddy outcome. But you can test the shade on scrape material and confirm if it matches the first finish.
Cure the glass paint by giving it enough time to dry. In addition, some acrylic and enamel paints need more time to set fully. So, leave the finish somewhere warm for about a week before use or display.
Always follow the manufacturer’s instructions when curing the formula. This way, you are sure of the best possible result. In addition, some paints that need drying to cure need hand washing with warm water and soap.
Finally, cure the glass finish by baking it. Some formulas need you to bake the material to cure and set permanently fully. So, put the surface in the oven and adjust it to the recommended setting.
Also, remember that a sudden temperature change may cause the glass to break. Therefore, leave it for about 30 minutes before switching the oven off and leave it to cool fully before removal.
Here’s More On How to Paint a Glass:
What Is the Difference Between Glass Paint and Acrylic Paint?
The primary difference between glass and acrylic paints is their heat resistance levels. Glass paint can resist up to 350 degrees Fahrenheit heat and is thus suitable for kitchens and other demanding areas.
On the other hand, acrylic paint is perfect for glass surfaces but versatile. Therefore, you need to prepare it and add some unique formula to facilitate proper adhesion to smooth surfaces without peeling.
Also, it would be best to seal the finish to ensure it does not wash off with time.
On top of that, remember that acrylic paints are not compatible with glass without priming or using the correct medium and paint. They tend to stick loosely on the surface, making it impossible to clean up afterward.
Also, although glass is non-porous and difficult to seal, it is advisable to apply a sealer. The paint does not soak into the surface but instead sits on the surface. Thus, acrylic paints will not adhere tightly to it, and you’ll eventually have a peeled finish if you ignore a sealer.
Lastly, acrylic paint is not 100% skin or food-safe, despite being a perfect decorative product for glass utensils. So, please be careful when painting glass surfaces that directly touch food.
That said, consider the following factors when choosing acrylic paint for glass surfaces.
- Read the Product Label Well Before Use. Remember that acrylic paint is water-based, but some brands include water, latex, and preservatives. So, check out the label to know whether the product is opaque, slow-drying, or transparent. In addition, some manufacturers will mention if the paint is suitable for glass surfaces.
- The Paint Quality and Brand Matter. Acrylic paints with higher quality acrylic ingredients are more durable than cheap ones. Thus, ensure that you check the color chart or test a sample before choosing the formula.
- The Paint Type. Most enamel paints are acrylic-based and stick better to glass surfaces. But you are better off sealing the surface with glass protector spray and clear varnish for a durable outcome.
- Opacity. Some pigments are more transparent or opaque than others. Therefore, it is advisable to check your project requirements and get the most suitable paint color.
- Drying Time. Acrylic paint is fast-drying. However, some brands will dry to the touch in ten minutes, while others will take one hour. Thus, determine the project duration and pick the product that favors you.
- Finish. The most popular finishes are matte, gloss, and satin. Gloss paint gives you a shiny surface, whereas matte is flat. Therefore, choose your finish depending on your desired outcome.
- Lightfastness. This term refers to how well the formula resists UV rays over time or how fast the finish will fade. Generally, there are four levels of lightfastness; levels one and two are more durable, while three and four easily discolor with more UV exposure.
How Do You Heat Set Glass Paint?
The glass heat-setting process is quite simple, and you do not have to worry that the material will melt. In addition, after heating the surface, you’ll be able to put the glass in the dishwasher or handwash it. But it will not be microwave safe.
The process is as follows:
- Wrap a cookie sheet with aluminum foil.
- Turn the oven to 180 degrees Celsius or 350 degrees Fahrenheit.
- Place the glass in the oven. Also, avoid pre-heated ovens and allow the glass to come to temperature with the device. Otherwise, heat from a hot oven will cause the glass to break.
- Set a timer and switch off the oven after 20 minutes.
- Leave the glass in the oven for ten more minutes.
- Remove the glass carefully from the oven as it may still be hot.
How Can I Make Glass Paint Permanent?
The requirements for this process include; gloss enamels, fine tip permanent marker, brushes, ruler, wine glasses, and glass plates. Then, follow the procedure below for a perfect result.
- Clean the glass with alcohol and edge it carefully with the paint pen. You can also add gold to the plate’s center for more detail.
- Draw ½” square grids on the plate’s front and fill in the squares with the white gloss enamel. Also, paint black squares with black paint and add polka dots around the plate’s outer rim.
- Paint some stripes on the base of the wine glass and add a different color to its stem. You can also paint some polka dots or gold accents to finish up.
- Put the dishes in the oven and bake them for 30 minutes. It is best to set the device at 325 degrees Celcius and let the glass cool for another 30.
Conclusion
Glass, like any other surface, needs protection against elements that might compromise its performance and service life like heat. Paint offers one such way of protecting a glass surface. Glass paints, in particular, are the center of focus here thus the question…
Is Glass Paint Heat Resistant?
Yes, glass paint offers resistance to heat up to 350 degrees Fahrenheit, beyond which it might not resist heat anymore. Higher temperatures than the standard set for glass paint would lead to the melting of the paint.
Therefore, it is important that you understand the heat ranges a glass may be subjected to before choosing the right paints.
As I conclude this discussion, I hope you found the post helpful to your quest in painting over your glass surface. Do you have a question that you’d love to share? Kindly feel free to drop it in the comment section below.