 Drying time for paints depends on the pigment’s contents and their reaction to the wood’s surface. In addition, humidity and temperature levels may lengthen or shorten the duration, making it difficult to recommend a specific drying time. Nonetheless, it is possible to get a drying time range for your project. So, let’s engage further in the topic cum question, how long for oil paint to dry on wood?
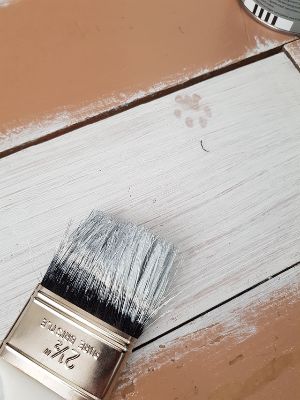
Oil paint is slow drying, unlike other painting formulas like acrylic, gouache paints, etc. Its drying time is dependent on the paint’s brand, environment, pigment color, and quality of the pigment. By approximation, most oil paints would need 6-8 hours to dry. 24 hours is on the safer side.
On top of that, good preparation and application determine whether you will wait too long for the paint finish to dry. Therefore, ensure that you do not overlook any recommended steps.
Please read through this article for more information on oil paints, their drying durations, and how to get the best out of this product.
Oil paint needs 24 hours to 12 days to dry thoroughly and about eight to sixteen hours before you can apply another coat. Also, please note that dry to the touch is not usually a go-ahead to resume using the surface. Thus, it would be best to adhere to the manufacturer’s drying instructions and duration.
Why Is My Oil-Based Paint Not Drying?
Various factors make oil-based paint remain tacky or wet. The primary ones include high humidity, low temperatures, and thick paint coats. Below is more information to beef up your research.
- High Humidity
The first thing you want to check if the oil-based paint is not drying is the humidity level. You can do the measurement with a hygrometer and confirm the issue. In addition, the ideal painting levels should range from about 40 to 70 percent.
Therefore, you shouldn’t have a difficult time establishing the problem.
Humidity refers to water in the air. Hence, high humidity alludes to more water content in the atmosphere, which lengthens the paint’s drying time. Moreover, oil-based paints dry through oxidation, and too much atmospheric moisture hinders the solvent from evaporating.
Additionally, every paint type needs slightly different humidity levels, and most products list the acceptable range on the container. Thus, it is wise to check and adhere to the manufacturer’s guidelines for a satisfactory outcome.
Reduce the moisture content in the air with a dehumidifier, or consider painting the wood at a different season when the humidity levels are too high. Also, please avoid painting after the rain as the humidity content is usually relatively high,
- Low Temperatures
Too high or too low temperatures are equally harmful to your painting project, and they might be the reason for your sticky finish. Moreover, painted surfaces struggle to dry in cold areas below 50 degrees Fahrenheit.
The ideal temperature range that will deliver a desirable result is 50 to 80 degrees Fahrenheit. However, ensure that you check with your manufacturer as the specific temperature level varies slightly among paints.
Finally, please consider warming up the room if you applied the formula during freezing temperatures. Otherwise, you might have to wait for suitable weather conditions to redo or continue with the project.
- Too Many or Thick Paint Coats
Another common reason for a sticky oil-based finish is applying too many thick coats. In addition, using these coats too quickly will lead to drying issues as the subsequent layers will hinder the undercoats from drying.
Also, the topcoat may dry quicker than the base coat, preventing the project from drying thoroughly. This situation may require you to wait out, which may take months. Or worse still, you’ll have to redo the job.
Fortunately, all is not lost if you notice that your oil-based paint is not drying. You can choose to give it more time to dry, use auto wax, and consider talcum powder.
- Wait for the Wet Paint to Dry. This alternative is perhaps the easiest and cheapest as it does not require additional products or steps. Also, the surface could still be tacky because you haven’t given it enough time. So, check the container for the recommended drying time and wait.
- Use Auto Wax. You can buff the sticky paint away, especially for furniture with heavy traffic or with lots of items. Also, the product protects the paint from damage and allows you to wipe off the wet paint easily.
- Apply Talcum Powder. This product is suitable for white surfaces or areas where two painted items can create friction. It dries the moisture and allows the paint to cure. However, please apply the powder to a small area to ensure that you can brush it off when needed.
On top of that, it would be best to take preventive measures to avoid a tacky surface altogether. Simply prepare the wood properly, apply a primer, and use multiple but thin paint coats for a professional finish. Also, even if there are ways to remedy a sticky surface, remember that prevention is always better than cure!
How Do You Make Oil Paint Dry Faster on Wood?
There are a few tricks that speed up the paint’s drying duration. For instance, you can alter the existing conditions during drying or mix the paint formula with some additives.
Check out this section to help determine the best strategy for your work.
- Increase the Temperature Levels
Oil paint dries quicker in warm temperatures and takes longer in cool spaces. Hence, exposing the paint finish to heat will significantly speed up the drying process while maintaining a perfect result.
One way to increase the temperature level is by using a heater or thermostat in your working space. But ensure that the heater does not blow directly on the wet paint lest you spread dust particles on it.
Also, you can stick the painted surface in a window on a warm and sunny day or place the painting on linen glued into the plywood at the car’s back window. However, be careful during this process. The vehicle gets so hot, causing the linen to separate from the plywood. And even worse, the heat may end up warping the wood.
A heat gun is another tool to use when speeding the paint’s drying time. Set it under 130 degrees Fahrenheit to keep the surface from cracking or yellowing. Then, move the gun slowly over the finish, keeping it a few inches from the painting. Further, ensure that the tool never touches the surface lest you ruin it.
Unfortunately, the above heating methods can accidentally set your house on fire. Therefore, avoid going overboard with any technique and keep it safe. Also, it is better to wait a few days for the finish to dry than burn your studio or damage the painting.
- Increase Air Flow
Remember that oil paint dries through oxidation, a chemical reaction that causes moisture to evaporate from the surface. So, stagnant air will make the paint dry slower, and it would be best to open the window to increase the airflow.
In addition, painting the surface in a dry, well-ventilated area will fasten the drying process. You can utilize a ventilation fan and a dehumidifier to aid constant air exchange and catalyze the chemical change.
Exposure to natural light is an option too. Thus, you can consider positioning the painting close to the window for maximum benefit. Also, ensure that the weather is not humid as it would significantly slow down the process.
Lastly, clean the dust from the fan blades for appliances that you haven’t used in a while. Otherwise, the dust would circulate in the air, get into the paint finish, and compromise the final result.
- Use Thinner Coats
Let’s move away from environmental factors and look into chemical and technical reasons. The first consideration is paint application, as thicker paint requires more time to dry.
Also, remember that the oil formula’s chemistry changes during drying due to the oxidation process. Thus, the thicker the paint layer, the longer the process.
Fortunately, there are multiple ways to thin oil paints. Solvents are the most widely used strategy, but you can also utilize various dryers, oil paints, and thin paint applications. Also, it would be best to avoid oil thinners as they extend the drying duration rather than shorten it.
Additionally, it is possible to thin the paint without any additives, which works best for those with a tight painting budget. Thin the formula by scrubbing it onto the surface with a bristle paintbrush until you deliver full coverage.
On top of that, always ensure that the initial coat is the thinnest and has the least oil content than other layers. Then, save slightly thicker layers for the topcoats. This way, you’ll avoid producing dull spots or cracking the paint finish.
In addition, the initial paint coat requires the most time to dry. And thus, allowing it to dry fast speeds up the drying of consequent layers. You can also apply thin paint layers all through, reducing the drying time to one or two days.
- Drying Mediums
Chemical drying agents, like Liquin or Galkyd, are another way to speed up the drying duration of subsequent paint layers. Notice the emphasis on ‘subsequent’ as these formulas have a petroleum distillates base that acts as oil.
In addition, different Galkyd and Liquin versions feature varying drying rates. The products also give a glossy appearance and have some toxicity levels. Thus, please use them according to the manufacturer’s drying and curing instructions.
Add the recommended dryer amount to the paint mixture before painting the surface. Also, please note that thin paint layers may become tacky within an hour. So, you are safer following the correct procedure throughout the application process.
Additionally, clean the brushes immediately after using the chemical mediums. Otherwise, you might end up with hardened and unusable accessories. Fortunately, you can try using Turpenoid Natural or other cleaning chemicals to clean and restore the tools for future use.
Alternatively, you can go for alkyd paints. They feature a quick-drying oil that shortens the drying duration to a day. In addition, they are compatible with most oil paints, and better still, you can paint the surface strictly with alkyds.
Also, you can use alkyds for slower drying colors, like Cadmiums and whites, and get regular oils for other colors. This way, it is easy to mix and match the product to deliver a sophisticated finish.
Lastly, Walnut Alkyd features a faster drying time than all other drying agents. Even better, the formula is non-toxic and suitable for indoor painting ventures. However, it is prudent to ensure that the medium is compatible with the alkyd to facilitate a better result.
- Use Acrylic Paint for Initial Layers
This strategy may not speed up the paint’s drying duration, but it will speed up the entire painting process. How so? You may ask. Well, most paintings undergo a layering process that allows the painter to establish color and value masses to use.
So, instead of using slow-drying oils for the block-in, you can utilize fast-drying acrylic paint. Then, use the oil paint for other layers.
The advantage of this technique is that it minimizes the likelihood of ghosting, which features dull spots when layered oil coats dry. Also, it delivers thin initial strokes that dry pretty quickly.
Finally, please consider a universal/acrylic-primed surface for this strategy. In addition, you can put an oil-based formula over a water-based one but never the reverse. Thus, always let the acrylic coat precede the oil paint.
- Type of Paint
Certain paint pigments dry faster than others, despite being similar drying conditions. Therefore, you can consider using these pigments since you can easily get a lovely finish with a compatible color match.
In addition, some paints have drying mediums mixed in them. Hence, there is no need to have a different thinner. But they are a bit more expensive than regular formulas, and it would be wise to budget accordingly.
Alternatively, you can go for oil paints with Linseed oil only. Please note that this oil dries much faster than walnut oil, safflower oil, and poppy oil. Therefore, you can be sure of a shorter drying time.
On top of that, some manufacturers use safflower oil in white or light valued cool colors since linseed oil yellows after drying. Unfortunately, these colors may dry at a slower rate. And you are safer having paint made from linseed oil to enjoy a faster drying rate.
Here’s How to Make Oil Paint Dry Faster:
Does Oil Paint Dry Faster in the Sun?
Sometimes you may get impatient and want to continue with the painting project, but the finish is still wet. So, consider exposing the artwork to the sun for a few hours. Also, you do not have to panic as this exposure will not damage the paint coats. Instead, it will help speed up the drying duration.
In addition, oil paint dries through oxidation, with the solvents in the formula evaporating in the atmosphere. Therefore, direct sunlight provides the required temperature and humidity levels for the process.
Nonetheless, it would be best to leave the painting in the sun for about fifteen minutes. Otherwise, prolonged exposure to UV rays can easily damage the finish. Also, please note that the drying duration can lengthen depending on the paint layers’ thickness. Therefore, keep checking whether the finish is dry and remove it from the sun once satisfied.
Note that a chemical reaction occurs when the paint finish heats up in direct sunlight. Worse still, this process alters the oil paint’s appearance and even changes the project’s final color. So, only keep the painting under the sun for the recommended duration.
Can a Hair Dryer Dry Oil Paint?
On average, oil paints take up much more time to dry than other paints. Because of that, DIYers look for alternative methods of lessening the drying duration of oil paints. And as a direct result, this raises objections to the question, can a hairdryer dry oil paint?
Yes, a hairdryer can dry oil paint. But to understand why a hairdryer is a better pick for drying oil paint, you first have to be well-versed with knowledge concerning how oil paint dries. Oil paint requires the oil to oxidize to dry correctly, unlike acrylic, which requires the water to evaporate.
Ideally, the oxidation process takes a longer duration than evaporation in acrylic. And that’s why most users look for methods to dry their oil paints quickly.
Here is a quick resolution of how to dry out the paint with a hairdryer.
To begin, turn on your hairdryer and hold it at least six inches away from your oil paint surface. After that, aim to distribute an even amount of airflow over the oil-painted surface. This way, you will have reduced the drying time of your oil paint as it will dry much quicker than normal.
Tip
You don’t have to waste electricity by switching on the heat settings on the hairdryer. Even if you turn it on, the heat won’t provide any value considering that you aim to intensify the airflow over the oil paint and not heat. Turning on the heat settings might also bring about water evaporation in the oil paint, making it crack with time.
For good measure, the best way to clasp your hairdryer is on the perimeters of your oil painting. In this position, sufficient airflow is blown across the entire oil painting, making it dry quicker than usual.
However, your situation will come into play and blow air directly on the oil painting; suppose you find it easier.
How Quickly Will a Hair Dryer Dry Oil Paint?
Even though a hairdryer is sanctioned to minimize the duration required for oil paint to dry, it isn’t easy to assess how soon it can make oil paint dry accurately. This is because of numerous variables involved, such as the type of oil mediums used, the amount of oil in the oil paint, and the power of the hairdryer you use.
Similarly, people also ask, is there a need to use an expensive hairdryer? No, you don’t have to use a costly hair dryer to dry your oil paint, whereas a cheaper one can do the trick. Worst of all, using an expensive hair dryer usually burns the motor quickly due to immense wear and tear.
Then as well, all the fancy features integrated with an expensive hair dryer are useless. I say this because oil paint doesn’t require heat to dry; instead, it requires sufficient airflow.
Are Oil Paints Harmful?
Oil paints are the most prevalent type of paint; that’s why most people use them for both interior and exterior projects. These paints incorporate a blend of distinguished mineral oils as the core liquid in their formulation. Along with that, oil-based paints also integrate a blend of toxic hydrocarbons and high levels of VOCs.
These harmful substances in oil paints can result in severe health issues upon exposure. When you contact oil-based paint fumes, you are likely to experience the following symptoms: stomach pain, irritated skin, breathing difficulties, pneumonia, and difficulty swallowing.
How to Get Rid of Oil-Based Paint Fumes
If you find it difficult to vacate a painted room, try these techniques to drive away from the paint fumes in your room.
First, ensure your space is well-ventilated. You can achieve this by keeping the windows open and mounting fans in your room. Doing this helps distribute fresh and clean air in your workspace exactly when pushing away contaminated air outside.
Alternatively, you can opt for baking soda to combat the toxic paint fumes. Using this technique is relatively easy: take a few small bowls and pour in a considerable amount of baking soda.
Next, scatter the bowls around the room and let them sit overnight. By the next morning, the odor should have disappeared. If not, empty the bowls, refill them with baking soda, and stay for another night.
Aside from that, clean water and lemon can also drive away the odor. Take several bowls and fill them with water. Cut a few pieces of lemon and place a slice in each bowl. Then place the bowls in different sections of your room. After roughly 10 hours, your room should be safe to stay.
Can I Put Water-Based Paint Over Oil-Based Paint?
Oil-based paints have a glossy surface that doesn’t accept new paint easily. So to improve its adherence qualities, you will want to remove the glossy top surface with fine-grit sandpaper: preferably 180 to 220 grit sandpaper.
Remember, you are not seeking to peel down the entire paint; only sand the surface until it’s no longer slick. After that, clean the surface with a clean cloth to fetch the remaining sanding dust.
After sanding, wear your protective gears and banish dirt and grime that can interfere with adhesion using TSP cleaner mixed with a bucket of warm water.
Once you are through, take your sponge and saturate it again in the mixture of TSP and water, lightly wring it out, and wipe down the surface as you pick the remaining impurities. Next, make another pass over the sanded spot with a clean sponge soaked in freshwater. Then allow the surface to dry before priming.
How Do You Dry an Oil Painting Overnight?
With oil paints, you are bound to enjoy the flexibility to improve your work for several days because oil paint dries slower than other paint options. The ability to modify your project is the prime reason people abandon other paint types in favor of oil paints.
Despite that great advantage, the slow drying time of this formula has its downsides, especially if you plan to use your painted surface soon. But don’t worry as this article graces you with good news.
There are techniques to adjust your oil paint drying time, and among them is painting on a flat surface. Usually, rough surfaces take longer times to dry due to the unbalanced perimeters. But with flat surfaces, you have the flexibility to administer the colors evenly, plus the oil paint will harden quickly.
Is Oil Paint Waterproof?
Oil paints dry to form a water-resistant coating allowing them to hold out water and extreme moisture. However, that doesn’t mean it’s safe to submerge an oil-painted surface in water as it will come off. Also, you are not allowed to expose your oil-painted project to any rainy situation unless it’s completely dry to the touch.
Can I Dry Oil Painting In Sunlight?
Oil paints often dry through the oxidation process; as such, continuous access to fresh air is imperative. But how about sunlight? Does exposure to various light levels affect the drying process? Keep reading as we unfold more of this.
It’s wise to let your oil paintings dry in the sunlight, but there are also some compelling reasons why you should not do this. For instance, if your oil painting stays exposed to direct sunlight for an extended duration, a chemical reaction occurs, causing discoloration and deterioration.
It’s best not to let your oil painting sit in direct sunlight for long periods with that in mind. But then again, avoid drying your oil painting in a damp, dark place, considering that the colors may come out muddy.
How to Dispose of Oil Paint
If you lack prior experience with oil paintings, it can be tricky to figure out how to dispose of your oil paint after the close of your paint job. Oil paints integrate harsh solvents, which can be too toxic if acquitted into the environment. So you are supposed to dispose of oil paint appropriately to prevent environmental harm from transpiring.
So the surest way to dispose of oil paint is to allow it to dry out independently. This way, some harsh solvents will come out of the paint, making it safe to dispose of. But then again, you should not dispose of your dried oil paint in your typical trash can.
As an alternative, opt for special disposal because the dried paint still qualifies as a toxic substance.
Can You Sand Oil Paint?
Even though oil paint applies relatively smoothly on surfaces, you cannot avoid brush strokes. With other paint options, it’s easy to sand down the surface to level out the surface imperfections, but it’s tricky to achieve that with oil paints.
Sanding oil paints elicits toxic dust and fumes, which can be harmful to inhale. So to avoid sanding, it’s best to try out other alternatives like using a sharp knife to scuff up the high peaks on your surface. Or, if you decide to sand, do it with caution.
Can I Smooth Out Oil-Based Paint?
Even if oil paints apply smoothly on surfaces, you will always encounter the issue of visible brush strokes. To avoid such a nuisance, it’s best to paint on clean surfaces free from dirt and grime.
Still, you will want to employ the right paintbrush, such as bristle brushes. Such types of brushes have smooth bristles, which promote a smooth finish. You can also add a protective sealant after painting to make your paint seem more vibrant and smooth.
Which Paint Is Ideal for Wood, Acrylic Paint or Oil-Based Paint?
The prime contenders for most wood painting projects are oil paints and acrylic paints. Both of these formulas brag it’s own strengths and mishaps. For instance, acrylic paint is known to last longer and is relatively easy to clean. Conversely, oil paint tends to wear out with time and calls for regular upkeep.
Usually, oil paints penetrate a wood’s surface and offer protection from within, whereas acrylic paint stays on top to form a protective layer.
So from experience, I suggest oil paints for wood projects because they rarely chip, crack, or scratch easily like acrylic paint. Also, they are easier to apply, and they give you ample time to modify your project. However, one of the oil paints’ downsides is that it’s very expensive, needs harmful additives to be thin, and involves dangerous fumes.
But if you are running an exterior project such as fencing and siding, acrylic paint Is a better pick. I say this because acrylic paint is very flexible, meaning it will contract and expand even in extreme conditions. Also, acrylic paint can keep up the rich pigmentation, unlike oil paints that fade with time and develop unsightly blemishes.
Can You Put a Hardener in Oil Paints?
Yes, it’s recommended to use a hardener with oil paints as it’s bound to speed up the drying process. For instance, for coats that last for three days to dry, a hardener can reduce the duration to a few hours.
Also, hardeners promote paint durability as your paint will hold out even the toughest weather conditions. So if you are in for an enduring finish that won’t break down at the touch of harsh solvents, you can’t go wrong with a hardener.
How Do You Soften Oil Paints That Have Hardened?
The surest way to soften oil paint is by using turpentine. However, be cautious when using this medium as it is rated very toxic once inhaled. It’s even better to use it in a well-ventilated space. Follow this procedure to get the job done with ease;
Step 1
Bring together your painting, brush, or acquire some dry paint from a tube.
Step 2
Put on your gloves and mask and start applying the turpentine regarding the instructions printed on the tin. If you realize the paint isn’t coming off easily, apply more turpentine to a rag, place it on the surface and let it soak for nearly 20 minutes until the paint softens.
If you want to soften your paintbrush, take a container, pour the turpentine into it and place the paintbrush inside. After a couple of minutes, the dried paint will have softened. Remember, the container you use should be disposed of correctly due to the toxic nature of turpentine.
How Do You Harden Oil Paint?
The prime motive of hardening oil paint depends on your liking. You may plan to harden it to maximize durability or harden it for safe disposal. If you plan to dispose of the paint safely, let it dry naturally by placing it in numerous disposable cans. After that, place them outside to receive direct sunlight for a few days.
Alternatively, you may want to add a paint hardener additive to reduce the time needed for the paint to harden. To use a paint hardener, pour a considerable amount of it into the paint, stir it well with a wooden stick, then let it set. I
f the consistency does not march what you need, add a cup of water into the mixture and continue stirring. After that, let the mixture stay for 30 minutes and watch out to see if it has hardened.
How Do Fix Oil Paint That is Tacky?
Tacky paint usually results from improper application or multiple coats when the previous one hasn’t dried. Another cause of tack paint is applying the oil paint on a dirty surface or your unprimed surface. If this happens, you’ll need to go to extreme lengths to ensure you resolve the problem as soon as possible.
Fortunately, you can fix the tacky oil paint with these helpful tips highlighted below:
Step 1
Take a hairdryer, plug it into the socket and program it to the lowest setting. Next, hold the hairdryer inches above the painted surface and begin to blow air directly on the tacky paint.
Tip
Be sure to regulate the heat to the lowest setting. If not, you will risk bubbling the paint.
Another alternative is to strip and replace.
Step 1
This method involves scraping off the tacky paint using a flat-edged scraper: metal or plastic. In the process, ensure that the scraper remains flat throughout to evade gouging the surface.
Step 2
Next, pour a small amount of chemical stripper into a rag and apply a thin layer to the oil paint to assist in peeling it off. Continue applying the stripper until you bring down the entire paint.
Step 3
Once you are through, use a solvent cleaner to wipe down the entire surface to remove any oil, grease, or dirt. You do this because any of the contaminants mentioned above can make your paint seem tacky after the close of the paint job. Afterward, wipe the surface clean with a rag soaked in freshwater.
Step 4
Now that the surface is free from impediments, prime it with an oil-based primer and then paint a fresh coat of paint. The paint should now dry to proper consistency.
How Do You Know If Oil-Based Paint is Dry?
It’s easy to tell if your oil paint has fully cured by scrubbing off the surface or washing it. If you realize that the paint accepts intense scrubbing without affecting the finish, your paint is fully dry.
Try out this method:
First, purchase an ordinary razor blade and use it to scuff up a small area of the painted surface. Hold the razor flat at odds with the paint and a slight angle to the surface.
You will also want to bend the razor towards you and start to scrape the blade across the painted surface. Some paint will come off in the process, but you don’t have to worry because it’s normal.
Watch out and see if the paint will come off in a powdery form; it means it’s dry, and you can proceed with multiple coats. But if it comes off in a string, that tells you the surface is still too wet to add another coat.
How Long Does Oil-Based Paint Stay Sticky?
The paint can remain sticky for several days, weeks, months, and even years, depending on the level of tackiness and existing weather conditions. Also, the surface may look dry, but you may still feel some wetness after touching it. Therefore, it is wise to adhere to the recommended application procedures as they facilitate a short drying time.
In addition, you are better off waiting some hours between each paint coat and the final curing period than dealing with sticky paint for years. Or worse still, having to redo the project and spend additional time, energy, and resources.
Generally, the first paint coat needs between one to eight hours to dry, depending on the paint type, temperature levels, and humidity content. Thus, do not overlook weather conditions before painting.
Can You Dry Oil Paint With a Heat Gun?
Yes, it is okay to use a heat gun to dry oil paint. Set it to 30 to 130 degrees or 86 to 266 degrees Fahrenheit for the best results. This way, you’ll bake the oils in the painting and help it dry faster.
However, please avoid setting the heat gun above the recommended ranges. Otherwise, it will cause the paint to appear yellow or crack. In addition, hold the tool a few inches from the painted surface and move it slowly until the heat penetrates the paint.
Lastly, remember that the gun’s nozzle gets very hot and should not touch your hands to avoid incurring burns. Also, it would be best to work with gloves and goggles to keep yourself safe from any accidents.
Can I Use Oil Paints Without Thinner?
It is okay to use oil paint without a thinner as all you need is an oil paint brand with a thin consistency. Also, the brush helps you spread the formula on the wood effortlessly.
Check out the following alternatives to using a thinner.
- Palette Knife Painting. Believe it or not, a palette knife will eliminate the need for mediums or solvents. More so, it creates bold paint strokes on the surface and, even better, delivers a unique outcome that you cannot replicate with a brush.
Additionally, you can create sharp edges that give the finish a rigid design. And better still, the knives are easy to clean. Thus, they deliver a convenient painting and cleaning session. But please note that palette knives use a lot of paint, and you may have to sacrifice overall accuracy.
- Direct Painting (Alla Prima). Thinners, mediums, and solvents are unnecessary when you paint using the direct technique. Place distinct color strokes and hope they remain intact after painting. In addition, adhere to the recommended drying time to deliver a desirable result.
On the other hand, thinners and solvents are necessary when using the layering technique. They give you more control over the paint’s drying time and help you deliver a more sophisticated finish.
- Use Water-Mixable Oils You can also opt for water-mixable oils, which are now a popular alternative to traditional oil formulas. Even better, though the mixable oils work well with water, they can still handle projects like traditional oils.
What Happens If You Apply Second Coat of Oil Paint Too Soon?
You will ruin the oil paint finish if you apply a second paint coat too soon. Worse still, this scenario will result in lost money, time, and effort and not to mention the added unnecessary stress. So, you are safer checking the manufacturer’s suggested drying time and if you are unsure, give the paint coat 24 hours.
Additionally, applying the second coat too early will lead to peeling paint, streaks, and uneven color. Therefore, even if the project survives, it will remain ugly and soon require reapplication.
It is best to wait for the first paint layer to dry, regardless of how it feels. Also, it is much easier to see the first coat during painting when it’s dry than wet. Therefore, you will deliver even paint strokes on the subsequent coat.
On top of that, ensure that you adhere to the recommended waiting times. Also, check out the following paint types to get a suitable outcome.
- Primers need one to two hours before adding a second coat.
- Glossy paint requires waiting for two hours before applying the next layer.
- Semi Gloss Paints also need two hours before having a second layer.
- Matte Paints only require one to two hours before you can successfully apply subsequent coats.
- Eggshell paint needs two hours for the second coat to adhere tightly to the base coat.
The temptation to paint the second coat too quickly is stronger when you idly wait for the first layer to dry. So, you can consider doing something else as the paint dries. For instance, get a head start on other walls or pieces of furniture.
Alternatively, do something you love, such as watching a Netflix episode, a cooking tutorial, or taking care of unused items in the backyard or deck. It is entirely up to you as long as it keeps you distracted as you wait.
Lastly, please note that you are likely to get tired and anxious to complete the project during the second coat. Therefore, it would be best to keep your composure to facilitate a perfect ending.
Fortunately, although this stage may have a lot of stress, the dried base coat lets you see where to apply the second layer. This way, you will end up with a consistent and even paint finish.
Final Thoughts
We have seen that the joy of oil paint is that it permits you to modify your painting project for a smooth finish. As much as it is a highly fancied painting option for DIYers, this formula comes with frustration, such as longer drying times. And for that, DIYers are pleading to know…
How Long for Oil Paint to Dry on Wood?
Oil paint doesn’t have an exact drying duration. Usually, its drying period is dependent on various aspects such as the environment, quality of the pigment in it, and the rest.
Thanks for your time. Delight in your paint job and let’s meet in the next one.