 A fire pit is a resource for your contemporary outdoor lounge as it bears witness to most of our memorable times. It comes in various versions, from lightweight metal bowls that install anywhere to permanent masonry wells that extend the outdoor living ambiance in style. However, these units often degrade with time due to exposure to critical elements. For this reason, you will want to restore your fire pit to its initial state, which begs the question, can you paint inside a fire pit?
Yes, the best paints to use on an indoor or outdoor fire pit are rated for high heat, around 1200℉. The high heat enamel spray paints are designed to withstand very high temperatures and prevent rusting too. They are good for wood stoves, fire pits, radiators, and barbecues.
Stay with me throughout the article for more insight on the subject.
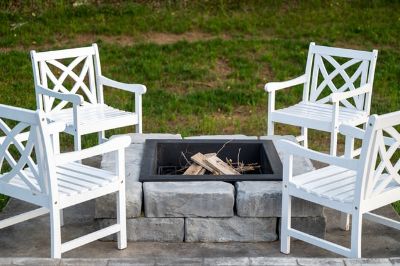
Do You Need a Grate in a Fire Pit?
Not all fire pits use grates. However, if your fire pit has one, it can be a very useful tool to help keep the fire burning longer. The ventilation in a fire pit releases excess gasses from the enclosure.
A grate plays an important role in a fire pit. It straddles Inside and holds the wood logs to keep them elevated as ash falls to the bottom. Because of this, your fire pit maintains constant airflow making the fire burn much longer. However, not all fire pits incorporate a grate.
How Do You Paint a Fire Pit?
A fire pit often degrades with time due to environmental variables. Fortunately, you can paint your fire pit and restore its default look.
Knowing how to paint your outmoded fire pit can save you from the hassle of purchasing a new one. Here is a detailed process of how to paint your fire pit.
Items Needed
- Sandpaper.
- Stripping pad.
- Bucket.
- Plastic drop cloth.
- Regular dish soap.
- High-heat spray paint.
- Denatured alcohol.
Step 1: Cleaning the Surface
Every painting project requires a clean surface for the new paint to adhere in the best way possible. So start by mixing warm water and soap in an empty bucket. Take your stripping pad, dip it in the soapy water, then brush off all the dirt and ash built up in the fire pit. You will also want to scuff off any loose paint. After cleaning, rinse the fire pit and let it air-dry.
Step 2: Sanding
After the fire pit dries, it’s time to sand it. Use medium-grit sandpaper to sand the inside, outside, wireframe, and fire pit base. Doing this creates a rough texture for the new paint to stick and helps to peel down any lingering loose paint left out from the cleaning step.
Step 3: Wipe Down the Surface
After sanding, put on your gloves, grab a clean rag and damp it in denatured alcohol. Next, wipe the entire fire pit with the damp rag and avoid contact with the alcohol.
The essence of the denatured alcohol is to peel down the sanding particles and other residues that can hinder your paint from sticking to the surface. After that, let the surface sit for about 30 minutes before painting.
Step 4: Painting
It’s now the ripe time to paint your fire pit. It’s wise to use Rust-Oleum ultra-high heat in copper paint to cover the actual pit. And Rust-Oleum black to paint the pit’s base and top.
First, spread out your drop cloths down to prevent a messy paint job. Then take your spray paint and shake it for about two minutes. Shaking the spray can is necessary as it helps bring together the paint’s molecules that gathered at the bottom. After shaking the paint:
- Keep a distance of about 12 inches from the fire pit and start applying the first coat.
- Use back and forth motions for best results and alternate between the base, wire top, and the pit.
- Let each coat dry as directed on the can. You can do as many coats as you wish, provided you apply thin coats.
What Kind of Paint Do You Use on a Fire Pit?
A fire pit is a safe place to gather around with your family and friends while enjoying the warm heat and sharing old stories. However, as time goes by, your fire pit begins to degrade, and that’s when a makeover comes into play. But what kind of paint is safe to use on your fire pit?
A fire pit elicits too much heat. And for that, it requires high-heat paint. The best high-heat paint for fire pits is rust-oleum high heat spray. This paint option is set to withstand temperatures as high as 1200 degrees F making it suitable for wood stoves, fire pits, and BBQ grills.
Why Put Sand In the Bottom of a Fire Pit?
There is some uproar about one element of the fire pit: sand at the bottom. The essence of using sand at the bottom of a fire pit is to offer the metal at the bottom protection from the severe heat elicited by the fire. The sand soaks up the heat of the fire and disseminates the heat all over the entire base evenly.
The heat at the bottom can become concentrated only in one spot if you fail to use sand. And when this materializes, the metal at the base of your fire pit will begin to deteriorate and burn through. Because of this, it’s integral to use sand at the bottom as it’s an ideal insulator against those high levels of heat.
Are Propane Fire Pits Safe on Decks
Safety is always a top priority when establishing a fire in your home. One of the common fire pits is propane fire pits. But are they safe on decks?
Yes, propane fire pits are safe to use on wooden deck surfaces. This is because propane fire pits don’t produce sparks as with wood fires. Therefore, the risk of unconsenting ignition is much lower.
But if you are making your gas fire pit, you will want to consider additional steps to guarantee safety. Among the common additions includes a deck insulation kit. But ensure you confer with your local fire codes before installing them.
Can Propane Fire Pits Get Wet?
Fire pits are arguably one of the best features to add to your backyard. They offer warmth and add a dose of elegance to your home. However, they require high levels of maintenance to ensure they withstand the damaging elements of nature.
So can propane fire pits get wet? Yes, propane fire pits can get wet, and the buildup of moisture inside the pit can mess with the gas burners. As a result, the buildup of moisture malfunctions the fire pit and brings about rusting. Luckily, these safety measures will keep your propane fire pit from getting wet.
- Cover the fire pit
It’s good practice to cover your fire pit when it’s not in use. This way, you will prevent your equipment from malfunctioning due to elements like moisture, heat, and bugs.
Secondly, make sure you purchase a propane fire pit designed for outdoor use. Such options can withstand the ravaging elements and will last a lifetime.
- Proper drainage
A good fire pit should integrate proper drainage at the bottom to prevent moisture damage. If your fire pit doesn’t have proper drainage underneath, you can install it yourself by drilling tiny holes at the bottom.
How Do You Paint a Propane Fire Pit?
A propane fire pit is a better pick over the commonly used wood fires. That’s because propane fire pits don’t elicit smoke and sparks, and at the flip of a switch, you have your real flame and warmth.
Propane fire pits are also useful for forgiving clean-up mess, and their convenience is a huge bonus. Using this guide, find out how to paint your propane fire pit in easy ways and make it look better.
First, clean your propane fire pit to remove the surface dust. You will need to use ordinary soap and warm water for this step.
Once you are through, take sandpaper and sand your propane fire pit to create a rough surface for the paint to stick. This is the most time-intensive step, but you will love the outcome once you master the trick.
After sanding, wipe down the surface to collect the lingering sanding particles that can prevent your new paint from adhering as expected.
Wait for the surface to air-dry before spraying a coat of paint. A high-heat paint is a better pick for propane fire pits because of its resistance to flames and the heat from the fire.
What Sand Is Best for a Fire Pit?
Most fire pits require sand underneath to help the metal bowl withstand the extreme heat from the fire. But what sand is the best to use? Ideally, silica sand is the best option for fire pits. It comes along with the following benefits;
- Improves flame performance
Silica sand delivers consistent gas dispersion throughout your fire pit’s base. For this reason, it improves the flame performance as it will light for an extended duration.
- Gas compatible
This option is also ideal for all fire pits like the gas options. It is a perfect replacement for faux log sets to create a better-looking flame.
- Safe and easy to install
Silica sand is safe for homes and commercial applications. Even better, it installs easily. All you need is to pour it into your fire pit straight from the bag, and you’re done.
What Type of Paint Is Heat Resistant?
Heat and temperature fluctuations make your surface breakage or corrode. That’s why you need coatings that can hold out the damage caused by these two elements. But first, you need to understand what heat-resistant paint is.
Heat-resistant paint is a coating specially designed to protect surfaces exposed to extreme temperatures and high heat. A high heat resistant paint can endure temperatures up to 800 degrees C.
With that in mind, what type of paint is heat resistant? Ideally, there is no specific paint rated best for heat resistance. It depends on the substrate in the question and the environment. Before purchasing one of these products for your project, be sure to confer with your manufacturer to determine what paint suits your project.
How to Remove High Resistant Paint?
High-temperature paints are coatings applied to surfaces that suffer high heat levels like ovens, fire pits, automotive components, and the rest. The paint is suitable for indoor and outdoor applications. But given that this paint brags high resilience qualities, removing it is quite a hassle and requires harsh chemicals combined with appropriate tools.
Learn more from these Steps highlighted in this guide.
Supplies Needed
- Rubber gloves.
- Paint stripper.
- Putty knife.
- Steel wool pad.
- Clothes.
- Water.
- Rag.
Step 1
First, proper ventilation is required if you’re working indoors. Still, you need to consider your health by putting on solvent-resistance gloves to avoid contacting the toxic chemicals. Also, be sure to put on clothing that surrounds a large surface area of your skin to avoid alkaline burns.
Step 2
Next, follow the manufacturer’s guidelines to mix chemical paint strippers. Pour a considerable amount of the striper into a rag and rub it over your high-heat paint. It’s even best to use an aerosol application for quick results.
Step 3
After applying the chemical stripper, let it stand according to the time highlighted on the label. This way, the product dissolves the paint making removal a straightforward task. After the paint softens, use a putty knife to scrape it off until you lift off most of the paint.
Step 4
By now, the paint must have peeled off the surface. However, it’s wise to treat the surface with another application to further thin the coat. You do this because high heat paint is usually applied in multiple coats and some chemical removers evaporate quickly. As such, it’s not a surprise for some chemical strippers to dry out quickly before taking full effect.
Step 5
After removing the existing high-heat paint, wet the surface with water, then use a fine steel wool pad to bring down the stubborn traces of the paint. You then rinse the surface and follow up with dry towels to eliminate any moisture.
Do You Need a Primer for High Heat Paint?
Using high-heat paint is a great way to update your fire pit without a complete replacement. It goes on surfaces easily with either of the two delivery methods: spraying or using brushes. But do you need to prime the surface before applying high-heat paint?
No, it’s not necessary. Most of today’s high-heat paints are self-priming and don’t need a coat of primer to adhere. However, you may need a primer during certain exceptional times, such as extremely humid climates.
How Can I Make High-Heat Paint Dry Faster?
High heat paint dries within 6 hours of application. But how about lessening its drying time? Is it possible? Yes, you can employ certain techniques to reduce the drying duration of your high-heat paint. Below are some tips that should help you dry your paint easily.
- Dry your painted project in a heat-controlled place
You can dry your high-heat paint by installing a paint booth to contain the environment better. Then after painting, amplify the booth temperature to 150-200 degrees F. Another alternative is to apply localized heat to your painted surface.
- Enhance the movement of high-velocity air over the painted surface.
Just as wet clothes dry faster when subjected to the windy climate outside, high-heat paint also dries faster when exposed to high-velocity air. The high-velocity air works by driving out the evaporation barriers, making the paint’s solvents evaporate easily. Because of this, your paint will dry sooner than you expected.
- Avoid thinning the paint.
High-heat paint doesn’t require thinning. So instead of thinning it, stick to these alternative recommendations.
- Use a plural component pump for typical epoxies instead of thinning your paint. This will solve the thickness issue.
- Use an in-line paint heater to heat your paint after it leaves the pump. This is because the paint is usually too cold when it comes out of the spray tip. So heating it will increase atomization.
What Colors Does High-Heat Spray Paint Come In?
High-heat paint is tailored for use on surfaces that suffer excess heat. What’s even better? These paints come in a lineup of more than 30 intriguing colors to cater to all your surface painting needs.
Some of the colors that high heat paint comes in include ford blue, light blue, Pontiac blue, Silver, GM blue, chevy orange, and the rest. Some reputable brands also made these paints clear and black for added color retention and extended lifespan attributes.
Why Do Fire Pits Have Holes in the Bottom?
Fire pits incorporate holes at the bottom to allow airflow to the flames. Without sufficient oxygen flowing to the fire, it won’t keep burning at all. So for a bright flame, your fire pit must integrate holes free from debris.
However, if you purchase an in-ground fire pit, you must acquire a separate air intake system, given that the holes will have been closed by the ground.
How Do You Fix a Hole in a Fire Pit?
Backyard fire pits offer dozens of sensational evenings with beloved ones. But the constant heat and stress caused by fire can spell trouble on the metal bowl, resulting in rust, holes, and cracks. Leaving your fire pit out in the rain also promotes added wear and tear.
So if you are well-versed with the knowledge of how to repair the files on your fire pit, you can counteract this breakdown and substantially prolong your fire pit’s lifespan.
Check out these tips to repair your fire pit:
Supplies Needed
- Furnace cement.
- Heat-resistant paint.
- Rust remover solution.
- Masking tape.
- Heat-resistant paint.
- Putty knife.
- Scrubbing materials.
- Spray on metal sealant.
- Pliers, screwdriver, and wrench.
Follow these guidelines to remove files and cracks on your fire pit.
Step 1: Assess your fire pit and remove all rust and corrosion.
Some fire pits usually start to exhibit signs of rust within the first year of use. So getting rid of the rust buildup means your fire pit will last a lifetime.
To begin, you will want to dismantle the fire pit as necessary, then use a wire brush to scour away rust, flaking paint, and corrosion. But if the rust is too deep, use rougher sandpaper or steel wool.
For stubborn rust, go for commercial remover, and ensure you use it repeatedly for best outcomes.
Step 2: Patch holes, cracks, and splits.
Next, put a masking tape around the perimeters of cracks, holes, and splits. You then use a putty knife to fill gaps with furnace cement. Be sure that the cement has no air bubbles and that your surface is as smooth as possible. After that, allow it to dry according to the directions on the product’s label.
Step 3: Apply a metal sealant.
After touching up the holes and other minor imperfections, it’s now time to apply your metal sealant. Take your spray can and shake it to enclose the sealant’s molecules. Then hold your spray can roughly 12 inches away from your surface and start applying the metal sealant using a sweeping motion.
Allow your sealant to take effect as it dries. With this technique, you will achieve full coverage and also evade pooling or dripping.
Step 4: Apply heat-resistant paint.
The moment your metal sealant dries, you now pass on a coat of heat-resistant paint over the mended spots. Use a spray can, considering that it guarantees full and even coverage.
Still, you will want to use a sweeping motion to avoid overlapping coats and sags. As usual, let the surface air-dry for a couple of hours before adding extra coats of paint.
Does Heat-Resistant Paint Protect Wood?
Wood is arguably the best durable material for your home, but it’s often susceptible to heat and fire. Because of that, you need to establish a solution to prevent your wooden surface from unwelcoming hazards.
One of the amicable solutions is to opt for heat-resistant paints. Such paints aid in retarding the heat. Unfortunately, they don’t prevent woods from fire risks. Instead, they only aid in keeping the wood safe from breaking down due to intense heat.
Where Do You Put Ashes from a Fire Pit?
Are you aware that there is a legal means of disposing of your fire pit ashes? Inappropriate disposal of ashes can result in burns, fire outbreaks, or present a carbon monoxide risk.
Disposing Of your fire pit ashes is relatively simple. All you need is to use the following trajectory and have your ash fully burned out.
Step 1: Give your ashes time to build up within the fire pit.
One of the biggest blunders people commit is to clear ashes away from the fireplace whenever a fire is burned. A small buffer of ashes at the underside of the fire pit helps insulate the fire, making it burn hotter and longer.
Ideally, it would be best if you permit at least an inch of ashes at the underside of your fire pit. After that, you can clear away the ashes once they accumulate beyond that point. If the ashes touch the bottom of your fire pit grate, it means you’re unpunctual for ash removal.
Step 2: Allow the fire to cool entirely
Sometimes, hot embers can lie low in a fire pit ash bed after the fire ostensibly burns out. So it’s important to ascertain that the fire cools entirely before removing the ashes. It’s even better to wait 24 hours after the fire burns out to remove the ashes.
Step 3: Use a shovel to withdraw the ashes from the fire pit
It’s a good practice to handle your fire pit ashes as if they are still hot. By this, I mean removing the ashes from the firebox with a metal shovel and putting them inside a metal ash bucket. If you look forward to using the ash for personal use, you should cover the bucket with a form-fitting metal lid.
Alternatively, you can place the ash in a ventilated space such as a garage. You do this because the ash might have combustion taking place, producing carbon dioxide, which can present a real danger in your living space.
Step 4: Reuse or Dispose of the ashes
After allowing your ash to cool for a couple of days, it’s safe to speculate that they are entirely cooled and safe to dispose of. So what you’ll do is to bag them and dispose of your regular garbage. Or, you may want to reuse your ash in many ways.
For instance, keep away pests like ants, create traction on icy surfaces, camouflage stains on cement, or scrub glass fire pit doors.
Tip
Proper disposal of your fire pit ash may seem more of a daunting task, but adhering to those simple steps is crucial to guarantee a safe home free from accidental burns.
Can I Use Concrete for a Fire Pit?
A concrete fire pit can make a good centerpiece for outdoor entertaining. However, building it requires a lot of references to avoid damages in your backyard. Most concrete fire pits trap moisture when subjected to high heat levels, making the fire pit crack and even explode in extreme conditions.
So the best way to prevent such minor accidents is by lining the inside of the fire pit with fire bricks. Also, it helps to fill the underside of the fire pit with lava rock to make certain that most of the heat doesn’t directly contact the concrete surface.
Final Thoughts
As you can tell from this article, a fire pit makes an important part of your home outdoors or indoors. It offers so much to you and your friend, especially during the cold seasons. Even so, most homeowners still asks…
Can You Paint Inside a Fire Pit?
Yes, you can paint inside a fire pit with a high resistance heat paint. Normally the paint can resist the heat of up to 1200℉, which is extremely high and cannot be sustained by normal paints.
Did you find this post helpful? I hope so; if you have a question, suggestion, or opinion, kindly share it with me in the comment section below!