The biggest challenge in wood painting is achieving a smooth paint job. You may have the right tools and products, but you won’t accomplish much without following proper painting procedures and techniques.
Mastering the skills of high-quality painting may seem intimidating on the first try. However, you can switch from producing amateur results to professional finishes with some practice. Here is a step-by-step guide on How to Paint Wood Smoothly.
Step 1: Clean and Repair the Wood
Before you begin, put on eye protection, a face mask, and some rubber gloves. Painting wood can be messy, and it sometimes involves products that emit fumes and can burn skin. Therefore you must keep yourself protected.
Mix ½ cup of Trisodium Phosphate (TSP) with 1 gallon of warm water in a large bucket to make a cleaning solution. These proportions are for a smaller surface, but you can adjust them accordingly to suit your project using the manufacturer’s instructions.
If you don’t have TSP, you can combine some warm water with a general-purpose house cleaner to make the solution.
- Dip a clean cloth into the TSP solution, then squeeze it to release excess moisture. The goal is to leave the fabric damp and not dripping wet because the wood will absorb the water and cause paint adhesion problems.
- Wipe down the wood surface to remove oils, grime, and other dirt. Ensure that you clean the surface thoroughly because dirt will prevent paint from sticking, and you will end up with bubbles in your finish.
- Rinse the surface with clean, warm water and dry it with a clean tack cloth. Next, give your wood up to 24 hours to dry, allowing all moisture absorbed during cleaning to evaporate.
- Finally, check your wood for gouges and cracks, then use wood filler to fill them where necessary.
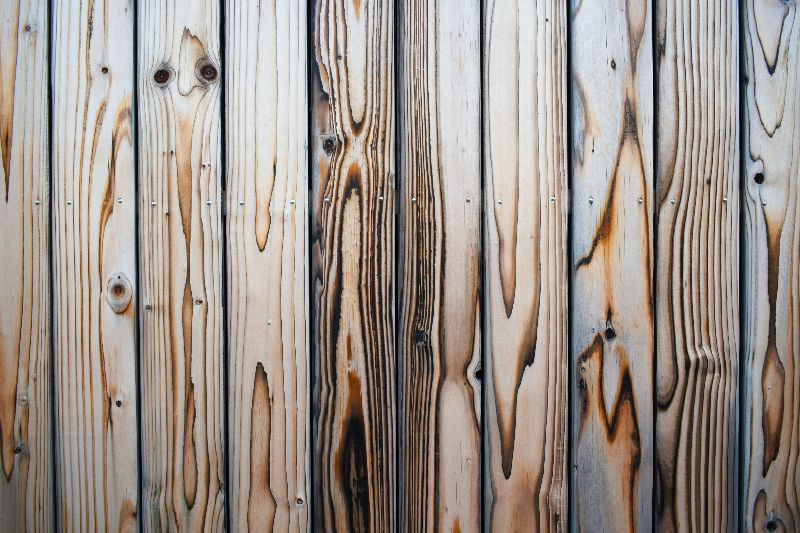
Step 2: Sand the Wood
You can use an orbital sanding tool or sand the wood by hand for this step. The orbital sander will work best on large flat wood surfaces because it gets the job done faster.
Conversely, hand sanding is best for small surfaces and hard-to-reach areas because you can easily conform the sandpaper to fit the shape of your piece.
Sanding the wood smooths the surface and gives it some tooth to help the paint bond; therefore, ensure that you use as little pressure as possible to avoid leaving deep scratches.
- Start with 180-grit sandpaper to knock down high spots and remove loose stains embedded on the surface grain. Next, switch to finer 220-grit sandpaper to reduce the size of scratches left by the rough sandpaper – this will make the surface smoother, which will reflect in your finish.
- After sanding, remove the sanding dust from the wood and all other surfaces surrounding it. You can sweep off the dust with a smooth hand brush or use a standard shop vacuum with a brush attachment. If you use the shop vacuum, ensure that you fit it with a bag and filter to prevent the dust from going airborne.
- After removing a majority of the dust, use a damp cotton rag to wipe the wood and remove any remaining dust. Allow your wood to dry for 1-2 hours before proceeding.
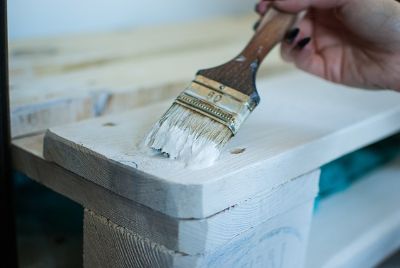
Step 3: Apply a Primer
Priming is one of the essential tricks to painting wood smoothly. It seals wood grain and levels the surface to ensure that your finish becomes uniform.
Good quality primers also improve paint adhesion; therefore, you won’t have to deal with peeling paint soon after application.
You can apply primer on wood either by brushing or rolling. A roller makes painting flat surfaces quicker, while a brush will give you better control when painting wood with many patterns and corners.
- Apply a thin coat of primer following the wood grain direction.
- Allow it to dry according to product specifications, then inspect your surface. If you can still see the wood grain through the first coat, you need to apply a second one.
- Sand down the first coat of primer with fine-grit sandpaper using very light pressure to avoid scratching the primer. Remove the dust thoroughly before applying the next coat of primer.
- Allow the final coat to dry, then sand it down like you did the first one to get it ready for painting.
Step 4: Paint the Wood
 Open your paint container, then use a wooden rod to stir and re-mix all the pigment and other solids that may have settled at the bottom.
Stirring also restores the correct color and consistency of the product getting you closer to a smoother and more uniform paint job.
If you are using a paintbrush:
- Load ¼ inch of the brush’s bristles with paint, then apply it to the wood. Use short brush strokes that run parallel to the wood grain, ensuring that you keep a wet edge all the time to prevent lap marks. Also, ensure that you apply thin coats to allow fast drying and prevent the paint coat from feeling tacky.
If you’re using a roller:
- Insert a liner into a paint tray, then pour some paint into the tray.
- Dab the roller gently into the paint, then roll it up and down the paint tray’s slope to distribute the product evenly on the roller pad.
- Roll the color onto the wood, starting with light pressure. Light pressure is necessary at this point because the roller sleeve has paint on its surface; therefore, it is not that hard to transfer it to the wood.
- As you continue, you will notice the paint coverage reducing. The reason is that high-density rollers tend to trap paint in the roller pad; therefore, you will have to increase pressure gently and gradually to release it.
Allow the first paint coat to dry for a few hours. The drying time will differ between products, so always check the label for precise instructions. You can achieve even coverage with one coat if you’re using some paint types; however, most brands require a second coat for best results.
Before applying the second coat, sand the first layer with 220-grit sandpaper or higher. Scuffing the paint at this stage will bring down bumps and other inconsistencies that you missed or caused during the application. Consequently, you will get the smooth finish you want.
Apply the second coat as carefully as the first one, then allow it to dry before using the wood. This way, there is less risk of ruining the paint job before it fully cures.
Paint slowly becomes more durable as it cures; therefore, restrict the use of your freshly finished piece to a minimum for the first 30 days.
Here’s a Video On Painting Wood Smoothly:
Why Should You Paint Wood Smoothly?
We encourage painting wood smoothly because of the satisfaction you get when the finish looks uniform. However, other reasons stem directly from the painting process that makes smooth painting worthwhile.
It takes a lot of wood preparation to achieve a flawless paint job. You must clean, sand, and prime the wood before coloring it. You must also choose good quality painting products that are durable to keep your pieces looking good for longer.
So how do these preparation processes help?
- Wood prep ensures that the paint dries into one continuous film over the surface. It ensures no cracks or breaks form in the paint film, leaving the timber vulnerable to damaging environmental conditions.
- The preparation also improves the wood’s ability to hold paint for longer. As a result, the wood remains protected and will look great for longer.
Methods of Smoothening Wood Paint
Mastering wood preparation skills alone will not help you achieve flawless paint on wood. To make your work appealing, you must learn other small tricks and incorporate them before, during, and after the painting process.
Most of these methods may seem like extra work, and some painters – primarily beginners – view them as negligible. However, they are very crucial to achieving excellent results when painting wood. So let me explain the importance and how to execute each method of smoothening wood paint properly.
-
Thinning the Paint
Thinning paint means adding more solvent to it to lower its viscosity. It is the perfect trick to reducing paint flaws that you cannot feel by hand but look bad when light reflects off the painted surface.
Thinning makes paint runny, which allows it to level better on the surface. Therefore, it reduces brush marks and the orange-peel effect as the paint dries. It also allows you to apply thinner coats that dry more evenly, creating a smoother finish.
The solvent you use will revolve around the type of paint you have – mineral spirits work best for oil-based paint, while water is perfect for water-based paints. It is best to use minimal solvent proportions to make the product 5% thinner.
You can make oil-based paints up to 10% thinner because they don’t usually have flow problems. However, stick to 5% for water-based paints because too much water will affect the paint flow causing more flaws in the finish.
You don’t always have to thin the paint right from the start of the project. Sometimes the project may be too small, and you won’t finish all the altered products in one project.
If some of the thinned-out product remains, you can store it but usually not for long. Moreover, it might not work so well for your next project.
Therefore, I recommend thinning the paint in small batches as you work, leaving the product in the main container unaltered. You can also use the paint untouched for most of the project then thin just enough for the final coat.
-
Straining the Paint
This method is always necessary when using a product that’s been on your shelves for too long. When paint remains unused for a long time, the solid ingredients clump together.
Sometimes they are big lumps that you can remove, and sometimes they are too tiny to see until you transfer them to your perfectly prepared surface.
You can reduce the lumps by stirring the paint before use, but that usually works on settled sediment at the bottom and some large lumps. You have to use a paint strainer to catch all other tiny chunks to ensure that you are working with a smooth product.
-
Adding Additives to the Paint
The one thing that affects a finish is the drying time of the paint. Products that brag about fast drying times may seem reasonable, and they are often perfect when you want to finish a project faster. However, such products do not perform well when you want a smooth finish.
When the paint dries too fast, it doesn’t have enough time to flow on the surface and level up. It mainly dries with brush marks and streaks in the film, which is not the kind of look you want.
You can remedy this issue by purchasing paint with additives that make it self-level or standard paint without “fast-drying” components.
You can also purchase additives separately and add them to your paint to slow down their drying times and improve other aspects such as adhesion.
The most common additive for water-based paint is floetrol, and penetrol is best for oil-based paint. Ensure that you do not interchange the two, or else you will ruin your paint even before putting it on wood.
-
Sanding the Primer Coats
You can never achieve a smooth finish with paint if you do not start with a smooth base. Paint primer is an essential product used to prepare wood for painting, and the way you apply it, will either make or break your project.
One of the purposes of primer is to seal wood fibers and lay down a flawless foundation for the paint. However, as it dries, there is a risk of bugs and dirt falling and sticking on the surface.
Most of these specks of dirt are hard to see with the naked eye, but they stand out once you paint on them. Therefore, to prevent them from tarnishing your finish, you must smoothen each primer coat by sanding.
Ensure that the primer is dry before sanding. Start at the edge of your wood and sand lightly, checking every time to see the state of the sandpaper.
If the paper starts gumming up, the primer isn’t dry enough; therefore, it needs more time. However, if the sanding stirs up some primer dust, you’re good to go.
Always use 220-grit sandpaper or fine sanding sponges for this method. Also, do not use too much pressure, or you will remove some of the primer, which will cause paint adhesion problems.
-
Wet Sanding the Final Coat
Wet sanding is a method that painters use primarily on vehicles, but it works for wood painting as well. It is mostly like dry sanding, but you use a lubricant – mainly water – to keep the sandpaper from clogging and leaving deep scratches in the paint.
Wet sanding removes embedded dirt on the paint film and adds a little sheen to the finish. Therefore I recommend saving it for the final paint coat.
How Do You Avoid Brush Marks When Painting?
 You may purchase the correct products and prepare your wood thoroughly but still end up with brush marks in your finish. But why is that?
We make minor mistakes during the painting process that make all preparations obsolete most of the time. It could be the painting tools you’re using, the amount of paint, or the atmospheric conditions on the day of painting.
The following are some essential skills and tricks to incorporate in all your painting projects to avoid leaving brush marks in your finish.
-
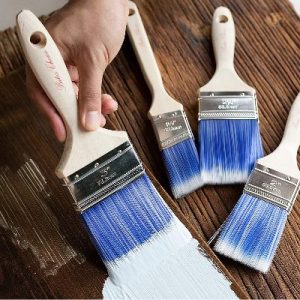
Choose Your Brushes and Paint Carefully
Spending extra money on a quality paintbrush will go a long way in improving your paint finishes. Such brushes last longer and deliver paint smoothly to surfaces without shedding bristles on the surface.
Quality aside, the type of paintbrush material you use also relies upon the kind of paint you have. So what are the types of paintbrush materials?
Paintbrushes either have natural bristles or synthetic bristles.
- Natural bristled brushes are made of hair from animals such as horses, oxen, hogs, etc. They are easy to work with because they readily accept paint and create smooth finishes. These brushes work best with oil-based paints because they are sturdy enough to transfer the highly viscous product without losing shape. Moreover, they are pricier than other paintbrushes, but they are worth the cost.
- Synthetic paintbrushes are made of nylon or polyester, and they work best with water-based and acrylic paints. These brushes are perfect because they maintain their shape and stiffness even when exposed to heat and high humidity. Moreover, they do not shed their bristles on the paint film. On the downside, synthetic brushes have lower product pick-up; therefore, you will spend more time loading the brush than painting.
-
Load the Brush With the Right Amount of Paint
Loading the brush is one of the most challenging things that most painters face. There are risks associated with either too little or too much paint, and getting it right sometimes seems impossible. So what’s the proper way of loading the brush?
When you dip your brush in paint, ensure that you cover only ⅓ the length of the bristles from the tip. If you notice the color dripping in a continuous stream or rolling down toward the handle, there’s too much paint; therefore, you need to reduce it.
Reducing the amount of paint is an easy task, but you have to do it correctly for the best results. Most painters rub the brush tip on the paint container, which works but not too well.
When you rub the brush like that, most of the paint goes back into the container, leaving very little on the brush. Consequently, you will lay down layers that are too thin and prone to visible marks.
The correct way of reducing excess paint on the brush is by gently tapping the bristles on the side of the container. Doing it this way releases little paint leaving you with just enough for ample coverage.
-
Don’t Put too Much Pressure On Your Brush
Using a lot of pressure when painting wood is a common mistake made by beginners. It may feel like the right thing to do to get paint all over the surface, but it produces opposite results.
Excess pressure will leave brush imprints in the paint, causing the finish to look blotchy. It also leaves streaks of thick paint in some areas more than others, making the paint film dry unevenly.
Furthermore, too much pressure distributes paint inconsistently on the surface; therefore, you might see wood grain showing through in some areas.
If you realize that you’ve been using too much pressure when painting, don’t worry because it is easy to fix the issue. Allow the paint coat to dry, scuff it gently with fine-grit sandpaper or a palm sander, then apply another thin coat to smoothen it.
-
Use a Sprayer Or Foam Roller Instead
If you want to avoid brushmarks altogether, you must stay away from paintbrushes entirely. Lately, paint sprayers and rollers are taking over because they are more convenient and get the job done faster.
You may have to use brushes from time to time to color edges and hard-to-reach areas on the surface, but there is a lower risk of leaving brush marks on the paint film.
How Do You Paint Rough Wood?
There’s no significant difference between painting rough wood and smooth lumber. However, the physical condition of rough wood makes it more challenging to paint.
The surface of rough wood is rugged and splintered; therefore, you have to make a few tweaks to the standard painting procedure to achieve good finish results.
Below are some pointers on how to paint rough wood.
-
Sanding
The procedure of painting rough wood is similar to that of smooth lumber, except sanding.
Rough-cut lumber is meant to have a rustic look and texture; therefore, sanding it would compromise its whole aesthetic. You can use sandpaper to knock down splinters that may cause injury, but that’s the furthest you can go without making the entire surface smooth.
Note: Sanding is necessary if you want to smoothen your wood entirely before painting.
-
Cleaning
Before painting rough wood, you must wash it with a solution of warm water and a strong detergent like TSP to remove any contaminants that could interfere with paint adhesion.
You can also use a Sodium hydroxide cleaner, provided that you use it at half strength to avoid damaging the wood. Half-strength means that if the product label recommends ½ cup of cleaner for every 5 gallons of water, use ¼ cup of cleaner or use more water instead.
After creating the cleaning mix:
- Pour it into a pressure washer, then clean the wood.
- Ensure that you hold the washer’s nozzle at least 10 inches from the wood’s surface to avoid damaging it.
- If you don’t have a pressure washer, pour a bit of the mixture on the surface, then use a wire brush to clear the dirt embedded into the rough wood’s grooves.
-
Method of Application
The quickest and easiest way to paint rough wood is by spraying. It allows you to get paint into all the hidden areas ensuring that no part of the wood remains bare.
Regular spray paints in spray cans will get the job done but use an expert-grade paint sprayer if you want a more flawless finish.
If you’re worried about dealing with paint overspray, you can use a roller to accomplish the task. Rolling is more time-consuming than spraying, but it wastes very little product.
On the downside, it might be harder to get paint into the many crevices of rough wood. Therefore, you will have to use a paintbrush alongside the roller for best results.
You cannot just use any roller to paint rough wood. I recommend choosing one with a thick nap – up to ¾ inches. These naps are dense to hold enough paint, and they can withstand the rough texture of the wood without getting ruined.
What Is the Best Paint for Rough Wood?
I recommend using acrylic paints designed for exterior surfaces to paint rough wood. These paints are easy to apply, and they dry quickly. Furthermore, cleaning brushes and paint splatters is easy because you only need water.
Acrylic paint is flexible; therefore, it will move with the rough wood as it expands and contracts. Consequently, you will not have to deal with cracking or chipping paint too soon.
You can also use oil-based paints because they are more durable than acrylics. They dry slower; hence they have time to flow into all the gaps on rough wood, giving you an excellent rustic finish.
On the downside, cleaning up oil paints is much more challenging, and it requires the use of harsh chemicals like turpentine.
How Do You Paint Rough Knotty Pine?
Painting rough pine is simple, and you can easily do it yourself without the need for professional assistance.
However, there is one trick that you have to learn before you begin the task that will help you achieve great results on rough knotty pine. So what’s the trick?
Pinewood releases tannins that tend to bleed through the paint. The problem is even worse when you have rough-cut pine with knots because knots release more tannins than the rest of the surface.
The only way to keep the tannins from seeping through paint is by using a quality stain-blocking primer.
If you fail to use a stain-blocking primer, you will notice brown rings that look like water stains on the paint a few hours into drying.
These stains are often more pronounced in lighter colors; therefore, you must remedy the situation to be safe. So what kind of primer works best on rough knotty pine?
Shellac-based primers are the best products when it comes to preventing stain bleed-throughs. They come in both spray and brush-on varieties and will work efficiently with most types of wood paint.
When using shellac primers on rough knotty pine wood, the secret is to spot prime the knots first. The knots produce a large percentage of the tannins; therefore, it makes sense to block them before beginning to paint.
When spot priming, always use the brush-on shellacs to get thick enough layers on the knots for best results. After spot priming the knots, you can spray the rest of the rough pine board with primer to keep any more tannins from seeping through paint.
You can also use oil-based primers on rough knotty pine because they are more stain-resistant than the water-based versions. It is also the best choice if you intend to paint your surface with oil-based paint.
What Kind of Paint Do You Use On Knotty Pine?
I recommend using oil-based paint on knotty pine wood because it is more durable and can resist color bleeding over time.
On the downside, you can only use oil paint if you use an oil-based primer or a shellac primer before applying the paint.
Latex paints are less resistant to bleed through and will last less long than oil paints. However, you can get acceptable results with a shellac primer as your base coat.
You can opt for milk or chalk paint if you want a more special finish for your rustic pine wood. These paints will give the wood a more distressed look, but they are resistant to color bleeding. Nevertheless, it is best to use a shellac primer first for maximum protection.
Conclusion
Achieving a smooth paint finish on wooden surfaces is a bit challenging, but you can achieve professional-level results with some practice.
When you prepare yourself with the correct tools, coating products, and proper painting techniques, you will have no problem achieving smooth results in all your projects.
The burning questions among painters, especially beginner DIY enthusiasts, revolve around choosing the correct products and tools for painting wood.
They also ask about the necessary painting techniques to achieve a smooth finish. The answers to these questions are in this step-by-step guide on…
How to Paint Wood Smoothly
The first trick to smooth painting is to start with a clean surface. Wash your wood thoroughly to remove debris that may interfere with paint adhesion. Next, repair then sand the wood to make the surface smoother.
After sanding, always use a good quality primer as your base coat to create a uniform surface to paint. Ensure that you sand between each coat of primer to maintain the smoothness of the finishes until you paint.
I hope this article has answered all your questions concerning smooth wood painting. If you have any more questions or information to share, feel free to reach out in the comments.