Baseboards are wooden boards that run along the bottom of interior walls. They are integral construction materials that protect walls and give the house an ornamental uplift. Whilst we know walls and furniture need painting, can you paint baseboards?
Yes! Like all other construction materials, baseboards need paint to function properly and last longer. You can paint them, but you have to use the right kind of paint, good painting techniques, top-grade brushes, and the correct painting procedures. Only then can you be successful.
In this review, I’ll discuss all you need to know concerning the painting of baseboards. I’ll begin with an overview of what is a baseboard and then I’ll show you how to paint it, plus other basic particulars.
So, I urge you to stay tuned as I bring you up to speed on baseboards.
What Is Baseboard?
 Baseboards are also known as floor molding, mopboard, or base molding. They are made of vinyl (PVC), composite wood, or natural wood and cover the base of interior walls.
The following are the functions of a baseboard:
- They cover the joints between the floor and the wall.
- The baseboards shield uneven edges of flooring close to walls.
- Baseboards function as decorative moldings.
- They shield walls against abrasion, kicks, and furniture.
The simplest baseboard comprises a wood plank that’s screwed, glued, or nailed to a wall; although it’s made of several moldings for decoration, especially in older buildings.
Plastic (PVC) baseboards are flexible and available in a variety of colors; they are normally glued to walls using adhesives.
The vinyl baseboard is difficult to detach or replace due to its strong bonding with the adhesives. It also has a good longevity profile hence low maintenance cost.
Wooden baseboards are available in prepainted, untreated, and lacquered forms. The prepainted version is made from a single piece of finger jointed wood, mainly softwoods.
Hardwood baseboards are either untreated/bare for staining or lacquered; they are made from a single piece of wood.
How to Paint Baseboards
Painting baseboards entails 90% of prepping and 10% of the actual painting.
Requirements
- Paint (oil-based or latex paint)
- 2.5″ to 3″ inch brush with angled bristles
- Latex gloves
- TSP (Trisodium phosphate) and water
- Safety gear (latex gloves, safety goggles, and respirator/mask)
- A clean rag
- Paint additive
- Sanding sponge
- 120-grit hand sandpaper
- Putty knife
- Painter’s tape
- Spackling paste or wood filler
- Buckets and painting tray
The process is as follows:
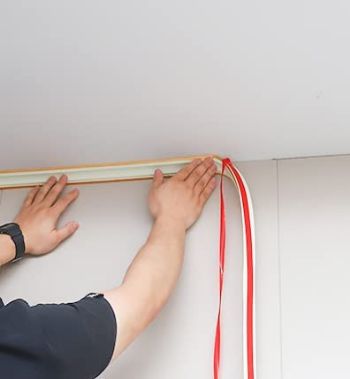
Tape off the surrounding areas (painted walls and floors) with masking tape (painter’s tape); use the putty knife to cut off excess tape.
If your baseboard is heavily-stained, clean it using TSP (trisodium phosphate) solution; dissolve TSP powder in water to make the said solution. Soak a rag into the solution and wipe off the stains. The TSP removes grease, oil, and tough stains from the trim.
Let the board dry before you proceed to sand.
If the board is mildly-stained, sand lightly using a sanding sponge; use 120-grit hand sandpaper on difficult spots.
If the board has holes and crevices, patch them up using a spackling paste or a wood filler, let it dry, then sand. Remove the accumulated debris using a vacuum cleaner.
The following procedure is painting, which I’ve covered extensively as below:
Painting
There are two options here: water-based/latex paint and oil-based/alkyd paint. Both paints have their advantages and downsides.
Water-based paint is good for the following reasons:
- It’s easy to apply.
- Latex paint is easy to clean up after use.
- It takes a shorter time to dry before recoating, i.e., 4 to 5 hours.
- It’s environmentally friendly.
Oil-based paint has the following benefits:
- It’s highly durable.
- It is resilient to heavy foot traffic.
- It has an excellent leveling profile making brush marks less visible.
- The paint gives a smoother finish.
On account of personal experience and customer reviews, I recommend latex paint. Choose a latex paint sheen that suits your taste, whether it’s satin, gloss, matte or semi-gloss.
Open the latex paint and add a latex-based paint additive, e.g., floetrol. The additive enhances the flow and leveling properties of the paint.
Stir thoroughly to form a consistent solution.
Pour the resulting solution into a smaller, portable container.
Dip the 2.5-inch angled brush into the paint and tap it against the container sides to remove excess paint. Paint within a range of 2 to 3 feet at a time.
If you apply excess paint, it will run down across your workpiece and ruin the painting project. The brush will drag on the base molding and leave brush marks if you put too little paint; so, put just enough paint on it.
Let the first coat dry for 4 hours.
After it dries, sand the baseboard lightly with a sanding sponge. Sanding removes any foreign material that might have stuck on and dried into the paint, e.g., dust particles and pet hair. Sanding also gives the surface a rough texture to receive the second paint coat.
Dust off accumulated debris.
Apply the final coat as you did the first and let it dry undisturbed for 5 hours.
That’s all there is to tell about painting. You’ve successfully painted your baseboards. Next is a post-painting undertaking known as the clean-up! It involves removing spilled paint and painter’s tape.
Pull back the tape gently to avoid pulling apart wall paint.
Then, clean the latex paint spills using soapy water. If you’ve used oil-based paint, clean up using turpentine.
Can You Paint Baseboards the Same Color as Walls?
Baseboards are made of different materials and have a lower density than walls. In that regard, can you paint baseboards the same color as walls?
Absolutely! It used to be that homeowners paint their baseboards a contrasting color from the wall. Well, that’s still the case, but a relatively new concept has cropped up where you can have your wall and base molding painted in identical colors.
It’s a trendy practice that extends to trims and even ceilings. Do you want your house to look fashionable? Do you want to set new trends? Decorate your baseboards with the same hue as your walls, and you’ll get there.
Reasons for Painting Baseboards the Same Color as Walls
As I’ve mentioned in the preceding segment, there’s a paradigm shift from painting baseboards and walls in different colors to painting them the same color. Why? Carry on reading to find out the reasons for painting baseboards the same color as walls.
There are several reasons as below:
It Makes Your Room Appear Larger
Painting the same color enables you to see the entire height of your walls. When the baseboards and walls contrast in color, people perceive the wall to be shorter.
It looks smaller when you reflect the short-looking walls across the entire room. But when the baseboards and the walls are identical in color, the tall-looking walls leave a mental image of a large room.
For a Downplayed Visual Appeal
The fact that this technique is relatively new-fashioned is enough to captivate. The overall look is different from the rest, and it adds an element of elegance to your walls.
On the other hand, painting with contrasting colors is a little too cliche. You also run the risk of color clashing the wall and baseboards; this spoils the allure of your room.
Painting the same color gives your room a somewhat subdued yet graceful outlook.
For Simplicity
It’s apparent that painting the same color is more straightforward than painting with different colors. You won’t have to worry about color clashing and color-compatibility issues.
Also, it’s time-saving and reduces the cost of buying new paint; you only use the same paint that you’ve put on your wall.
Lastly, when you accidentally spill or splash paint on the wall while painting the baseboard, it won’t stick out as a stain since it’s the same color as the wall.
I’ll let you imagine how the same accidental spill might unfold if the paint color for the baseboard is different from that on the wall.
It Hides Baseboards
Some homeowners don’t like base moldings on their walls, but they are so vital that you have to install them. If you’re one of those individuals, what do you do to make the baseboards inconspicuous?
Yes! You got it. You simply paint the baseboards with the same paint color as your walls. It solves the problem without having to remove the baseboards.
Highlights Home Decor
One of the main points of having home decor is to give your house an allure. The decorations should be as noticeable as possible. Painting the walls and base moldings with the same color, particularly dark and low-sheen paints, shifts attention to the home decor.
In this case, the walls and baseboards provide a background upon which the furnishing will stand out.
Can You Paint Baseboards Before Installing?
Let’s say you’ve moved into a new house upon which you want to fit baseboards. Can you paint the baseboards before installing?
If the walls are already fitted with base moldings, it’s okay to paint the boards affixed. However, if the baseboards aren’t fitted on the walls, it’s best to paint them before installing. These are the reasons that rationalize painting before installation:
It’s easy and saves time: When you lay out the baseboard on a sawhorse, it’s easy to move about painting it, and it’s also easy to manipulate the boards.
Installed baseboards are fixed in one position! Therefore, you have to bend down to the workpiece level and then position yourself according to the installations before painting.
It’s less tedious: Painting the free boards in a standing position is comfortable and safe; it’s a good application of ergonomics. Painting installed floor moldings require you to crouch for long periods during painting; this is tiresome and uncomfortable. Plus, it poses health risks such as lower back pain.
It lets you paint using the method of your choice: Painting on free baseboards is quite flexible in terms of painting technique choices. You can choose to spray paint, use a roller painter, or use a painting brush.
On the other hand, installed baseboards have limited options; you can only paint well using a painting brush!
It makes your painting clean and neat: When you paint uninstalled baseboards, there’s no splatter or accidental spillage to walls, floors, and surrounding materials. If anything, you only need a drop cloth to cover the bottom before you begin painting. As a result, you’ll leave behind a clean working station.
On the contrary, painting fitted baseboards leads to spillage on walls and floors. If your wall or floor happens to have a different paint from the one you’re using on the baseboard, you’ll have difficulties cleaning up.
It’s easy to set up your working station: Painting free/uninstalled baseboards doesn’t require you to seal off the walls and floor from splattering paint and accompanying agents. You only need a drop cloth, which is relatively easy to lay down.
As for installed baseboards, you have to seal off the surrounding wall and floor using a painter’s seal; this is done before you begin the painting. Even so, some paint may still spill on the walls and floors.
It makes your painting more accurate: Putting the base molding on a sawhorse is like setting it on a pedestal: this clearly exposes your workpiece for better accessibility and a more precise finish. Since you’ve got more control, there’s a reduced likelihood of mistakes.
To summarize, if you get an opportunity to paint baseboards before installation, proceed without a qualm. You may get such opportunities when moving houses or remodeling/renovating your home.
Painting installed baseboard is still workable, but the other option is far more convenient.
How to Paint Uninstalled Baseboards
As I’ve mentioned earlier, choose to paint your baseboards before installation. I’ll show you how to do just that.
The process involves:
- Setting up your working station.
- Priming the baseboards.
- Painting the first coat.
- Second coat.
- Third coat.
I’ve detailed the procedure as follows:
Materials Needed
- Paint (preferably water-based/latex)
- Drop cloth
- Roller pan
- Sawhorses
- Paint rollers
- Safety gear (gloves, a face mask, and goggles)
- Primer
- Baseboards
- Sandpaper (220-grit)
If you are working indoors, begin by laying down the drop cloth to cover the floor. If you plan to paint outside, e.g., in your backyard, there’s no need for a drop cloth.
Then, position the two sawhorses according to the length of the floor moldings.
Screw the baseboards on the sawhorses, 3 or 4 at a time; this secures the boards in preparation for priming.
Before we go to priming, I’d like to point out that nowadays, most baseboards come pre-primed so that you’re only left with the painting bit.
The pre-primed versions are a little more expensive than the bare boards, but when you do a cost-benefit analysis, you realize it’s cheaper as it saves a lot of time.
To coin a phrase, “time is money.” Anyway, I’ll proceed to include the priming part in the procedure just in case you have bare boards, but I advise you always to get the pre-primed ones.
Priming is a reasonably simple procedure. Apply the paint primer using a paintbrush, paint roller, or sprayer, whichever you prefer. Let it dry for 4 hours, then sand lightly in readiness for painting.
If the first primer coat is not enough, i.e., the board grains are still visible, sand and apply a second primer coat. It’s the reason I advocate for pre-primed boards; they save you all this priming hassle.
Open the latex paint and add floetrol additive; this thins the latex paint for improved flow. Stir the paint to form a homogeneous solution.
Put some of the paint in a roller pan; this allows easy application on the paint roller.
Dip the roller into the paint (in the pan) and apply to the baseboards.
Work on three baseboards concurrently to save time. Be careful always to get the dripping parts and roll over them.
Next, let your latex paint dry for 4 hours, sand lightly with the 220-grit, and apply a second coat.
Follow the same procedure until you put the final coat.
Every time you finish with a given lot of baseboards, unscrew them from the sawhorse and let them dry elsewhere as you mount new boards.
Don’t be bothered with the nail holes; you’ll fill them after installation.
When done with the boards, remove all debris and clean up your working area. Use soapy water for cleaning up latex paints and turpentine for oil-based paints.
Here’s a Video On Paintaing UnInstalled Baseboard:
Is It Easier to Paint Baseboards or Replace Them?
Maintaining the top-notch quality of baseboards requires significant input from the homeowner’s side. You have to carry out routine management practices (like painting) on the moldings to stave off degradation; some people go as far as replacing the baseboards.
Regarding maintenance, is it easier to paint baseboards or replace them?
Painting is the easiest of the two; that seems pretty obvious. But you have to be farsighted on this; take a hard look into the long-term consequences of painting rather than replacing the boards.
The consideration is paramount, especially if you factor in the condition of the moldings.
After doing the said analysis, it drives you to an even bigger question, “Which one is better? Painting or replacing baseboards?” Let’s delve into this dilemma to unravel the tangle.
Is It Easier to Paint Baseboards or Replace Them?
None of the two options is better than the other! I hold that view because painting or replacing the boards is contingent on their condition.
If the baseboards are faded but still looking strong and undamaged, painting is the best thing to do. If the baseboards are warped, water-soaked, chipping, or splitting, the best thing to do is replace them.
See? Both options are suitable, and it only boils down to the pertinence of your choice.
There’s one nugget of information I’d like to deliver before I proceed: Remember always to purchase composite boards in preference to natural wood.
It’s because composites have a better durability profile that lowers the board replacement frequency; you’ll only be repainting, which is much easier than replacing.
The trade-off is that composites have a higher initial cost. But when you incorporate maintenance costs, the natural wood becomes more expensive.
Do You Paint Baseboards Or Walls First?
If you find yourself in a situation where the walls and moldings are not painted, do you paint baseboards or walls first?
The best thing to do is paint them separately, let them dry, and then install the baseboards. If the baseboard is already fixed on the wall, and you’ve planned to use the same paint for both, you can start with any of the two.
If you’re planning to use different paints, begin with the baseboards and seal the walls with painter’s tape meanwhile. Let the paint dry, then proceed to the walls as you seal off the boards.
What comes first is mainly circumstantial, as I’ve highlighted above.
How Do You Paint Baseboards Without Brush Marks?
Imagine the agony of buying paint, purchasing top-grade baseboards, and prepping the boards. Then the painting bit derails your entire project by leaving brush marks.
It’s as painful as it sounds and equally depressing, given that painting is among the final stages of this installation project. So how do you paint baseboards without brush marks?
The simple and somewhat retorted answers are using a paint sprayer or a paint roller. But what happens if you’re only limited to paintbrushes?
For example, when you don’t have immediate access to a sprayer or a roller? You have to use the brushes, right? Use the following approaches to avoid brush marks:
Low-Sheen Paint
Low-sheen paints include matte and eggshell. They are famed for concealing imperfections such as streaks, brush marks, and cracks.
The low-sheen paints work by absorbing light, so you can’t make out the brush marks and other defects.
Top-grade Paint
There are several paint types out there, some of which are third-rate. The low-grade ones are cheaper, but they don’t get the job done; the contents may even differ from the information on the labels.
You should purchase legitimate paint from trusted sources like Amazon.com. Using top-quality paint ensures the drying times are accurate, the contents and the labels match, and the paint leveling is on point. It helps you avoid surprise fails like brush marks.
The Right Painting Brushes
Using the right brushes for painting baseboards also produces a surface devoid of brush marks. The brush has to be of first-grade quality, the right size, and with the right kind of bristles.
The best brush size for baseboards is 2.5 to 3 inches. Get one from trusted E-Commerce companies like Amazon.com. Also, you need to purchase top-class brushes if you want high-quality results; you get what you pay for regarding brushes.
High-quality baseboard brushes cost 20 dollars or thereabout; low-quality brushes cost around 2 dollars. The low-quality versions leave brush marks after painting.
The bristles, too, have to be spot on in terms of firmness and angle. The angled brushes give better precision when painting the moldings.
The Right Amount of Paint
The amount of paint here refers to the volume of paint you load on the brush before application. If you apply too little paint, the brush drags on the baseboard surface rather than stroking smoothly. It leaves brush marks on your workpiece.
If you apply too much paint on the brush, it will keep on dripping when painting.
You’ll paint smoothly, minus the dreaded brush marks if you apply just enough. The best way to control the amount of paint going on the workpiece is by beating the brush against the sides of the container to shake off excess paint.
Good Painting Techniques
A poor painting technique has never ended well on any workpiece; it may seem like you’ll get away with it during the painting, but in the end, the results turn out utterly poor.
Proper painting techniques will avoid brush marks many post-painting complications. Use the following painting techniques to attain good results:
- Paint in shorter strokes.
- Moisten the brush or roller by dipping lightly in water. It makes it easy to load the latex paint for smoother painting.
- At all times, paint the baseboards in one direction. Go along the board grain; it markedly minimizes the occurrence of brush marks.
- Do not press the brush too hard. It causes brush marks and destroys the bristles.
- If you find a defective spot after painting, do not paint directly on that spot when the paint is already dry. Instead, sand the area first, then paint.
- Paint the boards at a steady and moderate pace, i.e., not too fast and not too slow. Painting too quickly increases the risk for mistakes, while painting too slow will make you lose a wet painting edge.
- After a few brush strokes for a given area, re brush the same spot to smooth over the paint; this eliminates any brush marks.
Utilization of Paint Additives/Thinners
Paint additives improve the flow and coverage of latex/water-based paints. For oil-based paints, they are called paint thinners.
Adding these agents to paint makes it easy to apply; this minimizes brush marks. An example of an additive for latex paint is floetrol, while oil-based paints require turpentine for thinning.
Use of Oil-based Paint
While I prefer latex paint to oil-based paint for baseboards, the latter paint is better at hiding brush marks; I’ve got to give the devil his due, right? Anyway, the brush-marks hiding ability of oil paints is due to the long drying times and remarkable leveling properties.
Avoid Numerous Brush Strokes.
The most important aspect of painting is technique; just press firmly to work the paint into the board instead of increasing the number of strokes.
Several brush strokes on a given workpiece section don’t confer proper painting. Instead, it’s detrimental as it leaves brush marks on the moldings.
How Do You Modernize Baseboards?
Installation of baseboards is a concept that’s been with us over the ages. The inexorable march of progress calls for the modernization of baseboards to keep up with changing times. In this regard, how do you modernize baseboards?
You can splice up baseboards into the contemporary world by designing the boards uniquely by using different materials to make the boards.
Uniquely designing the boards helps make your home stand out from the rest. You can go for an ornamentally oriented design that gives your house a visual appeal, or you can go for a less noticeable design.
The point here is to break away from conventional baseboard designs; the unorthodox nature of your final product makes it modern.
Using different constituent materials to make the boards is another modernization approach. It used to be that all baseboards were made of natural wood; that has changed considerably over the years.
Nowadays, several materials are used to make better baseboards, e.g., composite wood, plastics, and PVC. You can modernize your baseboards by using the said materials. Plus, they are more affordable and durable.
Here’s a Video On How to Modernize Baseboards
Conclusion
To conclude, baseboards are important construction components that subtly improve the outlook of our homes. You can play around with the design and color of the boards to make them more recognizable. So can you paint baseboards?
I say yes with no reservations! And for more emphasis, you should actually paint your baseboards. I’ve already guided you through the painting procedures, how to go about different baseboard situations, and even how to make your boards look trendy/modern.
I personally feel the article has covered baseboards widely and deeply to cover anything and everything you may ever need to know. It feels great to give information that helps people through challenging tasks.
You can extend the favor by disseminating the contents or directing others that need the same kind of assistance.
I hope you had a wonderful time reading this article. I certainly had a wonderful time interacting with you. See you in the next post.