Surveys show that a good chunk of people usually ignore painting their garage floors either because they think it doesn’t deserve adornment or it’s wasting paint and money.
But how much does it cost to paint garage floor?
There are different costs for painting floors based on several factors.
The cost ranges from $1.8 to $3.7 per square foot if you outsource the task to a professional painter.
Painting yourself is cheaper, ranging between $1.2 and $2.25 per square foot.
The costs vary depending on the paint type, labor costs, paint coverage, application equipment, floor texture, etc.
This article discusses all matters regarding garage floor painting for a cost-effective and more successful project. Related subtopics highlighted include:
- Whether a garage floor is worth painting or not
- The advantages and disadvantages of painting garage floors
- Top-grade paint products for garage floors
- The need for priming before painting a garage floor
- How to prepare a garage floor for painting
- The procedure for painting a garage floor
- The durability of paint on garage floors
Gear up for an exciting discussion and a transformative learning experience related to the title.
I urge you to dedicate enough time in a conducive environment and read the article wholly for better comprehension.
Is It Worth It to Paint Garage Floor?
 Bare garage floors are good enough to bear vehicular weight, are heat resistant, and are easy to clean; it’s concrete-made, after all!
Garages are also primarily meant for automobiles, and visitors rarely see their floors as opposed to indoor house floors and patios.
Considering the just concluded statement, is it worth it to paint a garage floor?
Absolutely yes! A garage floor is worthy of painting for a variety of reasons. The main ones are as follows:
- For improved durability/longevity
- To make it look attractive
- It keeps the floor clean
- For operational convenience
- To lower the maintenance and repair costs.
Here are brief explanations of the above points:
Improved Durability
100% solids epoxy is the principal constituent of epoxy coatings. The hardener and resin components strengthen the garage floor, increasing its longevity.
Epoxy flakes add to the durability profile by improving the structural integrity of the coating.
The epoxy also covers floor imperfections like cracks, gouges, and holes. It prevents the further spread of the damage.
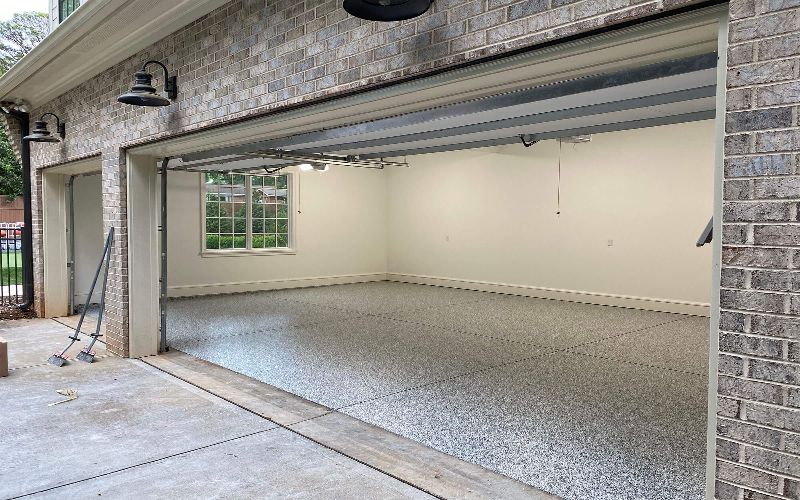
Aesthetics
A bare concrete garage floor looks dull; painting it augments its aesthetic appeal.
Epoxy coatings come in various colors, so you can choose the one you desire and even change to another during renovations for a transformed look.
Decorative chippings are also available in different designs and colors to give your garage floor an attractive textured profile.
Moreover, the decorative chips conceal the permanent stains that may otherwise blight your floor’s outlook.
It Makes the Floor Appear Clean
Epoxy coating application is preceded by degreasing, sanding, and priming. The preliminaries remove tough stains, oils, and discolorations, making the floor clean.
Furthermore, the epoxy clearcoat gives a smooth, less sticky surface that doesn’t hold stains, chemicals, grease, or dirty water; they simply slide off upon contact with the surface.
Even when the floor becomes dirty, it’s easy to clean. This stain-proof attribute makes it look presentable at all times.
Operation Convenience
Epoxy coatings make the garage floor skid-free even in wet conditions.
The flakes make it even better by improving car tire traction on the floor due to the rough-textured finish.
The tenacious surface also holds heavy garage equipment steadily and provides a safe working environment by preventing accidental slips.
Reduced Repair and Maintenance Costs
Epoxy coatings lower the floor’s overall repair and maintenance costs.
It’s because the protective covering and flakes are resistant to abrasions, moisture penetration/accumulation, corrosives, excess heat, and physical stressors.
It also prevents fungal growths that may weaken the concrete structure. All of the above reduces the restoration or refurbishment frequency.
Pros and Cons of Painting Garage Floor
Painting any surface has positive and negative upshots.
The advantages must always outweigh the disadvantages to render the project successful; this gives the painter/clientele a sense of accomplishment.
Tag along as I give you an overview of the pros and cons of painting a garage floor.
Pros of Painting Garage Floor
It improves your floor’s appearance: paints make it look more presentable and alluring.
People judge others mostly on first impressions; a neatly-painted garage floor is a marker of a well-mannered and organized car holder.
For a commercial garage, a painted floor communicates a lot about how they’ll handle your vehicle.
A painted floor can also increase your property’s value when you opt to sell it.
Prevents floor damage: Painting garage floors involves initial floor preparation, including mending/patching up defective parts.
This fills and seals cracks, holes, crevices, and other defects on the surface. It restores the floor’s structural robustness and complete functionality.
It makes the floor mold and mildew-resistant: Paints contain chemicals that present harsh growth conditions to mildew and mold, which commonly colonize bare concrete materials.
The fungal growths often discolor and erode the floor’s anatomy. Painting prevents all of the above, improving durability.
It reduces maintenance costs: painting a garage floor makes maintenance quite economical.
The painted surface doesn’t stain easily, doesn’t accumulate water, and is resistant to scuffing.
You won’t need to recondition it as frequently as a bare concrete floor. Plus, you won’t waste time constantly cleaning the floor.
Painting imparts anti-slip properties to the floor: bare concrete floor often becomes excessively slippery when wet (probably due to cleaning, damp weather conditions, or accidental spillage).
Painting the floor and adding flakes improves the floor’s traction, holding the automobile tenaciously and preventing accidental falls.
It hides imperfections: If you have a garage floor that’s heavily stained beyond cleaning, painting the concrete floor offers a great solution to conceal the imperfections without replacing the floor.
It’s the most affordable way to transform your floor’s outlook: at times, you may get bored with the single color that has stayed on your garage floor for many years.
Painting the floor with a different/new color is an effective way to break the above monotony.
Cons of Painting Garage Floor
- It’s labor-intensive and time-consuming; garage floor preparation and paint application involve several steps that are energy=draining.
- It has a high initial cost that’s down to labor, acquiring motor-driven sanding equipment, painting supplies, and the paint itself (some brands are more expensive).
Best Paint for Garage Floor
As I mentioned in the introductory bit, the write-up is fully constituted in garage floor painting matters.
This segment features three of the best paints for a garage floor.
It’s a clientele-favorite section; some usually jump straight to this part, ignoring the preceding and subsequent content.
Again, I urge you to read the article wholly for more insight.
These are the products:
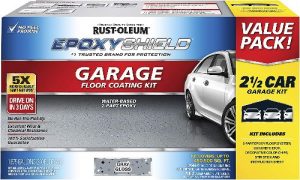
1. Rust-Oleum EPOXYSHIELD Garage Floor Coating Kit
Rust-Oleum®, a subsidiary of RPM International Inc., makes the above product.
RPM is a multinational company that manufactures and markets specialty sealants, coatings, and building materials.
The company is headquartered in Medina, Ohio, United States.
Their EpoxyShield garage floor coating kit has the following desirable features and benefits:
- It’s a two-part formula whereby part A is the resin, and part B is the hardener
- The paint gives a glossy finish that’s easy to clean and maintain
- It is a low-odor coating, ensuring a comfortable painting experience
- This epoxy coating contains low amounts of VOC, so it’s environmentally friendly and non-toxic to humans
- EpoxyShield Garage floor coating has excellent wear and chemical resistance
- The kit comes with decorative chips that you can broadcast on the garage floor
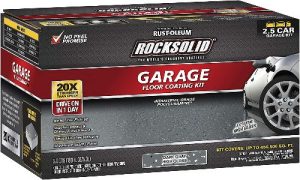
2. Rust-Oleum Rocksolid Polycuramine Garage Floor Coating
Rust-Oleum® also manufactures the above floor coating.
The company makes protective coatings and paints for residential/home and commercial/industrial use.
Robert Ferguson, a sea captain, founded it in 1921 after observing that fish oil prevents rust from spreading on metal decks.
Presently, RPM International Inc. owns Rust-Oleum company.
The rock-solid polycuramine floor coating comes with the following perks and qualities:
- It has excellent self-leveling properties.
- The coating works best on interior concrete surfaces like garage floors, basements, and workshop floors.
- This coating has superior surface coverage of 500 square feet, though it depends on the floor’s porosity,
- Rocksolid Polycuramine garage floor coating has no hot-tire pickup.
- The kit comprises polycuramine pouches, decorative chips, rollers, concrete etch, and an instruction sheet in English and Spanish.
- The product contains 180 fluid ounces/5.3 liters of coating material, making it a 2.5-car garage kit.
- Rocksolid Polycuramine floor coating is a high-gloss product that gives a showroom-quality finish.
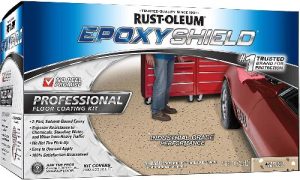
3. Rust-Oleum EPOXYSHIELD Professional-Based Floor Coating Kit
As with the preceding products, Rust-Oleum® produces the above floor coating kit.
It does so under the larger RPM International Inc., one of the world’s top-five largest paint and coating companies.
Rust-Oleum, alongside Zinsser, Testors, and Varathane, falls under the consumer segment of RPM.
Rust-Oleum ranks first in Canada and the US in the decorative, rust-preventative, professional, and specialty divisions of the small-project paint group.
Their epoxy shield professional floor coating kit boasts the following attributes and advantages:
- It’s a hardwearing product with superior resistance to standing water, heavy traffic, and chemicals
- The epoxy paint is easier to use and apply than other coatings
- This product has excellent surface coverage ranging between 300 to 400 square feet
- The EpoxyShield Professional-based coating is a two-part solvent-based formula
- It comes in various sheens ranging from matte to high gloss
- The kit contains 256 fl oz (7.57 liters) of painting material, more than enough to cover a two-car garage
- EpoxyShield Professional floor coating kit has decorative flakes to sprinkle on the floor for a textured finish.
Do I Need a Primer Before Painting Garage Floor?
Priming, alongside sanding and cleaning, is a significant surface preparation procedure in readiness for painting.
But priming substrates before painting is not cast in stone. What about the garage floor? Do you need a primer before painting it?
You do! Priming is a vital preliminary to garage floor painting in many ways.
First, it fills the pores on the garage floor, making its surface leveled; this ensures the paint lays down uniformly.
Covering the pores also prevents the incoming paint from seeping or getting absorbed into the floor material; this, in turn, minimizes wastage.
Secondly, priming provides additional protection to the underlying floor. The two or three primer coats form part of the protective strata that shield the substrate.
Damaging elements like chemicals and physical stressors must go through the paint and primer layers before getting to the concrete substrate.
Leaving out the primer compromises the structural integrity of the entire coating system.
Primers also etch or scuff the garage floor for better paint adhesion. It’s especially essential when you have a garage floor that is too smooth to hold paint.
The scuffing mentioned above differs from active sanding using sandpapers; the former only abrade the surface slightly, while the latter is more invasive.
Lastly, primers conceal the unsightly appearance of heavily stained surfaces and are an excellent intermediary for applying light colors over dark finishes.
It makes renovative or make-over painting operations affordable while attaining your desired new look.
How Do You Prep a Garage Floor for Painting?
Proper surface preparation is cardinal to all successful paint jobs. It’s like the foundation of a building; if it’s poorly done, the building collapses.
So getting the prep work right spells a longer-lasting, even, and visually appealing paint layering on the floor. But how do you prep a garage floor for painting?
The preparatory steps involve ventilating your workspace, cleaning the floor, filling imperfections, sanding, and priming.
You should follow some of the above steps on an as-needed basis; for example, you can skip the patching process if the floor is free of defects.
The other processes are crucial for bearing good results. Here is the detailed aspect of the preparation:
Procedure
Step 1: Ventilating Your Workspace
Remove all the movable materials from the garage to allow proper air circulation and clear the floor in readiness for the painting project.
Aerating the garage prevents excessive accumulation of primer and paint fumes when working.
Otherwise, inhaling toxic paint fumes may suffocate or experience long-term health effects.
Using electric fans improves air circulation if the garage isn’t located in well-aerated surroundings.
Step 2: Cleaning the Floor
Next, clean the floor using clean water and liquid soap, and a degreasing agent.
When cleaning, scrub thoroughly with a hard-bristled brush to remove as much stain as possible. Then, rinse using high-pressure water to wash off the soapy solution.
Afterward, take a squeegee and push off the accumulated rinsing water from the surface before mopping it dry with a rag.
Ensure you wring the rag regularly when mopping for effective drying. Allow the surface to air-dry in readiness for the next procedure.
Step 3: Filling up Imperfections
If your garage floor contains holes, cracks, or any defects, you must patch them up to prevent further damage and prevent them from showing through the paint.
Use an appropriate filler compound like the PC-Concrete Two-Part Epoxy Adhesive Paste for the above undertaking.
The product is sandable, compatible with epoxy paint, and durable; it comes in 8.6 fl oz cartridges.
Then, let the patching paste dry for the specified time before proceeding to the next step.
Step 4: Sanding or Grinding
Before sanding, put on the necessary safety gear to avoid injuries. The gear includes a respirator, a pair of gloves, and safety goggles.
Sanding gives the garage floor the necessary porosity and texture to receive primer and paint.
The degree of sanding determines the floor’s concrete surface profile (CSP); the best grade for a garage floor is CSP2.
It’s a delicate balance between paint absorption and surface gripping.
A lower CSP profile than 2 makes the surface too smooth to retain paint.
A high CSP beyond 2 makes the surface too rough and pitted; this accumulates paint, making it take longer to dry. It also leads to paint wastage.
If your garage floor is small-sized, use a diamond grinder or an edge grinder for sanding.
If it is a large surface, rent a commercial grinder for the convenience of speed.
After sanding, remove the accumulated debris using a vacuum blower.
Alternatively, you can connect your sanding machine to a vacuum cleaner to sand and remove the resulting dust simultaneously.
Step 5: Priming
A primer adheres to the substrate underneath and the incoming paint making the paint-substrate bond stronger.
I recommend the Rust-Oleum Concrete & Garage Recoat Primer; it is water-based, easy to spread, and with superior coverage.
You can apply it using a large paintbrush or a paint roller.
The primer doesn’t require sanding after application, so you can just lay down the first layer, let it dry for the dictated duration and apply a second coat.
Let the above second coat also dry.
Your garage floor is now fully prepared and ready for painting.
How to Paint Garage Floor
Painting often follows surface prepping. The sanding, priming, and cleaning preliminaries make the surface suitable for paint reception.
I’ll show you how to paint a garage floor in this section.
The painting process involves an initial phase of checking if the floor is moisture-free and gathering all the painting supplies.
You then proceed to unpack the epoxy kit, mix the A (resin) and B (hardener) parts, and wait for the paint induction time to elapse.
Afterward, pour the paint into a paint tray, roll it on the floor using the roller, and broadcast the flakes.
The last bit involves mixing and applying an epoxy topcoat, but it isn’t as necessary as such. The detailed version is as below:
Requirements
- Epoxy coating: Rust-Oleum EpoxyShield garage floor coating kit
- Paint roller frame and pole
- A small paintbrush
- Paint tray
- ⅜” nap roller cover
- Spiked shoes/sandals
- A pair of scissors
- A pair of rubber gloves and protective eyewear
Procedure
Before you begin, you need to ascertain that the prepped garage floor is moisture-free, as it affects paint adhesion.
Do so by taping a plastic sheeting or vapor barrier to the floor and leave it for a day.
If you find condensed moisture, apply the Rust-Oleum Concrete Moisture Stop to seal it.
Then, gather all the needed painting supplies.
Next, open up the epoxy kit and use a pair of scissors to remove the outer paper containing the epoxy pouch.
Remove the pouch and mix thoroughly by shaking and squeezing both sides.
Afterward, put the pouch on a surface and roll it from part B to part A.
Rolling from B to A causes the middle seal separating the two components to rupture; this enables part A and part B epoxy to interact.
Again, shake the pouch repeatedly as you squeeze its sides to evenly distribute/mix its contents; do so for around 3 minutes.
After mixing, let the epoxy sit undisturbed for the needed induction time. Induction time is the period required for two or more mixed components to activate.
The durations differ depending on the ambient temperature. The induction time at 60-70°F is 30 minutes, and 10 minutes if the temperature is between 71-80°F.
However, you don’t need to worry much about the above information as the kit comes with temperature charts showing induction time.
The EpoxyShield is now ready for use. At this point, you can put on the necessary safety gear (eyewear, a pair of gloves, and a respirator).
This is also the time to wear spiked shoes to avoid leaving footprints on the floor when laying down paint.
Then, use the scissors to cut off one corner of the pouch to empty the contents into a paint tray. Pouring the epoxy into the tray exposes it to air.
You should start using it immediately to avoid getting caught out by the paint’s pot life.
Pot life/working time is the period during which the paint is usable; beyond this duration, the paint is non-viable.
Pot life, like induction time, varies based on the surrounding temperature.
EpoxyShield’s working time at a temperature range of 60-70°F is 2 hours, and 1.5 hours for a temperature range of 71-80°F.
The kit has a chart that indicates the times for different temperatures, so be sure to check when reading the instructions.
Pro tip: Before using the paint roller, remove the lints from its sleeve by wrapping and unwrapping it with painter’s tape.
It prevents the roller sleeve fibers from contaminating the paint.
Next, load the paint onto the nap roller and roll it on the garage floor; the best nap thickness for a garage floor is around ⅜”.
It loads up more paint for effective layering. Use a small paint brush to apply the paint on the edges close to walls and hard-to-reach areas.
It’s best to paint small sections at a time and always maintain a wet edge to prevent gloss differences.
Once you’ve covered a given section, wait for around 3 minutes and start broadcasting the epoxy paint flakes/chips.
The momentary wait enables the paint to transition from a wet to a tacky state, where the flakes can stick to the paint without compromising its adhesion to the floor.
The flakes are parts of the EpoxyShield kit for ready access; you can opt to use them or not.
If you choose to use them, I recommend you apply copiously to give the garage floor the best anti-slip property.
Carry on painting the floor and sprinkling the chips until you’re done with the entire surface; remember to keep the spiked shoes on when painting to avoid damaging the wet floor.
Using paint flakes eliminates the need for a second and third paint coat. It’s because the chippings add strength and raise the paint’s level on the floor.
Afterward, let the epoxy paint dry for 24 hours before coming in with a topcoat; I urge you to use the EpoxyShield premium topcoat for this undertaking.
Note: A clear coat/topcoat is unnecessary, but it makes the paint last longer and is easy to clean. Research shows that it improves durability by 15%.
Put on the necessary safety gear and the spiked shoes to apply the clear finishing coat using the same procedure and techniques as the epoxy paint above.
The only part you shouldn’t repeat is adding flakes.
After layering the clear coat, the garage floor will be ready for use in the following ways:
- Light foot traffic: after 10 hours
- Heavy traffic: at least 24 hours
- Vehicles: wait for 3 days
- Full cure: 7 days
Here’s a Video On How to Paint Garage Floor:
How Long Does Paint Last on Garage Floor?
The one feature that will earn a given paint a legion of loyal customers is an excellent longevity profile.
It’s not surprising that first-time purchasers always inquire about this detail before making their purchase. So, how long does paint last on a garage floor?
There’s no definite response to the question above; the lifespan of a painted garage floor varies depending on several factors.
The floor will last for 7 to 10 years only when the preliminary practices preceding its application are done correctly.
And it doesn’t stop there; you must routinely exercise the necessary maintenance practices. It markedly minimizes paint and floor deterioration.
The following are the factors that influence the paint’s longevity profile on garage floors:
- The type of coating used: The most common ones include epoxy coating (100% solids epoxy), epoxy paint, and regular paint.
Epoxy coating has a lifespan of around 13 years on residential/home-based garage floors and 7 to 10 years on commercial garage floors.
Epoxy paint lasts five years on home-based garage floors and around 3 years on industrial floors.
Regular paints peel off or flake in less than 5 months when applied on any garage floor, whether residential or industrial; I contraindicate using it for the above project.
- Prepping procedures: These are the preparative practices leading up to paint application; they include repair operations (filling cracks and holes), cleaning, sanding, and priming.
Substandard preparatory habits, like rushing the process or applying the paint in non-conducive weather (wet conditions, lead to undesirable results and lower the paint’s lifespan.
The paints, including epoxy, won’t adhere firmly at first.
- Routine maintenance practices: It’s innately obvious that all materials need regular maintenance to improve their durability. A painted garage floor is no different.
The more effort you dedicate to maintenance, the longer the paint lasts. Such maintenance practices include cleaning and repairing teething problems before they become extensive.
- UV rays exposure: The colloquial term for UV rays is sunlight! The rays cause paint yellowing over time, especially in oil-based and epoxy paints.
While oil-based paint is more durable than water-based paints, the yellowing greatly undermines their aesthetics.
So if your basis for painting the garage floor is visual appearance, it won’t last as long as you may desire.
- Foot traffic: Industrial garages have higher foot traffic and carry heavier loads (heavy machinery and trucks) than home-based garages.
Consequently, paints like epoxy will last for 7 to 10 years on commercial floors and 12 to 15 years on domestic garage floors.
- The last determining factor regards DIY vs company-based paint application.
DIY means laying down the paint yourself, while company-based applications involve seeking the services of professionals to coat your garage floor.
The latter approach makes the paint last longer as professionals are well-acquainted with their crafts; they have the best layering methods, taking the least possible time.
The DIY route is cheaper but with a high risk of poor application techniques; it can lead to premature flaking and chipping.
Plus, some paints, like epoxy coatings, need more intensive labor to apply, so it’s greatly convenient when you get professional help.
What Is the Best Color for Garage Floor?
Some people opine that a garage floor should not be painted in vibrant or fancy colors.
Others believe that coating the said floor in bland or dull colors defeats the whole purpose of painting, terming it illogical at times.
So, what color is the best for a garage floor? Read on as I unravel the above dilemma.
The best colors for garage floors range from dull to not too bright. Such colors include gray, blue, tan, beige, almond, and brown.
The colors are generally absorptive; the goal is to make the garage floor as easy to clean and maintain as possible.
However, you may want to have a flashy or bright-colored garage floor. If that’s the case, you can go for such colors as red, yellow, orange, and even white.
The drawback to these colors is they get stained easily, and the stains are often conspicuous.
To counter the above downside, apply a topcoat or varnish after painting the floor.
The clear coat forms a polished layer that prevents stains from sticking to the surface.
Is It Better to Paint or Epoxy Garage Floor?
As I mentioned before, the paint type is a key determinant in the cost, longevity, and overall integrity of the painted floor.
In that respect, is it better to paint or epoxy a garage floor?
It is better to epoxy the garage floor compared to painting it! Concerning garage floors, you can use either regular paint, epoxy coating, or epoxy paint.
Regular paint consists of a latex acrylic substance only.
Epoxy coating comprises a polyamine hardener and epoxy resin; epoxy paint consists of a mixture of latex acrylic substance and small amounts of epoxy.
Of the three paints mentioned above, epoxy coating ranks first for garage floor painting; the second is epoxy paint, then regular/normal paint.
The above sequence reverses when we gauge using costs, i.e., regular paint is the least costly, epoxy paint comes second, and epoxy coating costs the highest.
However, epoxy coating is worth the money because of its remarkable efficiency as a garage paint product. It has the best durability, hardwearing, and load-bearing properties.
The only drawback of epoxy coating is its labor-intensive and long application process.
It involves sanding/grinding, cleaning, mixing the A and B parts, applying the coats, broadcasting the flakes, and top-coating.
The above is the summarized version, but it still appears long. The best solution is bringing in professionals to execute the task.
Conclusion
To conclude, painting a garage floor differs from regular ones like in-house, patio, and office floors.
It means you must employ a different surface-prepping strategy and use only paint for garage floors.
Knowing the costs of these painting products and the labor force required is important. Considering all the above…
How Much Does It Cost to Paint Garage Floor?
It costs between $1.2 and $2.25 per sq ft for a DIY project and a range of $1.8 to $3.7 per sq ft when you hire the services of a professional.
As already discussed, the above costs largely depend on the floor texture, paint brand/type, paint coverage, application method, and labor costs.
Other pertinent subheadings discussed include:
- Whether a garage floor deserves painting
- The benefits and drawbacks of painting garage floors
- Three top-grade garage floor paints
- Whether you have to prime before coating a garage floor
- Stepwise preparation of garage floors for painting
- A procedural guide for painting a garage floor
- The longevity profile of paint on garage floors
I urge you to read intently and follow all the outlined procedures for the best outcome.
You can also share the article with friends and colleagues for wider reach.
If you have questions, compliments, or additions, feel free to convey that in the comments section.