
 If you ask people out there if they know how to paint a front door, they’ll likely say yes. But is it as straightforward as it sounds? It’s easy to understand why people think painting a front door is child’s play and that it requires negligible input.
Painting a front door requires as much focus and diligence as other painting tasks. Briefly highlighting, it involves sanding, priming, paint application, and clean up.
In this article, I’ll get into the particulars of painting a front door to achieve your desired outcome. I’ve also included additional information pertinent to front door painting.
You may underestimate painting a front door because it is significantly smaller than other surfaces like walls and floors; therefore, it presents a small-scale painting project.
Consequently, you end up doing a shoddy job in the name of painting a front door. You can make nothing good of the door when you get to the above point until you paint it the right way.
So before you paint your front door, read this content and apply what you’ll learn. I assure you of exquisite results if you act strictly according to this guide.
What Kind of Paint Do You Use On a Front Door?
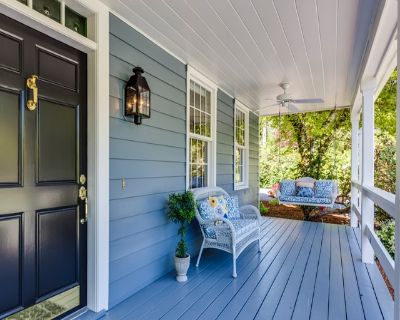
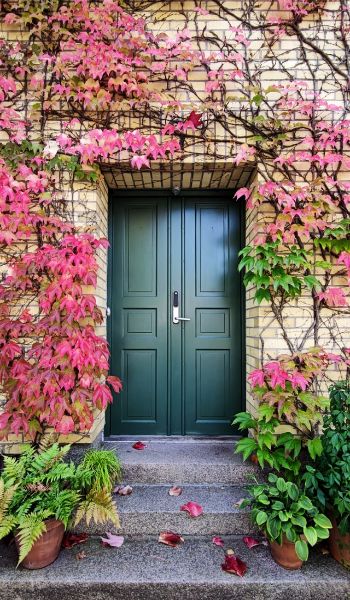
A front door needs to look as presentable as possible; it’s the first thing people see before making their way into the house. You need to paint the door neatly, and the paint has to be durable enough to withstand the constant handling of the door. What kind of paint do you use on a front door to get the best results?
There are a variety of paints to choose from for your front door. The best paint for your door depends on several factors including the prevailing weather conditions, paint sheen rank, color, paint-substrate compatibility, door material, paint durability, and the door condition.
I’ll discuss how each situation dictates the type of paint you need and what you should check to pick the best front door paint.
How to Pick the Best Front Door Paint
You cannot just lay any paint on your door before looking into its congeniality with the said door. As I had indicated earlier, I’ll show you how to pick the best front door paint.
Follow the determining factors below:
Weather Conditions
If you reside in high-rainfall regions, I recommend oil-based paint. The said paints are water-resistant; oil and water don’t mix, so this is pretty straightforward.
Also, oil-based paint does not wash off in the water. Original water-based paints have lower water resistance, and a perennial exposure to rainfall washes it off.
Oil-based paints have a yellow aging tendency exacerbated in sultry weather conditions. Latex paint and acrylic paint (water-based paints) do not lose their color quickly, and even if they lose, it does not yellow.
Oil-based paint fits better in regions with alternating hot and cold conditions because it has excellent elastic properties; it expands and contracts with the substrate.
Durability
Oil-based paints are more durable than water-based. The oil paint dries to form a firm, scratch-resistant film on the substrate. Since a front door is susceptible to frequent handling, it requires a tough and long-lasting cover, the perfect definition of oil paints.
Traditional water-based paints have a significantly low durability profile. However, modern varieties have improved durability thanks to advancements in water-paint research. However, the current water-based pants are still not as durable as oil paints.
Cost
The cost of front door paints varies depending on the paint’s makeup, the manufacturing company, and the category/class of paint.
The makeup concerns oil-based paints vs. waterborne paints. Oil paints are more expensive than water-based paints, but they are also more durable.
The manufacturing companies price their products differently, so you’re likely to get different costs for the same paint.
In classes, the paints rank from ultra-premium to contractor grade; the ultra-premium varieties are top-grade and will cost more.
I recommend oil-based paint or ultra-premium water-based paint for a front door. The ultra-premium water-based paints include latex enamel paints and acrylic enamel paints.
Previous Paint Type
The existing paint on your door influences your paint selection; check it before painting anew. If it’s waterborne paint, the incoming paint should also be water-based.
If the paint is oil-based, the incoming paint should also be oil-based. But what do you do if you want to shift from oil-paint to waterborne or from water-based to oil-based?
First, it’s essential to know that oil-based paint can go on top of water-based paint, but it cannot smoothly go over oil-based paint.
So from water-based paint to oil-based, just clean the door and prime it using an oil-based primer. Then, apply two coats of oil-based paint.
In shifting from oil-based to water-based, sand down the door thoroughly, then clean and prime using an oil-based primer. Afterward, apply the water-based paint, preferably acrylic enamel, but you can also use latex enamel paint.
Ease of Use
It’s common knowledge that water-based paint is easier to use than oil-based because it has excellent flow properties, is easy to clean up, and is eco-friendly.
But for a front door, I recommend oil-based paint over regular water-based paint. The benefits I’ve mentioned above for water paints are only impactful if you have a large painting project like walls and floors.
A front door doesn’t need much paint, so you’ll operate on a low scale.
If you insist on using water-based paint, go for the modern enamel water-based paints (the ultra-premium ones). These are more expensive than the old and regular water-based paints, but they have better durability and adhesive properties; they are also easy to apply.
Paint Sheen
Paint sheen means the shine or radiance it emits. Since higher sheen paints like semi-gloss are more durable than low-sheen paints like matte, it’s fairly easy to pick what’s best for your door.
High-sheen paint like semi-gloss and gloss dry to form a strong cover that’s smooth and skiddy to the touch.
High-sheen paints reflect away more light, making the door noticeable and alluring. They are also easy to clean and are more resistant to wear and tear.
While high-sheen paints are better than low-sheen paints for front doors, they are not wholly perfect. The high gloss is not good at hiding streaks and defects; the low gloss paints work better.
Exterior vs Interior Use
Painting a front door is an exterior project. When purchasing, ensure you select an exterior-only primer and exterior-only paint for the project. If you don’t find exterior only products, settle for exterior/interior products.
Don’t use an interior-only product on your front door; they won’t adhere well and will start flaking after a few months. The interior products are also less tolerant to sustained handling and scratching.
A front door, as you may know, takes a lot of impact and bumps daily, so it’s only sensible to use an exterior product for painting.
Paint Color
If you want to paint your front door with bright colors, like green or white, use water-based paint. If you want to paint the same door with a dull or dark color, use oil-based paint. Here are the reasons:
Water-based paints are fond of retaining a given color shade over longer periods than oil-based paints. These paints may be less durable, but they will maintain their tone throughout their lifetime. So if you want a brightly-colored finish, use water-based paint.
Oil-based paints turn yellow as they age. They have an excellent durability profile, but the paint will change color over time. So if at the beginning you painted your front door white or any bright color, it will gradually turn yellow.
Therefore, this paint is good for dark tones, as it won’t easily show the color changes over time.
Given that a front door is an exterior project, paint exposure to excess sunlight accelerates the aging and decolorization process; water-based paints are the most appropriate for mitigating this situation.
Paint-Substrate Compatibility
Front doors are made of different materials; these include metal, wood, fiberglass, and composite glass. You should select the best paint compatible with your front door material/component.
If you use paint that is incompatible with your front door, it won’t be long before you find out how bad things can get = it can eat up/react with your metallic door, charr your wooden door, it may fail to adhere to your fiberglass or composite glass door, and it can initiate rusting on your iron door.
The above are some of the consequences of paint/substrate incompatibility. You might even replace the door with a new one; what a hassle!
Here are some of the front door types and their matching paints:
Wooden: Use modern/enamel water-based paints or exterior oil-based paints.
Metallic: If the metal is bare, use exterior water-based primer followed by exterior acrylic paint.
Alternatively, use a DTM (Direct-to-metal) paint; it’s a water-based paint that’s specially made for direct application on bare metals.
If the front door is pre-primed, just apply exterior acrylic paint without sanding or priming. You can also use urethane paint.
Fiberglass: Use water-based acrylic paint, epoxy resin, or polyurethane paint, depending on the fiberglass type. Do not use oil-based paint here as it won’t stick well, and it will damage the fiberglass.
Composite: Use an exterior enamel water-based paint or oil-based paint.
Wrought Iron: Use exterior enamel paint or a DTM (Direct-to-Metal) paint.
Do I Need to Prime Front Door Before Painting?
 Priming is one of the preliminary steps before painting concrete, wood, and metals. But is it necessary? Do I need to prime front door before painting?
You need to prime the door before painting! Whether it’s wooden or metallic. You can only avoid priming in rare situations, for example, if your workpiece is very porous, when using paint and primer in one, and when changing colors.
If your workpiece is very porous, I advise you to use a sealer instead of a primer. Sealers help to even out pitted surfaces for uniform paint application.
Paint and primer in one is an agent that functions as both primer and paint. Its advantage is that it avoids the priming stage, thus saving time and reducing the cost of buying primer and paint separately.
The catch with a paint and primer in one is it does not work as well as separate primer and paint formulations.
You also don’t need to use a primer when changing the paint color of your door. The caveat here is that the paint must rank between premium and ultra-premium.
If the paint ranks in the economic or contractor grade category, you’ll have to use a primer before painting. You see, cheap is expensive in the long run; that’s why I always advocate purchasing topline paints from manufacturers.
When you paint directly over existing paint, you’ll only need two coats of the new paint; you may only need three coats when you’re doing an extreme color change, e.g., converting dark blue to white.
A dilemma arises when you want to change the paint color of a wooden front door with defects. In this case, repair the defects and fill the holes with a wood filler, then let it dry before sanding down.
Afterward, apply a primer to the repaired spots. Only then can you paint over the entire front door. If you don’t use a primer in this scenario, the renovated sites will have a flatter finish than the rest of the front door because paint soaks more into the sanded areas than the rest of the door.
The function of a primer here is to level and even out the substrate so the paint will have a uniform color throughout the door surface.
Besides the scenarios I’ve mentioned above, you need to prime your front door before painting. Be sure to use an exterior primer for good results.
Primers help create a rough substrate upon which paint will bond. They also prevent the wood resins and tannins from bleeding out to their surface.
How to Paint a Front Door Without Removing It
Some professional painters and DIYers find it difficult and time-consuming to remove a door off its hinges, paint it, and then return it.
It’s pretty understandable, and I fall in that category as well. I’ll show you how to paint a front door without removing it to get around the above situation.
It’s surprisingly easy to paint a front door while it’s intact. The process involves sanding down the door, cleaning, priming, and painting.
Below are the details of the task in question:
Requirements
- Drop cloth
- Oil-based paint or modern water-based paint
- 2.5″ paintbrush and a larger paintbrush
- Sandpaper (220 to 320-grit)
- Protective gear (respirator, safety goggles, and pair of gloves)
Procedure 1 (Using An Oil-based Paint)
First, ensure you ventilate your surrounding environment and put on all the protective gear.
Then, clear all the materials that are near the door; this prevents them from accidental splatter from the paint.
Next, remove as much door hardware as possible (including door knockers, mail slots, and door handles). It’s easier to remove them than to paint around them.
If your door is dirty, clean it using water and a general-purpose cleaning agent and let it dry. If it has mildew or similar growths (fungi), use a fungicidal wash to remove and cure it.
Seal off the back of the door using painter’s tape, and then cover your floor with a drop cloth to prevent spilled paint from staining it.
Then, prime and paint the edges of the door using an oil-based primer and oil-based paint, respectively. If your door opens by swinging in, the edge with hinges should have the same paint color as the front/exterior surface.
If the door swings outward, the free edge should have the same color as the outer surface.
If the door has defects, or if the preceding paint is heavily worn out, sand it using 300-grit sandpaper and vacuum off accumulated debris.
Then, apply an exterior oil-based primer on the surface to provide an adhesive medium between the incoming paint and the wooden substrate underneath.
If you can’t get a hold of an exterior primer, opt for an exterior/interior primer; it still does the trick. Don’t use an interior-only oil primer!
Let the primer dry for at least 8 hours before applying paint.
Open up the oil-based paint and pour some of it into another container; if the paint is too thick, thin is using turpentine or mineral spirits.
Start with the door panels; use a 1.5″ to 2.5″ angled paintbrush to cut into the recesses, then paint the panel. Do the same for the other panels until you’re done with them.
Next, paint the door rails; use a larger brush this time or a paint roller. When painting using any brush, don’t do so straight after immersing it in the paint; take off some of the paint by rubbing the brush against the sides of the container. Taking off some paint minimizes drips from a heavily loaded brush.
You may still have paint drips after getting some of the paint off, but they will be smaller in number; be keen to catch these drips and smooth them out using gentle brush strokes.
Then, paint the center stile(s) using the same brush as the rails.
Lastly, paint the outer stiles to finish the first coat of paint.
Let the oil-paint dry for 24 hours, then repeat the above procedure for the last coat of paint.
Ensure you orient your paint strokes along the wood grain when painting, i.e., vertical strokes for the panels & stiles and horizontal strokes for the rails. It enables you to work the paint well into the substrate for maximum interaction.
Procedure 2 (Water-Based Paint)
Follow the same instructions in Procedure 1 until you get to the priming and painting part.
Prime the door using an exterior water-based paint and let it dry for 3 hours, or as per the manufacturer’s specifications. Just like in procedure 1, don’t use an interior primer. The primer is a bonding agent between the substrate and the incoming paint.
Then, open your water-based paint (either acrylic or latex) and pour some of it into another container. Add a paint thinner/reducer to thin the paint if it’s too dense. Use water as the thinning agent for acrylic paint, and floetrol as the thinner for latex paint.
Pouring the paint into another container improves the convenience of the painting process as you can move around with it.
Then, apply the exterior water-based paint on the door by following the same order in procedure 1, i.e., door panels first, then the rails, followed by the center stile(s), and lastly, the outer stiles.
While painting, remember to catch the drips and smooth them out before they dry or form streaks on your workpiece. The drip and streaking problem is worse for water-based paints because it has a faster drying time, so be on the lookout.
Let the waterborne paint dry for 3 hours then apply a second coat of paint.
Here’s How to Paint Your Front Door Without Removing It:
How to Paint a Front Door Without Brush Marks
A front door should have a polished and classy look after the painting; all these get ruined when brush marks show on the surface after a backfired painting attempt. I’ll show you how to paint a front door without brush marks to avoid the above situation.
There are different approaches to attaining the above goal:
- Low-sheen paints
- Using the right paintbrush
- Proper painting techniques
- Applying paint in proper quantities
- Use of oil-based paints
- Minimizing the number of brush strokes
- The use of paint thinners and additives
- Using first-rate paints
Low-Sheen Paints
The paints include eggshell and matte; they are known for hiding flaws like brush marks, streaks, and crevices.
The paint in question works by absorbing light; therefore, you cannot easily see the brush marks and other imperfections.
Using the Right Paintbrush
Using the right brushes to paint front doors also produce a brush marks-free surface. The brush has to make the cut in regarding quality, size, and bristle type.
The ideal brush sizes range between 2.5 to 3 inches; these enable you to cut into the panel recesses effortlessly. They also make it easy to paint around non-detachable door hardware.
4-inch and above brushes suit the stiles and rails of the door.
Also, you need to acquire top-notch brushes to attain the results you desire; if you use cheap, third-rate brushes, your results will show just that.
The bristles also need to be up to scratch regarding their angles and firmness. Angled brushes are perfect for getting into the door recesses. Excessively firm brushes will leave brush marks on the door.
Applying Paint In Proper Quantities
The appropriate quantity, in this case, depends on the amount of paint you load on the brush bristles before application. The brush will keep dragging on the door surface instead of painting smoothly; this is the perfect recipe for brush marks.
If you overload the brush, you’ll have paint drips which will form streaks on your workpiece.
If you load the right amount of paint, the brush will leave a seamless coat of paint on the door, which is what you need. You can control the amount loaded by shaking off excess paint on the sides of the paint container.
Proper Painting Techniques
Poor painting techniques can never end well on any workpiece; it may look like you’re getting away with it when painting, but the results turn out disastrous after drying and curing.
Good painting techniques will avoid brush marks and other post-painting complications. Use the following painting techniques for maximum benefits:
- Paint in short strokes.
- Moisten the brush or paint roller by immersing it slightly in water. It makes it effortless to load water-based paints for smoother painting.
- Paint each part of the front door in the right direction, i.e., along the wood grain; this minimizes friction and brush marks.
- Do not overpress the brush on the door; this results in brush marks and breaks the bristles.
- If you spot a defective area on the door after painting, do not paint directly on it when the paint has dried. Instead, sand it, then repaint.
- Ensure your hands are steady when painting the door and proceed at a moderate pace; painting too fast causes brush marks, while too slow wastes time, and the pot life may run out before you finish.
- Brush over painted areas to smooth out the paint; it considerably eliminates brush marks.
Use of Oil-based Paint
Oil-based paint takes the first spot when it comes to eliminating and hiding brush marks. It almost seems magical, but it’s so real!
This remarkable feature stems from its long drying and curing time; this enables the paint to level out, and the brush marks that were initially present soon disappear.
Avoid Many Brush Strokes.
When painting a front door, getting your technique right is vital! Don’t focus on several brush strokes. Numerous strokes on a given door area wastes paint and leaves brush marks.
I advise you to press the brush firmly on the door when painting; this works the paint into the substrate, and you’ll only paint over twice or three times for a smooth finish.
Use of Paint Reducers
Paint reducers are agents that lower the viscosity of thick paints, making them easy to apply. They are commonly known as paint additives for water-based paints and paint thinners for oil-based paints.
Examples of paint additives are floetrol and water, while paint thinners include turpentine, mineral spirits, and acetone.
Top-grade Paint
There are several paint types out there, some of which are third-rate. The low-grade ones are cheaper, but they don’t get the job done; the contents may even differ from the information on the labels.
You should purchase legitimate paint from trusted sources like Amazon.com. Using top-quality paint ensures the drying times are accurate, the contents and the labels match, and the paint leveling is on point. It helps you avoid surprise fails like brush marks.
Use of Spray Cans
Paint spray cans offer an effective solution to avoiding paintbrushes; the rationale is that no brush marks will appear on your front door as long as you’re not using a brush.
You apply the paint with a spray can by pressing on a nozzle or actuator to release it in aerosolized form. The paint sticks to the substrate without the aid of a paintbrush.
Use of a Paint Sprayer/Spray Gun
A paint sprayer is a motor-driven machine for applying paint. The device emits paint in an atomized form under high pressure.
Here, you mix the paint separately, load it into the spray gun’s fluid section/paint cup, and then power the machine to release atomized paint. Again, there are no brushes involved so that you won’t have any brush marks on the door.
Use of a Paint Roller
A paint roller is used to paint broad surfaces swiftly and efficiently. The device comprises two parts: a roller cover and a roller frame.
The roller cover is the spongy part that soaks up paint for application, while the roller frame is the rest of the tool, i.e., the paint roller minus the roller cover.
The downside to a paint roller is it can only work on flat surfaces, so it can’t cut into the front door recesses. Therefore, you have to use the above tool in conjunction with an angled brush to get the entire front door painted.
However, it still helps to avoid brush marks on the flat parts of your door. Plus, the panel recesses are less prone to brush marks, even if you paint them using a brush.
How to Paint a Front Door to Look Like Wood
In this segment I’ll take you through how to paint a front door to look like wood; it ends up looking natural to turn on the rustic charm we all yearn.
We all know how priceless it feels to interact with nature or things that remind us of our natural environment. Painting enables us to recreate the natural environment to evoke a similar feeling.
Here is how to go about it:
Requirements
- 1.5″ to 2.5″ angled paintbrush
- Fine-grit sandpaper (220 to 400 grit)
- Wood tone base coat or primer
- Exterior wood paint(with a brown shade)
- Drop cloth
- Safety gear (goggles, a pair of gloves, a respirator)
Before you begin, ensure you pick a suitable day when the weather is sunny, or the temperature is 50 to 80 degrees Fahrenheit with no rainfall. Also, avoid too much direct sunlight as it makes the paint dry too quickly.
Procedure
Ventilate your working area and wear safety gear (goggles, gloves, and respirator). Since it’s an outdoor project, ventilation shouldn’t be much of a problem or concern.
If the door has an existing glossy finish, sand it down using sandpaper to roughen its surface.
Then, clean your door thoroughly using soapy water and let it dry.
Remove as much hardware as possible from the wood. If it’s your first time painting a door, take pictures before detaching the hardware to make the reinstallation process easy.
Take a painter’s tape and cover the door frame; include the hinges when taping. Also, seal off the outer stiles on the back of the door and any remaining hardware on the door.
All the above taping details prevent the paint from splashing to unwanted surfaces; it’s helpful, especially for vigorous painters like myself.
It’s now time to apply the wood-tone primer; take the 2-inch cut brush and apply it, starting with the recessed parts of one panel. Then, prime the rest of the panel using the same brush. Do the same for all the panels on the door.
Also, use the 2-inch brush to cut in around non-detachable hardware.
Next, prime the rails using a larger brush or a paint roller; work along the wood grain, i.e., horizontally.
Afterward, prime the center stile, then the outer stiles; use the larger brush or a paint roller. Remember to move along the wood grain when working the stiles; it’s up and down (vertical) in this case.
Let the primer dry for about 3 hours as you get your paint ready.
Apply the exterior wood paint following the same order as in the primer above. To recap, start with the panels, then the door rails, followed by the center stile, and lastly, the outer stiles. If any ridges, wakes, or paint drips form in the course of painting, smooth them out using the brush or roller.
Let it dry for 3 hours, then lay down a second coat of the paint. This second coat evens out any streaks and brush marks left, and it also augments the brown wood appearance.
Here’s to Paint Your Front Door to Look Like Wood:
How to Paint a Front Door Without Streaks
A streak is a long thin stripe of a substance different in color or texture from its surrounding surface. From the above definition, it can never be a good thing to have streaks on any painted plane, but it happens! Quite a lot.
In this section, I’ll show you how to paint a front door without streaks. It’ll save you the distress of living with a door that appears creased.
Painting without streaks comes down to doing everything right throughout your door painting undertaking. It means doing excellent preparatory work, working with professional painting tools (brushes, rollers, sandpapers, etc.), using good painting techniques, and using the appropriate paint type.
From the above, you may have noticed that painting without streaks requires the same preemptive practices as painting without brush marks. I’ve already discussed how to paint without brush marks up there, so you can just scroll up to get the particulars.
Should Front Door be Satin or Gloss?
When you get the chance to select a front door for your house, you may wonder, should front door be satin or gloss? Across many neighborhoods, there are innumerable varieties of front doors; there are those with bright vs. dull/dark colors, smooth textured vs. rough-textured, painted vs. bare/unpainted.
Even for a particular front door color shade, you’ll see different sheen levels. Follow my lead as I show you what a front door should look like and why.
Straight up, a front door should be glossy; but satin will still make do. The confusion about what sheen suits a front door stems from the fact that there are several different types out there.
Therefore, you find yourself oblivious to what’s best, especially for novice painters and homeowners.
A glossy finish suits front doors better than satin on account of:
- Durability
- Maintenance
- Visual appeal
- Protective properties
- Adhesion
Durability
Durability, in these terms, is the ability of the painted door to maintain its protective properties, adhesive power, and general viability.
A glossy finish will make your front door last longer because the paint has high quantities of binders to improve strength, resilience, and resistance to common pernicious agents.
The typical damaging agents are adverse weather conditions, frequent handling & door slamming, kicking and banging from kids, etc.
Glossy paint will also tolerate stains better than satin; this adds to durability because you won’t clean the door repeatedly. Frequent cleaning wears down paint.
On the other hand, satin has lower binder proportions than glossy paint, leading to lower durability. Satin also has a comparatively low stain-resistance profile; this means frequent cleaning, faster wear, and exposure to water. These further deteriorate the door.
Maintenance
Both satin and glossy have benefits and drawbacks concerning maintenance.
Starting with the benefits of gloss, it does not collect dust quickly, so the door doesn’t need much cleaning. Even if you clean it, the door is unyielding to wear from scrubbing; these are valuable for maintenance.
Satin carries the day when it comes to touch-up compliance; this describes its ability to accept restorations or remodeling. The refurbished patches easily blend in with the rest of the door; this is good for maintenance.
Gloss, on the other hand, doesn’t accept touch-ups quite well. Upon its application, any form of renovation will stand out from the other door parts.
The refurbishments stand out as they have a different radiance from the rest of the door. This is disadvantageous to maintenance because the repairs come at the cost of visual appeal.
Satin has its drawback also; it gets scratched easily during cleaning, especially when using stiff-bristled brushes to scrub. The door will also need frequent cleaning; this is tedious.
Cost
Satin paint costs less than gloss. The price difference isn’t fixed; it’s a range that varies among manufacturing companies and brands.
Since a front door presents a small painting project, the high cost of gloss isn’t worrisome. On the upside, its high price trades off with a superior durability profile.
If you carry out a cost-benefit analysis, your front door is better off with a glossy finish.
Adhesion
Adhesion means how strongly the paint sticks to the substrate, which is the front door in this case. Gloss has more adhesive power than satin.
It’s because glossy paint has a high concentration of binders while satin has high proportions of pigment. The binders make the paint hold tightly onto the front door.
Unmistakably, the paint with superior binding capacity suits the door better.
Protective Properties
Gloss ranks higher than satin when it comes to protecting the wooden or metallic door underneath. When glossy paint dries, it forms a hard and shiny layer that’s impenetrable and less prone to scratches.
The glossy finish also reflects away UV rays (sunlight) and doesn’t accumulate water. All these properties collectively fortify your front door.
Conclusion
At this point, you may have realized that painting a front door shouldn’t be taken lightly or dismissed and done with reckless abandon.
It may be a small project, but it needs attention to detail for excellent results. In this article, I’ve dwelt majorly on how to paint a front door.
As I’ve highlighted, the process involves sanding, priming, laying down paint (two coats), and cleaning up. There are also some accompanying but essential preliminaries like knowing your door type and its matching paint, painting in favorable weather conditions, using the most appropriate equipment & techniques, among others. I’ve detailed all of these up there.
It’s also important to know that you can only reap what you sow! The above undertaking may seem arduous before you start, but everything pans out well if you take your time and go by the book. Your commitment will reflect on the outcome of the door.
On the other hand, if you follow shortcuts or jump some of the steps I’ve outlined herein, the consequences will come down hard on your project.
You can now gather your tools and get that front door spruced up with new paint. When you get good results, don’t forget to come back for more and you can also share some of these with prospective painting DIYers, friends, and even neighbors.