Vinyl shutters are a practical way of controlling the light that gets into a room while simultaneously giving you total control over the privacy of your home.
However, constant exposure to ultraviolet rays and other harsh outdoor elements causes the color of vinyl shutters to fade. This discoloration causes homes to look bland and old, prompting immediate action to update the home’s look.
You can install new shutters, but it is costly and time-consuming. On the bright side, there is a more straightforward way to bring your vinyl shutters back to their original color – painting. Therefore, in this article, I’ll show you How to Paint Vinyl Shutters correctly.
First, take down the shutters, then use a standard household degreaser and a soft brush to clean them. If there is old paint on the shutters, use isopropyl alcohol to remove it before washing the shutters.
After the shutters dry:
- Scuff them with a fine-grit sanding sponge to make it easy for your primer and paint to adhere.
- Coat the shutters with an exterior latex primer.
- Once that dries, apply 100% acrylic or acrylic urethane paint.
- Allow the paint to cure fully before reinstalling your shutters.
Having looked at brief steps involved in the painting of vinyl shutters, it does not end there as there are many other aspects of vinyl shutters that I’d discuss in this post. So, stay with me.
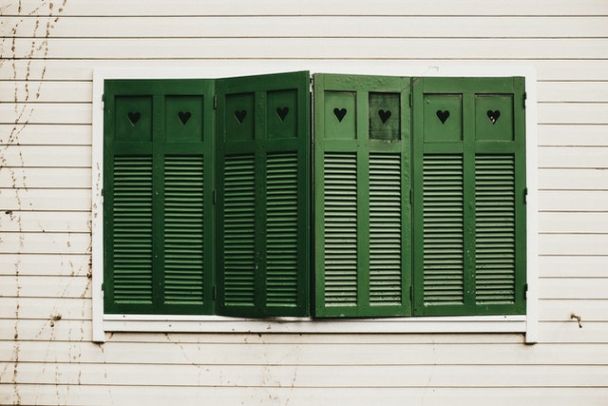
What Are Vinyl Shutters?
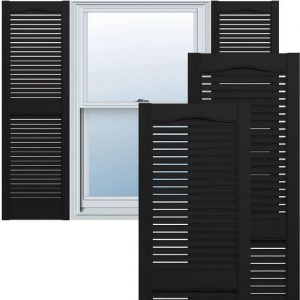 Vinyl shutters are wood fittings attached directly to the window frame to boost security, improve privacy or decorate your home’s exterior. They are the most affordable shutter material, ranking at the top over wood and composite-wood shutters.
These shutters are moisture resistant; therefore, they don’t rot or crack easily. This feature also makes them super low maintenance, so you won’t have to put too much effort into keeping them in good condition.
Moreover, vinyl shutters are lightweight, which is a significant contributing factor to how easy it is to install them.
Manufacturers make vinyl shutters from two types of vinyl materials – polypropylene and polystyrene.
Polypropylene shutters are super old school, and you’ll often find them in older homes. They do not hold paint well; therefore, you must use specialized bonding primers and exterior-grade latex paints to update their look.
On the other hand, Polystyrene shutters are more common today. Manufacturers use this material because it accepts paint well, making it easy to change its color or restore its faded old color.
They allow homeowners to easily keep up with today’s ever-changing home decor color styles.
When shopping for vinyl shutters, you may notice slight differences in prices. But why is that?
Manufacturers do not create vinyl shutters equally. They differ in quality and durability, which in turn causes contrasting costs. Therefore, it is best to know the different vinyl shutters available to make the best choice for your home and your budget.
Types of Vinyl Shutters
Hollow Vinyl Shutters have a hollow frame, as their name suggests. Manufacturers use less material when constructing them, making them the cheapest shutter type. Even though they are budget-friendly, hollow shutters are not sturdy; hence, they will sag over time.
They will droop even faster when installed in larger window frames because they cannot support that much weight. Therefore, it is best to use them on smaller window frames.
Structured-Hollow Vinyl Shutters also have a hollow frame, but they have a vinyl skeleton within the frame. The inner structure allows it to support more weight, which reduces the sagging you will experience with the completely hollow shutters.
Even though they have superior structural integrity, their price surpasses that of hollow shutters by very little.
Solid Vinyl Shutters have a frame filled with blown-up polyvinyl chloride (PVC). The PVC makes these types of shutters more stable than the first two, and their prices are also a bit higher. However, they still fall within the general budget-friendly nature of all vinyl shutters.
Solid Vinyl With Aluminum Shutters is the strongest of all the shutter types on this list. Manufacturers make the traditional solid vinyl shutters then insert some aluminum for extra support.
The aluminum component is fantastic because it supports the shutter structure without adding too much weight. As a result, this shutter type doesn’t sag and can last for years.
Vinyl-Clad Wood Shutters have a solid wooden frame wrapped with vinyl. The wood component makes this shutter type stronger, and the vinyl coating makes it moisture resistant.
Together, these materials make vinyl-clad wood shutters the most durable on the market.
Vinyl Shutters vs Wood Shutters
 Wood shutters perform the same functions as vinyl shutters. However, they each have unique characteristics and qualities that make them more suitable for some home areas than others.
For this reason, you must understand how they differ from each other to make the best choice for your home. Below are lists of the advantages and disadvantages of each shutter material to guide you.
Advantages of Vinyl Shutters
- Vinyl shutters are cheaper than wood shutters. Moreover, they won’t rot or disintegrate over time; hence, you won’t have to replace them for a long time.
- Vinyl shutters are pretty low maintenance. After installation, all you have to do is clean them regularly, and they will stay in good condition for longer. The best part is that cleaning them is easy as you only need to wipe them with a damp cloth, and you’re good to go.
- Vinyl shutters are invulnerable to moisture. They are inorganic; hence they don’t swell or warp upon contact with water. This feature makes them perfect for areas such as bathrooms and kitchens.
- Vinyl shutters come in several attractive block colors; hence you can quickly find one that fits your home decor. There are also some transparent varieties, which you can leave as they are or paint if you cannot find the exact color you want from the colored ones.
Disadvantages of Vinyl Shutters
- Due to their low costs and popular colors, vinyl shutters are a staple choice for many homeowners. You may find three in every five homes has vinyl shutters, so they are not the best choice if you are searching for a unique accessory for your house.
- Vinyl shutters won’t work well in large window spaces. Large frames require large shutters, and large pieces of vinyl won’t have enough strength to hold up. They tend to sag or warp quickly; therefore, it is best to use vinyl shutters on smaller frames.
- Damaged vinyl shutters are impossible to repair. If your shutters happen to sag or warp out of shape, you will have to replace them, and it will cost you a lot of time and money.
Advantages of Wood Shutters
- Wood shutters are unique. Even if your whole neighborhood has homes with wood shutters, you won’t find one that looks exactly like yours. There are several wood types, each with a distinctive wood grain pattern, so it isn’t easy to find two wood pieces with similar grain alignment.
- Wood shutters last longer than most types of shutters, provided you treat and maintain them the right way. They can stay in good condition for up to 20 years or even as long as your house remains standing.
- Wood shutters are very easy to repair. You can quickly repair minor cracks and dings by filling them with wood putty and sanding them to keep the shutters leveled.
- Wood shutters are easy to customize however you like. You can stain them to make the wood grain darker or bleach to make them lighter. If you get tired of the wood look and want to change it up, you can paint it with colors that match the rest of your house.
Disadvantages of Wood Shutters
- Wood shutters are prone to moisture damage. They are organic materials, so they absorb the water and warp out of shape when you constantly expose them to moisture. The moisture makes it easy for mold to grow and rot to develop. Therefore you cannot use this shutter type in areas like bathrooms or on houses in highly humid areas.
- Wood shutters are more expensive than vinyl shutters. It takes a lot of time, energy, and money to acquire and process the wood before manufacturers can make them into shutters. So it makes sense that they will cost more than other types of shutters.
How to Paint Vinyl Shutters, Step by Step Guide
The steps are as discussed below:
Step 1: Remove the Shutters
You will need to completely detach your shutters from the walls to paint them properly. Doing this will make your job easier because it allows you to paint them on a flat solid surface.
Most shutters are held in place by 4 or 6 shutter buttons or screws. Therefore, I recommend checking the fasteners on your shutters before you start to know which tools you need to remove them.
If yours are held down by shutter buttons:
- Put the flat end of a 5-in-1 tool behind the button head, then hit it gently with a hammer until the head comes off. Do this for all the remaining fasteners then you can easily pull the shutters away from the wall.
- If screws hold them in place, use a standard hand screwdriver to remove them. You can also use an electric screwdriver to make the task quicker.
Take care not to damage the fasteners when removing them because you will need them again to reinstall your shutters. This, however, does not apply to shutter buttons.
Once you remove the button head, the fastener becomes useless; therefore, you must purchase new ones for reinstallation.
Step 2: Clean the Shutters
As you remove the shutters, lay them down on your lawn or any place that won’t get affected by water. Here, you will wash them and leave them to dry in preparation for painting.
- Pour some warm water into a large bucket and add your regular household detergent to make a cleaning solution.
- Next, dip a soft-bristled brush into the mixture, then use it to scrub down the shutters. Ensure that you scrub every corner to remove dirt buildups, debris, and mold if there are any.
- Once the shutters are clean, rinse them with a garden hose to flush off the soapy mixture and all the loosened dirt and debris.
- Finally, lay down a drop cloth and put your shutters on it to dry. You can leave them overnight, but if you have a little bit of daylight left after cleaning, you might be able to prime and get at least one coat of paint on them by day’s end.
Step 3: Prime the Shutters
After the shutters dry, use a fine-grit sanding sponge to scuff them up a little. This is not a completely necessary step, but it will surely make a big difference in the adhesion and longevity of your paint and primer. It will also make sure that you achieve a clean and professional finish.
After sanding, apply any exterior latex bonding primer to improve your topcoat adhesion further. You can skip priming if you have paintable vinyl shutters. However, if you have older shutters made from polypropylene, you must use the primer to make your paint stick.
Apply two coats of primer, allowing coat the first one to dry properly before applying the next. Also, ensure that you scuff the first coat slightly before applying the second coat to make it adhere better.
Tip: If you don’t know whether your shutters are paintable or not, check the back of it for a stamp. If it has one, it is probably made from polypropylene. No stamp means you can paint it without problems.
Step 4: Paint the Shutters
After the final coat of primer dries, scuff it a little with the fine-grit sanding sponge to give your paint a little tooth to grip. Follow up by vacuuming away the sanding dust then wiping any excess with a tack cloth.
Removing the sanding dust is necessary because it will interfere with paint adhesion and mess up your paint finish.
The quickest way to paint your shutters is by using an airless paint sprayer. With this tool, painting the shutters will take less than 10 minutes each, saving you time.
You will also achieve a much smoother finish without globs or brush marks. However, you must spray it right to achieve the best possible finish. Here’s how to do it:
- Hold the sprayer nozzle about 10 inches from the shutter surface, then begin spraying.
- Start from the edges of the shutters, then finish with the center ensuring that you get to all the corners.
- Spray the paint in straight horizontal lines, ensuring that you overlap each pass to avoid leaving any part of the shutters paintless. Doing this will make your finish uniform.
- If your shutters have slats or louvers, angle the sprayer’s nozzle to ensure that paint reaches between the slats and under the louvers. You can also use a paintbrush to paint those hard-to-reach areas if angling the nozzle poses a problem for you.
- Let the initial coat dry, then apply the second one using the same techniques.
Tip: lay down your shutters to dry in an open garage or a makeshift shed. This will shield them from wind which may carry bugs and dirt that will get stuck on the wet paint and interfere with the finish.
Step 5: Reinstall the Shutters
Let the shutters dry for 24 hours before you put them back. You can also wait 48 hours before reinstalling to be on the safer side. If you try to fix the shutters before the paint has thoroughly dried, you risk scratching it, and you will have to start all over again.
Here’s a Video On How to Paint Vinyl Shutters:
What Kind of Paint Should I Use On Vinyl Shutters?
The perfect type of paint to use on vinyl is 100% acrylic paint or acrylic paint modified with urethane. The reason is that these paint types remain flexible even after they dry. But how does this make them suitable for vinyl?
Vinyl expands and contracts significantly when the temperature changes. Therefore, if you want to paint it, you must choose a product that is just as flexible as it is.
That way, there will be no resistance or stress during the movement, thus preventing the paint from cracking and eventually peeling.
Other than flexibility, acrylic paints are durable and will resist fading for a long time. Moreover, they adhere well to vinyl even without the help of a bonding primer, and they dry super quickly.
You can also use latex paints because they are flexible, but their movement level does not match that of acrylic paint. Latex paint may stick perfectly on vinyl for a while, but it will crack faster than acrylic paint.
Now that you know the kind of paint to use on vinyl let’s talk about color. The main rule to stand by when painting vinyl, especially exterior vinyl surfaces, is to use a hue that is the same as or lighter than the surface’s original color. Why is that?
Vinyl is made of pigmented plastic that gets extremely hot, especially in direct sunlight. For that reason, manufacturers make it in lighter colors to reflect some of the heat. So, when you use dark paint to color light vinyl, the paint will absorb a lot of heat which will cause the vinyl to buckle and warp.
If you desire a dark color on your vinyl, worry not. Nowadays, some manufacturers make a few vinyl materials in dark colors, and they design them to be sturdier and more durable. Therefore, they can withstand the heat for longer without warping.
How Do You Paint Vinyl Shutters With a Brush?
I often recommend spraying paint on vinyl shutters to achieve the best possible finish outcome. However, you can also paint them with a brush and achieve similar results.
The trick here is to select a good-quality brush and employ a few simple brush-painting techniques to actualize the look you want. Below is information to help you select the best paintbrush, followed by a detailed procedure for painting vinyl shutters.
-
Material
The best brush material to use on vinyl is synthetic brushes. You can use pure polyester or a blend of nylon and polyester to achieve great results. I recommend these paintbrush materials because they work best with acrylic paint, which is the best paint to apply on vinyl.
Acrylic paints are water-based, so if you use natural bristled brushes, the hairs will soak up the moisture in the product and become limp.
Consequently, the paintbrush will be less effective, thus producing a poor paint job. On the other hand, synthetic brushes like nylon will maintain their form throughout the project, giving you excellent results.
-
Style
Paintbrushes come in several different styles, but I recommend using the angle sash brush when painting vinyl shutters. Manufacturers designed this brush type to paint window sashes, and you can also use them for other detailed painting jobs.
They have a short handle and angled bristles which offer excellent stability when painting. Moreover, they are easy to maneuver when coloring shutters with slats or louvers.
Now that you know the kind of brush to use. Here’s how to paint vinyl shutters with a brush:
- Use a wooden rod to stir your paint, then pour some of it into a separate container.
- Next, dip your paintbrush into the paint, ensuring that you only cover ¼ inch of the bristles. Tap the brush lightly on the inside of the container to release excess paint before proceeding.
- Start by painting the shutter slats at the top, working your way down. Lightly run your paintbrush over the freshly colored area to eliminate brush strokes as you paint each slat.
- After coloring the slats, move to the edges where the shutters meet the walls of your house. Begin at the top and paint your way around until you cover all the edges.
- Finally, go back to the top of the shutter and start painting the face of the shutter frame until you cover it all.
Repeat these steps on all the shutters you have, allow the paint to dry, then apply a second coat for better coverage.
Should Shutters be Painted With Semi-Gloss or Satin?
Both satin and semi-gloss finishes have some sheen and are durable; therefore, you can use either of them on shutters. However, if you are having trouble picking one, I often recommend using the “skip 1” rule whenever you’re choosing a paint finish for your shutters.
This creates a pleasing contrast that will make your home more beautiful and put together. Let me elaborate.
Paint sheens are classified as matte, eggshell, satin, semi-gloss, and hi-gloss – with matte being the dullest and hi-gloss being the shiniest.
So when I say skip one, I mean if you have a matte finish on your walls, skip the eggshell finish and use satin on the shutters. Similarly, if you have an eggshell finish on the walls, skip the satin, use semi-gloss, etc.
Other than the skip 1 rule, you can look at the properties of each paint sheen. Look at what makes them stand out, then compare them to your needs to help you make a good choice for your home.
When comparing paint sheen properties, the shinier the sheen, the more durable and washable the paint. On the downside, glossy paints also tend to highlight surface imperfections; therefore, you should only use them when you’re sure that your surface is smooth and even.
Since semi-gloss and satin paint finishes have some sheen, they are durable and can withstand regular washing and constant ultraviolet rays exposure outside.
However, since semi-gloss has more shine than satin finishes, it is more durable and will last longer. But on the downside, it will also show all the surface imperfections on your shutters more than satin finishes.
Can You Paint Shutters Without Taking them Down?
Yes, you can paint shutters without taking them down, but I only recommend doing that when you cannot remove them. Typically contractors install shutters with metal mounting clips or screws, which are often easy to remove without damage.
However, contractors install the shutters using plastic mounting nails in some occasional cases. These are more permanent fasteners, and removing them automatically means damaging them.
If you remove such screws, you must have a new batch ready for reinstallation; therefore, I recommend painting over them instead.
If you decide to paint your shutters in place, make sure to seal all areas around them with plastic sheets and painter’s tape. Moreover, I recommend using only paintbrushes for such projects because sprayers will spread paint everywhere.
Even though painting shutters while still in place works, the task comes with several disadvantages. These are:
- You have to climb up and down a ladder repeatedly to reach the shutters, especially if you have a storeyed house. Moreover, you will have to carry the ladder around the house as you paint, which is tiring.
- You have to be extra careful to avoid knocking down your paint container during the project. You also have to ensure that there are no drips or runs that could potentially fall on your wall and ruin your general house finish.
If these disadvantages do not faze you, and you are sure you can get the job done, then painting shutters in place isn’t such a bad idea.
How to Paint Vinyl Shutters to Look Like Wood
Wood shutters have a beautiful rustic look, but they are costly. Luckily, there is a way to use paint to customize the cheaper vinyl shutters to look like wood.
All you need is a quality paintbrush, brown acrylic paint in the shade you prefer, some black paint, and a good quality primer. Follow the procedure below to achieve that wood look you desire.
- Start by cleaning, then priming your vinyl shutters as usual. Once the primer dries, use a fine-grit sanding sponge to sand it a little.
- Apply brown paint on the shutters using a paintbrush (not a sprayer). Apply the paint lengthwise but do not go back over the fresh paint to smooth out the brush strokes. In this case, we leave the brushstrokes to resemble wood grain. This is why I insist on using a brush instead of a sprayer.
- Take a smaller paintbrush and use it to add a few details to the freshly painted shutters. Use a darker brown or black paint to add on wood knots and other “imperfections” to make the vinyl look like authentic wood.
To Add Knots:
- Dip the small brush in the darker paint, then tap it on the side of the container to remove as much paint as you can. You must leave very little paint on the bristles to avoid leaving globs on the surface and prevent drying problems.
- Next, blot the paint onto different spots on the shutters. You can swirl the brush around while pressing down on the vinyl to give the “knots” a more believable look.
- Repeat the procedure on all your shutters, then allow the paint to dry. You can leave the paint as it is or apply a clear topcoat to protect the paint illusion and the vinyl better.
Tips.
- When choosing the paints, select those with a high Light Reflective Value (LRV) to ensure that the paint job lasts long.
- Use your favorite type of wood as inspiration. Try your best to mimic the wood grain and knot styles and positions to make your work look authentic.
How to Paint Vinyl Shutters Black
I do not recommend applying black paint on vinyl shutters because it will absorb heat and cause the material to warp. However, I have a solution if you are determined to get a bold, dark look for your shutters.
There are several vinyl-safe paint options on the market, but there isn’t one that is purely black. You can mix up a few paints to achieve a color that isn’t black but has a similar aesthetic appeal to the black color.
I insist that you only use vinyl-safe paints to make the mixture because manufacturers do not use black pigments in them to reduce their chances of absorbing heat.
Here’s how to mix the paints:
- Pick out vinyl-safe paints in the colors blue, maroon, and deep gold.
- Measure equal amounts of each and pour them into a separate mixing container.
- Next, use a wooden rod to stir the mixture until you achieve a consistent color shade.
- Finally, clean and prime your vinyl shutters, then apply the paint mixture like regular paint.
Note: The paint mixture will look blue in the container, and the first coat will also look like a rusty blue. However, don’t worry because the second paint coat will make the color look darker. Furthermore, the color will become even darker as the paint dries.
Conclusion
Vinyl shutters are a versatile and cheap material option for making shutters. However, their original look is somewhat bland, and upon long-term use, they begin to lose their luster.
When the shutters start to deteriorate, many homeowners think of removing and replacing them; however, that option is expensive and takes time.
On the bright side, you can use paint to revamp the look of your vinyl shutters by utilizing this simple guide on…
How to Paint Vinyl Shutters
Take down the shutters, then clean them with warm water and a standard home detergent. Rinse the shutters, then allow them to dry. Afterward, coat the shutters with an exterior bonding primer followed by 100% acrylic paint.
Apart from changing color, you can also use brown and black paints to customize your shutters and make them look like natural wood. This trick will allow you to make your shutters look expensive without actually running through your budget.
I hope this article has elaborated on the correct way of painting vinyl shutters. If you need clarification or have any more information to share with us, feel free to reach out in the comments section below.