Having polyurethane over paint is like hitting two birds with a stone- you get beauty and protection simultaneously!
We use paint to waterproof, decorate and protect surfaces from elements like UV rays and extreme temperatures. However, paint does not last forever.
It starts to degrade after a few years, and the only way to salvage the situation is to repaint
One way of preventing paint from quickly deteriorating is by applying a clear protective coat. The clear coat is usually more durable than the paint; thus, it can better withstand the elements.
As a result, the color lasts longer. One of the most durable protective coats today is polyurethane; therefore, it is pretty normal to hear people ask, can you put polyurethane over paint?
You can apply polyurethane over paint, provided you allow the paint to cure properly.
You must also ensure that the paint coat is clean because specks of dirt and grease will prevent the poly from gripping the paint properly.
As a result, the polyurethane will peel off the surface quickly, beating the point of applying it in the first place.
You can apply either water-based or oil-based polyurethane over paint with ease.
However, remember that the latter develops a yellowish hue as it ages; therefore, it will alter your paint color.
So, if what you want is a bit of extra protection for your paint, use water-based polyurethane but if the color change isn’t an issue, go for the oil-based ones because they are more durable.
This post focuses on both polyurethane and paint, especially how and why polyurethane makes the paint better through the beautiful finish and enhanced protection.
Keep reading for more insight on the subject:
What Is Polyurethane?
 Polyurethane is a petroleum-based finishing product that you can apply to numerous surfaces to protect them from damage.
It is water-resistant; hence it doesn’t get affected by mold and mildew, and it effortlessly withstands extreme hot and cold temperature fluctuations.
These features have made polyurethane the most used protective coating for vulnerable surfaces, especially bare and stained wood.
And recently, more and more painters are using it over painted surfaces to protect the paint and make the color pop.
Polyurethane comes in two forms – water-based and oil-based. They perform the same functions, but they have subtle differences that dictate where and how you can use them more efficiently.
Oil-Based Polyurethanes
Oil-based polyurethane uses either petroleum or mineral solvents as the vehicle for the polyurethane resins.
It has a thick formula that allows it to produce a rigid protective barrier with few coats, and it self-levels on horizontal surfaces.
On the downside, the thick formula of these products causes them to dry slowly, and during this time, the odor from the petroleum base is pronounced.
Many painters find the smell irritating, but it subsides as time passes and completely disappears when the Polyurethane cures.
Furthermore, oil-based polyurethanes leave a yellow tint on surfaces, especially when applying multiple coatings.
When to Use Oil-Based Polyurethane
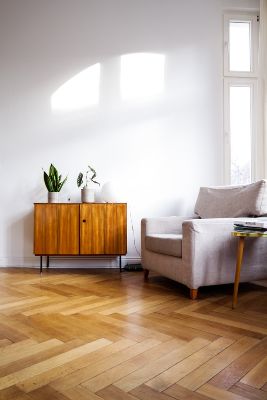
These products provide excellent abrasion and scratch resistance, making them a good choice for floor applications and any other use where durability is a significant factor.
You will have to confine its uses outdoors because of the odor it produces while drying.
However, if you must use it inside, ensure that your space has enough ventilation, and you can stay away from it for as long as the polyurethane cures.
Water-Based Polyurethane
Water-based polyurethane uses water instead of solvents as the vehicle for the poly resins.
It is as durable as the oil-based poly, but you need to apply several coats to form a rigid enough protective film.
On the bright side, the water base allows it to dry quickly, so you can apply the number of coats you need without worrying about time.
When you look at water-based polyurethane in the container, it appears milky white, but it dries into a very clear film.
It doesn’t add color to the surface, and it maintains the clarity for as long s it sits on the surface.
These products have no odor and no VOCs, and you can clean them up easily with soap and water.
When to Use Water-Based Polyurethane
Water-based polyurethane is best if you never want to deal with the smelly solvents of oil-based polys.
They are perfect for indoor applications, but you can also use them outside if you want to avoid the yellow tint of oil polys.
Just make sure that you apply enough coats properly to ensure excellent protection for your surface.
What Is Paint?
Paint is a liquid coating that you apply to different surfaces to protect them from damaging elements and make them look pleasing to the eye.
 Its formula consists of four essential ingredients – a solvent, the pigments, resin/binder, and an additive.
The binder, pigment, and additives are solids, while the solvent is the liquid carrier.
Pigments are finely ground color particles that provide color to paint.
Since they are insoluble, they determine how bulky the paint will be and how well it can conceal imperfections on surfaces.
Paint products with a higher pigment percentage provide better coverage than those with fewer pigments.
- The binder/resin is the ingredient that holds paint pigments in place to form the colored protective film on the surface.
It determines the sturdiness of the resulting paint film and how well it will adhere to the surface.
The binder also influences the washability and gloss-retention of the paint film after it cures.
- Additives are components that add specific functions to paint. You can find paint with a quick-drying formula and another made to stop UV rays from ruining the color.
- The solvent is the liquid medium where all the other ingredients stay suspended, and it makes it easy to transfer all the solids from the paint container onto the surface.
Nevertheless, this component plays no role in the beauty or durability of the paint. Instead, it evaporates to leave behind the rigid, colored film containing pigment, binder, and additives.
You can use either a brush, roller, or sprayer to apply paint. I recommend using brushes when you want more control over the project.
These include when you are painting surfaces with intricately carved details.
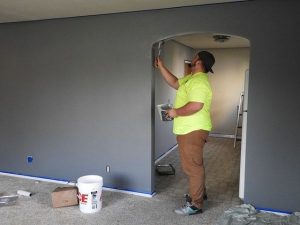
Rollers work best on broad surfaces like walls and ceilings, and sprayers are excellent when you need to finish projects quickly.
How to Apply Polyurethane Over Paint
Here are the steps involved:
Step 1: Clean the Surface
Polyurethane will not adhere properly to a greasy surface, so you must clean the painted surface thoroughly before application.
Depending on how much time passed after you painted the surface, you can use Trisodium Phosphate (TSP) or regular household detergent.
TSP is stronger and hence best for old paint, for instance, paint that has been on the surface for a few months.
Regular detergent is milder; therefore, it is perfect for more recent applications, like a month-old paint application.
- Mix TSP or detergent with warm water, then dip a clean cloth in the mixture.
- Wring out excess liquid, then gently wipe the painted surface to remove the dirt.
- Finally, rinse the surface with plain water and allow it to dry.
Step 2: Sand the Paint Film
Most paints have a sleek finish that polyurethane cannot adhere to; therefore, you must sand the paint film to dull the finish first.
120-grit sandpaper will get the job done, but you can use a higher grit if you prefer.
Don’t go lower than 120 because the sandpaper will leave deep scratches on the paint or remove the color entirely.
- After sanding, vacuum away all the paint dust, then wipe the surface with a damp cloth dipped in plain water.
- Allow the surface to dry before proceeding.
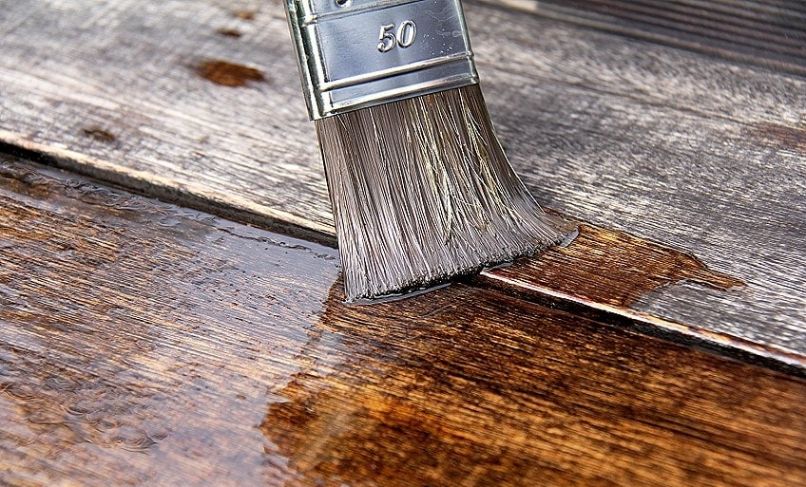
Step 3: Apply the Polyurethane
- Apply the first layer of polyurethane using a sprayer or brush. Do not apply the layers too thick because they will take longer to dry and may form bubbles as they dry. You can also use rollers, but I do not recommend them because they tend to leave bubbles on the surface.
- Allow the poly to dry according to the product’s specifications, then use 220 grit sandpaper to smoothen the coat before applying the next one. Sanding the polyurethane coat will also improve the adhesion of the subsequent coats resulting in a more durable finish.
- Wipe the surface with a lint-free towel to remove the sanding dust before applying the next coat.
If you are using water-based poly, you may need more than the standard two coats to get a firm film. the oil-based ones only need the normal two coats.
Here’s How to Polyurethane Over Paint
When to Apply Polyurethane Over Paint
The best time to apply polyurethane over paint is after the paint has fully cured.
This way, when you clean and scuff the surface in preparation for the poly, you won’t risk scratching off some of the color.
Most paints take about 2-4 weeks to cure properly, but you have to check the product’s label to get the precise duration.
When it comes to painting, two terms always confuse people – drying and curing.
Some painters use them interchangeably, but it is wrong, and what seems like a minor terminology issue could turn into a big problem.
When we say that paint is “dry,” it has lost its tackiness and won’t rub off when you touch the surface.
Most paints usually need at least 24 hours to dry correctly, although a few “quick-drying” products take a shorter time.
At this stage, the paint feels hard on the outside, but it is still tacky underneath; hence it needs more time to harden.
If you clean or scuff the paint film at this point, there is a big chance that you will take off some color, which won’t look good after you apply the polyurethane.
Even if you manage to clean and scuff the paint film, the polyurethane will not go on as well as it would on a cured film.
Some parts of the wet paint may mix with it and cause it to become colored, which is not a good final look.
Adding the polyurethane may also cause the whole finish to take too long to dry, thus delaying your project further.
On the other hand, we say the paint is “cured” if it has reached its final stages of hardening, and there can be no more changes to the paint film no matter how much time passes.
Some paints achieve this in as little as two weeks, while others can take up to a month to be ready.
I recommend that you wait until the paint has cured because then, you will have the freedom to clean and scuff as you like without the risk of messing up the finish.
Remember, the freedom to clean and scuff doesn’t mean you should scrub too hard because you can still accidentally scratch off some color.
Can You Put Polyurethane Over High Gloss Paint?
You can put polyurethane over high gloss paint, provided you allow the paint to cure fully, and you clean the coat before applying it.
Like with regular paint, you can use either water- or oil-based polyurethane, but remember that oil poly turns amber over time; thus, it will alter the paint color.
So, if all you want is a bit of extra protection for your paint, use water-based polyurethane but if the potential color change doesn’t bother you, go for oil-based polyurethane because it is more durable.
We usually apply a protective clear coat over paint to make it more durable and to add a little shine to the coat.
However, high-gloss paints cure with a brilliant sheen without needing a clear coat, and they are more durable than other kinds of paint.
So why would someone want to apply a protective coating like poly over paint that doesn’t need it?
The main reason people give for using polyurethane over gloss paint is that they want to get rid of the gloss. I know it seems impractical, but it is doable.
You see, sometimes you may make up your mind that you want a glossy finish for your piece only to realize that the gloss doesn’t look as good as you imagined.
At this point, your best option is to strip the paint and start over with a different product.
However, it is also expensive and time-consuming, so painters found a more efficient way to get rid of the gloss – applying a clear coat with a lower sheen.
When you apply a clear coat over paint, the final look of the finish will depend on the finish of the clear. So if you use a satin clear, the finish will be satin, and a matte clear will dull the paint sheen.
So, in this case, applying a clear polyurethane coat with a low sheen will get rid of the gloss while adding extra protection to the paint.
Even though you can apply polyurethane over high gloss paint, you need to remember that it doesn’t adhere well to glossy surfaces.
For this reason, you must get rid of the shine before applying the poly to achieve a flawless look on high gloss paint. So how do you remove the shine on high gloss paint?
There are two main ways to dull a glossy finish – using sandpaper or a liquid sander/deglosser.
We use high grit sandpaper (220 and above) to scuff the paint to remove the shine and promote a strong bond between the old coat and the polyurethane.
Failure to dull the shine pre-painting will cause peeling problems in the future.
On the downside, sanding can be time-consuming and tiresome, especially if you are working on a large surface like a wall, and this is where the liquid deglosser comes in handy.
A deglosser is a chemical that we use to prepare surfaces for liquid coatings application by removing anything that may interfere with adhesion – in this case, shine.
The chemical destroys the smooth finish, making it rough enough for the coating fluids to grip. Moreover, it removes sheen without you having to put in the effort required for manual sanding.
It also works in a short time – around 10 minutes – making it perfect for projects that you want to finish quickly.
After cleaning the glossy finish with soap and warm water, allow it to dry, then degloss it using the procedure below:
- Pour a generous amount of liquid deglosser on a coarse lint-free towel, then use it to rub the surface in circular motions. Fold and saturate the towel continuously to avoid re-depositing dirt back to the surface.
- Let the paint surface dry for about 10 minutes, then make a second pass if some surface parts are still shiny.
Types of Polyurethane You Can Apply Over Paint and Their Drying Time
The two types of polyurethane you can apply over paint are water-based and oil-based. They each have different properties that make them dry at different rates, and I’ve discussed them below t help you understand.
-
Oil Based Polyurethane Dry and Cure Time
Oil-based polyurethane uses petroleum products and minerals as solvent bases to make them durable. However, these components also make them thick hence they take longer to dry.
Generally, oil-based polys take between 6-10 hours to dry enough to accept a second coat. However, if you want a more flawless application of the subsequent coat, I recommend waiting 24 hours.
When it comes to curing, most oil polys take up to 30 days, but a few quick-drying products will cure in 21 days.
If you were painting an area that experiences constant foot traffic, I recommend waiting 48 hours before you can subject it to light traffic because the coating will be hard enough to resist scuffs.
However, it is best to wait the full 30 days for it to cure completely before putting your space or item to full use.
-
Water Based Polyurethane Dry and Cure Time
Water-based polyurethane uses water instead of minerals as its solvent; therefore, it is much thinner than oil polys. As a result, you get lighter coats that dry quickly.
The water base also contributes to the quick drying time because water evaporates faster than mineral solvents.
Generally, most water-based polyurethanes dry enough for a second coat in 2-4 hours.
They are usually ready for light traffic within 24 hours, but it is always best to give them three weeks to cure before putting your items to full use.
How to Speed Up Polyurethane Drying Time
If the drying times mentioned above seem too long, you can use the methods below to speed up the drying process.
However, I recommend that you only turn to these methods when you think it is absolutely necessary because you will only achieve the best results if you allow your poly to dry naturally.
-
Purchase a Quick Drying Product
The drying times mentioned above are standard for all polyurethanes. However, manufacturers have started creating quick-drying formulas to solve the waiting problems.
These new polyurethanes are a little more costly than the regular ones but only by a few cents.
If you cannot find a quick-drying formula, I recommend that you try and find products labeled as “high-build.”
With these products, you can achieve maximum protection using only one coat; hence, you won’t have to wait long for several coats to dry.
-
Apply Some Heat
Using heat is an excellent way of reducing the drying period of polyurethane. You can use a hair drier or a heat lamp, but the method I recommend is using your home heating system.
When you use a hair drier or lamp, you will only concentrate the heat on one spot at a time.
You may eventually dry the whole surface, but the different spots will not dry at the same rate.
Therefore, your finish will dry unevenly and cause problems in the future.
On the other hand, the home heating system will heat the space more evenly; hence the finish will dry evenly.
You can even set the temperature to match the numbers that manufacturers say are optimum when there are fluctuations.
Can You Put Polyurethane Over Acrylic Paint?
You can put polyurethane over acrylic paint because it is a clear protective coating, and acrylic paint finishes need extra protection. When acrylic paint dries, it leaves a softer exterior than standard latex or oil paints.
For this reason, it attracts dirt and dust easily. As a result, the finish will look dull, and you’ll be forced to clean the paint film all the time, which is a tiresome task.
By adding an extra layer of clear coat, you will be protecting the paint hence prolonging its lifespan.
Usually, painters prefer applying wax over acrylic paint because it protects the surface while maintaining the soft outer look.
However, finishing wax does not last long. It wears out in a year or two; therefore, you have to reapply it consistently to maintain the protective film over the acrylic paint.
Painters who want to avoid constant maintenance opt to use polyurethane because it is more durable than wax; hence there is no need for constant reapplication.
As long as you apply it at the correct time and follow the proper application procedure, polyurethane can last for years over acrylic paint.
The best kind of polyurethane to use over acrylic paint is water-based because it dries fast and will maintain the paint’s actual color.
Oil-based polys work as well, and they are even more durable than water-based ones. However, I only recommend using them if you have painted with acrylic paint in a dark color.
You see, oil polys turn amber over time, so if you use them over a light color, it will ruin your finish’s intended hue.
How Many Coats of Polyurethane Should I Apply Over Acrylic Paint?
The number of coats of polyurethane you’ll need to apply over acrylic paint will depend on which type you are using.
If you’re using water-based polyurethane, you will need three coats minimum to achieve the best level of protection.
You may need to increase the number to four or five if you’re painting a high-traffic area or a high-touch surface.
You need more coats of water-based polyurethane because its formula is lighter.
It has fewer solids; therefore, you need the extra coats to build up the kind of protection the acrylic paint needs.
On the other hand, oil-based polyurethane has more solids; therefore, you can build a protective layer with fewer coats.
Two coats are often enough for all surfaces, but you might want to increase the number to three in high traffic areas and high touch surfaces.
You can apply more coats of oil-based polyurethane, but you need to remember that its yellow tint will become more noticeable with every layer.
Moreover, every manufacturer might have different recommendations for their product regarding the number of coats, so always read the product label to be safe.
Why Should You Add Polyurethane to Acrylic Paints?
Manufacturers formulated acrylic paint to become more water-resistant as it dries.
You can clean it up easily when it is fresh, but you will need more abrasive methods to get rid of the mess once it hardens.
The fact that it gets harder to clean up with time should mean that it doesn’t need extra protection, but painters are making it a tradition to apply polyurethane over acrylic paint.
So, why should you add polyurethane to acrylic paints?
-
To Brighten Up the Color
When you apply acrylic paint, the color looks vibrant while still wet. However, after it dries, the color seems to lose some of its boldness, causing the finish to appear dull.
Applying polyurethane over the paint is one of the best ways to return the color to its intended hue.
As long as you use proper application techniques and use the correct type of polyurethane, the color will stand out just like you intended.
-
To Maintain Color and Shine
Apart from looking dull when dry, acrylic paint also develops a soft velvet-like exterior. As a result, it attracts lots of dust and dirt, which causes the color to look even duller, especially if you allow the dirt to build up.
When you apply the polyurethane, it keeps off the dust which helps keep the paint looking amazing.
Moreover, if dirt falls on the poly, you can easily clean it up several times without compromising the paint color.
Polyurethane also provides excellent protection against UV rays, one of the most notorious causes of paint fading.
-
To protect the finish
The dried film of acrylic paint may be water-resistant, but it is still soft and prone to abrasions and scratches.
Therefore, applying a protective film that can withstand damaging elements better than the paint is necessary. Polyurethane is the best product for the job.
How Long for Acrylic Paint to Dry Before Polyurethane?
Acrylic paint dries pretty quickly and is usually ready for a second coat in 30 minutes to 1 hour.
You can use this recoat period as a guide when applying polyurethane, but I recommend waiting 24 hours for the best results.
That would be enough time for the paint to have hardened enough to apply the poly without ruining the color.
Even though 24 hours is appropriate, the method you use to apply the polyurethane can dictate whether you apply it before the 24 hours elapse or after.
If you are spraying on the polyurethane, you can apply it after the acrylic paint has dried for about four hours.
However, if you are brushing or wiping it on, you should wait for 24 hours to pass or wait until the next day to apply it.
Spraying allows you a shorter waiting window because you won’t touch the surface when applying the polyurethane.
So, even if the paint surface is dry while the bottom is still wet, there is no chance of messing up the finish.
On the other hand, it is best to wait longer if you wipe or brush on the polyurethane because these are more hands-on methods.
Any wrong move while the paint is still wet could smudge or rub it off, and you would have to start from scratch.
How to Apply Polyurethane over Acrylic Paint
The steps are:
Step 1: Wash the Painted Surface
Before applying the protective coat, you must always wait for acrylic paint to become smudge-proof.
In that waiting period, dust and debris may have settled on the paint coat; therefore, it is essential to remove them before proceeding.
If you apply the polyurethane on a dirty surface, you will seal it in the dirt, and the specs will show after the finish cures.
- Combine some warm water with a mild soap in a bucket.
- Dip a clean cloth into the mixture, wring out the excess, then wipe the acrylic painted surface.
- Use very little pressure when wiping to avoid removing some color.
- Once the whole surface is clean, rewipe with another cloth dipped in plain water to eliminate all soap traces.
Step 2: Scuff the Surface.
Next, use 220-grit sandpaper to scuff the paint surface lightly. Remember that acrylic paint is waterproof but can still be scratched off; therefore, use very light pressure as you sand.
After sanding, use a clean cotton cloth to remove the sanding dust before proceeding.
Step 3: Apply the Polyurethane
You can utilize two methods to apply polyurethane over acrylic paint – Spraying and brushing. I recommend brushing because it will give you better control, but spraying will get the job done faster.
Moreover, you can apply the polyurethane sooner if you spray than if you use a brush.
If you are using a brush:
- Choose a synthetic bristled brush if you use water-based polyurethane and a natural bristled brush for oil-based polyurethane. It is essential to use the right brush to avoid messing up the application.
- Apply the polyurethane in long strokes going in the same direction. Also, remember to overlap each stroke to avoid leaving parts of the painted surface uncovered.
- Also, do not load the brush with a lot of product, or you will lay down a thick layer that will take ages to dry. Thick layers also increase the possibility of the finish developing white streaks as it dries, which is not a good look.
If you prefer spraying:
- Test spray the poly on another surface to ensure that your sprayer isn’t clogged and ensure proper product flow.
- Hold the sprayer about 10 inches from the surface, then spray in consistent back and forth motions.
- Ensure to overlap each spray pass to cover the whole surface.
Allow the first coat to dry for the period specified by the manufacturer before applying the second one. Also, remember to sand between coats to ensure maximum adhesion for best results.
How Long Does Polyurethane Take to Dry On Paint?
The time that polyurethane will take to dry on a painted surface will depend on how dry the paint is in the first place.
If you wait for the color to cure completely – as recommended – the polyurethane will dry in the time frame indicated by the manufacturer.
The reason is that cured paint has already hardened all through; thus, when you apply the polyurethane, it will be like painting on a regular solid surface.
If you allow the paint to cure, water-based polyurethane will take 8 hours to dry between coats and 24 hours to dry to the touch.
Your painted item or space will be ready for light use in 2-4 days, but you will have to wait 21 days before heavy use. This is when the poly will be fully hardened.
On the other hand, oil-based polyurethane will take 24 hours to dry between coats and 48 hours to dry to touch.
You can use the space or item in about five days, but you have to wait a month fr the poly to cure before heavy use.
You can apply the polyurethane sooner if you can’t wait weeks for the paint to cure.
However, you have to be more cautious in your application approach, and you may have to wait longer for the polyurethane to cure. Here’s the reason.
When you apply polyurethane over paint that isn’t cured, you’re adding more layers of another wet product.
As a result, the layers of paint underneath will take longer to dry because the solvents need to travel a greater distance before evaporating.
If you must apply polyurethane over paint that isn’t cured, I recommend that you use spray-on products.
The reason is that they will leave thin layers, which will not have much effect on the drying time of the paint.
Moreover, you won’t mess up the paint job because you will not touch the surface before it is ready.
Factors Affecting the Dry Time of Polyurethane
Manufacturers always recommend appropriate drying times for their products. However, these recommendations are not set in stone.
Some external factors influence the drying times, and the manufacturers only provide estimates based on these factors being at optimum.
-
Temperature
Manufacturers always base the drying times of their polyurethane on a standard 70℉.
If the temperatures during application go higher, the drying time becomes shorter because the solvents in the polyurethane will evaporate faster.
When temperatures go down, reaching below 65℉, the solvents in the polyurethane will evaporate more slowly. As a result, the product will take longer to dry.
If temperatures drop too much, reaching 55℉ and below, the solvents in the poly will not evaporate at all. Instead, the applied coat will remain tacky until the temperature rises again.
Therefore, if you want your product to work exactly as indicated on its label, you must ensure that the temperature during applications matches what the manufacturer suggests as optimum.
-
Humidity
Many people overlook this, but humidity levels in your location also impact the drying time of polyurethane, just like temperature. Humidity is the amount of water in the atmosphere at a given moment.
When there is high humidity, there is a lot of moisture in the air. This high water content makes it difficult for the air to absorb the evaporating solvents from the polyurethane.
As a result, the polyurethane coat will remain tacky for longer and can stay that way for up to 12 more hours than the indicated drying time.
On the other hand, low humidity means that there is almost no moisture in the atmosphere; hence the air will take in the evaporating solvents much quicker. As a result, the polyurethane will dry faster.
-
Method of Application
You can apply polyurethane with a spray gun or a paintbrush, and both methods impact the dry time of the product differently.
Brushes pick up more product; therefore, they leave thicker coats that will take time to dry. On the other hand, spraying leaves thinner layers that dry quickly.
Even though brushes pick up more product, you can use some techniques to pick up less product and lay down the layers thinner.
The primary technique that professional painters use is dipping only 1/4 inch of the brush bristles into the product and tapping off the excess.
Once you perfect this technique, you won’t have to worry about thick coats.
You can purchase specialized wipe-on polyurethane products if you want thinner layers without dealing with brushes or sprayers.
They leave thinner layers and dry even faster. However, these types of polyurethanes are only suitable for smaller projects.
-
Ventilation
Ventilation is essential, especially when you are applying polyurethane indoors. If you work in a room without proper ventilation, the drying time of the poly will be longer even if the temperature and humidity are at an optimum. Let me explain.
If the temperature and humidity levels are okay, the polyurethane solvents will evaporate at a normal rate.
But since you are indoors, the air in the room will soon be saturated, and the only way to do that is by increasing airflow.
Excellent airflow will ensure that fresh air circulates in the room, and as the air circulates, it will take up the evaporated solvents and pushes them outside.
The quickest way to improve ventilation in a room is by opening doors and windows.
If this does not work, you can switch on a fan at low speed to boost the airflow.
I insist on running the fan at low speed because high speeds could raise dust around the project, and it will settle on the drying polyurethane.
Conclusion
Today, polyurethane is the most durable protective coating, and painters use it to protect vulnerable surfaces like wood.
Paint is also a protective and decorative coating, but it is not as durable as polyurethane; therefore, it does not last as long.
For this reason, painters have been wondering if it is possible to protect the paint with polyurethane. Hence the burning question remains…
Can You Put Polyurethane Over Paint?
It is possible to apply polyurethane over paint provided you allow it to cure correctly- which could take up to a month.
If waiting a month is too long, you can wait for the paint to dry enough for light traffic, then apply the polyurethane carefully.
Both oil-based and water-based polyurethane works well on paint, but they have a few differences.
Water-based poly dries quickly and is environmentally friendly, but you must apply up to 3 coats to achieve maximum protection.
On the other hand, oil-based polyurethane is more durable, and its thick formula gives you maximum protection with a few coats.
However, it turns yellow over time, which messes up the paint color; therefore, only use it if you don’t mind the potential color change.