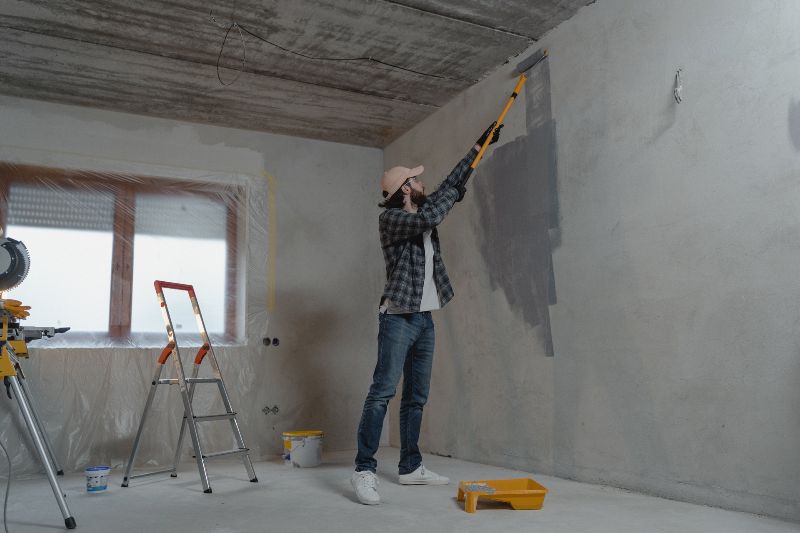
What is concrete painting? What’s the secret to this timeless craft? Why do we choose to paint concrete ahead of other available options?
First, we choose concrete because it is an economical and sturdy building material that can withstand heavy usage for many years. However, it has a basic plain look, and when left untreated and exposed, it is susceptible to moisture and stains.
Concrete is also vulnerable to chemical spillages, fires, and carbonation risks.
The above elements cause massive alterations in the strength and look of concrete structures. They cause the concrete to break down over time, leading to dusting, blistering, cracking, spalling, and even delamination of the surface.
One of the best ways to curb these potential problems is by painting the concrete. So, back to our subject of discussion, What Is Concrete Painting?
Concrete painting is a treatment that adds durability to the material and visual appeal to the surface. It is a treatment done after concrete cures, and it delivers long-lasting and reliable protection and preservation. Concrete painting is also a cost-effective method of adding personal style to whatever you build.
The product used for this treatment is called concrete paint. It comes in different varieties, and you will have to choose the right products depending on the location of your concrete structure, its current physical state, and the type of abrasive element you are trying to keep away.
In this article, I’ve discussed in detail everything you need to know about concrete painting – the products you need, the correct techniques to use, and how to take care of concrete structures in general.
What Is Concrete Paint?
Concrete paint is a liquid made specifically for application on concrete surfaces. Its primary purposes are to ensure that the concrete stays protected from damaging elements and make it look pleasing to the eye.
The formula of concrete paint includes four essential ingredients – pigments, resin/binder, a solvent, and an additive. The pigment, binder, and additives are solids, while the solvent is the liquid component.
- Pigments are finely ground insoluble particles that provide color to concrete paint. They determine the bulkiness of the paint and how well it can hide imperfections on the surface. Concrete coatings with higher pigment percentages provide better surface coverage than those with little pigment.
- The binder, aka resin, is the component that holds the paint pigments together to form the hard protective film on the surface. It determines how sturdy the paint film will be and how well it will adhere to the surface. Resin also influences the washability of the cured paint film and how well it retains gloss over time.
- Additives are components that add specialized functions to concrete paints. You can find concrete paint with a slip-free formula and another made to prevent corrosion in reinforced concrete or block UV rays.
Not all concrete paints contain additives. The few that do cost a bit more even though the additive portion is smaller than the other ingredients.
- The solvent is the liquid medium in which all the other ingredients stay suspended. It also makes it easy to carry all the solids from the paint container onto the surface. Nevertheless, the solvent plays no role in the durability or beauty of concrete paint. Instead, it evaporates to leave behind the sturdy, colored film containing resin, pigment, and additives.
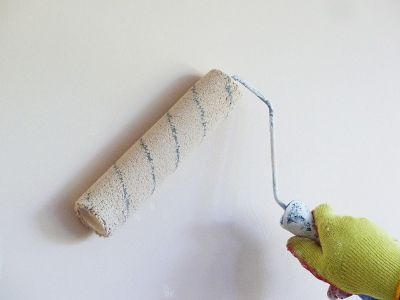
You can apply concrete paint using either a brush or a roller. For an average concrete painting project, I recommend using a roller to color the main surface of the material.
Rollers provide more even coverage, and as a bonus, they speed up the whole process. You can use brushes alongside the rollers for cutting in the paint and coloring edges and corners of the concrete,
There are different types of concrete paints, each with a unique formulation to provide the best protection for concrete surfaces. Some work best on walls and interior concrete floors, while others are better suited for high-impact areas such as concrete driveways.
You can choose whichever type you want for your project, but first, you need to understand what makes them different to help you select the best concrete paint for your particular project. So, let me explain it to you.
Types Of Concrete Paint
 Here are some of the types of concrete paints:
-
Epoxy Paint
Epoxy paint is the sturdiest and most durable paint type that works amazingly on concrete structures. It creates a shiny surface that is hard enough to resist moisture, corrosion, chemical spillages, and excessive heat.
Furthermore, it comes in various colors, so it is easy to find a shade that suits your style. It is also versatile; hence you can use it for commercial and residential projects.
Epoxy concrete paint comes either as a one-part system or a two-part system.
- Two-part epoxy paint comes as a kit containing a resin and a hardener. You have to mix these components in equal parts to make the formula you apply to the concrete. This paint type is the most durable of the two because of the hardener that you add to it. The hardener improves the adherence of the epoxy resin and triggers a reaction that allows the coating to cure into a more rigid coat than its counterpart.
- One-part epoxy paint is standard acrylic latex paint with epoxy added. It creates a vibrant and rigid paint film on concrete, but it is not as durable as the two-part system. This type is better than standard acrylic latex paint because the epoxy addition makes it adhere better to surfaces. Consequently, it will stay on for much longer, so you won’t have to worry about repainting constantly.
On the downside, epoxy concrete paint requires a long time to prepare, and it takes even longer to apply it correctly on the surface. It also becomes slippery when wet; therefore, It is best to avoid spilling liquids on it or using it in areas prone to liquid spills.
Furthermore, it is challenging to remove epoxy paint or change its color once it is on the surface. The task would be labor-intensive and will cost you a lot of money.
-
Acrylic Latex Paint
Acrylic latex paint is the highest quality latex paint available on the market today. It uses an acrylic resin as its binder, which gives it high adhesive quality, durability, and resistance.
These qualities of acrylic latex paint make it an excellent choice for painting surfaces like concrete that require superior resistance to damaging elements.
This type of concrete paint dries faster than the epoxy type and is resistant to yellowing over time. The acrylic in its formula makes the resulting paint film flexible to withstand extreme temperature fluctuations.
As a result, acrylic latex paint won’t peel, chip, or crack easily upon application to concrete.
Acrylic latex paint is water-based, meaning it uses water as the solvent. The lack of chemical components makes it environmentally friendly because it does not produce fumes and odors as you use it. Moreover, you can easily clean your paintbrushes and rollers with soap and water after using this type of paint.
Even though acrylic latex paint works amazingly on concrete surfaces, it is less durable than its epoxy counterpart.
Your concrete will require a recoat faster, especially in places with constant traffic; nevertheless, if you are on a budget, this type of paint will work just fine because it is more affordable than epoxy paint.
How to Choose the Best Paint for Your Concrete
You need to put the following into consideration to get the very best when choosing the paint for your concrete structure. With the right choices, you will have paint that protects your surface for an extended duration.
-
Location of Your Surface
Your concrete surface’s location will play a significant role when scouting for the ideal product to use. For example, some concrete paints will not perform efficiently outdoors like they would on indoor surfaces.
So always go for a product labeled “exterior-grade” whenever you are painting exterior surfaces like driveways, and stick to “interior-grade” paints for indoor surfaces.
Some paints, such as two-part epoxy, will not work well on vertical surfaces like walls. These paints are heavy, a characteristic that causes them to run down a wall before they can dry properly.
Do not get me wrong, two-part epoxy will eventually dry on a wall, but you will end up with a paint film that looks streaky and uneven.
-
Weather Resistance
Exterior concrete surfaces experience fluctuating weather conditions throughout the year. They “bake” during hot summers and freeze during the winter, which accelerates the wearing out of the concrete.
For this reason, it is best to go for an exterior grade paint that has some extra weather-resistant additives in its formula. The color will withstand the constant weather changes, thus providing efficient protection for your concrete.
-
Color
The paint color you choose will solely depend on your personal preferences. It will revolve around whether you like subtle dark tones or super bright colors.
Furthermore, it will also hinge on whether you want your concrete walls or floors to compliment the rest of your home decor or stand out. Even the most subtle contrasts or matches in color will transform the whole look of your space.
-
Price
You can never ignore the price of a paint product because whatever you buy will depend on what you set aside for the project. Even though concrete paints have similar functions, some are pricier than others, but why is that?
Two-part epoxy will cost more than one-part epoxy because it comes as two products and offers better protection. Paints with additives like UV block, slip resistance, and waterproofers will cost more than products without additives.
These subtle differences cause the price contrast, so be sure to check all products thoroughly to get the best concrete paint within your budget.
Why Is Concrete Painted?
The main reason for painting concrete surfaces is to shield them from elements that would damage and shorten their lifespan. As a bonus, the paint also improves the dull look of concrete, improving the look of your space.
The following is an in-depth look into all the reasons that make it necessary to paint concrete surfaces.
-
To Rectify Imperfections In the Concrete
The look of raw concrete is not always appealing. The final appearance of concrete is often tainted with marks and streaks caused by curing compounds, mortar smears, and other unavoidable onsite damages. These imperfections are hard to ignore, especially in areas frequented by people, and some even cause the onset of concrete deterioration.
You can use several coatings on concrete surfaces, but they usually do not hide these imperfections, so it is always best to color them.
-
To Prevent Spalling
Fresh concrete is highly alkaline, a characteristic that allows it to prevent any reinforcing steel from corroding rapidly. However, uncoated concrete quickly absorbs moisture and carbon dioxide, which neutralizes the concrete, thus lowering its alkalinity.
The neutralized concrete will allow the steel reinforcements to form an iron oxide corrosion, a by-product that occupies over five times the original volume of the steel.
The increase in the steel’s volume creates stress within the concrete, and with time the material will start to crack around the steel.
Painting your concrete with suitable products will prevent moisture and carbon dioxide from penetrating the surface. As a result, the neutralization will not occur, thus preserving the high alkalinity of concrete.
-
To Increase Aesthetics
Painting concrete adds color and light and imparts a sense of warmth and elegance to a space. A pleasing finish will make you feel differently about your area, so you can always paint concrete to change things up around you.
-
To Resist Chemical Attacks
As sturdy as concrete is, it is sensitive to acidic chemicals that make it deteriorate faster than usual. Most foodstuffs and some beverages may seem harmless, but they are slightly acidic and eventually cause concrete to wear out.
Even sugar can cause concrete structures to fail, so it is always best to apply some paint to protect the concrete.
How Long Does Concrete Paint Last?
Epoxy concrete paints in residential areas can last up to 30 years because we don’t subject them to high-impact activities. Industrial applications will need a retouch after 5-10 years because they experience higher rates of foot traffic, chemical spills, and other things that make epoxy wear out faster.
On the other hand, acrylic latex paint can last between 3-10 years, depending on where you use it. This paint will last longer on interior walls than if you use it on an exterior surface.
The reason is that interior walls stay protected from the harsh environmental elements, which in turn cause the paint to last longer.
Signs that It Is Time to Repaint Concrete
Even though concrete paint lasts and protects the surface for a long time, it will eventually wear out, and you will need to apply a fresh coat. The time it takes for the paint to deteriorate depends on the type of paint and the location of the concrete structure.
Furthermore, the surfaces will not show similar signs of wearing out. So how do you know when your concrete is ready for a repaint? Here are three signs that it is time to repaint concrete.
-
There Are Visible Cracks On the Paint Coat
Concrete paints are elastic; they expand and contract with the surface as they adapt to changing environmental conditions. However, the flexibility of the coating wears down with time, and as a result, the constant shifts make the paint crack.
It is best to repaint the concrete immediately you start noticing cracks in the paint. If you let the crevices stay longer, they will increase in size and allow moisture, dirt, and other harmful elements to attack the concrete. As a result, the concrete will incur several damages.
-
Stagnant Water
If your painted concrete floors start to be consistently damp or if cleaning liquid spills becomes more challenging, it is a sign that you need to repaint.
Stagnant water is always a consequence of the paint coat wearing out. With the paint deteriorating, the concrete is no longer adequately sealed. As a result, it will absorb moisture and retain it, causing irreparable damage.
-
The Paint Is Peeling or Bubbling
Peeling or bubbling paint is often a sign of poor concrete preparation before painting. For instance, if you paint the concrete while it is still wet, the coating products will not adhere well to the surface, and after a while, the paint will peel.
Another scenario is if you paint on concrete with dust particles or oil spills. These impurities will also affect the adherence of the paint coat, causing it to bubble and eventually peel off the surface.
In all the above cases, you cannot just put a fresh coat on the old paint and expect good results – they are problems that stem from the foundation of the paint film. So the best way to deal with the issue is to remove the ruined paint, prepare the surface properly then put on the fresh paint.
Pros and Cons Of Painting Concrete
Painting concrete surfaces is an affordable method of protecting them and improving their look. However, like most things, painting concrete has its pros and cons. Understanding both sides of the spectrum is crucial to know if painting is the way to go for your particular project.
Pros Of Painting Concrete
They include:
- Painting Makes It Easier to Clean Concrete
Cleaning floors is necessary to keep your space in pristine condition; however, the task becomes more challenging if you have bare concrete floors.
Regular sweeping of uncoated concrete floors causes small particles to break off from the material forming concrete dust. The dust accumulates after a while and will settle on furniture, window frames, and other things in your space, making cleaning more difficult.
When you paint your concrete floors, the paint film will prevent the particles from breaking off the surface and forming dust. This way, you will be able to sweep, vacuum, and mop concrete floors without much hassle.
- Paint Insulates the Concrete
Extreme temperature changes always cause concrete surfaces to crack. When you paint it, you add additional insulation over the material. Consequently, the constant change from heat to cold will not affect the concrete as much as before, reducing the chances of cracking.
- Paint Makes Garage Floors Spill-Proof.
There are high chances of spilling oil, grease, and other liquids in your garage. If you have a bare concrete floor, it will absorb the fluids, which will, in turn, leave ugly stains on your surface.
Such floors always require you to lay down a form of protection daily before work to prevent spills from damaging the concrete.
When you paint concrete, the paint film will catch all your spills. This way, the liquids will not mess up the surface. Furthermore, you can easily wipe off any liquid on the paint better than bare concrete.
- You Can Choose Any Style You Want.
Concrete paint manufacturers make them in different colors, shades, and sheens. You can personalize your space by painting concrete with your favorite colors or matching the colors to your current decor.
Cons of Painting Concrete
Some of the limitations with concrete painting include the following:
- Painting Concrete Is Costly.
The process of painting concrete requires special attention to get it right the first time. I always recommend hiring a professional to do the job to get it right. However, professional services often cost a lot of money, leaving a dent in your pocket. Furthermore, some concrete coating products, such as epoxy paint, are expensive, adding to the overall cost of painting the surface.
- The Process Takes Too Much Time.
Before painting concrete, you need to make sure that it is free of moisture, dust, and bumps. In some cases, you may need an acid-etch to prevent the paint from peeling or chipping. All these preparation methods take a lot of time to complete.
The actual painting also requires a lot of patience. You need to apply two coats of primer, then two coats of paint, and you have to wait for individual layers to dry before the next. This issue, combined with the long drying time of concrete paint, contributes to the lengthy process.
- It Is Hard to DIY
Most of the preparation steps before painting concrete require chemicals that need special handling. Your surface may also need significant repairs that you must do properly so that the paint coat comes out flawless.
Most of these preparation steps are hard to get right, especially if you are painting concrete for the first time. On account of this, it is always best to leave the concrete painting to professionals.
- Hard to Touch Up
Painting concrete for the first time is necessary and breeds good results. However, the paint will not stay in good condition forever, so you will have to touch it up from time to time to keep it fresh.
Repainting concrete is not that hard, provided the old paint hasn’t cracked or peeled. Once concrete paint gets badly damaged, you will have to strip the color to the bare concrete and start again.
Removing old paint from concrete is not an easy task. You will have to be constantly alert to signs of damage so that they do not become too much to handle without stripping.
Paint Comparison
Concrete paint and paints made for other substrates such as metal and wood have similar components in their formula. They all contain the usual pigments, binders, and solvents, and a selection of them have special additives.
You may wonder, if they all have the same components, do all paints work the same? Can you use any other paint type on concrete? or can you use concrete paint on another substrate?
Despite the similarity in ingredients, each paint type has a few additional components that make them uniquely suited for their specific substrate. Some are versatile; therefore, you can use them on different surface types without repercussions.
On the other hand, some paints are very substrate-specific, so you will get devastating results if you use them on other surfaces.
Let me break it down for you:
Concrete Paint Vs Wood Paint
Similarities
- Concrete and wood paint have similar functions because manufacturers created them to protect their substrates. Moreover, the pigments they contain hide flaws and decorate the surface simultaneously.
- Both paint types are versatile; hence you can use them on different surface materials. However, you need to follow preparation steps unique to each substrate to achieve the best results. For example, you can apply wood paint or concrete paint on metal surfaces, but you have to use a special metal primer first to keep the metal from rusting.
 Both concrete and wood paints have elastomeric properties meaning they expand and contract with the substrate as temperature changes. This feature gives the color and the surface a longer lifespan because they resist cracking.
Differences
- Concrete paints are breathable – meaning they allow water vapor in and out of the substrate without trapping it or affecting the integrity of the structure. This feature makes them perfect for masonry because such surfaces need to “breathe” to stay intact.
On the other hand, wood paints are impermeable – meaning they completely seal out moisture from getting into or leaving the wood. This feature makes them perfect for wood because it swells when it absorbs too much water. Moreover, wood can also lose a lot of moisture which would cause it to be brittle.
- Concrete paints contain more solids than solvents which makes them stronger. Manufacturers formulate them like that because concrete structures experience the most abuse, requiring better protection.
On the other hand, wood paints have fewer solids than concrete paints. Most wooden structures only get affected by the environment, so manufacturers created coatings that withstand harsh weather. Exterior grade wood paints can withstand some abuse, but they still are not as strong as concrete paints.
- Concrete paints cost a lot more than wood paints. They have several special additives that ensure concrete structures like patios and driveways can withstand the constant high impact forces they experience. Some wood paints also have additives, but they do not cost as much as concrete paints.
So What Happens When You Use Concrete Paint On Wood or Wood Paint On Concrete?
Using wood paint on concrete will give you good results, but the paint will start to deteriorate in a short while. The color may only last for a few weeks in high traffic areas such as driveways or concrete floors in commercial and industrial buildings. Wood paint may last longer on concrete walls, but moisture will soon ruin it because it is not breathable.
On the other hand, concrete paint will also produce good results on wood, but I recommend only using acrylic latex paints instead of the epoxy types.
Epoxy paints are not elastomeric; hence they won’t move with the wood as it shifts with temperature changes. Consequently, the paint film will crack after a short period exposing the wood to damaging environmental elements.
Concrete Paint Vs Metal Paints
Similarities
- Both metal paints and concrete paint perform similar functions – protecting and decorating surfaces. Both metal and concrete surfaces require constant protection from moisture and UltraViolet radiation. They also require shielding from external impacts that could compromise the integrity of the material.
Both concrete and metal paints shield their respective surfaces from the elements. As a bonus, the paints’ pigment covers flaws and leaves the surface looking beautiful.
- Both paint types come in varying colors, so you can always choose your favorite color in different shades. They also have different sheens, which allow you to customize your surface as you like.
- Both paints require substrate-specific primers to provide better protection for the surfaces. Metal surfaces need a metal primer to prevent rust, and you have to make sure that it is compatible with the metal paint you have. On the other hand, you need to apply a concrete/block primer on concrete surfaces to even out the surface and fill out pores before applying the paint.
- Concrete and metal paints are very durable. They both protect vital building materials, so manufacturers made them strong to withstand harmful elements for longer.
Differences
- Manufacturers package metal paints either in containers or spray cans. The products that come in containers are often thicker, but you can thin them down to a consistency that will allow you to use them in a spray gun. The spray versions are often runny to make it easy to pass through a spray nozzle.
On the other hand, concrete paints only come in containers. They have a very dense formulation that makes them hard to use in paint sprayers. Moreover, unlike metal paints, it is harder to thin down concrete paint, so I recommend using brushes or rollers to apply them,
- Concrete paints are breathable; hence they allow water vapor to pass freely through the substrate without the risk of trapping it. On the other hand, manufacturers make metal paints impenetrable to prevent water from contacting the metal.
So Can You Use Concrete Paint On Metal or Metal Paint On Concrete?
You can use concrete paint on metal but not directly. Metal surfaces are sensitive to moisture in paint; hence you need to apply paint made explicitly for metal to be safe. If you must use concrete paint, I recommend using concrete epoxy paints. Furthermore, ensure that you apply a special metal primer before applying the paint.
Metal coatings are trickier to apply on concrete surfaces. The primer you use before metal paint must be compatible for the coating to last.
There is no guarantee that a metal primer will work well on concrete, and a concrete primer will definitely not be compatible with metal paint. Furthermore, since metal paints aren’t breathable, they are prone to moisture ruin from the inside out.
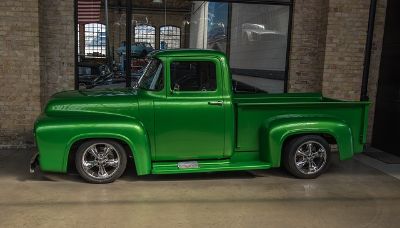
Concrete Paint Vs Auto Paint
 Similarities
- The main similarity between concrete and auto paint is functional – they both protect their surfaces. Most concrete structures are outside, and we use vehicles outside all the time. Because of this, they both need protection from UV radiation, extreme heat, and moisture, which is the primary function of the paints.
- Both paint types allow you to customize your surface as you desire because they come in varying colors and sheens.
- Manufacturers made both paint types durable because they protect surfaces from constant exposure to damaging elements.
- Both paints contain Volatile Organic Compounds (VOCs); thus, they produce harmful fumes as you use them.
Differences
- Concrete paint allows water vapor to pass in and out of the structure without getting trapped within the concrete. This characteristic is known as breathability. On the other hand, auto paint is entirely impenetrable to keep moisture and other elements from ruining your vehicle.
- Car paints have a runny consistency; hence you will need to apply several coats to reach the level of coverage you desire. On the other hand, Concrete paints are denser and can provide sufficient coverage in as little as two coats.
So What Happens When You Use Concrete Paint On Vehicles or Auto Paint On Concrete?
Auto paint will provide ample protection and coverage on concrete surfaces, provided you spray on enough coats. However, since it is impermeable, there is a high risk of the paint bubbling and peeling when moisture rises from below.
On the other hand, concrete paint will also provide ample coverage on vehicles. However, since it is very dense, it will be hard to apply it on cars since you need a paint sprayer to get the job done correctly.
How to Paint Concrete Floor
The steps involved in painting concrete floor are:
Step 1: Scrape Off The Gunk
Sometimes when you are repainting or repairing your walls and ceiling, adhesives, joint compound, and paint may fall and dry on the concrete. It is vital to remove these because they will appear as bumpy spots on the finished paint coat.
- Use a metal scraper to loosen all the paints and adhesives stuck on the concrete floor.
- Next, sweep away all the debris, then use a vacuum to remove any remaining dust particles.
Step 2: Etch the Surface
Etching concrete is the equivalent of sanding wood before painting. It makes the surface rough to give paint enough “tooth” to adhere. Etching also removes all oil traces and any other contaminants on the surface. However, etching concrete requires special chemicals instead of regular sandpaper.
You can use hydrochloric acid to etch your concrete, but it produces harmful fumes, and it can burn you because it is a strong chemical.
I recommend using a powdered concrete etcher for this step. It is much safer than the actual acid, and you only require water to make the etching solution.
- Pour three gallons of water in a large bucket, then empty about one Kg of concrete etching powder into the water.
- Use a wooden rod to stir the mixture and ensure that the powder dissolves completely to form the etching solution.
- Transfer the etching solution into a plastic watering can to make it easy to carry and pour around the work area.
- Next, pour the solution all over the floor. You will see it start to foam and bubble. When that happens, use a broom to scrub the floor and ensure the etcher reaches all corners of the surface.
- Keep scrubbing until the bubbling stops.
Step 3: Rinse the Surface
Once the etcher stops bubbling, use a garden hose to rinse it off the surface. This step will also remove any remaining dust and debris on the floor and dislodge dirt from cracks if any are present.
Once the floor gets clean, allow it to dry for 24-48 hours to ensure that no moisture remains in the structure.
Step 4: Fill Up Cracks
If there are any cracks on your floor, you must fill them up before painting, or they will show through the coat.
- Start by loosening debris in the crack using a screwdriver or any other tool that fits the crevice.
- Once loose, use a shop vac to suck out the debris or blow it out of the crack with your air compressor. Ensure that all the dirt comes out for your filler to adhere well.
- Next, use a backer rod to fill up some crack space before applying filler. A backer rod is a round flexible foam with different diameters to fit into floor cracks of any size. Make sure that you press it deep into the gap for the best results. You can skip the rod if the crevices on your floor are not too deep.
- Once you’ve fitted the backer rod, it’s time to repair the crack with a liquid cement filler. Cut off the tip of the filler container and apply the product on top of your backer rod. Ensure that you slightly overfill the crack to give the filler room to settle as it dries. You can also use a masonry trowel to smoothen the filler after applying it.
The cement filler will take about 30 minutes to dry and up to 24 hours to cure properly. I recommend waiting for the filler to cure before coating the concrete floor.
Step 5: Do A Moisture Test
Before putting any coating on concrete, it is crucial to ensure no moisture remains on the surface. The best way to check this is to do a moisture test.
- Take a piece of plastic paper and tape it down on the floor on all sides. Ensure that there is no opening for air to get under the plastic.
- Let the paper sit for about 2-3 hours, then remove it and check for moisture under it. If the plastic has some water on it, the floor is still damp inside; hence you need to allow it more time to dry. Your concrete floor is ready to paint if the paper comes out dry.
Step 6: Tape Off the Floor Edges
Before applying any product on the floor, seal off the edges of the wall that touch it with painter’s tape. This step will prevent paint from touching and staining the areas you do not intend to paint.
Step 7: Apply A Concrete Sealer.
Sealing concrete floors before painting is necessary because it prevents moisture from coming up through the floor and ruining your paint. Concrete sealants are usually expensive, but they are the only way to keep dampness away from your paint job.
- Use a paintbrush to “cut in” the areas of the floor bordering the wall. Do this all around the room, then begin to fill in the “body” of the floor using a roller.
- Always start at the wall farthest from the door and work towards the exit to not find yourself painted into a corner. You don’t want to step on the sealer before it dries.
- Always apply 2-3 coats of concrete sealant for maximum protection. Also, allow each coat to dry for at least 24 hours before applying the next one, or better yet, follow the instructions written on the manufacturer’s label.
Step 8: Apply Primer.
Most epoxy products and floor paints come as all-in-one solutions, meaning that they have a primer added to their formula. However, others require you to apply a separate primer before painting to achieve good results.
I recommend using an epoxy masonry primer to prime the concrete floor because it creates a strong bond between the concrete and paint.
Epoxy primers are commonly used in industrial and commercial settings because they are durable; hence they will work perfectly for your home floors too. And as a bonus, your paint job will last longer.
Use the same application technique you used to apply the sealant, then allow the primer to dry for 24 hours or as instructed by the manufacturer.
Step 9: Paint
Epoxy paints perform best on concrete floors. If you choose two-part epoxy, follow the manufacturer’s instructions to mix it properly.
Only mix the paint in small amounts so that it will not harden before you finish coloring the floor. If you choose one-part epoxy paint, ensure that you stir it properly to mix in the pigments before applying it to the floor.
Use the same application techniques you used for the sealer and primer to apply the paint. Apply two coats of paint to ensure full floor coverage.
Note: Epoxy paints emit strong fumes. So wear protective gear and ensure that your workspace is well ventilated to keep yourself from harm.
Here’s How to Paint Concrete Floor:
How to Paint Concrete Patio
Follow the steps below for the best results painting a concrete patio:
Step 1: Cleaning the Patio
Before you do anything, you need to clear your patio. You need an empty surface to work with to ensure that you clean and paint all corners of the concrete evenly. Furthermore, it is best to scrub the patio with a powerful cleaning solution to give your paint a fresh surface to grip.
- Start by removing all the decorations, furniture, potted plants, toys, and any other items you have on the patio. Also, use tarps to cover plants and other things you cannot remove to protect them from the chemicals in cleaning solutions and paint splatter.
- Next, remove mosses, vines, and other plants growing on the concrete surface. If there is too much vegetation, spray a broad-spectrum herbicide on the concrete one week before painting to kill the plants. You can use a power washer to remove the plants faster, or pull out everything by hand, then sweep them off the patio if you don’t have one.
Unlike other surfaces, concrete absorbs oils and grease and traps dust particles. Therefore, you have to use a cleaning solution to draw the contaminants out of the concrete. A solution like Trisodium phosphate (TSP) will get the job done right.
You can also use Phosphoric acid or muriatic acid to clean the patio. These chemicals will simultaneously draw out the contaminants and etch the surface to provide a clean and rough surface for the paint to grip.
- Mix ½ a cup of TSP with 1 gallon of warm water in a bucket to make the cleaning solution. Use a long wooden rod to stir the mixture until the TSP dissolves. If you’re using acids, mix one part of acid with ten parts of water to make the cleaning solution.
- Next, pour the solution on the concrete, then use a stiff broom to scrub the floor until all the dirt comes off. For the acids, brush until the solution stops foaming.
- Finish by flushing the surface with a lot of water to remove the cleaning solution and other dirt. You can use a pressure washer or a garden hose for this part. If you used an acid solution, sprinkle some baking soda on the patio to neutralize the acid before rinsing.
- Allow the patio to dry for 48 hours.
Step 2: Prepare for Painting
Before you paint your patio, ensure that the concrete is dry enough so that the paint will adhere properly. To find out if there’s moisture in the structure, follow the steps below to check for moisture content:
- Take a 15-inch by 15-inch square of thick plastic or aluminum foil, then tape it to the concrete. Ensure that you seal all sides properly.
- Let the cover sit for about 16 hours, then remove it carefully and check for moisture or condensation under the plastic and the covered concrete.
- If the concrete and the plastic are damp, give your patio more time to dry, then repeat the test. Proceed when the concrete dries completely.
If you are painting an old patio, the concrete will likely have cracks. Make sure that you fill them, or they will show through the paint.
Use a wire brush to loosen and clear out debris in the cracks.
- Next, vacuum away the dust or blow it out of the cracks, then sweep them away with a broom.
- Fill the gap with a masonry crack filler. Depending on the brand you are using, you can use a caulking gun or a scrapper to apply the filler. Ensure to overfill the gaps to allow the filler room to settle in the cracks.
- If you use a grout-based or concrete-based filler, use fine sandpaper to level them, then clean the surface again. You do not need to sand latex-based or any other self-leveling fillers.
Since you will be painting concrete outdoors, you have to select paint that will last longer than regular exterior paints. Standard exterior grade paints will crack and peel off shortly after application. Below are the best types of paint to use on your concrete patio:
- Concrete paints with sealing and waterproofing additives. Manufacturers design these paints to resist water, oil, salt, and grease; hence, they work perfectly for outdoor concrete surfaces.
- Oil-based, water-based, or latex paints are designed for patios, floors, and porches. These paints are an excellent choice because manufacturers created them for outdoor use, and they can withstand foot traffic for a long time.
Choose a concrete or a blocking primer to give you a nice even surface to paint instead of the bare porous concrete. A good primer will provide you with a neutral surface color to paint on, so you will not need many coats of paint to get the coverage you want. Furthermore, a primer has a lower viscosity than paint; thus, it will incorporate into the concrete and create a binder for the paint to grip.
- Choose exterior-grade prime designed especially for concrete. You will find these products labeled as “concrete,” “masonry,” or “bonding” primers.
With everything in place, pick an appropriate day to paint your patio. I recommend choosing a day with no rain for 24 hours and no rain expected for a while.
Step 3: Paint the Patio
Apply the primer.
- Pour the primer into a paint tray, then dip a paintbrush in it.
- Wipe off excess product on the side of the tray, then apply the primer.
- Start around the patio edges, making sure to cover everywhere that it touches other parts of your home.
- After painting around, use a paint roller to fill in the rest of the surface.
- Finally, allow your primer to dry. Most primers will dry in about 2 hours, but I recommend waiting at least 8 hours before painting.
Apply paint
- Pour the paint into another tray, then use the same application techniques as the primer. Ensure that you use new painting tools – not the ones you used for priming.
- Allow the first coat to dry for about 8 hours or per the manufacturer’s instructions, then apply the second one.
- Finally, allow the paint to dry. The patio may be ready for foot traffic in about 48 hours, but I recommend waiting one week before putting back furniture and decorations.
How to Paint Concrete Driveway
The steps involved are:
Step 1: Clean the Driveway
- Start by moving your vehicle away from the driveway and park it in a place you can leave it for a week or until you finish painting.
- Next, use a leaf blower to blow loose debris like twigs and leaves to the side of the driveway. You can use a broom for this step if you do not own a leaf blower. Ensure that you rake up all the dirt or wind will blow them back onto the driveway during the painting process.
- Use a pressure washer to eliminate the stuck-on dirt you could not remove with the broom. Point the washer’s nozzle at a 45-degree angle away from you, turn it on, then clean the entire driveway with a side-to-side sweeping motion.
- Next, use a degreaser to remove grease and oil stains on the driveway. Pour the degreaser directly onto the stain until you cover it completely, then let it sit for 30 minutes. Use a stiff-bristled brush to scrub the oil stains until they come off, then rinse the driveway with clean running water.
- Allow the driveway to dry for about 24 hours.
Step 2: Repair Cracks
- Use a wire brush to eliminate loose debris in the cracked concrete. Use long sweeping motions along the length of the crack to ensure that you do not miss any dirty spots. For large pieces such as stuck concrete pieces, use a hammer and a chisel to break them up before using the wire brush to sweep them out.
- Squeeze some concrete repair caulk into the crack using a caulking gun. Ensure that you overfill the gap, then smooth it out with a putty knife to make it level with the driveway.
- Let the filler dry for a full day before painting over it. Avoid coating over wet caulk because it will not cure correctly and eventually cause the paint to crack.
Step 3: Etch the Surface
Tape off your garage door and the sides of your home to protect them from unwanted paint splatters. Next, use a water-based active etch primer to roughen the concrete. It is a liquid that binds to bare concrete and makes it rough enough for the paint to adhere.
- Mix some active etch primer in a bucket of water following volume levels recommended by the manufacturer.
- Pour the mixture onto the driveway, then use a stiff push broom to spread it over the driveway.
- Allow the active etch primer to sit on the surface for about 30 minutes, then rinse it off with a hose.
Step 4: Paint the Driveway.
- Pour some concrete paint into a paint tray. Keep the man paint container near you to easily reach it when you need to refill the paint tray.
- Use a masonry paintbrush to color around corners and hard-to-reach places. I recommend using masonry brushes because they are stronger than standard paintbrushes; hence they can withstand the rough texture of concrete.
- Next, use a ⅜ inch nap roller to fill the paint in the body of the driveway. I recommend using a nap roller because it is a heavy-duty tool that can withstand concrete texture. Begin at the top corner of the driveway and work your way down in small sections until you cover the whole surface. Ensure that you overlap each section to get good coverage.
- Let the first coat set for 24 hours or as instructed on the product’s label. Avoid walking on the driveway during this period.
- Put on the second coat of paint using the same techniques you used for the first one. The final coat will dry within 24 hours, and you can safely walk on the driveway. However, I recommend that you wait 72 hours before driving on the newly painted concrete.
How Much Does Concrete Paint Cost?
The price of concrete paint mainly depends on the quality of the product. Low-quality concrete paints tend to be cheaper, costing between $30-$40 per gallon, while high-quality concrete paints can cost up to $80.
The quality of paint you choose for painting your concrete will affect the job differently. It will affect how long the color will last, the number of coats you need for full coverage, and the overall quality of the paint job.
The low-quality concrete paints may be pocket-friendly, but they do not produce good results. If you use them, you will be stuck doing costly paint retouches all the time. Furthermore, they have inferior coverage; hence they will not protect your surface as needed.
On the other hand, high-quality concrete paints are worth every penny you spend. They are durable; hence you won’t need to repaint for a long time, and they provide sufficient coverage with fewer coats.
So, what makes high-quality concrete paints worth their price?
- Better Resins
Resins are the most pricey components in paint. Manufacturers use quality resins such as acrylic, latex, and epoxies to make their products stand out.
These high-quality binders form tighter bonds with the pigment and the substrate, making them last longer on concrete. These characteristics also allow high-quality concrete paints to resist peeling, blistering and other forms of wear and tear.
- More Solids-Solvent Ratio
High-quality paints always have more solids (pigments and resins) than solvents compared to low-quality paints. The highest quality concrete paints often boast a percentage of as much as 45%, while the lower quality ones have 30% or below.
A higher number of solids means that the paint will produce thicker films, resulting in better hiding capabilities and durability.
- Additives
High-quality paints often have additives added to their main ingredients to improve their performance. The paint additives expensive which translate to high cost of the paint.
How to Fix Concrete Paint Bubbles
The primary cause of concrete paint bubbles is moisture. When temperatures go up, the water trapped within the concrete evaporates. Soon, the vapors deep within the structure come up to the surface and cause bubbles in the paint film.
Concrete paint bubbles are unsightly, and the procedure to remove them is long and laborious. However, it is not impossible. All you need is a paint stripper to remove the ruined paint, clean the concrete, prime it properly, then repaint using proper techniques. Below is a procedure to help you fix concrete paint bubbles.
Step 1: Clean the Surface
- Start by using a broom or a vacuum cleaner to remove dust and debris on the paint film.
- Next, prepare a warm water and soap solution, then use a wire brush to scrub the surface.
- After cleaning, rinse the surface, then allow it to dry.
Step 2: Strip then Repaint
- The first cleaning step is a little abrasive; thus, you may notice paint chipping in some areas. Use a scraper to eliminate as much paint as possible, then apply a paint stripper to whatever remains on the surface. I recommend using a paint stripper formulated especially for use on concrete surfaces.
- Let the paint stripper sit on the surface until the paint loosens. Most concrete paint strippers work in 30 minutes to an hour, but it is best to follow manufacturers’ recommendations for best results.
- Once the paint loosens, use a stiff wire brush or a paint scraper to remove it. If some color remains stuck, reapply the stripper, wait for a few more minutes, then scrape again.
- Once all the paint comes off, wash the surface with running water to remove all traces of the paint remover and other specks of dirt on the surface.
- Give the concrete 72 hours to dry to ensure that all the moisture comes out of the structure. It is best to allow the surface to dry properly because dampness will cause the paint to bubble again.
- After 72 hours, do a moisture test on the concrete, then paint once you establish that it is dry.
Here’s How to Fix Paint Bubbles:
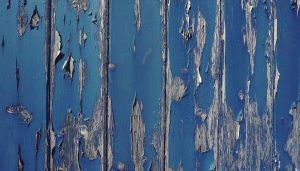
How to Stop Paint From Peeling Off Concrete
Peeling paint on concrete is a problem that can occur immediately after painting or after a long while. It is one of the most significant setbacks in painting because the only remedy is to strip the paint off the concrete and repaint it.
Several factors contribute to peeling paint, including the quality of products you use and how well you prepared the concrete before painting. You can stop paint from peeling off the concrete by rectifying or avoiding some of these contributing factors. Here’s how.
-
Seal Bare Concrete Before Painting
Sometimes water rises through concrete surfaces even after you paint them. It weakens the adhesive bond between the concrete and paint, causing the paint layers to separate. Once separated, the paint layers bulge, crack and eventually lift off the surface.
You can keep this from occurring by applying a concrete sealant before painting concrete, especially on indoor surfaces like concrete floors. The sealer will block water from contacting the painted surface, preventing the paint from peeling off.
-
Control Humidity Around Painted Concrete
High humidity causes many paint-related problems, including peeling paint. It can prevent fresh paint from drying properly and cause it to detach from the concrete immediately after application.
It can also induce the growth of mold and mildew on old paint coats, causing them to become weak. Eventually, they crack and peel off the surface.
You can control the situation by installing an air conditioning system, especially in moisture-prone rooms like bathrooms and washing areas. It will keep the concrete in those areas dry for longer, reducing the chances of paint peeling.
-
Clean the Concrete Properly Before Painting
Paint will never last on dirty concrete surfaces. Dust particles, grease, and oil spills interfere with paint adhesion causing the paint to peel off soon after application.
Therefore, ensure that you sweep all large debris and vacuum the concrete surface properly to remove all dust particles before painting. Also, use a powerful cleaning solution such as Trisodium phosphate to remove oil and grease before painting concrete.
-
Paint When the Temperature Is at Optimum
Sometimes people paint on an extremely hot day, resulting in peeling paint. You may think that painting on a hot day is wise because it will make your paint dry faster, but you’re mistaken.
When the temperature is too high, the concrete will be too hot. The heated surface will cause the solvent in paint to evaporate too quickly before the binder has a chance to adhere.
Before painting, always check your product’s instructions for the ideal temperature before coating. This way, you can schedule your painting sessions when the temperature is optimum to keep the paint from drying too quickly.
-
Etch the Concrete Before Painting
Bare concrete is not 100% smooth, but it has a slight shine. Painting on unetched concrete is like painting on glass because the paint will slide right off the surface a few months after application.
The best way to roughen concrete surfaces is by etching them with acid before painting. The acid will give the concrete a bit of “tooth” for the paint to grip, thus preventing future peeling problems.
-
Use the Correct Primer
Manufacturers design different primers for different surfaces to improve paint adhesion. Therefore if you use the wrong primer on concrete, it will lead to bonding issues causing the paint to peel off prematurely.
Always use a concrete/block primer on all your concrete surfaces before painting to achieve the best results.
Conclusion
Much as concrete is a sturdy painting material, it has a plain gray look which makes rooms look dull and unappealing. If left untreated and exposed, it is prone to moisture damage, chemical attacks, fires, and staining.
The damaging elements cause concrete surfaces to wear out over time, leading to blistering, spalling, cracking, among other concrete-related problems.
The best and most affordable way to deal with these issues is to paint the concrete before they occur. Bu before you jump into actual paint work, let’s answer this question…
What Is Concrete Painting?
Concrete painting is a surface treatment that protects concrete from damaging elements, preventing the surface from deteriorating. It is a treatment best done after concrete cures to make it last.
The product used for this treatment is called concrete paint. It contains a pigment, binder/resin, and a solvent – together, these ingredients leave a protective film on concrete when it dries.
Some concrete paints also have additives such as UV blockers, non-slip agents, and thickeners to make them protect concrete more efficiently.
There are two primary types of paint used on concrete – epoxy and acrylic latex paint. Epoxy paint is the most durable of the two offering better abrasion resistance.
On the other hand, acrylic latex paint is more affordable and has lower VOC levels than epoxy paint. Therefore you can choose whichever product you want based on your requirements.
Concrete paint can last up to 30 years in residential areas because there’s no high impact activity to cause damaging abrasions. On the other hand, it only lasts between 5-10 years in industrial and commercial settings.
You will know that your concrete is ready for a repaint when you see visible cracks on the surface or when the paint starts to bubble and peel. Stagnating water on concrete also indicates that the paint coat may be worn out, and it’s time to retouch.
