The day’s topic will be “Wood Filler Vs Spackle,” where I’ll provide clear guidelines to dispel confusion between these two products.
There are cases where drywall, floor, or wooden furniture contains minor damages like cracks and crevices.
Some also sustain medium-sized impairments like gouges, holes, and indentations.
The impairments mentioned above do not warrant the total replacement of the workpiece!
An economical solution is to patch up the damaged parts, sand, and repaint.
There are several patching compounds, but this article reviews two of the most common ones, i.e., wood filler vs spackle.
The two filler compounds differ in several aspects, including uses, substrate compatibility, costs, sandability, consistency, etc.
However, some of their uses overlap as there are various types and grades of wood fillers and spackles.
I’ll give a detailed analysis of the above differences and similarities a few segments down the writeup.
The article also contains information and guidance on the following:
- Whether you can substitute spackle for wood filler and vice versa
- The consequences of using the wrong filler
- Procedure for wood filler application
- Method of applying spackle
- The way to use spackle on wood
First, I’ll describe a wood filler, its uses, advantages, and disadvantages.
I’ll do the same for spackle and even name two of the best products in each category.
Gear up for a fascinating discussion that will enlighten you and give you a professional perspective of the above restoration and repair products.
The subheadings are different but mutually related, so I encourage you to read the entire article to reap maximally.
What Is Wood Filler?
Using the proper patching compound for a mending or restoration project forestalls further damage and makes the substrate more appealing.
This opening segment features wood filler. What is wood filler? What are the said product’s types, uses, pros, and cons?
Wood filler is a complex of substances like polyurethane, clay, and epoxy used for filling small holes, crevices, and gouges in wooden substrates.
The sealing and fixing of scratches and dents are either for cosmetic or functional purposes.
There are many types of wood fillers; you can sand and stain some of them, while others are non-sandable and reject wood stains.
Also, some wood fillers are exclusively meant for exterior applications, while others are interior grade.
In that regard, indoor wood fillers are contraindicated for outdoor use and vice versa.
Otherwise, the product will not function as intended, and you may end up worsening the already sorry situation of your substrate.
Ensure you always check to confirm the type of wood filler before purchasing.
I recommend always acquiring as many types as possible to be ready whenever any wooden material needs a makeover or refurbishment.
Incidentally, wood fillers can work on drywalls, but less effectively and for minor fixes only.
Types of Wood Fillers
Wood repair compounds come in many shapes and forms.
This segment features various wood fillers that will recondition your substrate for an improved look.
Wood fillers are categorized into interior vs. exterior use, water-based vs. oil-based vs. epoxy, and based on their form or design.
Here is the breakdown:
Interior vs. Exterior Wood Fillers
Interior wood fillers are meant for indoor repair projects, mainly for wooden materials like baseboards, crown moldings, wall trims, and casing trims.
Other substrates for interior wood fillers are tables, indoor furniture, cabinets, and cupboards.
While the primary substrate for interior wood filler is lumber, it also works on drywalls but less effectively.
Therefore, you can use it to patch up small wood cracks and dents in interior walls and ceilings.
On the other hand, exterior wood fillers are suitable for outdoor wood restoration projects. Such projects involve patios, outdoor furniture, wooden fences, etc.
Also, there are wood fillers that are made for both interior and exterior use. These are formulated with the combined properties of the two fillers.
It makes for flexible and economical usage as one filler container can service internal and external projects.
Water-Based vs Petroleum-Based Wood Fillers
Wood fillers have low solvent proportions compared to paints because they are more designed for mending than decorating.
However, the fillers still need solvents to make their use, application, and cleanup practicable.
Most fillers contain water or petroleum/oil as the principal solvent.
Waterborne fillers need only soapy water for cleaning up messes and application tools, while petroleum-based fillers require mineral spirits like turpentine and acetone for cleaning up.
The water-based varieties dry faster after application and are easier to sand, while the petroleum-based fillers have the edge regarding durability and toughness.
Epoxy Wood Fillers
The above is made of polyepoxides/epoxy resins, i.e., polymers containing epoxide groups.
The epoxy resins can be polymerized with themselves (homopolymerization) or copolymerized with co-reactants like amines, thiols, phenols, and acid anhydrides.
The reaction of epoxy resins with polyfunctional hardeners or themselves forms a hard, thermosetting polymer with excellent mechanical properties and chemical & thermal resistance.
These wood fillers are perfect for frequently handled materials or with high traffic.
They are also suitable for filling wider cracks, dents, gaps, and bigger holes as they confer better structural properties.
They are usually colored or transparent and are packed in tubes or cans.
The health risks of overexposure to epoxy wood fillers are contact dermatitis and hypersensitivity reactions.
It also precipitates respiratory complications from inhaling the sanding dust.
Wax Filler Sticks
These are stick or rod-shaped wood fillers predominantly made of wax.
They repair splits, scratches, cracks, and small to moderate-sized holes with minimal sanding.
The fillers mentioned above usually come in sets; some contain five sticks, while others have ten.
They are available in many colors, so you can choose the one that matches your substrate to conceal the touch-ups.
Using color theory, you can mix colors to create unique hues.
Wax filler sticks are easy to use and have a long shelf life so that the leftovers will remain viable for future mending projects.
Laminate Flooring Wood Fillers
Wood fillers can also fix laminate floors! As I highlighted earlier, these fillers are mainly meant for wooden substrates but can also work on other materials.
The above wood fillers are usually packaged in squeeze tubes, small containers, or sticks and are multipurpose.
They repair all laminate floor impairments like dents, cracks, scuffs, holes, and pet marks. You can also use them to fix poorly-fitted joints on the floors.
The product is a laminate flooring wood filler because most laminate materials are floors.
However, if you have a flawed/damaged kitchen worktop, you can still use the laminate flooring filler to restore it.
Laminate flooring fillers only need a straightforward use where you squeeze the contents to the damaged area and level it off using a putty knife.
Depending on the manufacturer’s specifications, you can sand it or just smooth it over using a soft cloth; some are sandable, while others are not.
After the repair, you can use a laminate reviver to restore the substrate’s luster and prevent further scratches and scuffs.
Home-Made Wood Fillers
You can also make your wood filler by mixing finely-pulverized sawdust with wood glue.
The simplistic nature of the above wood filler calls for immediate use after formulation.
The resulting filler doesn’t contain preservatives, stabilizers, and other additives; it only comprises glue and sawdust.
The expeditious use after compounding enables the glue to stick to substrate and sawdust as it dries.
Home-made wood fillers are a last resort option if you urgently need to repair a wooden workpiece and a factory-made filler is not readily available.
I recommend using it on small-scale indoor projects only.
Uses of Wood Filler
We can extrapolate the preceding classifications to end up with the following uses of wood filler:
- It fills the pores in notoriously porous timber like hickories and oaks.
- They spruce up damaged wooden workpieces like patios, wood decks, kitchen worktops, and cabinets.
- It offers a more straightforward and cheaper alternative to replacing damaged materials. Instead of buying anew, you recycle using wood filler and paint it for a new look.
- They are used to improve the aesthetics of substrates. Filling up the cracks, holes, and dents upgrades the initially dilapidated substrate significantly.
- It’s used to prevent further damage to a run-down workpiece.
Pros and Cons of Wood Filler
Grain-filling materials are beneficial in many ways but also have a few disadvantages. Read on to uncover the pros and cons of wood fillers.
Pros
- Some wood fillers facilitate both sanding and painting after application
- They work well on absorbent or porous substrates
- The fillers can repair big holes and defacements on wood
- These compounds enable you to alter their consistency for easier use
- They can also work on other substrates like laminates and drywalls
Cons
- Wood fillers have a tendency to shrink and expand with weather fluctuations.
- Wood fillers are more challenging to sand in comparison with spackling pastes.
Best Wood Filler Products
There are many wood filler products out there.
It’s imperative to know which one is the most appropriate for your substrate to make the right purchasing decisions.
For your convenience, I’ve done thorough research to come up with the following best wood filler products:
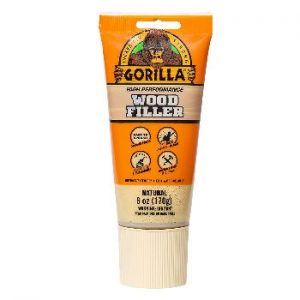
1. Gorilla All-Purpose Wood Filler
The above product is made by the Gorilla Glue Company, headquartered in Cincinnati, Ohio.
It has been selling glues, wood fillers, and related products for over 20 years.
The glue was discovered to be used by Indonesians on teak wood.
It was then tweaked and mixed with other ingredients to manufacture the presently used products like wood fillers.
The consumers soon realized how versatile and convenient the filler was, and its demand increased.
It led to further expansion of the company to include the manufacture of super glues, adhesive tapes, sealants, construction adhesives, etc.
All their products undergo rigorous quality assurance tests to meet performance, reliability, and design expectations.
Their wood filler product has these desirable properties and advantages:
- It is easy to spread for a smooth finish
- The filler is for interior and exterior use
- This wood filler resists cracking and shrinkage
- It’s available at pocket-friendly prices
- Gorilla wood filler accepts paints, stains, and other wood finishes
- The above filler dries sturdily to anchor screws and nails
- It gives a natural finish that complements the wooden workpiece
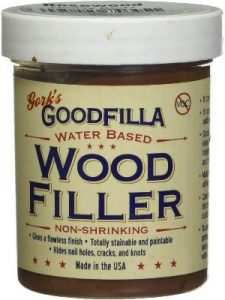
2. Gork’s GOODFILLA Water-Based Wood & Grain Filler
Gork’s Goodfilla Company makes the product mentioned above.
The company is renowned for manufacturing one of the best wood-filler products that almost match the strength and consistency of the target substrate.
The quality of its products is down to the professionalism of its employees and a supportive work environment. It improves their productivity.
They are also at the forefront of environmentally friendly production methods as they recycle used containers and product leftovers.
Moreover, most of their products are waterborne, with low VOC contents.
These are the benefits and features of the above wood and grain filler:
- It is sandable, stainable, and paintable
- The filler is available in many colors, so it’s easy to find the one that matches your substrate
- Gork’s wood and grain filler has excellent surface coverage
- This wood filler is water-based, so it’s easy to work with
- It doesn’t shrink, crack or expand with temperature changes
- The product has a long shelf life as you can reconstitute it with water before use
- It hides holes, nails, knots, and cracks on surfaces
What Is Spackle?
On to the next patching compound. What is spackle? What are its uses, types, pros, and cons?
Follow my lead to probe into this revolutionary patching compound.
Spackle or spackling paste is a putty for filling cracks, holes, and minor surface imperfections in wood, plaster, and drywalls.
The paste consists of gypsum plaster from calcium sulfate hydrate and glue.
Other than wood filler, people often confuse or mistake spackling paste with joint compound.
So much so that the general public refers to both products as spackle. Well, they look similar and play similar roles in building and construction.
The differences are that joint compounds (known commonly as drywall mud by contractors and builders) are slow-drying.
They shrink more when drying and are mainly used to fill seams between multiple drywall sheets in large installations, like an entire room or house.
On the other hand, spackles dry faster, undergo less shrinkage during drying, and are used to make small-sized mends.
Nonetheless, the uses overlap slightly due to the sheer number of market wood filler and joint compound types.
Plus, the different product features make them adaptable for other uses.
In that regard, you’ll find a spackling paste that can be used to seal joints or a joint compound that’s used to patch up holes and tears or fix minor wall defects.
Types of Spackle
Spackling pastes also come in many forms. This part journeys through the various types of spackle. There are five types, namely:
Lightweight Spackle
These spackling pastes comprise a mixture of sodium silicate and an adhesive. They are easy to sand, show minimum shrinkage, and are fast-drying.
Moreover, they only need a one-time application, i.e., a single coat will suffice. It’s perfect for fixing minor cracks, dents, and nail holes in walls.
Standard Spackling Paste
The standard spackle consists of gypsum, adhesives, and other additives in its formula.
It’s important to note that gypsum is the material used to construct drywalls.
Therefore, the paste has similar properties to the substrates, and some people refer to it as a semi-solid drywall.
The standard spackling compound is ideal for mending extensive damage on interior drywalls. These include large gaps, gouges, and holes.
The standard spackles dry harder than the lightweight varieties. It enables them to take more impact without yielding.
Vinyl-Based Spackle
As the name suggests, it comprises vinyl, which is the distinguishing component from the other spackling compounds.
The other adjunctive components are similar across the board.
The application of vinyl spackles is made in multiple layers. Each layer is allowed to dry adequately before adding another one.
The benefit of this unique method is it enables the repair of deep crevices, tears, and holes.
Polymerized vinyl gives the compound elastic properties, making it stronger and unyielding to thermal expansion and contraction.
Epoxy Spackling Paste
The above spackle has the best durability profile; the trade-off is it’s more challenging to use.
Like epoxy paints, the spackles are packaged in two different containers=one containing the hardener and the other containing the resin.
You need to mix the two a few minutes before use.
The above patching compound is ideal for outdoor use because it is hardwearing, water-resistant, and capable of withstanding fluctuating weather conditions.
Acrylic Spackles
Acrylic spackling compounds share similar usage to vinyl spackles, i.e., they are suitable for deeper and broader impairments like gouges, gaps, and indentations.
They are also resistant to shrinking and can be applied in layers to fill the hollowed-out surfaces.
The only difference is that they are more versatile in substrates; you can use them to renovate drywalls, plaster, masonry, and wood.
Uses of Spackle
Each type of spackle is specialized for a given function. Here is a run-down on the different uses of spackle:
- Used for filling holes and small cracks
- Used to conceal surface defects
- It repairs gaps and defacements on drywalls
- It fixes damages to plaster
- It’s used to mend wooden materials
- Used to touch up laminate and composite materials
Pros and Cons of Spackle
The overriding features and effects of spackling pastes are advantageous.
However, these patching compounds have a few shortcomings. Here is an outline of the pros and cons of spackle:
Pros
- Spackling pastes don’t need prior surface priming to work; this saves time and requires less labor.
- They are always ready-to-use; the manufacturers conveniently mix the products before selling them for a user-friendly experience.
- Spackling compounds are cost-effective, i.e., they have a commendable value for money profile.
- They also have superior durability profiles; this presents a lasting solution to impaired/damaged drywalls.
- Spackling pastes are easy to use and pretty convenient. They are stainable once dry and take up most wood finishes. Therefore, you can use any color and then paint it to match your substrate.
- Some work on interior and exterior restoration projects, so you can use one product instead of two. It is more budget-friendly
- They are resistant to shrinking, especially the vinyl spackling pastes. It maintains the shape and level on the substrate even after drying.
Cons
- They are ineffective for large or industrial-scale projects
- Spackling compounds can’t be adapted for sealing tasks
Best Spackling Compounds
Spackling compounds also have a universal market presence, thanks to the affordable sourcing of raw materials and simple manufacturing methods.
In this segment, I’ll showcase two of the best spackling compounds.
-
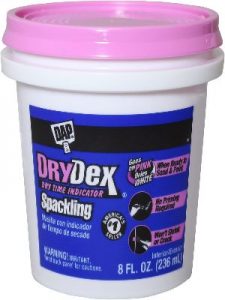
DAP DryDex Interior/Exterior Spackling
DAP Company makes the product named above.
It was founded in 1865 and is a leading manufacturer of sealants, caulks, adhesives, foam, repair, and patch products.
Their enduring market presence is a testament to the reliability, quality, and trust that they’ve won from professional contractors, homeowners, amateurs, and DIY enthusiasts.
Their Drydex spackling paste has the following selling points and characteristics:
- It comes in 1-quart containers.
- The spackling paste is for interior and exterior use
- It works on wood, plaster, bricks, drywall, and gypsum
- Dap Drydex spackling doesn’t require priming before its application
- This product goes on pink but dries white; this indicates the precise to start sanding and painting
- It’s resistant to cracking and shrinking
- The spackling compound is easy to use
-
Red Devil ONETIME Lightweight Spackling
Red Devil Company, a family business headquartered in Pryor, Oklahoma, makes this product.
It specializes in making glazes, sealants, caulks, patching compounds, and accompanying application equipment for the said products and paints.

The Red Devil Onetime spackling paste boasts the following beneficial features:
- It comes in half-pint containers.
- The product doesn’t require sanding after application as it’s a lightweight spackling
- Red Devil Onetime spackling is for interior and exterior use on wood, plaster, stucco, and drywall in one application.
- The spackle fills dents, cracks, nail holes, and other small holes.
- It comes at an affordable price.
- This paste dries fast and doesn’t shrink, flake, or crack
- It’s easy to clean up; you only need to use soap and water
Wood Filler Vs Spackle
The introductory bit of the article contains only an overview of the two compounds. In this segment, I’ll delve into the specifics of wood filler vs spackle.
Spackling paste is mainly used to restore drywall and plaster, while the wood filler is primarily used on wooden substrates.
It’s the major difference between the patching compounds. However, as highlighted earlier, some of their uses overlap.
For instance, the spackling compound is sometimes used on materials like wood and masonry to seal small cracks, holes, and other defects.
Likewise, wood fillers work on drywalls, masonry, and composites.
Wood filler is mainly meant for wood because it resembles wood to some extent (its formula contains wood-like fibers).
Therefore, it can cover pores and holes on inordinately porous wood types like hickories, oaks, and ashes. It forms a pleasantly smooth surface.
Comparably, spackle’s formulation is designed for repairing cracks, dents, and holes in drywall, but less so on wood, masonry, and other substrates.
However, the spackling compounds are more adaptable than wood fillers, i.e., they perform better than wood fillers on substrates outside their domain.
In other words, wood fillers will only outdo spackles on wooden materials.
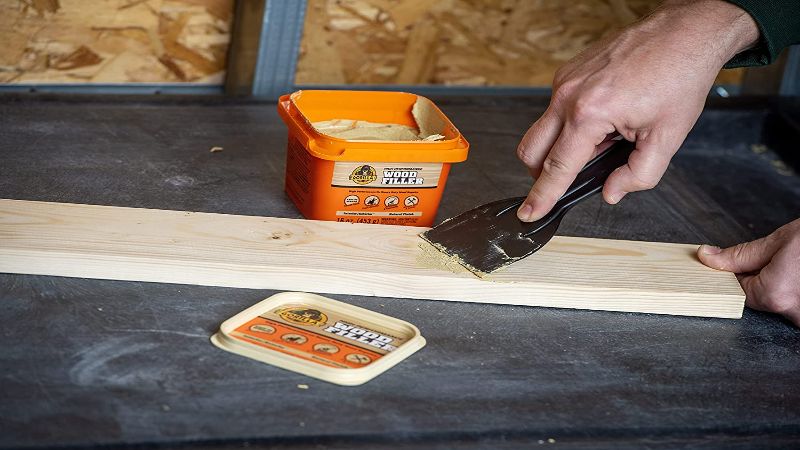
Application methods for the two substances are essentially the same.
When covering cracks, gaps, and holes on molding or wood surfaces, apply the filler to the affected area, press it in, and smooth it over the surface with a putty knife or spatula.
The goal is to patch up the defects with ample amounts of the paste for the best outcomes.
After covering all the damaged parts, wipe off the excesses with a damp cloth and let it dry. Then, lightly sand it for a smooth finish.
Like wood spackle, apply the wood filler copiously to cover the impairments, press it in, and spread the extras around the affected areas for a leveled and even look.
Then, let it dry before sanding to make it smooth.
In both cases, you can paint the renovated surface after complete drying.
However, you should check the labels to establish whether the product accepts paint; otherwise, the paint will clump into beads on the surface.
Regarding drying times, wood fillers take longer than spackles when all factors are kept constant.
However, there’s no pinpoint drying time for either product as deeper and more extensive holes and gouges usually take longer than shallow and smaller cracks.
Also, the solvent used to formulate the product dictates the drying time; oil-based varieties take longer to dry than water-based types.
Generally, spackling pastes dry within 30 minutes in small to medium-sized cracks, holes, and dents. But, it takes 1 to 2 hours to dry if the hole or dent is deep.
If you have to use spackle to remedy the above situation, I recommend acquiring a fast-drying spackle from home-improvement depots.
They conveniently shorten the drying and waiting times throughout the project.
Water-based wood fillers usually dry in 2 hours for minor imperfections like cracks and nail holes.
But, if the defect is extensive, it’ll take around 5 to 6 hours to dry.
And if it’s an oil-borne filler in deep holes and cracks, it’ll take at least 24 hours to dry.
Spackle has the edge on wood fillers regarding resistance to shrinking. Even with changing weather conditions, the spackle won’t shrink or expand.
Proper application of the paste to holes and other surface gaps makes it maintain its shape after drying.
On the other hand, wood fillers have the dubious distinction of shrinking due to weather changes.
The waterborne versions are more susceptible than the oil-based varieties.
In that regard, you need to apply large quantities of wood filler and press firmly into the gaps and holes to compensate for the above flaw.
Alternatively, I advise you to use oil-based wood fillers, especially for bigger projects, as they are more resistant to shrinking.
The waterborne fillers are suitable for fixing superficial damages.
Overall, spackle facilitates a more straightforward sanding process. It also needs less time to scuff compared to wood filler.
Therefore, soft sanding materials like a sanding sponge will suffice to even spackled surfaces.
Furthermore, you don’t need to press hard when sanding as it doesn’t need much pressure.
Comparatively, wood fillers need stronger abrasives to even them out.
It’s best to hook up the sandpapers on a power sander or press a bit harder when hand-sanding for the best outcomes.
The difficulty level of sanding wood fillers depends on your type or grade.
Spackles also result in more polished and even surfaces, courtesy of their congeniality to sanding.
Spackling compounds generally receive paint and other finishes more readily than wood fillers.
However, lightweight wood fillers are easy to sand and receptive to paint.
The simple and less demanding sanding of spackles strongly indicates their ability to accept paints.
You should apply a primer before painting on both wood filler and spackle.
While they can accept direct paint, the paint will adhere better if you use a primer, even though it’s time-consuming and demands more labor.
Remember to use a compatible primer in either case to achieve maximum coverage and bonding strength.
Can You Use Spackle And Wood Filler Interchangeably?
It’s a societal norm to use some closely-resembling things interchangeably. But what happens in the case of repair substances like patching compounds?
For instance, can you use spackle and wood filler interchangeably?
It’s both yes and no! You can use them interchangeably in some instances, but it won’t work in others.
These are the cases that warrant interchangeable use:
- When repairing minor surface cracks, the adhesive power of both products makes them adequately effective on drywalls, wood, baseboards, and trims, provided the damage is not extensive.
- If the alternative patching compound has similar properties, you need. For example, if a given spackling compound matches the characteristics of wood filler, you can use it to mend wood instead of purchasing the filler.
- When restoring an indoor workpiece that’s less exposed to physical stressors
Situations that contraindicate interchangeable use of spackles and wood fillers:
- When working on outdoor materials: they are typically exposed to harsh weather conditions, so you need to use the right patch-up material for successful and long-lasting results.
- High-use substrates: these undergo a lot of physical strains and high traffic. Therefore, they are prone to abrasive damage. Using the right mending product minimizes the degree of damage and frequency of restorations.
- Substrate compatibility: some substrates only accept wood fillers, while others only receive spackles. It facilitates subsequent repair operations like sanding, painting, and finishing.
What Happens If You Use the Wrong Filler?
Fixing damaged substrates is necessary, but the most crucial part is using the right mending material. So, what happens if you use the wrong filler?
It’s consequential in the following ways:
- It will come off easily; the wrong wood filler usually is incompatible with the substrate. So it won’t attach or bond firmly to the surface.
- The impairment will get worse: the wrong filler does not solve the faulted state of the wood. On the contrary, it’s a waste of time that makes the defects grow.
- It undermines the aesthetics of your workpiece: for example, if you use a non-sandable, unpaintable wood filler to repair a wooden material that needs an evenly matched surface, it won’t look appealing.
- In the long run, it’s expensive: you’ll make frequent repairs, and in some cases, you might replace the entire substrate when it wears out from the chronic nature of the mending.
How to Apply Wood Filler
After all the preceding information concerning the two restoration compounds, we can now have a discourse on procedural usage. I’ll start by explaining how to apply wood filler.
Procedure
Here are the necessary steps:
Setting Up
First, read all the instructions on the filler container or tube before opening it.
Some wood fillers are irritating, so you must review the cautionary instructions on the container sides before usage.
Then, cover the areas you don’t want the filler to go to as needed. Use old newspapers, a drop cloth, or a tarp for the above undertaking.
Afterward, wear the necessary safety gear to prevent harmful contact with the patching chemicals. They include a pair of gloves and a face mask.
It’s important to note that some wood fillers are innocuous and can be applied using bare fingers and without wearing a respirator.
Mixing
Open up the wood filler and stir it to make it homogeneous, especially if it’s a leftover from previous projects.
Newly bought ready-to-use fillers don’t need mixing before use as they often have a uniform consistency.
Plus, the fillers are usually thick (semi-solid), so the components remain fairly intact during storage; they don’t separate, like paints.
If the wood filler is powdered, you must reconstitute it with the proper solvent before applying it.
Mix using a spatula, putty knife, or a trowel if you’re handling large volumes.
The reconstituting agent for water-based fillers is clean water, while oil-borne fillers require turpentine or mineral spirits.
Reconstitute in a separate wide container using the ratios specified in the instructions.
If you don’t have the ratios, mix until you attain a smooth, paste-like consistency that’s uniformly colored. Ensure all the powder blends well into the mixture.
When reconstituting wood filler on a broad surface, don’t mix large amounts of the filler, as it may dry before you apply it.
Instead, mix in small amounts on smaller areas of the substrate to avoid eclipsing its working time.
The mixed material will be unusable if the working time elapses before applying the filler.
Application
If it’s a small-scale application, use a spatula; if it’s medium-sized, use a slightly large putty knife. But if you’re working on a large surface, use a trowel for application.
Scoop up copious amounts of the filler material and apply it to the affected area.
Press it firmly into the holes or dents to fill up the spaces.
Then, scrape off the excesses using the edge of the putty knife. Be careful not to gouge or scratch the surface of the substrate in the process.
Smooth over the patched surface using the same putty knife or trowel to the level of the surface.
If the filler is harmless and non-irritant, like the water-based varieties, you can use your finger to press it further into the cracks to fill it solidly.
Then, use a rag or cloth to wipe the excess filler off the wood.
Let the filler dry for the specified time in readiness for sanding.
Sanding
Wood fillers normally dry to a hard substance, so they need significant sanding to level and smooth them.
Take fine-grit sandpaper and hook it to a power sander or handstand using a sanding block if you don’t have a power sander.
Even though hand=sanding gets the job done, it takes more time and is labor-intensive.
If you’ve performed extensive repair due to heavy substrate damage, I advise you to sand the entire surface so that you can paint it wholly.
Press firmly, but not too hard to sand beyond the substrate level. It makes the entire surface look even and new after painting.
Then, take a lint-free rag and wipe off the accumulated dust, or you can vacuum it away.
If you don’t remove the debris, the paint won’t adhere well, and the surface will be textured after the paint application.
At this point, the wood surface should be smooth and clean in readiness for painting.
Priming and Painting
Painting is the last step that enables you to conceal the touch-up, giving your substrate a revamped look.
First, you need to prime the surface using the most appropriate primer.
Water-based fillers require a waterborne primer, while oil-borne fillers need an oil-based primer.
Let the primer dry for the specified time before coming in with paint.
Then, paint the substrate to complete the restoration process. Lay down at least two coats of the paint to form a stronger coat and to improve its durability.
Allow the paint to dry completely between layers to avoid trapping the solvents.
That’s it! If you follow the above processes to the latter, your restoration project will be successful, and the workpiece will look as good as new.
Here’s a Video On How to Apply Wood Filler:
How to Apply Spackle
All the above patching compounds have their application procedures, although they are largely similar. In this segment, I’ll demonstrate how to apply spackle.
Procedure
The steps include:
Step 1
First, prepare your working area by gathering the required materials.
Next, read all the instructions in the datasheets or the ones printed on the spackle container/tube.
Then, shield the areas you don’t want the spackling paste to go to using a drop cloth or old newspapers.
Next, don the appropriate safety gear to shield you against harmful inhalations or irritation from skin contact if you’re hypersensitive.
Note that you don’t need to wear safety gear if the spackling compound is environmentally-friendly and non-toxic to humans.
Step 2
The next stage involves mixing.
Spackling pastes, like wood fillers, come in a pre-mixed paste or powdered/pulverized form for reconstitution with solvents.
Most pre-mixed forms are lightweight and all-purpose spackles, suitable for fixing minor defects and use on delicate substrates.
The powder form is mainly acrylic, which suits medium to large-sized defects. Acrylics are known to form hardwearing solids when they dry and cure on surfaces.
The acrylic also minimizes shrinking and cracking.
The reconstitution and mixing process is the same as that for wood filler discussed above, i.e., it involves adding water if the spackle is powdered or simply stirring if it comes pre-mixed.
Do the mixing in a separate container, preferably wide.
When mixing, do so in small batches to apply to a given section at a time.
Step 3
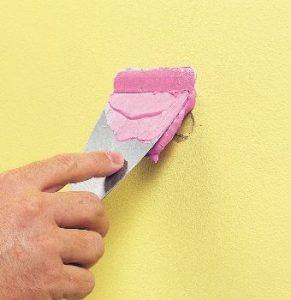
This step involves the application of the spackle.
Ensure you work fast to enable you to apply the reconstituted spackle within its working time.
The application method is also similar to the one for wood fillers discussed earlier. Use a spatula, putty knife, or a trowel depending on the size of your project.
Apply the spackling paste abundantly to the holes, dents, and cracks on the drywall or baseboard.
Work it into the divots and imperfections by pressing firmly with the putty knife.
Scrape away the extra spackle using the knife’s edge, and be cautious to avoid scratching or gouging the wall or trim.
You should also be dexterous enough to avoid chiseling the spackle from the patched holes.
Use the same knife to smooth the spackle to the surface. You can use your finger to press and smooth it further as it gives you better control.
Take a cloth or paper towel and wipe excess or unwanted spackle off the drywall or trim.
Then, let it dry for the dictated time before sanding.
Step 4
Before sanding, inspect the dried spackle for shrinkage or regression.
If so, add more of the patching compound into the affected areas, and repeat the above procedures.
However, it is quite rare for this to happen; wood fillers are more fond of shrinking than spackles.
If it’s all clear, proceed to the sanding process.
Spackling pastes are easier to sand than wood fillers. Here, you don’t need to use a power sander or a sanding block.
The best sanding method is using a sanding sponge and scuffing lightly.
Take a lint-free cloth and wipe away the accumulated debris from sanding. It makes the final process (painting) easier by facilitating adhesion.
Step 5
We’re in the last step, which involves priming and painting the repaired substrate.
Priming the drywall makes its surface more receptive to paint.
I advise you to prime and paint the entire surface so that the patched-up parts don’t stand out from the rest of the surface.
Prime using the appropriate agents, i.e., a water-based primer if you’re planning to use waterborne paint and an oil-borne primer if you’re planning to use oil paint.
Let the primer dry for the required duration before laying down the paint.
Afterward, paint the surface to give it the all-important spruced-up look.
Use two or three paint coats and let it dry adequately between the coats.
Let the drywall stay untouched for at least three days to allow the paint to set in and dry well.
That’s how to spackle drywall, baseboard, or crown molding.
Conclusion
To conclude, replacing entire walls, patios, or household furniture with new ones is expensive due to minor or moderate damage.
It’s not limited to monetary setbacks; it also costs you time and labor. Your next best option is to repair the damages and give the repaired parts a facelift.
This article vividly showcases two of the most popular substrate repair materials in the name wood filler vs spackle.
The above content has differences in their uses, cost, density/opacity, pliability, application method, sandability, etc.
However, it’s safe to say that the differences aren’t as clear-cut as such!
The lines are somewhat blurred in all the mentioned aspects as some of the characteristics of both products overlap.
It’s quite a tangle, isn’t it? I’ve unraveled this tangle to make it more convenient to purchase the right product.
You only need to match it up with your substrate and needs.
Other related themes contained in the article are:
- The possibility of using spackle and wood filler interchangeably
- The upshot of using the wrong filler
- How to use wood filler
- The procedural aspect of using spackle
- Using spackle on wooden materials
Moreover, I’ve included two top-quality products for wood filler and spackle.
I’ve drawn my findings from experience and customer feedback, so rest assured they are the best.
I urge you to take a look at their characteristics and purchase judiciously.
Also, I encourage you to share the article as much as possible for a wider reach and to make everybody’s renovation or remodeling experience.
You can give your thoughts, comments, and additions in the comments section.
