Are you wondering what is wood painting? Well, here’s the best place to understand wood painting and everything that comes with it. So, stay with me for more insightful tips on the subject.
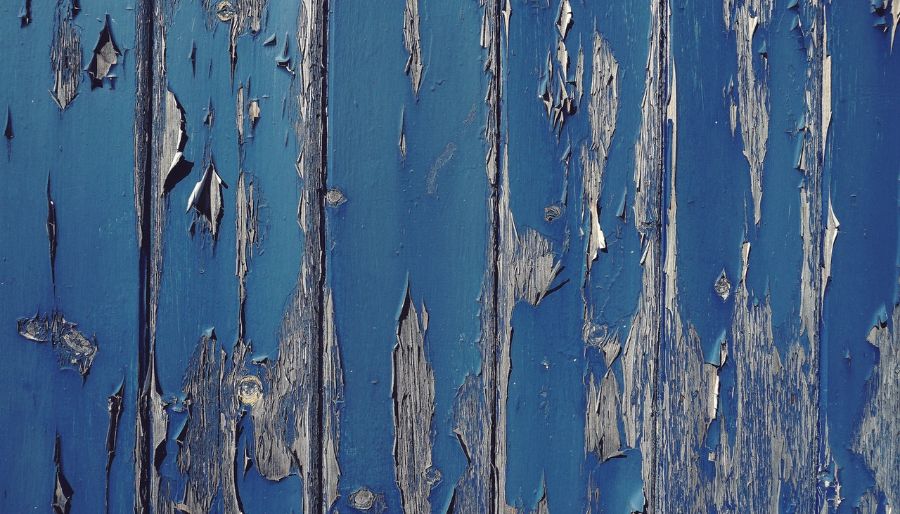
Wood is a durable building material but is vulnerable to moisture and can be affected by environmental conditions. In some cases, the wood gets attacked by mold or pests such as termites that eat away at its fibers, causing irreversible damage.
Continued exposure to these harsh elements causes wood to discolor, decay, swell, or warp.
On the bright side, you can make your wooden structures last for many years with the proper protection measures.
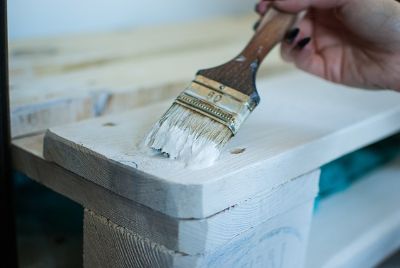
The method that professionals and DIY enthusiasts widely embrace is painting the wood. Painting wood is an effective method, so I want to help you understand what is wood painting?
Wood painting involves applying a protective coating over wood to keep the damaging elements away. Protection aside, the coat also doubles as a decorative agent, so you can turn to wood painting whenever you need to make your pieces look more appealing.
As effective as wood painting is, you can only produce good results if you start on a well-prepared surface. If you paint over wood in bad condition, the paint will not hold well or stop your structure from falling apart.
You need to repair every minor dent and replace all parts that are too ruined to repair. You must also clean the surface and prime it well to ensure that the paint adheres properly to the wood.
Let’s look at different aspects of wood painting.
What Is Wood Paint?
Wood paint is the colored liquid you apply on wood to protect it from the conditions that make it degrade quickly. It dries into a rigid film that prevents the surface from absorbing or releasing moisture and prevents insects and fungi from attacking it.
 Furthermore, wood paint is perfect for decorating old or plain wood. Manufacturers produce them in several color assortments and finish types so you can pick the best paint that fits your style and color preference.
The most challenging problem that new painters face is choosing the right paint for their specific project.
There are several types of wood paint on the market, each with a unique formulation that makes them suitable for some tasks more than others.
Paints work well on both hard and softwood though you must ensure that you are picking the paints based on the characteristics of the wood to be painted.
You need to understand the unique advantages of each type of paint to give you an easier time when choosing products for your project.
Before we delve into the different types of wood paint, let me tell you about the ingredients that make up paint in general. Understanding the function of each component will give you better insight into the different wood paint types as I discuss them.
Paint has three main ingredients – pigments, binders (resin), and a solvent.
- The pigment is the component that gives paint its unique color. It also determines the bulk of the paint and its ability to hide flaws on your surface.
- The binder holds the pigment particles together, ensuring that the paint film is hard enough to resist the harmful elements. It also affects how well the paint will adhere to the surface.
- The solvent is the “carrier/Vehicle” of the pigment and the binder. It allows the smooth transfer of the solids from the container to the substrate. However, as the paint dries, the liquid carrier evaporates, leaving the solid elements on the surface. As a result, the solvent in paints does not affect the hiding ability or the protective properties of the product.
Some paint manufacturers add special additives to the main ingredients to give their products better protective abilities.
You will find paints with components that improve adhesion or leveling and others with additives that help resist mold, mildew, or damage from UV rays. The additives usually make up a tiny percentage of the paint, but they drive up paint costs by up to 10%
Types of Wood Paint
Here are some of the types of wood paint:
-
Water-Based Paint
Water-based paints, aka latex paints, contain a pigment and binder with water as the solvent. Since they don’t use oils or harsh chemicals, these paint types have extremely low Volatile organic compound (VOC) levels making them ideal for interior wood painting.
Furthermore, they retain a “soft finish” after they cure, so I recommend using them on wood pieces that don’t get much use.
Latex paints are also affordable, and they come in various colors. As a result, it is easy to find the particular shade that perfectly fits your project’s vision.
If you cannot find an exact shade, you can have your local paint provider customize a shade close to what you need.
Water-based paints are also available in several finishes ranging from matte to high gloss.
- Flat finish latex paints have little to no resins in their formula. Products with this finish won’t reflect light off the painted surface; thus, it will have a dull finish that looks almost “velvety.” So if you love the flat/matte look for your pieces, this is the paint finish to choose.
The downside of paints with a matte finish is that they don’t possess the protective abilities needed in paint coats. The cured paint film won’t be hard enough to resist lots of touching, cleaning, and bumping.
Hence, I recommend only using it on decorative pieces of furniture that you don’t use daily.
- A satin finish will reflect a minimal amount of light and is the perfect substitute when you need less reflection with better protection. You can also purchase a satin finish paint with a “washable” formula because those brands can withstand regular cleaning.
- Semi-gloss paints contain a greater concentration of resins on their formula; hence, they reflect more light off the surface. Furthermore, the higher resin concentration makes them strong enough to stand up better to regular washing and the demands of daily use.
- High-gloss paints are the most reflective and the most durable of the bunch because they contain more solids. They can withstand lots of cleaning and use for a long time without needing a recoat. However, the highly reflective nature of high gloss paints also doubles up as its downside.
High sheen makes surfaces stand out, but on top of that, they amplify even the smallest of imperfections on the surface. So if you choose this type of paint, make sure that you prepare your wood correctly and repair any minor damages that may appear after painting.
Oil-Based Paint
The formula of Oil-based paint or alkyd paint contains color pigment and a linseed oil binder suspended in mineral spirits – or any other thinning solvent made from petroleum.
It is the most durable paint type for wood because it dries into a more rigid film than the rest of the paints on this list.
Nevertheless, the durability of oil-based paint comes at a high cost. First, these paints are more expensive and take too long to dry between coats(up to 24 hours).
Furthermore, they have high VOC levels, and they release toxic fumes up to one week after applying the final coat. So, whenever you use oil-based paint, you must wear protective gear and ensure your work area is well ventilated.
I recommend using oil-based paint on exterior wooden pieces because they are more exposed to the elements. Furthermore, using this type of paint outside will save you from the trouble of dealing with toxic paint fumes.
Acrylic Paint
Paint manufacturers formulate acrylic paint by suspending color pigment and acrylic resin in an acrylic polymer solution. It is the most versatile paint type, ideal for many surfaces, including wood.
Acrylic paint is easy to apply because it has self-leveling properties. As you use it, it flows out evenly on the surface so that you won’t have any problems smoothing out the paint film.
Furthermore, it takes a short time to dry in between coats; hence, you can finish your projects sooner with acrylic than most paint types.
On the protective side, the dry film of acrylic paint has more elasticity. This feature reduces most coating products’ resistance towards expanding and contracting surfaces.
The flexibility of the paint film allows it to move with the substrate, thus making it more resistant to chipping and cracking.
Even though acrylic paint is resistant to chipping, I recommend using it on pieces that you use moderately or rarely use. It is better for painting small-scale pieces such as console tables, picture frames, and other accent pieces.
Chalk Paint
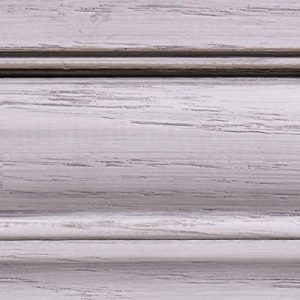 The popularity of chalk paint grows by the day as people are embracing the vintage look for wood pieces. This type of paint contains pigment with chalk as the binder and water as the solvent. It is a water-based paint with a thicker and more buildable texture.
Chalk paint dries incredibly fast, a feature that is both an advantage and a disadvantage. Since it dries fast, you will finish your project in good time.
However, it also increases the chances of leaving brush strokes on the painted surface if you try to touch up a painted area after it has started to dry.
I recommend learning the proper application skills and techniques before using chalk paint on wood. You may be craving the distressed vintage look for your pieces, but without appropriate skills, you will end up with a ruined project.
Why Is Wood Painted?
The reasons for painting wood vary from one individual to another. Some paint to style, while it is merely a form of preserving the wood for others. However, a few things stay constant, and they steer most of the reasons for painting wood. These are:
- Whether the wood is bare
- The state of the old paint on previously painted wood.
The following is an in-depth look into all the possible reasons that drive homeowners to paint wood.
Why We Paint Bare Wood
Bare wood is the most vulnerable and will always require some form of coating to keep off the damaging elements. Whether or not you choose to color it and the type of color you choose will depend on personal reasons.
Some of the most common reasons for painting bare wood include:
-
Waterproofing
Water facilitates most of the damages that occur on wood. It causes unsightly stains, cold-spots, and upon daily exposure, it increases the chances of mold and mildew growth.
Once the fungi grow, they spread quickly and feed on the wood fibers. Eventually, the integrity of the wood gets compromised, and you will find yourself with a crumbling wooden structure.
The proper way to deal with such problems is to avoid them in the first place, and homeowners resort to painting the wood to do that.
The best wood paints form a waterproof film on the wood’s surface to keep all moisture away from the wood. Consequently, the wood’s performance will stay optimum for more extended periods.
-
Blocking Sunlight
Apart from water, sunlight is the other element that is destructive to wood. Prolonged exposure to the Ultra Violet rays will cause the wood to fade and damage the wood fibers irreversibly.
UV radiation destroys the component in wood that hardens and strengthens its cells. Eventually, they become less resilient to external pressures making them prone to cracking and splitting.
The best way to protect the wood from UV rays is by painting it with a coating with extra UV-resistant additives – especially on exterior wood.
-
Decoration
The appeal of building things with wood is the unique wood grain look. However, not all types of wood have that exotic appeal that would make you want to leave the grain bare for all to see.
Some wood types have a bland appearance, and they need the extra decoration that wood paint provides.
Some people also paint new furniture pieces to fit into the current style in their home space. For instance, you can paint a new wooden lawn chair to make it fit into your other exterior furniture style.
Why We Repaint Previously Painted Wood
Previously painted surfaces remain protected as long as the old paint film stays intact. Once cracks start to form or the paint peels, the wood gets exposed.
With the wood exposed, all the damaging elements will rush back in, and your wood will continue to deteriorate until you repaint.
Apart from extending the protection on your painted wood, the following are more reasons that prompt a repaint of previously painted wooden surfaces.
- Following Style Trends
Sometimes, the interior decor community leans more towards black furniture or specific colors for kitchen cabinets. If you follow trends, you may find yourself painting your wood pieces several times even before the old paint film shows signs of wearing out.
You may also have to repaint your wooden pieces if you change the appearance of your living space with your mood. It’s a possibility to find that you like a dark grey color on your coffee table only for the paint to bore you after a few months or a year prompting a repaint.
- Rejuvenating Old Wood Pieces
 Sometimes, people discard old furniture and replace them with new ones. It is not a bad practice to follow, but sometimes you may find that the old pieces need a little revamp to look good as new again.
The old piece may have some dents and minor scratches or stains that won’t go away. However, such damages are minor, easy to repair, and you can cover them up with a few layers of paint.
Nevertheless, you may find an old favorite piece with some damages that are too challenging to repair. In this case, you can discard the wood.
However, if it holds sentimental value, you can replace all the badly damaged wood and then repaint the whole piece if you have the budget for it.
- Increase the Value of the Wooden Structure.
Whether you have wood siding on your home exterior or old wood art pieces, fresh paint will surely give it back a bit of value. Fresh paint implies that the structure beneath the color is well maintained and in good shape.
Furthermore, it revives the appearance of the wood, making it even more appealing to buyers if you intend to sell.
Pros and Cons of Painting Wood
Much like everything, painting wood has some benefits and downsides to it. Understanding them will help you know whether or not painting is the proper method for protecting your wood.
Pros Of Painting Wood
Here are some of the advantages that come with painting wood:
- Paint Extends the Life of the Wood
Any structure made of quality wood should last for at least 20 years minimum. This timeline won’t shift, provided you keep the wood in favorable surroundings and carry out regular maintenance.
However, when you coat the wood with paint, you add about 15 more years to its lifespan. The painting will extend the value period of your wood, but only if you prepare the surface well and use the correct products.
- Painting Preserves Wood’s Structural Integrity
The most significant vulnerability of bare wood is the growth of mold and mildew. Without proper protection, these fungi will eventually eat away at your wood, causing it to rot. Once the wood rot spreads, it compromises the overall strength of your wood.
Wood rot is unlike any other wood damage. You cannot seal the decayed wood with wood filler and expect everything to be intact. Instead, you have to replace all the rotten wood boards to keep your projects standing.
For small pieces like furniture, replacing rotten parts may not be enough, and you may end up building another piece from scratch.
The paint film hinders the agents that encourage wood rot from contacting the surface when you paint your wood. Consequently, the durability of the substrate stays intact for longer.
- Painted Wood Is Easier to Maintain
Paint lasts longer than all the other wood coating products. Therefore, you do not have to worry about repainting it all the time to keep it in good shape.
Retouching old paint is unavoidable, but you will only have to do it every 5-10 years, provided you follow the necessary wood painting procedures.
Moreover, painted wooden surfaces are much easier to clean. All you require is a damp towel to get the dirt off the paint film or something more substantial like Trisodium Phosphate (TSP) if you are dealing with stubborn grease stains on the film.
- Paint Gives You Variety.
Choosing paint to coat your wood puts an endless list of colors and sheens at your disposal. You can choose from the current color choices or mix tints and shades to create new tones that better fit your style.
- Paint Hides Imperfections Better.
Since paint is tinted, it completely covers the flaws on your wood. For instance, if you have wood that has acquired stains you cannot remove, painting is the best option to cover the stains.
You won’t have to worry about the blemishes showing through the film later, mainly if you use a stain-blocking primer before painting.
Cons Of Painting Wood
Some of the shortcomings of painting wood include:
- Paint Hides the Wood Grain.
Paint is an opaque liquid, and it forms a film to cover the wood’s surface instead of penetrating the wood. It does a good job shielding the wood, but it also hides the natural beauty of the wood’s grain.
So if you prefer the brown appearance of natural wood, you will have to consider an alternative option to coat your wood.
- Painting Is Time-Consuming.
The most significant disadvantage of painting wood is the process itself. It takes a lot of time because you have to repair damages, clean the wood, apply primer then paint.
These may only be a few steps, but each of them requires a lot of precision if you want to achieve a smooth, durable finish.
Moreover, it is best to allow the paint and primer to dry properly between coats. If you become impatient and paint over a damp paint coat, you will end up with peeling or bubbling paint before finishing your painting project.
So if you have limited time to rejuvenate your old wood pieces, painting may not be the solution for you.
- The Paint Is Harder to Touch Up.
Even if you manage to produce the most flawless paint job, the deterioration of the paint film is inevitable. This is especially true in places that get high traffic, such as the children’s bedroom or kitchen, which often need a touch-up.
One of the biggest hindrances when touching up paint is color matching. You will have to use the same brand and shade of paint as the old paint so that the touched-up spot compliments the rest of the finish.
Without the exact color, the touch-up will stand out more than the blemish you were trying to remove.
Moreover, even if you manage to find an exact match for the paint, the colors may still not match completely, especially if the old finish is more than seven years old.
Since paint fades over time, the single spot you touched up will have more shine than the rest of the finish and stick out.
If the old paint is too damaged for a touch-up, then your work will be even more challenging. You will have to strip the old paint back to bare wood, then start painting from scratch to be on the safe side.
- Painting Is More Expensive.
Painting wood is a task that requires skill to execute correctly, and the best people to do that are professional painters. The most significant percentage of the cost of painting wood comes from labor.
Professionals charge either by the hour or by the size of your project. Either way, you should be prepared to spend a good amount of money to get the job done right.
You can opt to paint yourself, but you cannot guarantee great results if you are still new to painting. So, if your budget doesn’t allow it, you may have to wait much longer before repainting or choose another method to protect your wood.
Paints Comparisons
Most of the paints on this list have similar formulations. They all have pigments binders and a solvent to carry the solids. However, a few additional components in their formulas makes them all unique.
The extra component gives each type of paint the proper characteristic to protect their respective surfaces.
Wood Paint Vs. Wall Paint
The best wood paints and wall paints are water-based. They protect the surfaces well and are gentle in the environment too. Don’t get me wrong, there are other oil-based versions of each, but the disadvantages they carry far outweigh their protective advantages.
Both wood paint and wall paint produce low VOC emissions, and they dry faster than other types of paint. Furthermore, they come in varying sheen levels, so you can choose them based on the shine you like and the durability you desire.
The significant difference between wood paint and wall paint is their level of protection. Most wall paints are emulsion paints, meaning manufacturers add more vinyl or acrylic resins to the standard paint ingredients. As a result, emulsion wall paints dry into a more robust film than regular wood paint.
Since they are similar in many ways, you can sometimes use wall paint on wood and wood paint on your walls. But what happens when you make the switch?
Wood will benefit more if you use wall paint on them because a hard paint film means better protection. As a plus, the differing sheen levels still give you various choices.
On the other hand, wood paint will not last long enough on walls, and their protection is not ideal. The color will adhere to the wall for a few years, but you will have to repaint earlier than usual.
Wood Paint Vs. Metal Paint
There are more differences between wood paint and metal paint than similarities. The usual similarity is the paint ingredients, but metal paint takes it a notch higher.
Metals are sensitive materials, and they often react to the moisture in coating materials, causing rust. So manufacturers had to add a few additives to metal paint to counteract the reactions and ensure that paint sticks to the surface,
Most metal paints will require you to apply a specialized metal primer on the surface to ensure that the color adheres appropriately. However, a few manufacturers produce products that boast “direct to metal” applications, meaning they do not need priming.
You can use metal paint to color wood, but you will have to include all the preparation methods, including priming first. Even if you have the “direct to metal products, do not skip the primer when the wood is your substrate because it will suck up moisture from the paint.
On the other hand, wood paint will stick to metal, provided you apply a metal primer first. However, wood paint is not as strong as metal paint; hence it may not protect the metal from corrosion for too long.
Wood Paint Vs. Automotive Paint
The most significant difference between wood and automotive paints is strength and toxicity. Auto-paint dries into a more durable film than wood paint because manufacturers designed it to protect car bodies.
Car bodies require extra protection because they stay outside for more extended periods. Furthermore, they get constant exposure to potential mechanical damages while on the road.
Auto paint ensures that the car body remains intact and immune to the damaging UV rays. So, what happens when you switch the roles of the two products?
Wood will get the most protection from automotive paint, especially pieces that you keep outside. However, one must prepare the surface well, or the auto paint will not stick.
Automotive products are runnier than wood paints; hence they cover surfaces thinly. Because of their consistency, you will have to apply several coats on the wood to get the kind of coverage you want.
On the downside, automotive paint is highly toxic, so I recommend only using it on your exterior wood pieces. Also, keep it away from kids’ wooden toys or pet homes to reduce the risk of your loved ones swallowing toxic paint chips.
On the other hand, if you use wood to paint cars, you risk ruining your vehicle. Wood paint cannot protect car bodies from damage. Furthermore, its thicker consistency doesn’t allow you to apply it with a sprayer which is the best way to paint a car.
You can use a thinner to use the paint in a sprayer, but you will simultaneously lower its protective abilities. The thinner consistency may produce a smooth paint job, but it will not last as long as standard automotive paint.
Wood Paint Vs. Concrete Paint
Wood paint has some similarities to concrete paint stemming from their functions. They are both highly porous materials, so they need coating products that prevent moisture from damaging them,
There are two primary types of concrete paint – acrylic latex paint and epoxy paint. Acrylic latex paint is easy to apply, and you can use either a brush, roller, or sprayer to achieve great results.
However, this type of paint is less durable on concrete, and you will have to repaint in 2-3 years.
On the other hand, epoxy paints are highly durable, making them ideal for painting concrete in high-traffic areas. Its paint kit comes as a resin and a hardener that you must mix before putting it on the surface. On the downside, epoxy concrete paints are difficult to spread and expensive.
When you use wood to paint on concrete, the paint film will deteriorate within a few weeks, especially in high-traffic areas. The paint may last longer on vertical concrete surfaces, but their level of protection remains low.
You can use concrete paint on wood, but I recommend only using acrylic latex instead of epoxy paints. Why is that?
The acrylic latex paint is cheaper and does not require much skill to apply. On the other hand, epoxy paints do not do well on wooden surfaces.
The resulting film is rigid when epoxy paint hardens and won’t expand and contract with the wood. The resulting resistance will cause the paint film to crack, and you will repaint sooner than expected.
How to Paint Bare Wood
Painting bare wood is an easy task, but you have to take some extra steps during surface preparation to get the job done right. You also have to know which coating products to use so that you do not end up with a textured paint job or tannins bleeding through the paint.
Bare wood is like a blank canvas. It has no previous treatments, and it is still in good shape, so it is up to you to get the paint job right with the first attempt. Follow the procedure below to achieve good paint results and ensure that your new wood stays in good shape for longer.
Step 1: Prepare Your Work Area.
Painting gets messy. There will be paint dripping off your surface to your floors or paint drops splattered onto other objects in your workshop. Cleaning up paint splatters is a doable job, but it is best to avoid it to reduce your working time.
- Lay down a drop cloth or newspapers to catch paint drips and spills.
- Ensure that you tape off all the areas you don’t want the paint to touch so that there are no spillovers.
- If you work in an enclosed space, open all doors and windows, then run a fan on slow speed to keep the room ventilated.
Step 2: Check the Moisture Content (MC) of the Wood
The moisture levels in your piece of wood will determine how well or how badly your paint job will turn out. High moisture content will not allow the paint to grip wood properly, eventually resulting in paint failure.
You can gauge the amount of moisture in the wood accurately using a moisture meter. For exterior bare wood, ensure that the MC ranges between 15-20% to ensure paint adhesion. On the other hand, interior surfaces require between 12-15% MC.
Step 3: Sand the Wood
Sanding bare wood may seem unnecessary, but lumber stores often coat newly dried timber with a glaze to protect it. Sanding is necessary to remove the glaze coating to help paint adhere. Furthermore, scuffing the surface will open up and raise the wood grain, which also helps with paint adhesion.
- I recommend starting with 150-grit sandpaper to remove all the glaze.
- Next, use fine 220-grit sandpaper to get the wood leveled and ready for painting.
- Finish by vacuuming all the sanding dust, then wipe the wood with a damp cloth to remove any remaining dirt. It is necessary to remove the dust thoroughly after sanding, or it will interfere with the grip of the coating products.
Step 4: Seal Wood Knots
The stain of a knot bleeding through paint is unsightly and is more vivid in lighter colors. Even if you apply more than two coats of paint, the knot stains will eventually show through the paint and ruin it.
You can prevent knot bleed-through by spot priming the affected areas with a shellac-based primer. These products do a fantastic job, and even though their odor is pungent, they will not allow the knots to show through your paint.
Step 5: Apply Primer
Priming is the one step that most painters dread because it does not offer the instant satisfaction you get from seeing color on your surface. However, it is a crucial step in this process and is the key to the success of all painting projects.
A good quality wood primer will seal the wood grain to prevent the wood from sucking moisture from the paint. Furthermore, it improves the adhesion of the paint to bare wood, so you will not have to deal with peeling or cracking paint any time soon.
You can use an oil-based primer on bare wood because it dries into a firmer film that protects your surface better. However, oil-based primers take too long to dry, and some of them emit foul odors.
A water-based primer will get the job done, too, and it dries faster than an oil-based primer. However, they are not as strong as oil primers.
Use a roller or a brush to apply primer to get fuller coverage. You can also use spray primer for large wooden surfaces to get the job done quicker. Also, ensure that the primer properly dries before painting over it to avoid future paint problems.
Step 6: Apply the Paint
Once the primer dries, it is finally time to apply the paint of your choice. It is best to use a paintbrush for small surfaces with intricate furniture, crown molding, and wood trim. Use a high-density foam roller on larger wooden surfaces to get the job done faster.
- Dab ¼ inch of the brush bristles into the paint to load some product on it. Next, use short strokes parallel to the wood grain to apply the paint. Load the brush with more paint every time you feel it running dry.
- If you use a foam roller, pour some paint into a paint tray, then roll the applicator up and down to get paint on it. Next, start with light pressure to move the paint onto the wood, then increase the pressure as you apply. High-density paint rollers trap a lot of color in the roller pad, and that is why you need to increase pressure to release more paint.
Allow the first coat to dry for a few hours when you finish. The amount of time your paint requires to set will depend on the product you have. So always check the manufacturer’s label to get the paint’s accurate drying time.
- Once the paint dries, sand down the first coat before putting on the second one. Sanding the first coat will remove bumps and other inconsistencies left by the roller or the brush. Furthermore, it will make the second coat adhere better to the first one, so you will achieve better results.
- Use fine 220 grit sandpaper for this step, and make sure that you use very light pressure to avoid removing paint from the wood. Next, wipe the surface with a damp towel to remove paint dust, then apply a final coat.
- Let the paint cure fully before you put your newly painted wood to use.
How to Paint Stained Wood
Stained wood has a beautiful appeal, but the finish tends to wear out too fast. As a result, you need to keep reapplying the finish to keep up the look. The constant maintenance of stained wood is a tiresome task; therefore, many people opt to paint the stained wood as a more permanent solution.
The process of painting stained wood is almost similar to that of painting bare wood. However, since stained wood already has a finish on it, you need to make a few changes to make the job successful.
Step 1: Clean the Stained Wood
- Fill a bucket with water, then add one cup of Trisodium Phosphate (TSP) to make a cleaning solution.
- Dip a rag into the solution, wring out excess liquid then wipe the stained wood. If you’re cleaning a large area such as a deck, use a stiff-bristled brush to scrub the surface.
- If you don’t have TSP, you can use a vinegar-water solution to clean the wood instead.
Step 2: Rinse the Wood
- Rinse the wood with running water to remove all traces of the cleaning solution. If you used the vinegar option, use plenty of water to ensure that the vinegar doesn’t damage the vegetation around your work area.
- Allow the wood to dry properly before proceeding. The amount of time the wood will take to dry will depend on your area’s temperature and humidity levels. So to be safe, I recommend waiting at least 24 hours for the wood to dry.
Step 3: Sand Wood
Stained wood always has a clear coating applied to help the stain stay on for longer. Since the layer has some sheen, it is crucial to rough it up a little for the paint to grip better.
- For the first round of sanding, use 60-grit sandpaper, then follow with 80-grit sandpaper for the second round. Remember, you are not trying to remove the stain. Therefore, avoid using too much pressure, or you will end up making the surface uneven.
- Use a damp tack cloth to clean the stained wood after sanding to remove the sanding dust.
Step 4: Apply a Coat of Primer
Apply the first coat of primer, then allow it to dry properly before applying the next one. Two primer coats will ensure more protection for your wood, and your paint will adhere better. Also, make sure to sand between the coats of primer to achieve a more even finish.
Step 5: Paint the Deck.
I recommend using oil-based paint for painting stained wood, primarily if you use the wood outdoors. Use a foam roller or brush for this step to achieve a smooth paint job without brush strokes or bubbles.
Apply thin layers of the paint, giving them at least 6 hours of drying time between coats. It is more convenient to apply several thin coats than slathering on one thick layer – thicker coats take longer to dry and are prone to peeling.
Step 6: Seal the Paint.
If you use your newly painted wood outside or in areas with too much traffic, I recommend you seal it with a clear liquid sealer. Sealing will ensure the paint lasts longer, and it will provide extra protection for your wood.
How to Paint Stained Wood Without Sanding
Sanding is necessary for the painting process because it improves paint adherence. However, it is a tiresome task that requires a lot of energy and patience to execute. Furthermore, the work becomes even more challenging when working on a sizable project.
The need to eliminate sanding altogether has driven many homeowners to look for ways around painting without sanding. Below are a few methods and products you can use to achieve a satisfactory paint job on stained wood without sanding.
- Prepare With a Bonding Primer.
After cleaning your stained wood, the next step is to sand, then apply primer. The formula of bonding primers allows them to adhere to several surface materials without sanding. However, if you purchase a bonding primer, you can skip the sanding.
They act as a magnet between the substrate and the color, thus reducing the chances of paint peeling off the surface.
- Use a Liquid Deglosser
A liquid deglosser, aka liquid sander, is an abrasive solution used by painters to remove the sheen from glossy surfaces. Instead of manual sanding, you can use a little bit of liquid deglosser to matte out the old finish.
I recommend using a bonding primer after deglossing with the liquid sander to ensure that the paint doesn’t slide off the surface.
- Use Milk Paint + Bonding Agent.
Milk paint is biodegradable paint that works and looks fantastic on wooden surfaces. You can use milk paint to paint stained wood without sanding first if you mix it with a bonding agent.
Paint stores sell milk paint as a powder that you can mix at home before using – which is convenient as you won’t mix more than you need. You can also get it premixed, and all you have to do is stir and paint.
- Use Chalk Paint
Chalk paint is becoming more popular by day because it sticks to so many surfaces without the need for prep work. It dries quicker than most paints which is an advantage, but you need some familiarity with it to get the job right with one try.
Chalk paint dries into a smooth, silky coat with a matte finish. So, if you like dull finishes, chalk paint is best for you.
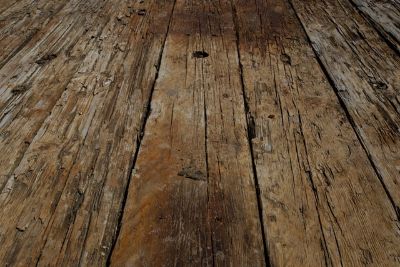
How to Paint Over Old Wood
Painting over old wood takes more work than painting new lumber. Wood that has stayed for years will have dents, rots, cracked paint, among other things that make it look ragged.
So if you want to make it look more appealing, you will have to repair all damages, replace worn-out parts and remove old finishes.
Below is a step-by-step guide for painting over old wood.
Step 1: Remove Old Finishes
Older woodwork may have old layers of paint or varnish, which you must remove before applying fresh paint. If you start painting without removing the old coats, you will end up with an uneven color that will begin to flake in a few weeks.
The best and fastest method for stripping paint from old wood is using a stripper. Paint stripper is a chemical that softens solidified paint so that you can easily scrape it off the surface.
On the downside, paint strippers produce toxic fumes as they work; hence they are not safe for the environment.
To strip paint with paint stripper:
- Apply the paint remover on the surface, then let it sit on the surface for about 30 minutes to an hour.
- Once the paint softens, it will begin to bubble off the surface. Use a plastic scraper to get the color off the surface when this happens.
- If there are some stubborn paint bits, apply the stripper on them again, then scrape them off once they soften. Repeat the whole procedure as needed until all the paint comes off the surface.
- Afterward, use a clean damp cloth to remove all traces of the paint remover and any remaining paint.
If you dread using chemicals, there are other ways you can use to remove paint from old wood. They are safer compared to chemicals and are more friendly to the environment. On the downside, these methods are slower, requiring more manual work to get the job done.
Heat guns can make paint bubble off a surface so you can scrape it off quickly. It works well for large surfaces, and you can work fast with enough practice. However, there are so many risks associated with removing paint with a heat gun, including:
- The wood may catch fire by accident.
- If you burn the paint, it will start producing harmful fumes.
If you can’t use a heat gun, I recommend using any other alternative method until you’ve had a little more practice.
Sanding is more friendly and poses less risk to you and the environment. However, this method requires too much manual labor, so it is best for smaller projects.
If you choose this method, make sure you use minimal pressure because you’re working on old wood. Old wood is fragile, and too much pressure will leave deep scratches.
Step 2: Repair All Damages
Most old woods have holes, deep scratches, and gaps caused by many years of use. If you paint over the imperfections like that, they will stick out badly after the paint dries. The best way to deal with these flaws is to hide them using wood epoxy.
Wood epoxy will fill the superficial dents and those running deep into the wood body. When applying the filer, make sure that you use a little more than enough to cause the gaps to overflow. The raised filler will allow you enough room for sanding.
Step 3: Sanding and Cleaning
After the wood epoxy dries, sand down the extra bits until they level up with the surface. When the surface levels up, run fine-grit sandpaper over the whole wood board to ready it for paint.
After sanding, use a mixture of TSP and water to clean the old wood and remove any mold or mildew present. Allow the wood to dry properly before proceeding. It is crucial to allow the wood to dry before coating it with anything to avoid trapping moisture in the fibers.
Step 4: Prime then Paint
Once the old wood dries, choose an appropriate primer to seal the surface and improve its paint adherence. Apply two coats of primer and make sure to sand between coats for a more even finish.
After the primer dries, paint the old wood with your desired color.
Note:
- If the old wood has too many parts that need replacing, consider calling a professional woodworker to assist you. They will advise you on the best way to deal with pests and fungi on old wood and dispose of the damaged bits.
Wood Paint Vs. Wood Primer
Wood paint and wood primer always go hand in hand, so you cannot mention one without the other term popping up. They are both necessary wood coatings that confuse many people, especially novice painters.
So what exactly are wood paint and wood primer?
Wood primer is the preparatory coat you apply to the wood before painting. It is the product you use to seal the wood to promote paint adhesion.
On the other hand, paint is the pigmented liquid that you use to protect and decorate pieces of wood. It dries into a complex film that keeps damaging elements away, thus maintaining the quality of the wood.
These products are liquids, and they have similar jobs – to protect the substrate. Moreover, their methods of application are identical. You can apply them using a brush, a roller, and in some cases, a sprayer.
All signs point to these products being similar in every way. So what exactly makes them different?
Composition
Wood paint contains pigment, a binder, and a carrier/solvent. The binder fuses the pigment particles, and the solvent is the medium that carries the pigment and binder, making it easy to transfer onto surfaces.
The pigment particles in paint are what give it its color. They also create the bulk of the paint and determine the hiding capability of your paint.
On the other hand, primer only contains a synthetic resin, a solvent, and an additive. It lacks pigment particles, so most primers are either white or grey. The lack of pigments makes primers a little less firm than paint, but the abundance of synthetic resin makes its bonding properties top-notch.
Functions
The function of paint is to add visual appeal to a surface. The pigment in its formula adds color and sheen to wood, making your space look beautiful.
On the other hand, a wood primer’s function is to seal the wood to prevent it from soaking up moisture from paint. It is highly adhesive, creating a powerful bond between the wood and the color to ensure a lasting paint job.
Even though these two products have some differences and similarities, they need each other to perform at their best. Wood paint lasts longer and looks better when you apply primer before it.
On the other hand, wood primer cannot protect the surface of the wood for a long time without top coating with wood paint.
Can I Use Wood Primer as Paint?
I do not recommend using a primer as paint because the compositional differences between the two products make it impossible.
Primer has a higher resin consistency, perfect for sealing wood before painting. However, it lacks the pigment that gives paint its color, so it cannot hide flaws or decorate the surface.
Moreover, primers do not have the additional durability agents and gloss mediums that make paint strong enough to ward off all the damaging elements.
If you use primer as paint, it will not take long before the primer film deteriorates. After about a week, the primer will start to form chalk-like substances on its surface. So it is best to coat primer with paint as soon as it dries.
If you want to leave your primer without paint, I recommend sealing it with a clear topcoat after it dries. Most clear coats on the market act as an additional barrier between the harmful elements and the substrate.
They are the last seal that can make the paint last longer, so they will protect the fragile primer film for a while.,
I recommend using polycrylic clear to seal unpainted primer because they offer protection for longer and are easy to apply. Polyurethane clear coats can also work, and they are stronger than polycrylic clears.
However, I do not recommend them because they turn yellow over time, and since most primers are white or grey, the color change will show.
Can I Paint Wood Without Primer?
I do not recommend painting wood without applying primer first because it will compromise the paint results. However, you can get away with skipping the primer in selected instances. You can skip priming if:
- You are coloring a previously painted surface, and the old paint is still in good condition.
- You are using fresh paint in the same sheen and shade as the old one.
- You are changing from a light color to a very dark color.
- When you are using paint and primer in one over any previously painted surface
Other than those four instances, your paint results will be a disaster if you skip priming. So what happens if you paint wood without primer?
- The Paint Will Peel.
Without a primer, the paint will not adhere properly to the wood. As a result, it will lift and start to peel a few weeks after application. Furthermore, painting without primer will give you a hard time when cleaning your painted wood in the future.
The paint coat will detach in some areas whenever you wipe or scrub the surface.
- Surface Imperfections Will Stand Out.
One of the functions of wood primer is to seal all the tiny crevises on wood to create a smooth surface to paint. The high resin concentration in primer allows it to fill the minor dents on the wood’s surface.
However, if you skip priming, the flaws will remain unsealed, and they will show up more prominently once the paint sets.
- You Will Apply Several Coats.
Wood primer creates a neutral background for the paint so that you can achieve the intended color intensity in just two coats. Without a primer, the wood’s natural color will show through the paint, and it will take more than two coats to get the color you want.
Unprimed wood will also soak up most of the moisture in paint, including the pigment. As a result, the ratio of pigment in the paint reduces, causing its color to be lighter than intended. Consequently, you will have to apply more coats to achieve the desired color.
Applying several coats may reveal the paint’s actual color, but some spots will look lighter than others. Consequently, your paint job will look patchy. Furthermore, more layers mean thicker coats that peel off easily.
Tips for Priming Wood Properly.
- Sand the wood before applying primer to improve adherence to the surface. After sanding, ensure that you clean the surface properly to remove all the wood dust. Otherwise, the dust will interfere with the primer’s adhesion causing paint peeling problems in the future.
- Do not use very old primers to avoid the chances of using expired products. If you have had several containers of wood primer stored away for a long time, ensure that they are still good quality before using them.
- You can tell whether primer is good or expired by paying attention to its smell. A sharp stink will indicate that the primer has gone rancid. If there is no smell, look at the consistency of the product. A good primer is smooth; however, purchase new primers if you see chunks like those in coagulated milk.
- Use the same quality tools and techniques on painting to apply primer. Since primer is the foundation of your project, you will yield better results when you pay better attention to it.
Conclusion
Several external factors cause wood to deteriorate faster than it should. Too much moisture causes fungi and rot, while UV rays discolor the wood. All these damages are hard to salvage if you fail to treat them in good time.
On the bright side, you can take a few precautions to protect wood before harmful elements attack. The most widespread protection method is painting the wood..
So What Is Wood Painting?
Wood painting involves applying a liquid coat on wood to protect the surface from damage. Moreover, it is a way of decorating your wood pieces to match your style.
The liquid applied here is called paint, and its formulation consists of a pigment and a binder carried in a solvent. Once you put the paint on the surface, the solvent evaporates, leaving the binder and the pigment as the protective film.
There are several types of wood paint you can use to color your surface. Water-based paints are the most affordable and environmentally friendly, plus they dry quickly. On the other hand, oil-based paint provides better protection, producing high VOC emissions.
People choose to paint wood for different reasons. Some do it purely to protect the material, while for others, it is purely for decoration. Sometimes people use paint to revive old wood pieces for sale or personal use.
Whatever your reason for painting, it is always best to start with a clean and primed surface before applying the paint. Excellent preparation will ensure that your color looks good and lasts longer. For older pieces, make sure that you repair the minor damages and replace the parts that need replacing.
Like everything, wood painting has its advantages and disadvantages. Understanding the weight of each will help you decide whether painting is the right move for your wood project.
The most significant advantage of painting wood is that you get to select from several colors and paint sheens to match your style. Furthermore, painted wood is easy to maintain, and you only have to clean your surfaces with soap and water. A fresh coat of paint will also increase the value of your home or wooden art pieces if you are looking to sell.
On the downside, paint covers the wood grain entirely, so it is not ideal if you like the natural wood’s brown color. Moreover, the painting process is time-consuming, stretching out for days. Touching up paint is also a challenging task as you will need to choose precise color shades and sheens to get it right.