
Have you ever imagined having black paint for wood furniture? I hope so, if you haven’t then here’s what you should know…
Paints come in a variety of colors, hues, and sheens. Painting as an art has a surprisingly long history, dating as far back as 40000 years.
In these realms, the three primary colors are blue, yellow, and red; they are so-called because you can’t produce them by mixing other colors.
It’s impossible to discuss all paints in one article because the topic is so wide and detailed. In that respect, I’ve narrowed it down to black paint for wood furniture.
Black paint is available in many forms based on thickness, adhesiveness, permeability, patina, base solvent, quality, etc.
It leads to a difference in costs, durability, water resistance, environmental friendliness, appearance, and the number of coats required for application.
Black is the strongest of all neutral colors, so it easily matches warm, cool, and other neutral color hues.
Black paint connotes power, sophistication, seriousness/solemnity, mystery, and elegance.
It also has negative perceptions of pessimism, fear, darkness, and war.
It’s therefore essential to contextualize the black paint before application.
Continue reading the article for more information regarding the paint in question to find out how to apply it and the best brands for every project.
I’ve also discussed the following:
- The pros and cons of black paint on furniture
- How to select the best black paint
- How to attain a low-sheen black paint finish
- Painting wood black without sanding
- The possibility of sealing black-painted furniture
I’ve made the review as forthright as possible, so stay tuned throughout; I guarantee you absolute success when we’re done here.
What Is Wood Paint?
For complete coverage, I’ll begin with the basics; what is wood paint?
Wood paint is the pigmented liquid you apply to wood to guard against adverse conditions and degrading agents.
On application, a cascaded reaction occurs, leading to a dry layer forming on the painted surface.
The coating is impervious to water, excess UV rays, and chemicals.
It is also resistant to fungal growth and unpalatable to vermin and termites.
Other than the above-mentioned protective functions, it improves the aesthetics of wood surfaces.
They are available in numerous colors, shades, textures, and sheens; you can also mix compatible paints to come up with new varieties.
It allows you to achieve a customized look unique to your furniture.
When a given paint wears out, or you get bored with the look, you can remove it by following the appropriate protocol and putting on new paint.
Paint formulation strikes a delicate balance between the ability to stick firmly to wood and an easy removal mechanism whenever you need to.
Before deciding what wood paint to apply to your furniture, check for their compatibility.
The compatibility depends on the wood type (softwood vs. hardwood), paint type/composition (waterborne vs. oil-based), frequency of use, and environmental conditions (weather and vermin prevalence).
Softwood like pine should be entirely covered with high-quality paint, while hardwoods can be painted lightly but still with high-quality paint.
Incidentally, paints going on softwoods should contain less caustic components.
Food-grade wood like those found in kitchens requires non-toxic paint with low VOCs.
Lumber meant to go into building foundations should be laced with unpalatable components to ward off termites, wood-eating insects, and rodents.
Hard-wearing timber paints like urethane and enamel-made varieties are ideal for frequently-handled furniture or high-traffic wood floors.
Paints meant for distressing like chalk paints and milk paints are perfect for antique furniture that are less frequently handled.
Oil-based paints better fit furniture or wood substrates exposed to rainy conditions as they are less susceptible to washouts and water accumulation.
So it’s best to assess the situation to make the right purchase.
Regarding constitution, paints comprise the following:
- Vehicle: binder and diluent
- Pigments: natural and synthetic
- Fillers
- Additives
Vehicle
The vehicle consists of the binder/film former and the diluent/solvent/thinner.
As the paint dries on wood, the solvent evaporates, leaving behind the binder.
It ensures enough coating material (polymer backbone) remains on the surface after drying and curing.
Therefore during formulation, there’s always a keen focus on getting the resin or vehicle solids proportions right.
Binder
The binder is the paint’s adhesive and film-forming constituent; it makes the paint form a single continuous layer on the substrate.
It’s also known as the film former and is the most defining component for all paints.
Applying binders without incorporating other paint components like thinners is impossible as it is often too thick.
The type of diluent or solvent varies in congeniality to the binder.
Binders impart durability, gloss, toughness, and flexibility to paint.
The film-formers include synthetic and natural resins like acrylics, polyurethanes, epoxy, alkyds, silanes, polyesters, vinyl acetate-ethylene (VAE), and melamine resins.
You can also classify the binders based on the mechanism of film formation. These are:
- Thermoplastic mechanisms: It forms the films by drying and coalescence.
- Thermosetting mechanisms: It forms a film by a chemical reaction that involves polymerization or cross-linking.
- Combination mechanisms: This is common with catalyzed lacquers. They form films by combining classic drying and curing reactions accelerated by the catalyst.
Diluent/Thinner/Solvent
The primary function of a diluent is to dissolve/dilute the polymer and binder component of the paint; this adjusts the viscosity or flows property of the paint accordingly.
The solvent is always volatile and evaporates once you lay down the paint.
Lowering the paint’s flowability makes it easy to apply and, in some instances, buffers the paint to remain in the liquid state.
When adding a solvent or diluent to paint, be careful not to add too much as it will be too thin.
It can lead to overflows, paint drips, and streaks during application.
It will also affect the pigment concentration of paint, making it look lighter on the surface.
Water is the solvent for water-based paints, while paint thinners like mineral spirits, acetone, turpentine, and alcohol are the main diluents for oil-based paints.
Pigments and Dyes
Pigments are finely-grounded substances incorporated into the paint to impart color; they make the paint visually perceptible.
Dyes play a similar coloring role but are in liquid form; they dissolve in paint.
The pigments are categorized into natural and synthetic.
The natural ones come from calcium carbonate, ferric oxide, ferrous oxide, certain clays, talcs, mica, and silica.
The synthetic varieties are blanc fixe, synthetic pyrogenic silicas, precipitated calcium carbonate, calcined clays, and other specially-engineered elements.
Pigments also impart opacity to the paint film; this shields the underlying wood furniture from harmful ultraviolet rays and hides stains.
The downside to pigments, especially those used in oil paints, is that they yellow over time when exposed to sunlight.
Fillers
Fillers are inert particulates incorporated in paint to give it texture, toughness, and bulk.
They lower the cost of paint production and purchase.
The texture property comes from their granular nature, while the toughness property is because they add to the structural makeup of the paint, keeping the other components suspended in the system.
The bulky attribute increases the volume/amount of paint while maintaining its potency.
Fillers are often cheap and non-reactive. They include talc, clay, diatomaceous earth, barytes, quartz, and lime.
Additives
Additives are miscellaneous substances added to paint to give various properties.
The preceding paint components show consistent similarity in all paint types, i.e., it’s the usual suspects. It’s a different story for additives, varying from one paint to another.
The additives include thickeners, flatteners (deglossing agents), stabilizers, catalysts, emulsifiers, adhesion promoters, texturizers, biocides, and anti-UV agents.
The additives confer the following characteristics to the paint:
- They increase the surface tension
- Improved pigment stability
- Better flow properties
- They mitigate paint skinning
- Additives help to maintain a wet paint edge for convenience of application
- They prevent paint foaming
- The agents have antifreeze properties
What Is Wood Painting?
If you’ve gone through the preceding subheading (what is paint?), this should unfold pretty easily, even with little explanation.
But let’s cover it for good measure; what is wood painting?
It is the application of paint, color, pigment, and other protective media to solid surfaces. It’s often done for protective and decorative purposes.
Wood painting has a rich history, and the earliest forms date as far back as 40,000 years; some texts have it at 52,000 years.
The paintings were done on tree trunks, rocks, and caves. In other terms, the art has an extensive evolutionary background leading up to its modern form.
You can carry out wood painting through various techniques. These include:
Brushing
The above refers to the use of paint brushes to apply paint.
Wood painting with water-based paints is done with synthetic brushes, while oil-borne paints are applied using both natural and synthetic paint brushes.
Painting with a brush involves dipping the bristles into paint and then applying it to the substrate in back and forth motions.
It’s best to be careful when doing the above to prevent the formation of brush marks.
The paintbrushes are designed differently in terms of angles, shapes, sizes, and bristle firmness.
It ensures that all the wood types and situations are taken care of for a top-rate finish.
Using Paint Rollers
A paint roller comprises, i.e., a roller cover and a roller frame.
The roller cover is a cylindrical absorbent that soaks up and transfers the paint to the substrate (wood in our case).
The roller frame attaches to and holds the roller cover in position.
The tool above is effective for rapidly painting large, flat wood surfaces.
Some roller covers have a spiked surface for paint leveling and the elimination of trapped air or “fisheyes” during painting.
Using Rags and Sponges
This involves using absorbent materials like cotton or woolen towels and spongy material to lay down the paint.
Here, you pour controlled amounts of paint onto the rag or sponge, then smudge or smear it onto the wood in a back and forth motion.
This technique is used in small-scale painting projects that don’t need smoothing. The most implicated paints for this method are chalk paints and milk paints.
Spraying
The above refers to the release of paint in atomized form through the air to the wood. The application devices are spray guns and aerosol/rattle cans.
Spray painting wood assumes different forms that include:
- Air-atomized spraying
- Airless spraying
- HVLP spraying
- Electrostatic spraying
Spraying is not particularly common for wooden furniture. The technique better suits metallic substrates and commercial painting operations.
The other two remaining methods are dip-coating and flow coating. T
hey are also nonconventional for wood painting and are more typical of industrial painting.
Dip coating involves the immersion of substrates into a tank or reservoir of coating material.
It works so fast and efficiently to complete large painting projects.
It doesn’t work well for wood furniture in most cases because it is expensive in installment and machine maintenance.
Timber also has a floating tendency, so some parts don’t get coated well.
Flow coating involves pumping paint from a reservoir through pipes and nozzles to the product, where it flows on the surface and to the sides.
The excess paint draining off the substrate is collected and recycled for the next painting round.
This process needs careful control of flow and evaporation to get a uniform coating.
If the flow speed is too high, it can lead to foaming and bubble formation, especially with water-based paints.
How to Apply Black Paint On Wood
One of the cherished tenets in the scientific field is the ability to be read/said, and applied! I couldn’t agree more, could you?
In strict adherence to the above principle, follow my lead as I show you how to apply black paint on wood.
In a broader sense, the application process involves preparing your working station, determining wood moisture content, sanding, sealing of wood knots, priming, and paint application.
In a more specific sense, the procedures differ a little depending on the situation.
For instance, bare wood follows a slightly different painting protocol from a previously painted wood, as does knotted pinewood from teak wood.
The disparities could also be due to the paint brand/quality you are using; some have paint & primer in one formulation, and even the drying times are different.
I’ve decided to discuss all the procedures to make the article all-encompassing. These are the steps:
Step 1: Workstation Preparation
Painting is often messy; there are lots of drips, spills, spatters, and oversprays in the case of spray painting.
These can stain and damage surrounding objects, walls, and the floor. You have to prepare the working room in anticipation of the said mess.
While you can clean up most of the mess, the better option is to avoid it in the first place.
You also need enough working room, especially when handling large projects. It facilitates free movement when working.
Prepare your area in the following order:
- Evacuate all the movable materials to safer locations; these include foodstuffs ( if working on kitchen cabinets), clothing items, machines, water vessels, etc.
- Open all windows and doors to improve air circulation. It prevents the nauseating effects of a strong paint odor.
- Cover the floor with a tarp, a drop cloth, or newspapers; this catches spills and splatters.
- Mask the walls and immovable objects with painter’s paper and tape.
Step 2: Screen the Wood for Moisture Content
Most people usually neglect to check this step. Wood moisture content significantly impacts painting results as excess water hinders paint adhesion and causes rotting.
You can measure the moisture levels using a moisture meter. The machine is calibrated for easy reading.
For outdoor wood, the optimum range is between 15 to 20%, while for indoor wooden material, the best range is between 12-15%.
Step 3: Wood Sanding
Sanding is the intentional scratching of a wood surface using abrasive materials, mainly sandpapers.
The above step exposes the underlying bare wood, enabling paint adhesion and direct interaction with the wood grain.
Sanding is necessary for previously painted furniture, lumber riddled with divots and non-washable stains, and new timber containing glaze coating.
- Start by putting on a respirator and safety goggles to prevent inhalation or eye irritation from the wood dust.
- Next, sand using a low grit abrasive like 120-grit sandpaper. This removes the rougher big chunk of material on the surface. Sweep or wipe off the accumulated dust afterward.
- Then, use higher grit sandpaper (220-grit) to remove the smaller bits of rough material and raised wood grain.
- Next, take fine-grit sandpaper (360 to 400-grit) to level and smooth out the surface in readiness for the next step.
- Vacuum away the accumulated debris before wiping it with a damp rag. It makes the furniture sufficiently clean to receive paint.
Excessive sanding reduces the wood mass unnecessarily.
If you work with bare wood with an appropriate texture, you don’t have to sand as the paint will adhere easily. Simple surface cleaning will suffice.
Step 4: Sealing
Sealing the wood will fill up the pores on its surface, making it level.
It prevents the lumber from absorbing or soaking up paint rather than bonding with it.
Sealing is also vital for knotted wood like pine. The knots contain concentrated sap and tannins, which bleed out habitually.
The bleeding then comes through the painted surface (if you fail to seal), making your substrate look mottled/discolored.
If the wood is knotted, spot-sand the affected regions, then apply a shellac-based sealant like the Zinsser Bulls Eye Shellac Sealer.
It solves two problems: sap bleeding and the knotted spots showing through the paint, which can ruin what ought to be a perfect paint job.
The sealing agent above often has a pungent smell, so I advise you to put on a respirator, safety goggles, and gloves as a cautionary measure.
On the bright side, the odor quickly dissipates after sealer application.
Step 5: Priming
Priming is a vital preliminary for painting. It improves paint adhesion by etching the surface a tad bit; this gives the substrate a better grip for the incoming paint.
Primers also bind with the lumber underneath and the paint above to make them so closely stuck as though they were a single entity.
Whether knotted or not, apply the primer to the entire furniture surface. Use a roller or a paintbrush for the undertaking.
But if working on a commercial scale (meaning larger or numerous surfaces), spray using a rattle can or a spray gun.
If you plan to use an oil-based paint, apply an oil-borne or waterborne primer.
If your final paint will be water-based, use a water-based primer only.
Don’t use an oil-borne primer for the latter case because water paints cannot go over oil-borne primers.
You can apply two or three primer coats as needed. Allow sufficient drying between each primer coat before moving on to the painting step.
The advantages of using water-based primers are that they dry super fast, are easy to clean, and produce less odor.
The drawback is they are less durable compared to the oil-based varieties.
The benefits of oil-based primers are that they form a strong layer with better water and stain resistance.
The downsides are they take longer to dry, have a stronger odor, and have higher VOC levels.
Step 6: Painting
When you follow all the preceding procedures, painting becomes effortless. It’s because the surface is ready and receptive to the paint.
You can use a paintbrush, foam roller, spray gun, or a rattle can for the application.
If you’ve opted for brushing, use smooth but firm-bristle paint brushes.
If the paint is water-based, ensure the brush bristles are exclusively synthetic; if the paint is oil-based, use natural or synthetic bristle brushes.
First, mix the paint in a separate container from the main can and thin if necessary using water (for waterborne paint) or turpentine (for oil paints).
Next, take your paintbrush and dip it into the paint; dab it against the container sides to remove the excesses.
Then, apply the paint to the wood surface in short, gentle, but firm strokes.
Also, paint along the wood grain to make the application smooth and enable the paint to interact closely with your substrate.
Go back and forth on each section to catch paint drips and spread them evenly across the surface; it also eliminates any brush marks and paint streaks.
For hidden or hard-to-reach areas of the furniture, use a smaller angled brush for paint application.
Let the first paint coat dry for the specified time by the manufacturer before laying down a second and third coat.
Water-based paints take roughly 3 to 4 hours to dry for recoating, while oil paints take around 24 hours before recoating.
For the paint roller, take the roller cover and clamp it on the roller frame.
Test using your hand to see if it’s rotating freely; if there’s too much friction on the roller, it won’t work well during paint application.
Then, open the paint can and pour some of it into a paint tray for thinning and mixing.
Hold the roller by the handle and dip it into the paint. Then, roll it lightly against the rails of the paint tray to remove excess paint.
Next, roll the applicator on your wooden surface. The rolling technique is a subject of controversy; some texts say you should roll it in alternating diagonal motions.
I prefer rolling in vertical/up and down motions while overlapping each painted section by half.
Overlapping eliminates paint runs, spreads the paint evenly, and covers any missed parts.
Let the first paint coat dry, then apply the second and third layers using the same procedure as the first.
When waiting for the paint coats to dry, wrap the paint roller in a polythene bag/cover to prevent drying or hardening of the paint.
Otherwise, the hardened paint will make the foam roller rough, and it will also undermine its free rotation.
A paint roller’s advantages are that it works faster than a brush and lays down paint smoothly without leaving brush marks.
The downside is it doesn’t get to the hidden parts of the substrate easily.
You can then let your furniture cure for 5 to 7 days before resuming normal usage.
PS: Remember to clean your painting equipment immediately after project completion.
Use warm water to clean the materials for water-based paint and mineral spirits to clean the materials and spills from oil-based paints.
Here’s How to Paint Furniture Black:
Best Black Paint For Wood Furniture
After bombarding you with all of the above information, you may find yourself in the dilemma of picking the right paint for your project! It’s understandable.
I’ve set apart this segment to showcase the best black paint for wood furniture.
I’ll mention specific brands, related background information, and outstanding features.
These are the products:
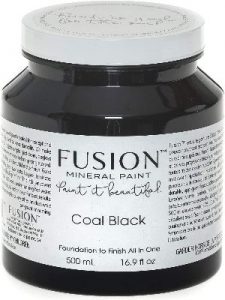
1. Fusion Mineral Paint Coal Black
The above paint is manufactured by Homestead House Paint Co., headquartered in Canada.
The company makes and supplies top-notch environmentally-friendly paints throughout North America; it’s been operational since 1988.
The Fusion™ Mineral Paint Coal Black took over a decade to develop. It has undergone rigorous testing and refinement to become the household brand that it is.
Here are a few benefits and facts to know about the above product:
It Is Not a Chalk Paint
Fusion coal black paint is not chalk paint!
Rather, it is a mineral paint comprising natural minerals and 100% acrylic resin; these are responsible for its striking color depth.
Although the fusion mineral coal-black is not chalked paint, it can accomplish most of the effects of chalky paints.
Moreover, it gives a smooth and classy matte finish with excellent durability.
No Need to Prime or Top-Coat
This is down to the paint’s exceptionally high durability. The mineral paint’s 100% acrylic component forms a non-porous, hard-wearing, and waterproof layer.
You don’t have to add wax or any topcoat to buttress or seal the paint.
By the same token, you can use Fusion coal black on high-traffic/exterior projects like garden furniture, decks/patios, and front doors.
You can also apply it on frequently handled wooden materials like kitchen cabinets and wooden pestles & mortars.
Regarding prep work, you don’t need to prime wood furniture before laying down Fusion mineral paint.
It has high adhesive power and goes well even on rough-surfaced wood materials.
The paint’s ability to go on surfaces without priming and waxing has led to its famous colloquial reference as a ‘foundation-to-finish’ product.
It means the black paint can work perfectly as a stand-alone.
The above statement is not a warranty to avoid priming and top coating every time you use Fusion coal black paint; when necessary, apply the primer and the topcoat.
Self-Leveling Property
Self-leveling is paint’s ability to even out and form a smooth layer on surfaces by itself.
It’s a slow process that happens after you’ve laid down the paint; some paints take longer than others, and some dry before leveling.
Fusion black paint has excellent self-leveling properties thanks to its ingredients and the rigorous testing procedures I mentioned earlier.
It takes less time to level, and all the brush marks and raised surfaces disappear, giving way for a flawless and smooth layer to the touch and in appearance.
If you need a textured black finish on your furniture, you can add Fresco powder to the paint before or immediately after application.
Add in amounts that suit your desired texture.
Water-Based Product
The above paint product is water-based.
It has many advantages like an easy clean-up process for the painting equipment and accidental spills; you only need water for complete removal.
Water-base also makes the paint less toxic to the environment and humans (it has a low VOC content).
For the above reasons, you can apply the Fusion Mineral Black paint to food-grade wooden materials like cutting boards and food storage units/pantries.
The only drawback to the water-based characteristic is that the paint is prone to washing away when wet and is less durable than paints with oil-based solvents.
Minimal Prep Work
As I mentioned, surface prepping involves cleaning, sanding, priming, and sometimes sealing.
For the Fusion black paint, you don’t have to do all the prep work before laying it on furniture.
In some instances, you only need to clean the surface because the paint in question has superior adhesive and curing properties.
The qualities make it get deeper into the grain of your wood.
The black color of the paint further precludes the need for prepping as it will hide most of the furniture imperfections.
The situations that call for complete prepping before applying the black Fusion paint include:
- An overly shiny, smooth furniture: this needs light sanding to provide better a grip for the black paint
- A heavily damaged wooden substrate: this requires heavy sanding to remove the defects and even out the surface
- Wood furniture containing an oil-based paint: all water-based paints (fusion black included) cannot go over oil-based paints. You need to sand down to bare wood so the paint can stick well.
Long Shelf Life
Most paint types last long after opening their cans; this leads to spoilage, discarding, and paint wastage.
The Fusion coal black paint is different! It’s formulated with potent preservatives that keep it viable even after opening the cans.
The preservatives also prevent congealing of paint hence maintaining its liquid state.
Here is the time frame: the paint has a seven-year shelf life. It buys you more time to use the leftovers of one project in the next one.
 A longer shelf life reduces paint wastage and costs of repurchase.
Surface Coverage
Small amounts of Fusion black paint can work large areas of wood furniture thanks to its broad surface coverage.
The paint is available in 500ml containers and 37ml tester pots.
The 500ml container covers about 75 square feet (7 sq meters), which is significantly large.
Wide surface coverage economizes paint and lowers costs.
Check Latest Price
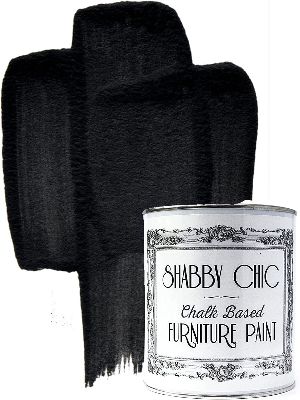
2. Shabby Chic Chalked Furniture Paint: Black Liquorice
Shabby chic is a technique of interior design where wooden furniture is chosen for its aged appearance and signs of wear.
It also describes a style where the new furniture is distressed to attain an antique appearance.
The above look is often achieved by painting, followed by rubbing and light-sanding some sections of your workpiece to reveal the base coats and wood.
The ‘shabby chic’ phrase was used through the 20th century to describe both decor and fashion. Min Hogg then popularized it as a decoration style in the 1980s.
The popularity in the United States came later in the 1990s when shabby chic described decoration styles using paints and special effects.
It’s where shabby chic paint made its debut.
The above-named chalked paint is not only ideal for wood furniture but also for metals, plastics, and stones.
It’s a chalky finish for interior use, like in home decor and DIY projects.
 More advantages and distinguishing features include:
- It is water-based paint: this means easy clean up after use and innocuous to the environment and human health.
- The paint comes in a back liquorice color, giving your wood furniture a pristine-looking black that’s uniquely picturesque when distressed.
- It has short drying times to enable timely project completion.
- Shabby chic furniture paint gives a matte finish: it takes the rustic charm a notch higher.
- This black paint comes in 8 fl oz containers conveniently covering large wood surfaces.
- The black liquorice chalk paint is an advanced formula with low VOC content, low odor, and is free from harsh chemicals like formaldehyde, heavy metals, or phthalates.
- Shabby chic chalked paint comes at a budget-friendly price. Its formulation is a fine balance between affordability and efficiency.
- The paint is easy to spread and use.
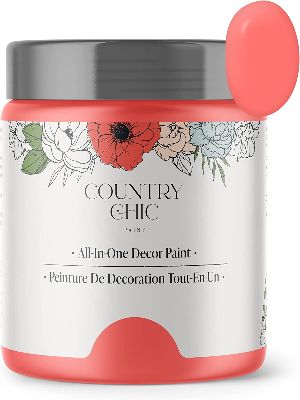
3. Country Chic Chalk Style Paint
Country chic paint is a couple-inspired creation by Jan and Roseanne Korteland; they introduced it into the painting world in 2014.
Their goal was to convert the then labor-intensive painting into an easy and fun undertaking.
Their invention saw the rapid success that in November 2015, the Country Chic paint was featured on Dragons’ Den, a famous Canadian reality show.
The same year Country Chic Company won the 2015 BC Export Award in the consumer products division.
The success is by no means a happenstance as the company is robustly structured with good leadership/management and a dedicated production team & staff.
Their black chalk-style paint perfectly lays on wood, metal, glass, and laminates.
For wooden substrates, you can use them on kitchen cabinets, butcher boards, pantries, and other food-grade materials.
 The advantage and qualities of the above paint are:
- It’s suitable for interior projects (like cabinets and kitchen implements) and outdoor surfaces (like garden furniture, picket fences, and patios).
- The paint comes in 16 fl oz containers, that’s sufficient for most wood-painting tasks.
- This chalk-style paint produces a matte finish that looks rustic but classy when distressed.
- It is environmentally friendly and harmless to humans, making it perfect for painting food-grade materials and even children’s toys.
- Country chic chalk-style paint is water-based; this makes it easy to clean your painting equipment after use and remove unwanted spills.
- The paint contains low levels of VOC and zero amounts of heavy metals, phthalates, & formaldehyde.
- It is almost odorless; besides, the low odor disappears quickly after application; this makes its usage convenient, especially for individuals with respiratory allergies.
- It comes at an affordable price; the manufacturers have prioritized clientele’s interest, with monetary pursuits secondary.
- This paint dries and cures fast to render the substrate reusable.
- The black color of the paint is so rich that it hides wood surface defects.
Pros and Cons of Black Paint On Wood Furniture
As with all artificial products and machines, paints have advantages and shortcomings.
It goes without saying that the benefits must outdo the drawbacks to render the product useful.
The black paint samples mentioned in this article have passed this test with flying colors.
Without further ado, these are the pros and cons of black paint on wood furniture:
Pros
For Improved Wood Furniture Aesthetics
Aesthetics relates to the beauty or attraction of the painted surface.
Black is a neutral color that improves the look of your furniture in many aspects, as I’ve highlighted below:
- Sheen level: you can choose flat, satin, matte, or glossy black paint.
- Shade: you can use a dark tone containing highly pigmented black or a light shade that’s less concentrated.
- Texture: you can opt for a more textured black paint containing spackles or a smooth textured one containing no solids.
All of the above variations change the appearance of furniture, and you can periodically shift from one look to another for a new experience.
Additionally, a freshly-painted wooden material will always look new and entrancing.
Painting Conceals Defects
Black paint gives a neutral and absorptive finish. It works pretty well to hide the flaws present on a wooden surface.
Such imperfections include indelible stains and minor damages.
If the wood furniture has sustained significant damages, for instance, charring from fire and deep gouges, painting alone won’t cover the imperfections.
In the above situation, it’s best to sand the wood thoroughly, apply a wood filler, seal, prime, then apply the black paint.
Black Paint Protects the Wood
The black paint products discussed in this article confers protection to wood furniture in the following ways:
- Termite and vermin proof: The paint contains chemicals that make the wood distasteful to wood-eating organisms like termites, wood-eater ants, and rodents such as ants.
- Water resistance: when the paint dries, it forms an impervious and smooth coat. The waterproof property prevents water and moisture penetration, while the smooth texture makes water skid off the surface to prevent its accumulation. It prevents rotting as the water won’t get to the substrate underneath.
- Fire-resistance: Some of the paints are laced with chemicals that are fire-proof. It’s a highly sought-after property that keeps your furniture safe in the event of a fire breakout.
- Resistance to fungal growth: The above-mentioned black paints pose harsh growth conditions that cannot support fungal colonization. The most implicated fungi that grow on the wood are mildew and mold; they cause discoloration and are challenging to eradicate once they set in.
- Precludes corrosion from chemicals: The three paint coats keep the wood securely intact alongside the primer and sealer. Any caustic chemicals like acids can’t come into contact with the substrate in the event of accidental spillovers.
All of the above protective attributes give longevity to the furniture.
You only need to purchase high-quality paint from a reputable brand and follow the correct application protocols; it’s the essence of painting.
Painting Lowers Maintenance Costs
I recognize the initial purchasing and labor costs of painting. But in the long term, it dramatically reduces the maintenance costs.
If you leave the wooden furniture bare, it will fall victim to damage from sunlight, water, vermin, etc.
You’ll have to replace the wood planks regularly, which is quite expensive. Yet, you can prevent the above situation in a single move, i.e., painting.
It Maintains the Furniture’s Structural Integrity
In overall capacity, black paint keeps your wood planks and furniture strong and in good working order.
Without the paint, the mildew and mold I mentioned earlier grow deeper and feed on the wood grain.
This breaks their bonds, making your wooden structure weaker.
Also, water causes wood rot which only spreads if the water accumulates for long.
It further undermines structural integrity; needless to say that rotten furniture emits an awful smell.
The paint products mentioned above are specially formulated to remedy the above vulnerabilities.
They get into the wood grain and firmly adhere to repel rodents, resist water penetration, and discourage fungal growth, which are the main agents of structural sabotage.
All of the above make for durable furniture that will span many generations.
Cons
It Hides the Beauty of Bare Wood
The protective role of black paint on wood is at the expense of concealing the beautiful appearance of raw wood.
The sight of bare wood always connects us with nature, evokes quaint charms, and makes us feel belonging.
The smell of pure wood has similar powerful effects. Painting obscures all of the above.
Some people leave their furniture unpainted to maintain that natural connection.
However, the consequences are far-reaching in terms of maintenance and durability.
Nowadays, there are paints designed to match the appearance and smell of natural wood. I urge you to use them instead of leaving the furniture bare.
Painting is Costly And Consumes Time
The initial cost of painting is high due to purchases and labor. Plus, it takes a lot of time to complete the project successfully.
But in a long-term sense, it’s actually cheaper due to the sheer protection it confers to the substrate.
Harmful to Human Health And the Environment
Paints, especially oil-borne varieties, are environmentally harmful and hazardous to human health.
It’s because they have high VOC contents and produce strong odors.
The remedy to the above is to use water-based alternatives or premium oil-based paints.
The waterborne paints contain lower amounts of VOC, are odorless, and have ordinary water as their principal solvent; the premium oil paints are modern and highly purified, making them nearly as good as water-based paints.
How Do You Get Matte Black Finish On Furniture?
Paints result in different lusters based on their formula.
Luster means the quality of shine a paint leaves on a given surface; it ranges from a low-sheen (flat and matte) to a high-sheen (semi-gloss and gloss) finish.
Black paints also differ in the degree of glossiness from which you can select. Take, for example, one of the low-sheen finishes; how do you get matte black finish on furniture?
Getting the finish mentioned above is pretty straightforward. You only need to purchase a low-sheen black paint, specifically labeled matte.
The type of finish is often indicated clearly on the paint container and information guides.
Afterward, apply the paint using the same procedure as I detailed in the “how to apply black paint” segment of the article.
To recapitulate, the painting protocols are:
- Preparation of the working area
- Screening for wood moisture content
- Sanding
- Sealing of wood knots, if present
- Priming
- Laying down the paint
It’s as simple as such! You can scroll up to check for detailed information regarding the same.
Can You Paint Wood Black Without Sanding?
Wood and other materials require good prep work before laying down paint; it promotes paint adhesion and subsequent substrate durability.
The three main surface prepping protocols are cleaning, sanding, and priming.
But sometimes, you are pressed for time, or maybe the paint is so good at hiding surface defects.
Under the said circumstances, can you paint wood black without sanding?
Absolutely! You can paint wood black without sanding.
But, it depends on the condition of the wood, the products you’re using to paint lumber, and the preparatory practices leading up to painting.
These are the products you can use to avoid the sanding step:
By Using a Primer
A primer scuffs the timber a little bit, like sandpaper. It improves the surface texture in readiness for paint reception.
It’s important to note that primers are uniquely formulated for wood and other substrates.
They have a corrosive property but are not as destructive as concentrated acids and other caustic chemicals. So, rest assured they won’t damage the furniture.
On your side, I urge you to be careful and diligent enough to buy primers only meant for wood.
The best primer that works for most lumber is the Zinsser Peel Stop Triple Thick primer.
It has quick drying times of 2 hours for recoating and broad coverage of 12 to 50 square feet per quart. It also comes at a budget-friendly cost.
Chalk Paint
Chalk paint and other chalky finishes are designed to go on any surface without prior sanding and priming.
They are made to give the furniture a distressed, antiquated, classy appearance.
The best brand in the above category is country chic chalk-style paint. I’ve listed its outstanding features in the ” best black paint for wood furniture” segment of the article.
Textured Wood
Using an appropriately-textured bare wood, similar to a sanded one, obviates the need for sanding.
But it’s a bit challenging to find timber that exactly fits the texture you need for painting without sanding or priming.
You need a prior consultation with a lumber dealer and thorough research to get a suitable substrate. If you do, however, you can skip the sanding process.
Using a Deglosser
A deglosser is a solution formulated with chemicals, making it function similarly to sandpaper; no wonder it’s popularly known as liquid sandpaper.
The substance draws out the sheen luster from a painted surface and makes it rough.
It, therefore, forecloses the need for sanding, which consumes a lot of energy, especially when done manually.
On the other hand, you only apply a deglosser to a rag and then rub it on the targeted surface for the same outcome.
Use Milk paint
Milk paint functions the same way as chalk paint!
You can apply it to surfaces without following the regular prepping procedures like priming or sanding.
For better results, I advise you to mix the milk paint with a bonding agent; it promotes paint adhesion to surfaces.
Most milk paints retail as powders. After purchase, you can mix and solubilize the powder with water to form liquid paint.
The mixing enables you to come up with your desired color in the right shade.
Mix red, blue, and yellow colors in equal proportions to get black.
Can You Seal Black Painted Furniture?
A painted wooden material seems good enough to get you going. However, can you take it a step further and seal black-painted furniture?
Yes, you can! Paint sealing is not only important for black painted surfaces; it extends to other substrates and paint colors.
While you can make do without sealing (the paint coat alone can go a long way), the said sealers bolster the adhesion and durability of the paint.
To put some perspective, a paint sealer is like the front bumper of a car; it prevents the car from sustaining severe damages from a collision, but you can still do without it.
From a different angle, a sealer is like an insurance cover for the paint alongside the substrate underneath.
Some situations call for paint sealing more than others, for instance, using a chalky finish or milk paint.
The said finishes are prone to scuffing, peeling, and water damage; a sealer provides the best solution to keeping them intact.
Wax-based sealants are the best for chalk and milk paints; they effectively repel water and provide structural strength.
The drawback to waxy sealers is that they can melt away when exposed to excess heat.
A dilemma arises when you want the black painted surface to remain visible, and at the same time, you want to seal it for a better longevity profile.
The quandary is that the seal will obscure your beautiful finish while leaving it unsealed makes it more vulnerable to destructive agents like sunlight, water, and frequent handling.
Here is the good news: you can counter the above situation by sealing with colorless or clear topcoats! Isn’t that brilliant from the manufacturers?
They’ve designed sealing agents that protect your painted surface while keeping the black color and sheen underneath visible.
Conclusion
To conclude, painting your furniture makes it resistant to water damage, termites attack, fungal growth, and stains.
Above all, it makes the wooden workpiece look attractive and last longer.
For all the above benefits and even more, I’ve presented you with the best solution in the name of…
Black Paint for Wood Furniture
Gone are the days when black was only associated with sadness, evil, funerals, darkness, and violence.
In the contemporary world, the black color is widely regarded positively, almost with reverence in some quarters.
Here’s one trivial fact: high-ranking officials in many religious sects don black attire in their functions!
Did you know that? Now you know, and it speaks a lot regarding how the current generation perceives black.
The painting world hasn’t been left behind! Black paint signifies power, elegance, high-social status, solemnity, etc.
It’s therefore common to see black-painted wood furniture, metals, plastics, glasses, ceramics, and other materials.
However, the article’s content is centered on wooden substrates.
I’ve defined wood paint & wood painting and given a stepwise procedure for applying black paint on wood.
Conveniently, I’ve mentioned the best black paint products currently available, basing my findings on customer reviews and personal experience.
Other analyses that I’ve done in pertinence to this article revolve around:
- Choosing the best black paint as per your wood furniture
- The hits and misses of black paint on wood furniture
- How to get a low-sheen black finish like matte on furniture
- The feasibility of painting wood black without sanding
- Whether you can seal black painted furniture or not
In short, I’ve delivered everything you need to know in one written piece; all you have to do is read all of the above, make your purchase, and get down to painting your furniture.
It’s now as easy as ABC.
At the beginning of this review, I promised you good results when we get to this point. Kindly share your experiences and outcomes in the comments section.
Likewise, if you’ve got any queries or relevant thoughts, channel them through the same route.
From my end, I wish you well in all your painting endeavors.