
Would you rather paint or stain cedar wood structures?
Our discussion today comprehensively analyzes circumstances under which you should choose to stain cedar over painting and vice versa.
Cedar wood is a popular building material because it has natural repellants for insects, rot, and decay.
Therefore, you do not need to put too much effort into protecting or maintaining it.
However, extra protection will go a long way toward making your wood last twice as long as its average lifespan.
The usual methods of protecting any wood are painting and staining.
However, they differ in appearance, application, cost, and durability, which causes people to wonder, is it better to paint or stain cedar?
Whether you paint or stain cedar wood primarily depends on how you want the wood to look.
Staining is best if you want to maintain cedar wood’s unique color and grain pattern because most stains are transparent.
They seep into the wood grain, protecting it from the inside out instead of lying flat on the wood’s surface.
On the other hand, painting is best if you do not care about the natural rustic wood look and want to go for a more modern, sleek look with endless color choices.
Paint products are opaque; hence they hide the wood grain completely. Moreover, they are thick; thus, they sit flat on the wood’s surface instead of penetrating the grain.
Painting also comes in handy for old and wethered cedarwoods that have lost their perfect hue and need a little rejuvenation, which you cannot achieve by staining.
The explanation above is just an overview of the two wood finishing methods.
Let us delve further into their similarities, differences, pros, and cons to help you make the best choice for your project.
Painting vs Staining of Cedar Wood
Similarities
 The only similarity between painting and staining cedar wood is in their function.
Both provide protection and add some color to the wood.
However, the level of protection and the intensity of the color differ significantly, so you must be precise when selecting the one to use for your projects.
Differences
Let’s look at the difference in painting or staining cedar wood:
-
Cost
Staining cedar wood is more cost-friendly than painting because stains cost less than paint. Wood stain will cost you an average of $30 per gallon.
You may need a gallon or two depending on the size of the area you stain, but you will not spend a fortune.
Moreover, staining is relatively easy; thus, you can do it yourself instead of hiring a professional who will charge you for their services.
On the other hand, paints will cost you an average of $50 per gallon, with some high-quality products costing up to $60.
You will need a lot of paint for each project because you must apply two full coats of paint for a lasting finish – a factor that adds to the paint cost.
Paint aside; you will also need to purchase a primer – a must-have when painting cedar or any other type of wood.
Primers block stains on the wood, keeping them from showing through the paint coat and helping the paint adhere properly to the surface.
Painting also requires precision to achieve a uniform finish.
If you have no experience, you will have to hire a professional to do the work for you, adding to the overall project’s cost.
-
Appearance
Wood stains range from transparent to semi-solid in terms of opacity, allowing the wood grain to show through.
It is the perfect choice if you want to show off the unique hue of cedar wood, especially if you have the red cedar species.
On top of showing the grain, wood stains also make the grain pop, like how a colored fabric will appear more intense when wet than when dry.
This feature makes staining the perfect choice if you want to achieve a rustic wood look for whatever structure you build.
On the other hand, paint products have a high percentage of pigments, making them dry into an opaque film that hides the wood’s grain and natural color.
The result is often a refined, sleek look that you cannot achieve by staining.
This paint feature is handy if you want to hide imperfections on old weathered cedar woods that have lost their color.
Also, you can use it if your home has a modern aesthetic and you want your new cedar wood creation to match it.
-
Durability
Paint finishes on cedar wood are more durable than stains and will last up to 10 years before needing reapplication – if you follow correct painting practices.
Most paint products have UV protection additives that prevent them from discoloration, which is perfect if you’re painting cedar fences, decks, or any structure constantly exposed to the elements.
Paints also dry into a harder film that can resist dents and scratches, allowing them to sit on the surface for longer.
On the other hand, stains offer ample protection for cedar wood but tend to wear out faster than paint.
You must restain every few years to keep up the protection and maintain the excellent look of the cedar.
You will get longer-lasting protection with higher opacity stains because they have better resistance to UV damage.
However, the time frame will still be shorter than that of properly applied paint.
Pros of Painting Cedar
- Paint products come in many colors allowing you to customize your structures however you want to fit your general environment.
- Paint is more durable; thus, you won’t have to worry about reapplication for many years.
- Painting cedar allows you to achieve a more uniform look.
Cons of Painting Cedar
- Paint is opaque; thus, it hides the naturally beautiful color and grain of cedar wood.
- Paint products are pricey, which makes painting cedar wood a costly project.
- Painting can be pretty challenging, especially if you are a newbie, forcing you to seek the help of a professional.
Pros of Staining Cedar
- Staining maintains the natural look of cedar wood by allowing its color and wood grain to show through.
- Even though wood stain fades over time, it does so gradually without cracking or peeling like paint.
- Staining cedar wood is more budget-friendly because the products are affordable, and you do not need professional assistance to apply it.
- Applying stain is easy and quick, allowing you to finish projects faster.
Cons of Staining Cedar
- Stains tend to fade quickly; thus, you must reapply them periodically to maintain the finish.
How Long Does Paint Last On Cedar?
Paint can stay on cedar wood for an average of five to seven years before needing a retouch.
The finish will only achieve this time frame if you prepared the wood properly before applying the paint.
That said, you can make the paint last up to 10 years by taking the following crucial steps:
Select the Proper Paint
The best paint to use on cedar wood is 100% acrylic latex paint. It is the most dependable product to protect cedar because it is thick and weather-resistant.
Its thickness also makes it ideal for old weathered cedar because it will hide imperfections and fill any tiny pores on the wood’s surface.
Acrylic latex paint also retains its elasticity over time which is an advantage because cedar wood is flexible too.
It will move in sync with the wood as it expands and contracts with weather changes; thus, you won’t have to fret about the paint cracking or flaking off.
Start With a Primer
Even though 100% acrylic latex paint is best for cedar, using it alone will not be enough to make the finish last longer.
Cedar wood is incredibly porous; thus, it will soak up most of the first coat of paint, leaving you with a thin layer that will deteriorate quickly.
Even if you follow up with more layers of paint, the final look will not be uniform.
It will have an orange peel effect, and the paint color will be duller than usual because the surface will soak up most of the pigment.
Porosity aside, cedar wood also produces a lot of wood tannin that bleeds through paint, leaving yellow or brown patches on the paint coat.
These patches are especially prominent in cedars with knots.
You can avoid these issues by applying a good-quality primer on the surface before going in with the paint.
The primer will fill the little pores on the cedar, leaving a smooth surface that will not soak up the paint.
It will also improve the paint’s adhesion to the surface, allowing it to last even longer.
The best primers to use on cedar wood are alkyd/oil primers.
On top of improving paint adhesion and smoothening the surface, alkyd primers have stain-blocking properties that keep the tannins in cedar wood from ruining the finish.
Use a Paintbrush
The usual methods of painting wood involve brushing, rolling, or spraying.
However, I recommend brushing when it comes to painting cedar wood.
Paint brushes allow you to apply thick paint coats to fill the pores or gaps in cedar. Granted, it is time-consuming, but it will give you the best results possible.
If you use the spray method, ensure that you back brush the paint while it is still wet to get it into the pores properly.
Choose the Correct Painting Timeframe
Cedar wood is highly susceptible to weather damage when exposed for a long time.
Its color will turn silver-grey, and its surface will become too brittle to hold protective coatings properly. And as we know, if the paint doesn’t adhere properly, it won’t last.
I recommend painting your cedar two weeks after installation.
This timeframe is perfect for allowing the cedar to lose any lingering excess moisture without risking too much damage from the sun.
How Long Does Stain Last On Cedar?
Wood stain typically lasts three to eight years on cedar depending on a few factors – the climate of your location, the number of coats you applied, and the quality of stain you purchased.
The application method doesn’t affect the finish’s lifespan but brushing on the stain will give you better and longer-lasting results.
Let’s see how these factors affect the lifespan of wood stains in depth.
-
Climate
If you live in a place with a lot of sunlight, your stained cedar will be exposed to UV rays for long periods.
And as we know, exposure to a lot of UV rays causes the wood stain to degrade much quicker.
For this reason, you will have to retouch it every three to five years to keep the cedar looking beautiful.
If you reside in such an area, I recommend applying a clear protective coating with excellent UV resistance over the stain to prolong its life.
You can also purchase premium quality wood stains because they tend to be more UV resistant and can last up to 8 years.
-
Number of Coats Applied
The number of coats you apply on cedar wood often determines the overall look of the finish, but it can also determine its lifespan.
If you apply a few coats, say one or two, the opacity level will be low. This look is pleasing if that’s what you intended, but the stain won’t last long.
The same goes if you apply several coats – the stain will appear darker and last longer. Why is that?
The more coats you apply, the more pigment you leave on the wood. With more pigment, you get better resistance to UV, which prevents fading for a long time.
If you do not want to apply many coats, always seal the stain with a clear coat with excellent UV resistance to keep it from fading quickly.
-
Quality/Type of Stain
The type of stain you use is perhaps the most crucial factor affecting the finish’s longevity.
Lower-quality stains are often budget-friendly, but they do not last long, and the finish may require retouching in as little as three years.
The higher quality stains are pricey but worth every penny because they last much longer.
There are several types of wood stains on the market, but since we’re discussing longevity, I’ll explain two groups – penetrating and film-forming wood stains.
- Penetrating wood stains, as the name suggests, work their way into cedar wood grains to strengthen and rejuvenate them.
They protect the wood from within, keeping rain, snow, and other damaging elements from penetrating.
These stains last the longest, requiring a retouch after five or eight years if you apply a clear coat over them.
- Film-forming wood stains create a barrier over the exterior of cedar instead of soaking it into the grain.
They provide ample protection but do not last as long as the penetrating types because they are in more direct contact with the damaging elements.
If you use this type of stain, you will need to retouch it in as little as three years; however, it can get to five years with a quality clear coat.
How to Paint Cedar Wood
Here are the steps involved in the painting of cedar wood:
Step 1 Sand the Surface
Newly purchased cedar wood always has a glazed coating on its surface since it comes straight out of the mill.
The glaze is an oily residue that will prevent the wood from accepting the paint if you do not remove it and the best way to do that is by sanding.
- Use fine-grit sandpaper to scuff the entire wood surface, remove the glaze, and give the wood some “tooth” to grip the paint.
- If you’re painting weathered cedar, the sanding is still necessary to smoothen the wood if it has some lifted fibers or splinters.
- As you sand, be careful not to use too much pressure as this will likely leave some gouges in the soft wood surface.
Step 2: Clean the Wood
After scuffing, there will be a lot of dust on the wood. Before applying any coating, you must remove every speck to ensure that the paint adheres properly.
Cleaning the wood will also remove any accumulated grease and dirt on old or stored wood, giving your products a fresh surface to coat.
A combination of water and a mild household detergent will clean cedar wood.
If the wood is older or has accumulated stubborn grease, you will need a stronger cleaning solution, and I recommend using Trisodium Phosphate (TSP).
- Mix equal parts of warm water and TSP in a bucket, then wash the surface with the solution.
- Ensure you clean all corners of the wood, then rinse it with a rag dipped in clean water.
- Afterward, allow the wood to dry thoroughly before proceeding.
Step 3: Apply Primer
Primer is the key to an excellent paint finish on cedar wood because it fills the pores of the cedar, providing you with a smooth surface that will not soak up the paint.
Ensure that you use an alkyd/oil primer with stain-blocking properties to prevent the tannins present in cedar wood from bleeding through and ruining the paint finish.
- Use a brush to put on a thin layer of primer following the direction of the wood grain.
- Allow the first coat to dry, then use fine-grit sandpaper to smooth it before applying a second coat.
- For best results, follow the product’s guidelines regarding drying time.
Step 4: Paint the Wood
After the primer dries, you can apply 100% acrylic-latex paint in any color and sheen you prefer.
- Ensure that you follow the direction of the wood grain as you apply the paint to get a uniform finish. Also, cover every corner of the wood to prevent moisture from penetrating the wood in the future.
- Put on at least two coats of paint for an excellent finish and allow each coat to dry as directed on the product’s label for best results.
Here’s How to Paint Cedar Furniture:
How to Stain Cedar Wood
Steps involved when staining cedar wood are:
Step 1: Choose a Stain For Your Cedar
There are different types of wood stains on the market today.
Each of them will bring out a different appearance and protect cedar wood differently; therefore, it is vital to select one based on how you want your wood to appear.
- Transparent Stains are usually clear because they have very few pigments.
For this reason, they will not change the appearance of your cedar, making it the ideal choice if you want to show off the wood’s natural grain.
On the downside, these stains won’t shield the wood from turning gray over time unless you purchase the ones with UV inhibitors and wood preservatives.
Moreover, you will have to refinish your cedar yearly if you select this stain.
- Semi-transparent Wood Stains are more opaque than transparent ones, but they still allow some of the wood grain to show through.
They are ideal for intensifying the look of cedar’s grain and color and need refinishing every two years to keep the wood in stellar condition.
- Solid/opaque wood stains come in various colors and look like paint because they have more pigment.
They tend to hide the wood grain; thus, you should only choose them if wood grain visibility isn’t that important for your project.
These stains build up a film if you apply several coats, leading to peeling and chipping in the future. So, If you select an opaque stain, limit yourself to only one or two coats to be safe.
No matter the opacity of the stain you choose, ensure that it is a penetrating stain.
You’ll be staining a softwood, and penetrating stains provide the best appearance results and protection for softwoods.
Step 2: Prepare the Cedar For Staining
Before staining, it is crucial to examine the surface for any defects and remove them to help the wood take on the stain properly.
The main problems on a cedar surface may include rot, mildew, sawdust, cedar bleed, and chalkiness.
Each problem has a unique solution, which you must observe for your project to succeed.
- Mildew, soot, and other pollutants are easy to remove with any cleaning solution that has sodium hypochlorite.
This chemical is an active ingredient in ordinary household bleaches, making it easy to find.
You can also use a non-ammoniated detergent/wetting agent or a strong oxidizing agent such as calcium hypochlorite.
- Chalkiness is usually an indication of a previous stain breaking down.
Failure to remove it will cause your finish to have an uneven texture, which won’t do your project any good.
To remove chalkiness, clean the cedar using a detergent with sodium metasilicate as an active ingredient.
Note: In the case of chalkiness, your cedar was previously stained. Therefore,
you must ensure that the stain you choose matches the old stain for the best results.
- Cedar Bleed, also known as tannic acid, is a reddish-brown discoloration that will make any stain application look uneven and splotchy.
However, not all reddish-brown spots on cedarwood indicate the presence of cedar bleed; thus, you must test for it using a ferrous sulfate solution.
- Apply a little ferrous sulfate solution to the discolored spots on the surface. If the solution turns blue-black, it means you have cedar bleed. If cedar bleed is present, use an oxalic acid solution to remove it before staining.
- Sawdust is always present on new cedar wood; you can easily remove it by wiping the surface with a damp cloth.
If you’re working on a larger project, say staining a whole deck, use a power washer to remove the sawdust but allow the wood to dry for 24 hours before staining.
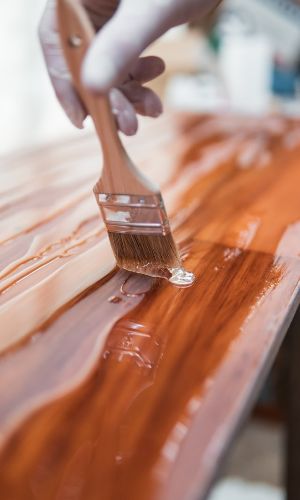
Step 3: Stain the Cedar
- Use drop cloths and painter’s tape to cover furniture, floors, and surfaces you do not want the stain to touch.
- Use a brush to apply the stain smoothly. I recommend brushes because the back and forth motions of the bristles will force the stain into the wood fibers as required.
You may use a roller to apply the stain, but ensure that you use a brush to work it into the wood fibers.
- Allow the cedar to sit/rest for 24-48 hours to give the stain enough time to dry before touching or putting the wood to active use.
Here’s a Video On Staining Cedar Fence:
Can You Paint Pressure Treated Cedar?
You can paint pressure-treated cedar wood just like you paint untreated cedar; however, you must never paint it too soon after purchasing it.
Wood millers often ship treated cedar while it is still damp; therefore, if you color it immediately, the paint will peel off the surface too quickly.
If you want to paint treated cedar fresh from the store, I recommend purchasing the ones labeled “kiln dried” because they have the proper moisture content.
How Long Should I Wait Before Painting pressure-treated Cedar?
I recommend you wait three months after purchasing pressure-treated cedar before applying paint on it.
That time frame is long enough for the wood to dry and accept paint without the risk of flaking and peeling.
However, the specified period is only enough to dry wood in dry areas with low humidity.
If you live in a humid location, I recommend waiting between 4-6 months.
The time is longer but necessary because the air in humid regions already has a lot of moisture, making it difficult for the wood to dry.
The timeframes above are merely estimates based only on climate. Other factors will cause the waiting periods to vary, and they are:
-
The Treatment Time Frame
Knowing your cedar’s exact treatment timeframe will help you estimate how long you should wait before painting.
You will know if the wood has had some time to dry in the lumber store or if it is fresh from the treatment plant.
Ask an assistant at your local lumber store for the exact timeframe, or check the wood tags for details.
-
Where and How the Wood Is Stored
As you purchase the treated cedar, note where the distributor stores it and how they stack the planks.
If the storage area is cold and dark, the wood will likely still be wet, and you will have to wait 3-4 months before applying paint.
If they stack the wood properly with stickers, there is excellent airflow between the planks; thus, you will not have to wait too long before painting.
Unfortunately, some stores stack their lumber in tight bundles causing them to dry unevenly.
You may find some wood boards are drier than others; hence the waiting period will not be accurate.
Can You Stain Pressure-Treated Cedar?
Yes, you can stain pressure-treated cedar because it will prevent the wood surface from cracking over time.
Staining the treated cedar will also give the wood a better hue if you do not like the greenish color left behind by the treatment chemicals.
The purpose of treating cedar with chemicals is to improve resilience against insect attacks and rot.
However, the treatment process does not account for weather damage; thus, the wood will continue to deteriorate like untreated wood when exposed to rain and UV.
Staining the treated cedar gives it even better moisture protection on top of the rot and insect resistance, thus doubling its lifespan.
Is Pressure Treated Cedar Safe?
Pressure-treated cedar is safe because the chemicals used are designed to bind to the wood.
However, small amounts of the chemicals can slowly leak out of the wood fibers when the wood breaks or when the wood’s dust falls on other surfaces.
The leached chemicals do not travel far from where you’ve installed the wood; therefore, you should not experience any health effects if you handle the wood correctly.
That said, keeping pressure-treated wood away from areas where you handle food is best. These could be kitchen counters, picnic tables, chopping boards, etc.
You should also keep young kids and pets far from pressure treated wood because they tend to lick and eat everything around them.
If they accidentally ingested the chemicals used to treat the cedar, it could pose severe health risks to them.
How to Dispose of pressure-treated Cedar
Pressure-treated cedar has a lot of chemicals that make it strong and resilient. However, these chemicals also make it very dangerous if you dispose of them incorrectly.
Usually, most people burn old wood that cannot be reclaimed or recycled, but you should NEVER BURN PRESSURE TREATED WOOD.
Burning treated wood will release the chemicals in the wood, and the resulting ash is 100% poisonous. So what is the proper way to get rid of pressure-treated cedar?
-
Sell the Wood
If you no longer have use for your treated cedar and it is still in good condition, the best alternative is to sell it.
Many people would not mind buying used treated wood for a fraction of what they would spend on freshly treated wood.
Not only will selling the cedar help you get rid of the old cedar, but it will also help you get back some of the money you spent purchasing it.
That’s a win-win for you and the buyer. You can also give the wood to a close friend in need if you do not want to sell it.
-
Take the Wood to an Eco-Friendly Landfill
Landfills are large areas where you can dump any sort of garbage except those infused with dangerous chemicals.
For this reason, many countries are setting up eco-friendly landfills to provide a safe place to dispose of the most dangerous garbage.
These landfills have large protective liners at the bottom to prevent dangerous chemicals from leaching into the soil and contaminating the environment.
Therefore they are the safest place to dispose of your treated cedar.
-
Take the Cedar to a Hazardous Waste Recycling Facility
Most towns and cities have facilities that safely recycle hazardous materials.
They will charge a fee to take the treated cedar off your hands, but at least you will be at peace knowing that professionals are handling the disposal.
Conclusion
Cedar wood has many benefits, and the most popular is its ability to fend off insect attacks and rot naturally.
However, like any other wood, it is still susceptible to moisture damage. So, should you
Paint or Stain Cedar?
The choice between painting and staining cedar wood solely depends on personal preferences, the condition of the wood, and the kind of budget you’re working with.
Staining is best if you want to show off the lovely cedar wood grain, but painting is the best option to hide blemishes if the wood is a little weathered.
Painting is also great if you have the budget because paints and primers are pricey compared to wood stains.
Moreover, painting is a job that requires precision; thus, you may need professional assistance if you’re a newbie to painting wood.
I hope this discussion has helped you select the best method to protect your cedar wood.
If you need more explanation on anything or have information to share, please feel free to reach out in the comments below.