Are you wondering how to paint glass windows? This article has everything you need to get it right by painting your glass windows!
Transparent window panes are so common that they make your home’s curb appeal look prosaic.
However, you can change this look by adding shade or color to the glasses. You can do so by painting.
But a glass window contains several parts, including the stiles, rails, sash, etc.
It needs a tactful painting approach. This article contains a detailed guide on how to paint glass windows. Read on.
Painting glass windows involves the following steps:
- Gathering all the appropriate equipment
- Surface preparation
- Selecting and mixing the paints
- Paint application
- Cleaning
- Curing the painted surface
Painting glass windows is quite simple and varies slightly depending on what kind of finish you want, the design of your window, the product you are using to paint, and the scale of operation.
Why Paint Glass Windows?
Conventionally, we’re used to painting doors, walls, furniture, and other opaque objects for decoration and protection.
But this art has extended to glasses. So, why paint glass windows?
These are the reasons:
- Privacy: Painted windows prevent visibility from outside or on both sides.
It enables you to carry out your business without worrying about unwanted attention from onlookers.
- Artistry: People paint glass windows to explore their artistic mindsets.
It enables us to digress from conventional painting practices that involve wood, masonry, and metals.
- Economic Benefits: Some people, especially professional painters, have shifted to painting window panes for commercial reasons.
Painting glasses is a relatively new concept with few practitioners, so the rewards are bountiful.
- For Improved Aesthetics: painting the windows makes the house look more attractive.
It also improves the house’s curb appeal to enable you to sell it for higher prices.
- Marketing Strategy: This is more relevant for commercial or office buildings.
For example, painting glass windows blue makes them look more executive and painting them black gives the impression of power and elegance.
Fashion buildings have their glasses painted pink or flashy colors—all of the above help attract potential customers for high profit margins.
Pros and Cons of Painting Glass Windows
Those who’ve ever painted glass windows have a lot of good things to say about it.
There are a few downsides too. From my viewpoint, these are the pros and cons of painting glass windows:
Pros
- It improves the durability of your window: painting glasses makes them less susceptible to damage from heat, stains, and chemicals; this makes them last longer.
- Painting glass windows confers safe storage conditions to the items in the room, especially those that require dark environments and UV-sensitive chemicals.
- From a health perspective, painted window panes protect us from harmful levels of UV radiation and heat from the sun. It also guards office workers against bright light during the diurnal working schedules.
- It makes buildings stand out; most homes and commercial buildings have transparent panes. Painting the glasses will undoubtedly single out the house from others. The unique appearance also elevates the house or office building to landmark status, and people can quickly identify a given place with your house.
- Painting the window panes is an excellent security strategy. It deters criminals and other ill-mannered people like burglars and vandals from following through on their intentions. A good example is glass windows for banks; they are often painted with reflective finishes that only enable visibility from inside. You can paint your home windows with a similar finish or black them out for the same benefits.
- It improves productivity: the privacy of blacked-out or one-way glass windows is a morale and confidence booster. This is especially true in office environments as the workers can carry out their duties knowing that no one is watching them from outside. On the other hand, transparent panes attract audiences and subsequent anxiety in the workforce.
- Lastly, painting windows enables you to change the outlook of your building without having to replace the glasses or paint the walls.
Cons
- Applying paint on glass is tiresome, especially if the window has wooden or metallic frames.
- It is costly, especially if you have several glass windows to work on
- The process is delicate; any wrong move amplifies significantly on the outcome. It could damage the glass or result in a poor finish.
How to Paint Glass Windows
The preceding texts are the perfect buildup to address how to paint glass windows.
We’ve looked at the reasons for painting glass windows and the accompanying advantages; I’ve even mentioned the disadvantages to keep the discussion transparent and honest. Follow this guide:
Requirements
- Warm water
- Cleaning agents (soap and glass cleaner)
- Paint brushes (round, angled, and flat)
- Scraping knife
- Paint
- Putty knife
- Painter’s tape
- Safety gear (respirator, goggles, and gloves)
Procedure
First, we’ll start with the window frames; some are made of wood, while others are metallic.
Lay out drop cloth or newspapers on the floor to minimize contamination from paint splatter and drips.
If the window frame is wooden, check for the moisture content using a moisture meter; the ideal proportion ranges from 12% to 16%.
Next, inspect the window frame (sashes, stiles, rails, etc.) for any damages, including the putty’s intactness/structural integrity.
If the putty is loose, or parts of it have fallen off, it means the rest of the putty is worn out due to aging, weather conditions, or poor maintenance.
In this case, remove and replace the entire putty. Use a breakaway knife in conjunction with a scraper for the above undertaking.
After removing the large chunks of putty, scrape off the remaining smaller bits and flakes of old paint using a smaller scraper.
Use the smallest scrapers in your collection and a wire brush to remove the existing paint from hard-to-reach areas like the hinges and their surrounding.
Make sure you don’t scratch the window panes.
If wood or metal paint stains are on the glasses/panes, scrape them off using the window scraper.
Then, sand the window sashes, panels, and stiles using sandpaper. Start with a 120-grit abrasive and move up to 400-grit for a smooth and even surface.
Ensure you remove the accumulated debris before proceeding to the next step; use a vacuum cleaner or just wipe off using a lint-free rag.
Afterward, clean the wooden or metallic frame using an appropriate cleaning agent and water and let it dry.
Next, oil the window frame, including the areas you removed the old putty.
Afterward, apply a primer; priming is always wet-on-wet with oil, though I urge you to follow the manufacturer’s instructions as each product is designed differently.
Let the primer dry appropriately in readiness for the next step. Water-based primers dry after 3 to 4 hours, while oil-borne varieties take at least 10 hours.
Meanwhile, apply new putty to the frames using a sealant gun and remove the excess using a putty knife. Smooth it out afterward.
Fill in tiny holes, cracks, and defects on the wood (still using the putty).
Afterward, take the masking or painter’s tape and place it around the glass edges, approximately 1 mm from the putty.
Then, take the angled brush and paint the intricate/hidden parts like edges, hinges, and corners; alternate with a round-tipped brush as needed.
Next, take the flat brush and paint the window’s main frame starting with the panels, followed by the rails and sashes.
Make sure you apply plenty of paint on the putty and be cautious enough to avoid drips or splatters on the window panes.
Let the first paint coat dry for the duration specified by the manufacturer before recoating.
Afterward, apply a second and third paint coat using the same procedure as the first.
Remove the painter’s tape immediately after you’re done with the painting. It’s easier when the paint is still fresh.
Paint the interior side of the window using the same procedure above; you can use a different color, but most people use the same paint for both sides.
It ensures the homogeneity of color, paints thickness, and saves you the cost of purchasing and mixing anew.
The above procedure is for the window frames only; you may also wish to paint the transparent panes to make them darker, frosty or convert them into a one-way mirror.
Here is the procedure for painting the window panes:
Note: Glasses are always painted on the interior side to attain the desired external effect; this end is commonly known as the reverse side.
For instance, if you want a reflective finish to show outside, you’ll paint on the side inside the house.
Materials Required
- Glass cleaner
- Lint-free cloth/microfiber cloth
- Safety kit (a pair of gloves, respirator, and safety goggles)
- Drop cloth
- Glass spray paint
Procedure
Substrate and Working Area Preparation
First, ventilate your working area as much as possible for improved air circulation.
Next, spread the drop cloth on the floor as you cover nearby walls and objects with painter’s paper.
Also, cover the wooden frames and sashes of the window with masking tape as the glass paint is not designed for wood or metal.
If you want a creative or artistic finish, you can take stick lentils with any design on the glass so that the artwork can appear at the end of your painting project.
It can be in the form of writings or drawings.
Then, clean the reverse/interior side of the glass using a glass cleaner; do this by applying the cleaning agent on a lint-free rag or microfiber cloth and rubbing it on the glass.
If you don’t have a household glass cleaner, use isopropyl alcohol instead. Cleaning the surface removes fingerprints, tackiness, and stains like grease.
Selection and Mixing of Paint
Paint selection is based on the type of finish you want.
Choose the Krylon Looking Glass Silver-Like Aerosol Spray Paint, or the Rust-Oleum Mirror Effect Spray Paint for a reflective or mirror-like finish.
If you want a frosted glass appearance, use the Rust-Oleum Specialty Frosted Glass Spray, or you can use the Rust-Oleum Rippled Effect Spray paint for a wavy look.
The glass paints are also available in different colors to offer you variety.
You may want the window panes to appear blue, black, amber, or whichever color. They are all available; all you have to do is select.
As for paint mixing, the paints come in rattle cans, which precludes the need to mix and thin externally.
The only mixing operation you should carry out is to shake the can thoroughly for 1 to 2 minutes before letting out the paint.
It ensures the homogeneity of the paint inside. Beforehand, it’s best to read all the printed instructions on the spray can.
Paint Application
Before spraying, put on all the safety gear: gloves, respirator, goggles, and old clothes.
It prevents inhalation of overspray, eye irritation, and skin contact that could harm hypersensitive individuals.
Hold the aerosol can 8 to 12 inches from the panes, with the orifice pointing perpendicularly to the substrate.
Then, press on the nozzle cap to let out the paint. The cap is ergonomically-designed to accommodate your index finger; this is convenient for spray painting.
Spray back and forth at a steady pace and overlap each stroke by half. It makes the finish even and avoids paint runs.
If you want a fine texture, hold the aerosol can a little further (about 14 inches) from the panes.
Hold it 8 inches from the surface if you want a larger, rougher texture.
Apply 3 to 5 coats of the paint, waiting 1 minute between each coat. The more coats of paint you apply, the more intense the effect.
Also, light coats are better than thick coats because they dry faster and attach more firmly to the glass.
Remove the masking tape and painters’ paper from the non-glass parts of the window and surrounding objects as soon as you’ve finished painting.
Then, let the painted window dry for at least 40 minutes before resuming normal usage.
As I’d intimated, you only need to paint one side of glass windows to achieve your desired effect.
The interior side is mainly painted to produce an effect visualized from the outside.
So as far as the procedures go, you’re just about done with painting. The only steps left are curing and cleaning.
Curing the Painted Surface
Curing, in this context, describes a close interaction between paint and substrate, leading to a dry and well-adhered coat formation.
It takes place naturally but slowly, sometimes for weeks or even months, depending on the weather conditions.
To improve the natural process, expose the painted window to sunlight and wind.
The UV rays will heat the solvent and volatile components of your paint to cause rapid evaporation.
The wind is air in motion; it blows away evaporated solvents to create more room for evaporation. It also blows off accumulated dust particles and debris.
You can also use artificial curing methods if you reside in cooler and rainy regions or just want to accelerate the process.
Artificial methods include using hairdryers, UV lamps, and electric fans.
Hairdryers are motor-driven units that blow air at high velocity to enhance evaporation and drying; they are primarily used in the hairdressing industry.
The said working principle is also handy when you want to facilitate the curing of painted glass windows; simply point the machine towards the substrate and power it on.
UV lamps simulate the sun, i.e., they produce ultraviolet rays. The radiation heats the window panes, making the paint lose water, harden and knit up.
Be cautious when using UV lamps, as many paints are often flammable, especially when wet.
Position the lamps at a safe distance from the window (around 3 meters), and remove any flammable material from the vicinity.
Another cautionary piece of advice is not to let the UV lamps stand for too long and close to the windows.
It leads to overheating of the paint, creasing, and bubbling/fisheyes.
The above situation distorts the optics of what ought to be a good paint job. Moreover, the heat can weaken the glass and lead to cracking.
Electric fans present a safe and relatively effective way to accelerate glass paint curing.
Not only do they create a windy atmosphere, but they also improve air circulation/ventilation.
In other words, you get pronged benefits from a single device. Your bit is to power on the fan, set a timer, and let the machine work its magic. The glass windows will cure super fast.
Cleaning
I recommend you clean immediately after painting. It’s because paint spills and spatters come off easily when still wet.
Start by removing the painter’s paper and masking tape from surfaces, then remove the drop cloth/tarp.
Next, clean the stains using the most appropriate cleansing agent. Use turpentine or mineral spirits if the paint is oil-based or soapy water if the paint is water-based.
Clean repeatedly to remove the tougher stains.
Then, mop the surface with a rag soaked in clean water to remove the turpentine or soapy water that was initially used.
Best Paint for Glass Windows
Here, I’ve discussed the best paint for glass windows products, their outstanding features, and how they compete against each other.
These are the products:
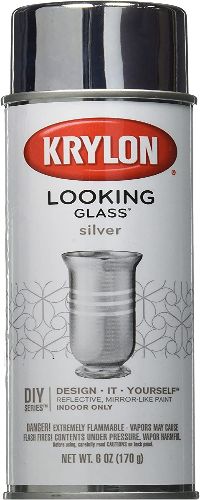
1. Krylon Looking Glass Silver-Like Aerosol Spray Paint
 The above paint is developed and manufactured by Sherwin-Williams Company based in Cleveland, Ohio.
The company is heavily invested in the coatings, paints, and floorcoverings niches.
It sells to commercial, professional, industrial, and retail customers. It has broad tentacles: in the last quarter of 2020, Sherwin-Williams was active in over 120 countries.
Their Krylon-looking glass spray paint gives a mirror-like finish to plain glass windows.
The paint has the following benefits and features:
- It produces a reflective/silvery finish which is ideal for a one-way mirror view
- The product comes at a pocket-friendly price
- The paint cans have a 12 fl oz capacity
- Krylon glass spray paint has a broad substrate coverage of 25 square feet
- This paint is eco-friendly thanks to the low VOC levels and its water-borne solvent medium
- It gives a durable finish
- The paint dries to water and the stain-resistant coat
- Its water-based nature also makes it easy to clean spatters
2. Rust-Oleum Specialty Frosted Glass Spray
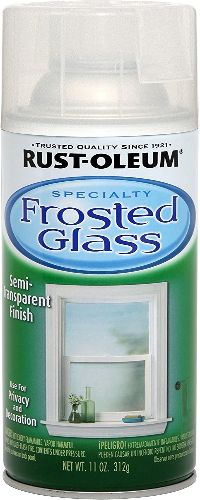 Rust-Oleum® makes this product. On a broader scale, the company manufactures coatings and protective paints for industrial and home use.
Rust-Oleum ranks first in the USA and Canada specialty, decorative, professional, and rust-preventative segments of the small-project paint classification.
The ranking is based on market share.
The company uses resins from polyurethanes, latex, acrylics, epoxies, alkyds, etc. Their specialty frosted glass spray contains acrylic resins.
The product named above is uniquely characterized and advantageous as follows:
- It gives a satin finish
- The paint is applied to interior glass surfaces
- The glass paint comes in 11 fluid-ounce cans
- It has fast drying times
- Specialty frosted glass spray is easy to apply
- The paint has a strong adhesive power
- This paint gives a frosty finish that’s available in many colors
3. Krylon K09053000 Sea Glass Spray Paint, Amber
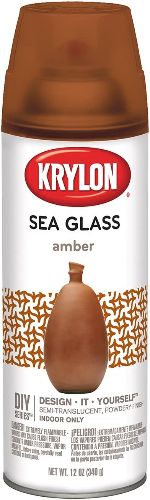 The above product is made by Sherwin-Williams, an American company headquartered in Cleveland, Ohio.
Edward Williams and Henry Sherwin founded the company in Cleveland in 1886, evidenced in the name and headquarters location.
It operates in three divisions: Consumer Brands Group, the Americas Group, and Performance Coatings Group.
The Krylon sea glass spray paint falls under the consumer brands category, designated to manufacture and distribute coatings, paints, and similar products.
The K09053000 spray paint comes with lots of features and benefits as below:
- It’s used on interior glass windows
- The paint comes in 12-ounce rattle cans
- This paint is easy to use
- It has a wide surface coverage of 25 square feet
- Krylon K09053000 produces a golden brown frosted finish on window panes
- The product comes at a budget-friendly price
4. Rust-Oleum Mirror Effect Spray Paint
Rust-Oleum® also manufactures the above paint product. The company’s slogan is “Rust Never Sleeps,” It was adopted in 1979 from an album.
Its corporate headquarter is in Vernon Hills, Illinois.
The Rust-Oleum company was family-owned until it was acquired by the current owner RPM International Inc. in 1994.
 Rust-Oleum is a force to reckon that RPM International Inc. has continued to produce paint products under the same brand name.
RPM is a household name that initially manufactured aluminum roof coatings known as Alumanation.
It has developed over time to acquire and consolidate the coatings and paints industry, including Rust-Oleum.
Their mirror-effect paint product has these benefits and features:
- It gives a reflective finish; this is ideal for one-way mirrors
- The paint comes at an affordable price
- This paint is easy to use
- Rust-Oleum mirror effect spray paint has fast drying and curing times
- It forms a highly-durable coat on the glass windows
- This paint has excellent water and stain-resistance profiles
- Each of the above aerosol cans contains 11 fluid ounces of paint
- The product is VOC-compliant
What Kind of Paint Do You Use On Glass Windows?
Paints have customized formulations to go on specific surfaces. So, what kind of paint do you use on glass windows?
There are four main types of paint for glass windows. They are:
- Acrylic enamel paints
- Acrylic ceramic paints
- Solvent-based glass paints
- Tempera paints
Acrylic Enamel Paints
These are the best paint types for glasses. They are premium acrylic coatings with strong adhesive power and high durability.
The paints are water-based, so they are eco-friendly, odorless, and contain only trace VOC levels.
The above paints dry to a hard, scratch-resistant, and water-resistant coating on the glass.
The acrylic enamels vary slightly in their formulations to produce different effects on glass windows.
The effects include frosty finish, mirror-like effect, opacity, rippled-glass effect, etc. They also come in various colors; your only bit is to select what you desire.
You can use the above paints on home, office, and industrial building windows.
Acrylic Ceramic Paints
These are paints that are specifically meant for ceramics.
But, they can also go on glass surfaces because ceramics and glass have similar substrate properties. Both of them are smooth and brittle.
Like its enamel counterpart, the ceramic paint contains acrylic polymer, which enables it to go over glass windows with decent outcomes.
The only difference is that it has lower polymer concentrations and additional constituents different from acrylic enamel paint.
Solvent-Based Glass Paints
You can opt for solvent-based glass paints if you don’t fancy the preceding paints I’ve discussed.
They are the go-to glass paints for professionals due to their remarkable durability.
Moreover, you can use them on wood, metal, and ceramics.
Therefore, you can paint the glass windows and the wooden or metallic frames with one paint type in one go.
The drawbacks are they are flammable, toxic, and produce pungent fumes. In that respect, you must strictly wear safety gear when using the above paints.
The gear includes a respirator, safety goggles, and a pair of latex gloves.
You should also practice safe storage, especially if children are a major part of your household.
Tempera Paints
The above paints have been around significantly longer than the other paints.
They were initially the dominant paint type for glass surfaces, but their use has faded over the years due to the advent of acrylic paints.
Tempera paints are reasonably easy to use and mainly applied on a temporary capacity for glass windows, bottles, vases, and jars.
The downside is they easily wash away, so you can’t use them on a long-term scale.
The paints are therefore suitable for store windows, which don’t need to maintain that executive or attractive appeal.
Can I Paint My Glass Windows Black?
You can apply black paint to wooden doors, stone walls, concrete floors, and iron sheets. What about the panes? Can I paint my glass windows black?
Absolutely yes! In the past, painting glass windows black was unheard of, let alone practiced. It was associated with evil, sadness, and ominous outcomes.
However, the inexorable progress of painting has led artists, DIYers, and professionals to explore the idea in question.
Nowadays, painting window panes black imparts sophistication, power, elegance, and a sense of solemnity to your house.
There are numerous black paints specially formulated for the above purpose. The black paints come in different sheen levels, including flat, matte, satin, and glossy.
The flat and matte finish appears dull/suppressed but classy, while the glossy finish makes the windows reflective/shiny.
How Do You Black Out a Glass Window?
Let’s say you have a transparent glass window, as do most people, and on a whim, you no longer want it to let in light. How do you black out the glass window?
Blacking out a glass window means a total or near-total block of light penetration.
It either blocks external light from entering the room, internal light from escaping outside, or both.
There are several ways of blacking out glass windows; they include:
- Painting
- Applying a blackout window film
- Installing a mesh liner
- Covering with aluminum foil
- Using blackout curtains
- Installing an awning
Painting
The best painting technique for the above project is spray painting using rattle cans. It saves time and confers excellent adhesion to glass.
I advise you to use black, blue, or gray paint; these absorbent colors bring a darkening effect and are widely available.
For painting the transparent panes, I urge you to use the same methodology I’ve highlighted in the preceding segments of the article.
Applying Blackout Window Film
The blackout window film is also known as zero percent film. It’s so-called because it blocks all visibility once installed. You can’t see from both interior and exterior sides.
The film performs its function while giving unique aesthetic properties to your house or commercial building.
Window films are easy to apply to sizeable plain glass panes. It’s challenging on smaller panes because the network of sashes and putty impede film layering.
Materials Needed
- A black window film
- Slip-solution in a spray bottle
- A hard plastic card
- Squeegee
- Tape measure
- A pair of scissors
- A breakaway knife
- Scraper blade
Step 1: Substrate Preparation
First, clean the glass panes using a water-soaked rag and then dry with a microfibre cloth.
Then, spray the glass with the slip solution. This solution forms a very thin layer between the glass and window film.
It makes it easier to move around the blackout film on the surface and remove any trapped gases or any folds.
Next, scrape all the paint specks and residues on the panes using a scraper blade.
Afterward, take the squeegee and drag it across the glass to remove excess slip solution and accumulated vapor.
When using the squeegee, some liquid will collect at the edges of your window panes; wipe them off using a kitchen roll or a lint-free rag.
Step 2: Unpacking the Window Film
Set up a clean, broad, and flat working station. Preferably, the surface should be raised to the waist level; this is ergonomically convenient.
Window films are usually packaged in rolls inside cuboidal boxes. Unpack the film by rolling it out on the working table/station.
You can have someone hold one end of the black film or put a load on it to prevent refolding.
Step 3: Measuring Window Dimensions and Film Cutting
Measure the window pane dimensions using a tape measure. It helps you determine the film size you need to cut for each window.
Next, take the sharp scissors and cut out the window film. When cutting, overlap each of the above window dimensions by half an inch.
All window films consist of two layers; one is a clear backing liner, and the other is the main film.
You must remove the clear liner before sticking the film to the substrate.
To remove the above lining, cut out an 8 cm adhesive tape into two and stick both of them in one corner of the window film.
One adhesive should be on the clear liner and the other on the film. Then, pull the adhesives apart to separate the clear backing from the black film underneath.
This newly exposed side of the film will stick to the glass.
Step 4: Layering the Blackout Film
After removing the backing, spray the black film with the slip solution. Spray the glass with the same solution before you apply the film.
Next, pick up the film carefully (hold it from two corners using the fingers of both hands).
Fit the film onto the glass. It will easily slide into position as the slip solution lets it float on the pane. Move the film around as needed.
At this point, you’ll see some water bubbles under the black film; it’s normal. You need to eliminate the said bubbles, but you can’t do it by pressing on the film back directly.
It’s because the film back is dry, and any attempt to remove the bubbles could slip the cover out of position due to excess friction.
To remedy the above situation, spray the slip solution on the film back.
Then, remove the bubbles by squeezing them to the edges.
Use the hard plastic card to press the film harder onto the glass while removing the smaller bits of water bubbles.
Step 5: Film Trimming
Initially, I advised you to overlap the measured window dimensions by half when cutting out the film. At this point, you need to trim out the overlapping ends of the film.
Take the breakaway knife and cut out the excess blackout film at the edges.
Use the hard plastic card as your guide (like a ruler). Peel away the trimmed film using your fingers.
Spray the film for the last time, followed by the squeegee process. You can use the plastic card or the squeegee, whichever works best for you.
Afterward, fold a paper towel or kitchen roll over the plastic card and blot out the liquid collected at the edges of the window. Do so while pressing.
Removing the above liquid prevents it from seeping back under the blackout film.
Lastly, wipe the entire surface with a dry, lint-free cloth or the kitchen roll.
Voila! You’re done with the project. If you get inside the room, you’ll find it totally blacked out, i.e., no light penetrates even during daylight.
By the same token, you can’t see anything happening in the room when you try to observe from outside. Count this as a successful project.
Installing an Awning
An awning is also called an overhang. It’s a covering affixed to the exterior wall of buildings.
The cover is mainly canvas woven of cotton, polyester yarn, or acrylic; sometimes, it’s vinyl that is laminated on polyester fabric.
You then stretch the cover tightly on a light aluminum, wood, steel, or iron frame.
On the building, awnings are often positioned above windows, doors, or a walkway extending from the building.
The above structure is an alternative that enables you to black out the glass window without touching or altering the window structure.
It does not lead to absolute blacking out but significantly prevents light penetration.
Awnings are used in the following situations:
- When you want to block out external heat from the sun
- When your glass window has several panes; these are difficult to spray paint or line with a window film
- To partially prevent sunlight from getting into your room or office
- For temporary blacking out; you can remove or retract it during the winter seasons
- To avoid interfering with the design and aesthetics of the existing transparent window panes
Installing a Mesh Lining
You may want to block visibility, but simultaneously, you want sustained air inflow into the room or building.
Air inflow needs a constantly open window, while light blockage obliges you to keep the windows closed if you plan to tint the glasses. So, how do you solve this conundrum?
The solution is to install a mesh lining. You can use one made of either metallic wires or fabric; I recommend the wire-made mesh.
The mesh also doesn’t cause 100% blacking out as it has spaces between the wired network.
If you want to improve its light-blocking ability, install two or three layers of finely-woven mesh; this, however, reduces air inflow.
Install the mesh interiorly, just behind the glass window.
With this, you can simultaneously open the glass window to let in air and block any incident light or the light emanating from the room.
Using Blackout Curtains
The above offers a simple and cheap means to blackout glass windows.
The curtains also enable you to alternate between dark and light conditions.
You only need to close the curtains when you need to darken the room and prevent heat from the external environment.
You open the curtains when you need light and a little heating up from the sun.
Predictably, the best curtains for the above project should be black, with thick and high-quality fabric.
Using blackout curtains saves you the agony of painting or tinting the panes. It also enables you to open the glass windows to allow air circulation.
Conclusion
To finalize, learning and acquiring new skills is always a good thing. We are used to painting wood, metals, concrete, and plastics.
This article has explored uncharted waters that showcase how to paint glass windows. It is a simple process when you have the glass forming a large part of the window.
However, it’s somewhat delicate if the panes are etched between wooden or metallic frames.
Here’s How to Paint Glass Windows
- Assembling all the needed equipment
- Preparing the substrate
- Choosing and compounding the paints
- Applying the paint
- Curing the surface
I’ve given insightful accounts of the above procedures to make your painting experience fun and easy. I’ve also included pertinent aspects hinged on:
- The reasons for painting glass windows
- The benefits and drawbacks of coating window panes
- The best paint window-paint products on the market
- What kind of paint is compatible with glass windows
- Whether it’s possible to apply black paint to glass windows
- Blacking out a glass window
You’ll always reap what you sow! Therefore, I urge you to invest in top-grade working materials and products; the brands discussed herein certainly check out in that regard.
That said, I wish you the best painting experience ahead.