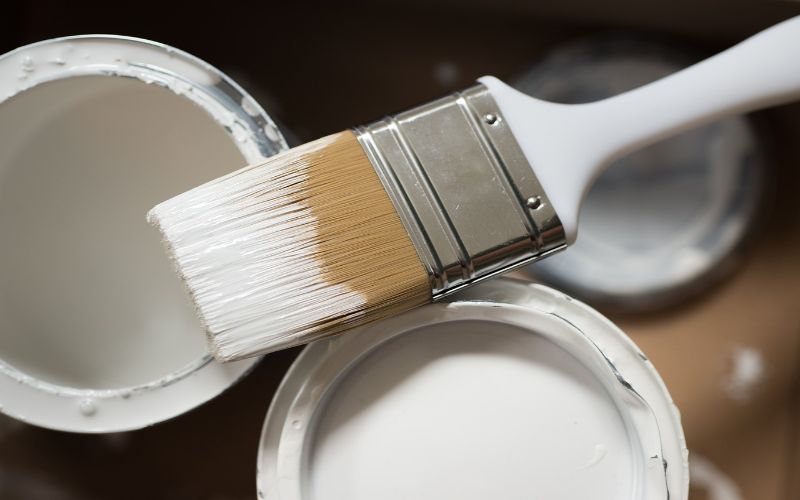
Can You Wash Paint Brushes In the Sink With a Septic System? That’s the headline for our discussion in this article; stay with me for more…
Septic tanks are significant in conserving the environment. Such tanks help separate wastewater into three main layers: solids, effluent, and scum.
The solids at the bottom eventually decompose while the effluent is drained into the drainage field. With this repeating cycle, we rest assured of a protected environment.
If you want to prevent blockage in the tank, avoid draining solid nonbiodegradable particles through your sink.
But the question is can you wash paint brushes in the sink with a septic system?
You must never clean paint brushes in the sink because paint can ruin a septic system.
Even the smallest amount of paint can lead to blockages in the septic system, contamination, flammable dangers, and other costly repairs.
Paint always has some solid particles that will settle at the bottom of the tank and eventually clog the drainage pipes.
Keep reading for more information regarding the subject.
What Will Ruin a Septic System?
Here are some common aspects that can ruin these systems:
-
Chemical Cleaners
It’s good to note that septic systems depend on bacteria to eliminate pathogens in waste.
Thus, adding bleach or bacterial cleaners to your septic tank will interfere with the bacterial cycle.
For this reason, I recommend only using safe septic cleaners for cleaning.
-
Bath Oils
Oil is less dense than water. Therefore, if you introduce it to your septic tank, it will float to the surface, resulting in forming a layer of scum.
Due to its resistance to bacterial activities, the oil will embed the solid waste layer, thus clogging the drain fields and stopping the pathogenic decay.
-
Dryer Sheets
The sheets have a formulation of synthetic fiber that isn’t biodegradable. For this reason, the dryer sheets will clog the inlet baffle of your septic system.
-
Additives
Various septic additives will increase bacteria in the system. However, such additives may also harm your tank.
Note: I recommend calling a professional to inspect the bacteria quantity in your tank before increasing them personally.
-
Kitchen Grease
It’s good to note that any grease type will add a layer of scum to your tank. Suppose you do a lot of cooking.
Consider installing grease traps to prevent grease from entering your septic system.
If you can’t do this, then you should stop pouring grease down your sink.
-
Cigarette Butts
Are you a smoker? If so, please refrain from flushing cigarettes down your drain. The reason is that cigarette filters may result in the tank’s blockage.
-
Trash
Solid waste is not suitable for your septic tank since it will fill twice as quickly as liquid waste. Thus, I don’t recommend using your toilet or sink as trash cans.
-
Prescription and Chemotherapy
Powerful drugs are not suitable for your septic tanks since they might contain chemicals even after passing through your digestive system.
Suppose these drugs are part of any family member’s treatment.
Then, it will be good to schedule more frequent septic pumping or keep the medicine contaminated excrement out of your septic system.
-
Dental Floss
You might ignore the dental floss since they don’t enter the tank in large quantities.
However, you should note that even a tiny amount of these products may damage or clog your tank impellers.
Flows are non biodegradable. Hence, they’ll remain in your tank and warp around the pump leading to damage.
-
Clothes
Even though you can’t flush clothes in your toilet, this can happen if you have children or grandchildren around.
Thus, ensure you restrict them from doing so, even with coins or toys.
-
Large Amounts of Water
Large amounts of water in your tank may risk flooding. Besides, it will also prevent the proper processing of waste.
So, please let your septic tank hold its recommended capacity.
-
Latex products
Such products are non biodegradable. Therefore, allowing them into your septic tank may cause clogs until the next pump out.
These products may also clog the pump impeller, drainage system and burn your septic motor.
-
Automatic Toilet Cleaner Products
You might be happy with how these chemicals save your time for toilet cleaning.
Even so, they may be adding excess antibacterial substances that may damage your tank and leave it full of blue water.
Tip: Go for septic safe toilet cleaners.
-
Paints and Oils
As stated earlier, septic tanks depend on bacteria to eliminate pathogens in the waste.
Thus, introducing substances such as paints, motor oil, floor wax, and vanishes will damage the organisms.
-
Kitty Litter
Did you know that cat litter always contains clay particles? Well, now you know.
Introducing such waste into your tank will only increase the solid debris, which may clog the pipes and ruin the tank over time.
Note: You must keep non biodegradable products out of your septic system.
Other causes of septic tank failure include:
- Failure to perform routine maintenance.
- Inappropriate design.
What Will You Do If Your Septic Tank Fails?
Suppose you notice your tank has failed. Contact a local septic system service provider.
What if the septic water backs up into your home?
In such a case, consider the following:
- Avoid getting in contact with the water since it may contain harmful pathogens.
- Ask for guidance from your regulatory agency or local health department.
- If you try cleaning, ensure you have protective clothing.
- Thoroughly wash all the equipment and the flooded area after cleaning.
- Disinfect all the exposed areas with a mixture of 90% water and 10% household bleach.
- Please don’t use the area until it thoroughly dries for at least 24 hours.
How Do You Dispose of Water After Cleaning a Paintbrush?
 I hope we all agree that painting is fun. However, never make the mistake of draining the cleaning water into your septic system.
Doing this might result in environmental issues and plumbing problems.
Here is how you can dispose of dirty water…
Step 1
For this step, a warm, dry climate will be ideal. But first, you’ll have to set the bucket with the wastewater aside for the paint to settle.
Step 2
After some time, you’ll realize that the paint has settled at the bottom of your bucket. So allow enough time for the water to evaporate.
Step 3
You’ll notice the formation of a solid paint in your bucket that resulted from the settled paint. Peel out this layer of dried paint and dispose of it with your other trash.
Pro Tip: If you can’t wait for the water to evaporate completely, consider tipping out the clear water onto a flat grassy area until you remain with the less clear liquid.
Allow it to dry completely to form the solid paint, then dispose of it as before.
Note: The grassy area must be away from storm drains, sewers, wells, and other waterways.
Is It OK to Wash Paint Down the Drain?
No, I don’t recommend doing so. However, you can safely drain small amounts of latex paint into your septic tank.
But you must ensure you don’t regularly do this.
So, what can happen if the paint goes down the drain?
You must note that paint doesn’t dissolve in water. Therefore, it will end up coating inside your pipes.
Such cases will cause shrinkage to the pipes and material build up that will eventually clog your drainage system.
Note: Paint is highly flammable. Thus if you release it into your drainage system, fumes will later fill your house, and it can even ignite.
How Do You Dissolve Paint In a Drain?
You can opt to use clog killing chemicals.
Note: Such chemicals might be harmful. Hence ensure you properly handle them.
Alternatively, you can use other homemade solutions, such as baking powder and vinegar, to help dissolve the paint in the drain.
Here are the necessary steps:
Step 1
Start by pouring ½ cup of baking soda into the drain, followed by ½ of vinegar, and allow the combination to sit for about three hours.
Step 2
Run hot water into the drain for approximately 5 to 10 minutes.
Note: Suppose these methods fail, contact your local plumbing service provider.
How Do Professional Painters Clean Their Brushes?
The points below show how professionals clean their paintbrushes.
Step 1
First, you must ensure the paintbrush has no excess paint. Doing this is as easy as scraping the brush against the inside rim of your paint can.
Afterward, remove the remaining paint by painting on another surface, such as a magazine.
Step 2
Before cleaning the brush, ensure you check the instructions for the recommended solvent. For instance, you can wash latex paints with soap and water.
However, for oil based paints, I recommend using stronger solvents.
Step 3
After determining the appropriate solvent, immerse the brush and work the paint free from the bristles.
Step 4
Once you realize the brush has no more paint, use clean water to rinse off the remaining paint.
Step 5
Finally, use heavy paper to wrap up your paintbrush to retain its shape.
Pro Tip: After washing your paintbrush, don’t position it with the bristle facing upwards since the remaining small particles will settle at the bottom of the bristles and eventually damage them.
Also, please do not use a wire brush on your paintbrush since it might damage the bristles.
Can You Pour Acrylic Paint Water Down the Drain?
No, you shouldn’t do this if you don’t want to damage your septic system.
Acrylic paint can be less harmful to the system because it has better environmental advantages than oil-based paints.
Some of these include the first drying time and the lack of fumes. The paint is also water based, thus easy to clean up.
Note: Acrylic polymers are a kind of plastic. Therefore, they can be a problem for the wastewater treatment process.
Here are the options for disposing of acrylic paint:
- Returning the toxic acrylic paint to your local hazardous waste disposal center.
- Allowing the nontoxic one to dry and throwing it away with your other solid trash.
- Recycling the leftovers of the nontoxic acrylic paint.
- Giving the remaining paint to a friend, neighbor or donating to charity.
Can I Pour Paint Thinner Down the Drain?
No, it would help if you went for a safer way of disposing of your paint thinner. The reason is that paint thinners are toxic to the environment and may damage your septic system.
Below are some options for disposing of paint thinners:
- Choose natural ones- instead of using hazardous conventional paint thinners.
- Reduce consumption- you can do this by purchasing and using fewer of these products.
- Recycle- this is one of the best options since it reduces wastage and contamination. Call your area municipal hazardous collectors to take away the remaining thinners for recycling.
- Reuse- Products such as paint thinners, turpentine, and minerals can be used repeatedly.
You only need to put the product in a container and let the solid particles settle. Afterward, drain off the clear liquid and store it away from children and pets for subsequent use.
- Add to solvent paint- suppose you have any leftover oil based paint. Add your paint thinner. Doing this will help thin it out and is a convenient way to eliminate hazardous waste.
- Give it away to any of your friends who need it.
Will Acrylic Paint Hurt a Septic System?
Yes, it will damage your septic system. However, this depends on how much paint you will allow draining into your tank.
Acrylic paints comprise resin portion, water, and pigments (sometimes organic cosolvents).
It also has some additives, including defoamers, preservatives, surfactants, and flow additives.
The above compositions show that this paint type is organic and inorganic. Due to this, the organic side will end up breaking down in the tank.
However, the inorganic compositions do not break down. Instead, they remain solid and might clog and damage the septic tank.
Is It Safe to Wash Latex Paint Down the Drain?
No, it’s not safe to do so. Latex paint might be less harmful when released to the septic tank, but consistent action will later cause blockage to the drainage system.
If you insist on washing the latex paint down the drain, limit it to brush cleaning and other minor clean ups.
Note: Don’t dispose of latex paint rinse water into storm drains or on the ground. The reason is that the products will leach into the soil and cause contamination.
For the case of empty containers, brushes, rollers, and other application devices, consider disposing of them into your trash after the paint has dried.
Is It Bad to Wash Paintbrushes In the Sink?
Absolutely! I don’t recommend washing paintbrushes in the sink, especially oil paints and acrylic plastic paints.
If you consistently do this, the paint’s solid particles will build up in the drainage pipes and eventually cause shrinkage and block the system.
Apart from not cleaning the paintbrushes in your sink, never put the painting accessories into the dishwasher for washing.
Suppose you insist on using your sink for cleaning purposes, please adhere to the following:
Close the drain before filling it with warm water and soap.
Use the water to clean your painting equipment.
Release the water and refill it with a clean one for rinsing.
Repeat the process until your painting equipment is clean.
Note: It’s not good to clean your paintbrushes in the sink.
Do You Need to Clean Paint Brushes After Every Use?
It’s not necessary all the time!
Cleaning your paintbrush is unnecessary if you stop to paint for a while or plan to continue painting the next day.
Note: Don’t forget to wrap the brush in a plastic bag.
What if you want to continue painting after 2 to 3 days or longer? In such a case, consider wrapping the paintbrush in a plastic bag and storing it in your freezer.
Doing this will prepare the brush for use in about 10 to 15 days or even two weeks.
Tip: Suppose you leave the bristles soaked overnight. They might shade off fast.
How Do You Clean Up After Painting?
Paint can sometimes be hard to clean if you let it dry for long. If you want to avoid this, please follow the below steps.
Step 1
It would be wise to have a damp cloth handy to wipe off any paint that drips while painting.
If there are any recent but drying drips on a dry, non-porous surface, use a wet cloth, mineral spirits, or paint thinner to wipe them off.
Step 2
Before cleaning, remember to remove any masking tape. Ensure you do this before the paint dries.
Doing this will reduce the chances of lifting the new paint film.
What if you delay and the paint dries? In such a scenario, use a utility knife or a razor blade to score along the tape’s edge lightly.
Note: You should let the paint completely dry before using a scraper or a razor to scrape off
Step 3
You’ll want to have some folded drop cloths and plastic sheets around the painting area to prevent small drips or spills.
Step 4
Consider cleaning all your painting tools immediately after painting to prevent the paint from permanently drying on them.
Also, wipe them dry to prevent rust formation.
Note: You’ll need warm water and soap to remove latex paint and mineral spirits or paint thinner for oil based paint.
Step 5
It would be best if you let the tray liners dry before disposing of them. It’s also good to hang oily rags and allow them to dry before washing thoroughly.
Note: You will risk spontaneous combustion if you leave oily rags in closed containers.
If you want to clean a painted surface, never touch, wet, or wipe fresh paint for up to 30 days.
After this time, you may remove the dirt and stains with clean water and mild, non abrasive cleaner.
Here’s a Video On How to Clean Up After Painting:
What Are the Necessary Precautions for Paint Storage and Disposal?
- It’s good to clean the area surrounding the lid and the threads before using it to close the can.
- Use a rubber mallet when resealing metal paint cans.
- Ensure the containers are well sealed after use.
- Store your paint at room temperature (don’t freeze or store in very high temperatures).
How Long Does It Take a Can of Paint to Dry Out?
This period will vary depending on the following factors:
- Type of Paint
Latex paints will take about an hour to dry to touch before recoating after four hours. On the other hand, oil based paints will dry to touch in 6 to 8 hours, and you can safely recoat after 24 hours.
- Amount of ventilation
The ventilation system in your room will highly affect the drying time of your paint.
For instance, a freshly painted surface in a stuffy room will take longer to dry than in a good airflow room.
- Humidity and temperature
If there is excess water vapor in the air, it will slow down the drying time of wet paint.
Consequently, higher temperatures than the average will also slow down the drying time.
On the other hand, lower temperatures and moderate humidity will increase the drying time.
Note: Closing the windows, running a fan, or air conditioning the room can speed up the drying time.
- Application Method
The thick application will slow down the drying time. Additionally, applying the second coat before the first one dries will also result in the same drying conditions.
Tip: Two coats of paint is better than applying one thick coat.
With the above factors, how long will paint take to cure?
Oil based paint takes about seven days, while latex paints will take approximately 30 days.
Can You Leave a Paintbrush In Mineral Spirits Overnight?
It depends on the type of brush you are using. For regular brushes, 5 minutes is enough time to soak your paintbrush in mineral spirit.
Longer soaking in mineral spirits can help with the cleaning. However, depending on the paintbrush type, you’ll risk damaging and weakening the bristles.
Tip: The white spirit is ideal for cleaning oil based paints.
Can You Save a Dried Paintbrush?
It does not matter if your paintbrushes have dried with oil- or water-based finishes. You can restore any paint brush by simply soaking in brush cleaner.
Here’s what you need to restore your paintbrush: ready your brush cleaner and pour it into a metal or glass container.
Have your brush suspended on a stiff wire. The brush cleaner has solvents that give off nasty, flammable vapors.
Have the container covered with a plastic bag and keep it safely in the garage or outside.
After the brush has soaked for a couple of days, most of the paint will drop off.
Pour brush cleaner into another container and splatter the brush around to clean out the remaining paint.
Allow the containers sit overnight. The sludge from the paint will settle to the bottom, allowing you to pour most of the paintbrush cleaner back into the can.
Carefully choose the correct brush cleaner. For instance, solvent based cleaners are suitable for any brush type (synthetic or natural).
On the other hand, a water based cleaner is only ideal for synthetic brushes.
However, you can use both of these solvents for removing latex and oil based paints.
Ensure you cover the left side of the container with foil paper in a well ventilated room before leaving the brushes to soak overnight.
If you notice that the paint hasn’t softened after 24 hours, soaking the brushes for another day will help.
Tip: Suspend the brushes in the container to prevent the bristles from bending.
When you are satisfied with the flaked off paint on the bristles, comb away any remaining solids from the brush.
Suppose you’re going for a solvent based cleaner. You’ll need to re-soak the brush for at least an hour in a clean solution to eliminate any more solids.
Afterward, use the same procedure for cleaning oil based paints from brushes.
However, washing the brush in soapy water will let you do the job right if you use a water-based cleaner.
Do You Wet Brush Before Painting?
Yes, I suggest moistening it in water if you intend to use water based paint or in turps for oil based paints.
Before wetting your paintbrush, flick the bristles back and forth to remove any dirt. Also, remember to remove any excess liquid before painting.
For acrylic paint, you’ll want to keep your brush in the water while painting. Doing this will ensure the paint doesn’t dry in the bristles.
You’ll need a container with a shallow water layer for this purpose. Besides, another container will be significant since you’ll use it to clean the brushes between colors.
How Do You Use Vinegar to Restore Paintbrushes?
Did you know vinegar is cheap, safe, and highly effective for restoring paintbrushes?
Let’s find out how…
Step 1: Soak the bristles.
You’ll need a saucepan to pour enough vinegar that will only cover the bristles. Next, please drop in your brushes and allow them to soak for at least an hour.
Step 2: Allow simmering
After soaking the brushes for an hour, heat the saucepan with a regulated amount of heat for the brushes to simmer in the vinegar.
In this case, the heated vinegar will allow the bristles to reform by moisturizing them.
Step 3: Rinse
Here, you’ll drain the vinegar and use running water to rinse your reformed brush before it’s ready for the next use.
How Do You Deep Clean Paint Brushes?
Apart from using vinegar, below are the other methods of deep cleaning paintbrushes:
Solvents
Step 1
Squeeze the brush against the can to get rid of most of the paint from the bristles.
Step 2
Pour your preferred solvent into a clean vessel and dip your brush into it.
Step 3
Swirl the brush back and forth until there is no more paint on the brush.
Step 4
Rinse off the remaining solvent by running water over the bristles. Remove any remaining solvent or water, gently remove it, rubbing the brush, an old rag, or a paper towel.
Step 5
Finally, reshape the bristles before storing the brush for the next use.
Fabric Softeners
Step 1
First, remove as much paint as possible from the brush.
Step 2
Make a solution of a ⅛ cup of fabric softener and 4 cups of warm water in your bowl.
Step 3
Swirl your brush in the mixture until the paint comes off.
Step 4
Rinse the remaining solvent on the brush in running water.
Step 5
Allow the brush to dry before using a paper towel or old rag to remove the remaining solvent.
Step 6
Reshape the brush bristles before storing them.
Here’s How Do to Deep Clean Paint Brushes:
Final Thoughts
Up to this point, you’ve realized how the septic system is essential to the environment and the need to maintain it.
It would help if you tried not to let solid particles into your drainage system. The remaining question is
Can You Wash Paint Brushes In the Sink With a Septic System?
No, you must not wash paint brushes in the sink with a septic system because the solid particles in the paint will settle at the bottom of the septic tank and block the drainage system.
The particles may also accumulate in the pipes and cause shrinkage.
You need to be watchful of how you take care of your sinks and septic systems so that you don’t have to incur costs in repairing them.
One way to keep your septic system functional is to avoid activities that compromise it, such as washing paintbrushes.
As we have mentioned, paintbrushes form solid particles that can easily block the pipes and other openings to prevent the floor of other waste liquids.
Until now, I hope you have gathered enough to help you clean your paintbrushes and keep your sinks and septic systems functional all the time.
I also want to imagine that this post has answered all your concerns about the subject. Even so, I’m still available for further discussions.
If you have questions, opinions, or suggestions that might need my attention, feel free to contact me through the comment section below!