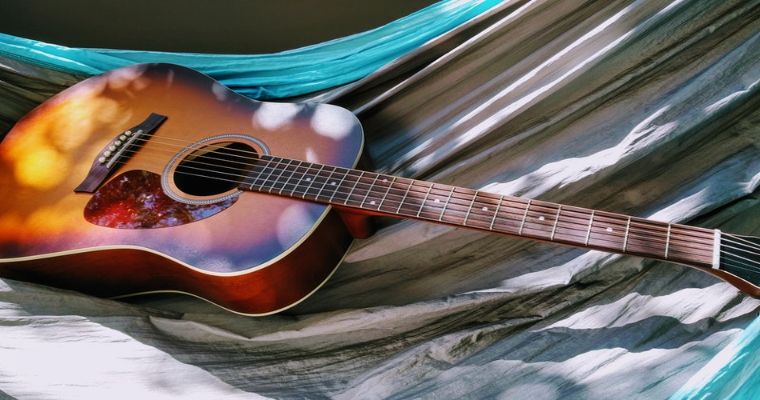
Guitars are delicately and precisely designed that they need painting for protection.
Not all paints are compatible with guitars! Some contain agents that will ruin the musical instrument. However, can you use acrylic paint on guitar?
Yes, you can! Acrylic paints have an unparalleled ability to go over numerous substrates.
They work well on all guitar types. Still, you must ensure the acrylic paint you’re using is compatible with the specific guitar.
In this article, I’ll discuss the process of painting guitars with acrylic, from prepping through the main application to sealing or top coating.
I’ll also scrutinize the following:
- The use of acrylic paint on different guitars like regular, acoustic, and electric.
- Painting guitars with ordinary paint
- Whether or not you can use car paint on a guitar.
Gear up for an engaging and informative session to help you choose the best paint for your guitar.
I urge you to read with utmost focus to make the painting process effortless, to get the best results, and to avoid damaging the guitar.
I’ll start by defining acrylic paint.
What Is Acrylic Paint?
 Acrylic paint is water-borne paint containing pigment, stabilizers, acrylic polymer emulsion, metal soaps, defoamers, and silicone oils.
All these constituents are dispersed in a solvent, i.e., water.
You may wonder why acrylic paints stick to substrates yet are water-based.
They should wash out as soon as they touch water, shouldn’t they? But they don’t!
This happens when acrylic paint dissolves or mixes homogeneously with water when wet or fresh.
It will come off when doused or rained on with water at this stage.
Upon drying, however, the paint becomes water-resistant.
In this state, it can’t dissolve in water; neither can it allow it to penetrate. In short, the paint becomes water-resistant.
Water-resistant is the most accurate label when describing the interaction between acrylic paint and water.
It’s often confused and wrongly used interchangeably with the word waterproof.
Water-resistant means it holds off or keeps out water to some degree, while waterproof means absolute water repulsion.
Acrylic paint is formulated with water-resistant qualities to enable easy removal when cleaning up spills or when you want to make a makeover.
You can convert acrylic paint from water-resistant to almost waterproof by top coating with varnish or applying more coats of acrylic.
Adding acrylic media, water, or both can modify the paint’s hardness, texture, hue, and flow properties.
The said modifications enable them to be compatible with various substrates.
Acrylic paints can go over canvas, metal, wood, cardboard, plastics, glass, masonry, and other surfaces.
However, the prepping practices leading up to its application to the above substrates vary as they are made of non-identical substances.
Applying acrylic paint in thin coats or washes produce effects resembling watercolors and other water-based media.
Conversely, applying the paint in multiple thick layers builds gels and molding pastes; the paintings have a relieving effect.
In artistry, acrylic paints make raised features more prominent and attractive.
To clean up wet acrylic from paint brushes, hands, and spillages, I advise you to use water and soap; the paint will come off without much effort.
How to Prepare Your Guitar for Painting
To make your guitar painting prospects a success story, you must be meticulous with the preliminary or buildup to paint application.
Otherwise, the paint won’t stick up sufficiently, will peel off soon after application, and will take away your guitar’s attractive appeal.
In this segment, I’ll show you how to prepare your guitar for painting.
The preparation involves disassembling the instrument, cleaning, sanding, and priming.
Other preparatory practices that don’t involve direct guitar modification are mainly workstation preparations.
They improve ventilation, prevent paint spillage/splatter to surrounding objects, and give more room to carry out the project.
I’ll detail these in the next subtopic. Let’s get back to preparing the guitar:
Disassembly
This involves the removal of all the strings and electronics. If the neck is detachable, remove it and paint it separately.
If not, or if you’re uncomfortable removing it, let it stay put.
Please don’t remove the pickguard and the bridge as they are often firmly attached to the instrument.
Any attempt to remove them risks damaging the chordophone.
Later on, just before you begin painting, you’ll tape off the irremovable parts using masking tape.
Cleaning
Take paper towels and wipe the dust off of the guitar.
If It’s stained with greasy or stubborn stains, wipe it with a rag soaked in a household cleaning agent.
Sanding
If the guitar was previously painted, you must sand down the body to bare wood before applying new paint.
Start with coarse sandpaper like 360-grit. You can either attach the abrasive to an orbital sander or hand-sand using a sanding block.
Filling Cracks and Imperfections
Take a filler compound or regular spackle and fill in the surface’s cracks, gouges, and dips.
Sand down the filled sections with the 360-grit paper to level the surface.
After sanding, remove the accumulated dust using a vacuum cleaner, or wipe with paper towels.
Taping Off
Take a painter’s tape to cover the parts that shouldn’t be painted.
These include the fretboard, the neck fit (if you detached the head and neck), the pickguard, the bridge, and the soundhole (for an acoustic guitar).
If you need to paint the neck, don’t cover its back.
Position the Guitar for Painting
Now it’s time to set up the guitar for painting.
If you’re going with spray painting, hanging with a wire or strong thread is the best way to position the instrument.
Let the thread pass through the hole of the removed neck bolts.
If you’ve opted to paint by brushing, secure the instrument using a guitar body holder.
The next stage is painting, as described in the following segment.
How to Paint a Guitar With Acrylic Paint
Each part of a guitar is delicately designed to play its role.
When painting the instrument, you must be careful so that each part of the guitar functions properly after coating.
Every brushstroke or paint spray counts. In that respect, follow my lead as I demonstrate how to paint a guitar with acrylic paint.
Requirements
- Spray paints: four cans (you can also paint with brushes)
- Primer; one can of sandable primer
- Top coats/sealants: two cans of clear coats
- Various grits of sandpaper
- A pack of paper towels
- Rubbing compound
- Automotive wax
- Safety wear (latex gloves, safety goggles, and a respirator)
- Microfiber towels
Procedure
Step 1; Working Station Preparation
Prepare your working station by removing the surrounding materials and covering the immovable ones.
Ensure also that there is sufficient air circulation in the room.
Next, lay down a drop cloth or old newspapers. It prevents paint spillage or splatter to the floor.
Alternatively, you can set up a temporary painting booth using cardboard and boxes.
This approach is significant if you’re planning to spray paint outdoors where wind might be a hindrance.
Step 2: Priming
First, put on all your safety. It prevents spray inhalation, skin contact, and eye irritation.
Then, shake the primer can well to mix and “activate” its contents.
Apply a light coat of the sandable primer to the body and let it dry for the specified time before recoating. The standard duration usually is 15 minutes.
Spray a second light primer coat and let it dry for the same duration above.
Afterward, apply a third thick primer coat and let it dry overnight.
Filling Holes and Sanding
Fill in any holes and imperfections with sparkle, then wet sand the entire guitar with 600-grit paper.
Rinse off the abrasive regularly to remove the pasty buildup during sanding.
Then, wipe the guitar dry with paper towels.
Afterward, you need to prime again.
Apply two light coats and a third thick coat following the previous procedure.
The following day, the same process, i.e., wet-sanding with a 600-grit abrasive, followed by the three primer coats.
Ensure you don the safety gear before you begin all spraying cycles.
Paint Application
Shake the spray paint can thoroughly and point the nozzle perpendicularly to the substrate.
Hold the rattle can at a distance of 8 to 12 inches from the surface as you discharge the acrylic paint.
Apply a thin first coat, wait for 15 minutes and follow with a second light paint coat.
I advise you to shake the rattle can regularly during painting to maintain the homogeneity of the paint.
Let the second coat dry for 15 minutes, then apply a third heavier coat.
Allow your work to dry overnight or for 8 hours if you complete the above cycle by early morning hours.
Repeat the above three-coat painting cycle for two or three more days as needed.
You don’t need to sand daily; stick to the 3-coat color spraying routine.
Be cautious to avoid paint drips, especially when applying the third heavy coat.
If you get any, let it dry, sand down, then respray the affected spot.
Here’s a Video On How to Paint a Guitar With Acrylic Paint:
Once you’re done with the spray paint application, the next stage involves sealing/protecting the acrylic with a clear coat.
I’ve described that in this next segment:
How to Seal Acrylic Paint on a Guitar
After painting a guitar, you must take further steps to ensure the paint remains stuck to its surface for as long as possible.
It will maintain the instrument’s attractive appearance and keep it in good working order.
Top coating or sealing is one of such steps. This section will guide you on how to seal acrylic paint on a guitar.
You can use an oil-based sealant or a water-based one to topcoat. Sealing is done soon after the paint has dried.
The sealing process involves cleaning the surface, light-sanding, and seal application.
Most sealants form clear coats to enable the underlying paint to show through the topcoat.
Acrylic paint is good enough to get you going as it has an excellent durability.
However, adding a sealant will make the paint last even longer as it shields it from cracking, peeling, and stains.
It also maintains the paint color by preventing fading.
The detailed sealing procedure is as below:
From the just-concluded painting process, don’t reassemble the guitar!
The only change you can make is to remove the masking tape from the covered areas and put new masking tape again.
Let the acrylic paint from the preceding painting segment dry completely; this prevents the trapping of unevaporated solvents and water in the fresh paint.
The best drying technique is by suspending the guitar in the air using a strong string.
After the paint has dried, take a clean, lintless rag and wipe your workpiece; this removes any accumulated dust.
Next, take the sealant/clear coat, shake it well and spray the guitar while still hanging.
In seal application, the first two coats should be thin/light and the third one of medium thickness. This facilitates drying and prevents the formation of paint drips.
It’s important to know that paint drips at this stage are highly consequential because you will have to wait for them to dry, then sand and recoats.
So, as I’ve advised, go for thinner sealer coats; it’s much safer.
Wait 15 minutes between the first two clear coats, then let the third/last one dry overnight.
Follow the same three-coat sealing procedure the next day, i.e., two light coats, followed by a third medium layer. Let this dry overnight as well.
If you finish early during the day, let it dry for 8 hours before proceeding to the next stage.
I emphasize applying many clear coat layers because the last stage involves sanding and polishing.
If the sealer coats are insufficient, you risk sanding through the underlying acrylic.
Sanding and Polishing
At this point, the guitar will appear so sleek that you might be tempted to stop the project.
However, you can make the body look even better by sanding and polishing. Here is the process:
Wait at least two days for the paint and sealer to dry and cure completely.
Your patience is crucial for a successful outcome; this is where it’s tested.
If you rush things, you’ll mess up the entire project; it’ll look worse than an unpainted guitar.
During drying or even before, you can remove the masking tapes from the guitar’s neck pocket and other parts.
These tapes can impede smooth sanding and polishing.
Remove the guitar from the suspended position and lay it on a working table.
Start with a 1000 grit abrasive and wet-sand the entire guitar.
Be gentle with the sanding to prevent going through the clear coat, especially when working on corners and edges.
The initial sealing process leaves an orange peel effect, where the surface has slight dull bumps and shiny ridges in between.
This sanding procedure will change the above look to an even but dull appearance; the key is to make the surface even.
Admittedly, your guitar will look worse than before starting, but worry less; there’s a bigger picture we’re targeting. Better things are ahead.
Next, shift upwards to 1500-grit abrasive and wet-sand the whole instrument again.
It levels the bumps and smoothes the finish on a smaller scale. Again, remember to be gentle to avoid sanding too far.
Afterward, move up to 2000-grit abrasive and wet sand. At this stage, the shine will start coming back to your workpiece.
This shine is different from the one in sealing as it does not have an orange-peel texture; everything is even.
The last step is polishing. Here, you need the following:
- A rubbing compound
- Microfiber cloth
- An orbital sander
- Waxing pad
- Car polisher/waxer
Rubbing compounds are often conveniently packaged in squeeze bottles.
Squeeze the rubbing compound onto the guitar and buff with the lintless rag, working on a given section at a time.
Ensure you work the compound into the workpiece thoroughly and immediately after application to prevent it from drying on the surface.
Next, apply generous amounts of the wax/dedicated car polish to the guitar and spread it using your hands.
Then, attach the waxing pad to the orbital sander and power it on; make sure it operates at the lowest speed setting and press on the surface with minimal pressure.
Buff out the wax, ensuring the sander is in constant motion to achieve evenness and to prevent the wax from drying.
Use your hands for the instrument’s corners, edges, cracks, and crannies.
You’re done! The guitar is ready for reassembly.
One glaring fact is that the whole painting and finishing process is extensive and takes long. It can take two weeks, even if you do it daily.
On the bright side, the result proves worthy; you’ll like every bit of it. It’s the real-life experience of the end justifying the means.
Can You Use Acrylic Paint On an Acoustic Guitar?
Musical instruments require different paints because they are made of different elements.
Acrylic paints are renowned for their compatibility with several materials. On that note, excuse the pun, can you use acrylic paint on an acoustic guitar?
Yes! Acrylic paints work well with acoustic guitars and many other string instruments.
While you can use the paint on the guitar in question, you must prepare the guitar beforehand.
The prepping process involves cleaning, sanding, and priming.
After that, you apply the acrylic and then lay a top coat. Only then will the acrylic stick perfectly and last longer on the instrument.
Cleaning removes dust, grease, chemicals, and stains that hinder acrylic adhesion.
Moreover, it augments the guitar’s aesthetics as the stains won’t show through the paint.
Sanding helps remove existing paint and levels the wooden guitar body; this smoothes the acoustic guitar for better paint reception.
Priming helps fill tiny pores on the acoustic guitar’s surface; this prevents paint absorbance and wastage by the guitar’s body.
It further increases adhesion because the sealer sticks to the substrate and acrylic paint to form a firmly bonded layer.
Top coating after you’ve applied the paint helps to seal it in. It prevents distressing, peeling, and loss of color.
Acoustic guitars have large soundboxes accessible through the sound hole.
The acrylic paint must not get into the sound box/chamber as it will interfere with the guitar’s tone or timbre.
Cover the hole using masking tape before you begin painting to prevent the above.
Applying several thin coats instead of a few thick coats is advisable when using acrylic paint on the acoustic guitar.
It enables complete drying and reduces the incidences of paint drips.
Can You Use Acrylic Paint On an Electric Guitar?
An electric guitar is as good as it gets when we’re talking modern guitars. It’s undoubtedly handled differently from the others.
But when it comes to coating, can you use acrylic paint on an electric guitar?
Absolutely yes!
It’s understandable to be apprehensive about using acrylics on electric guitars because they are more complex and have several components than regular guitars.
Well, you should worry no more; acrylic paint ranks among the most widely used to paint string instruments, and an electric guitar is among them.
All thanks to the science-based development and testing protocols that led to its invention.
Still, you must get every aspect of the painting right for the acrylic to coat your electric guitar successfully.
You need to start by disassembling the instrument, then surface prepping (cleaning, sanding, and priming), followed by paint application and sealing the paint.
During paint application, follow all the procedures I’ve already outlined and adhere to the specified drying times.
Otherwise, you’ll have wasted your time, and money and have a damaged electric guitar. In short, a failed project! So, be meticulous with your approach.
Substrate prepping makes the instrument more receptive to acrylic paint by removing the stains and leveling the surface.
Top-coating with a clear coat keeps the paint intact and shields it from scratches and moisture damage.
All of the above increases the paint’s adhesion and overall durability of the electric guitar.
Don’t gamble if you’re not adept at disassembling an electric guitar. I urge you to take it to a music store and let the experts do it for you.
You can then go back and paint the body and get back to the store for reassembly after painting. It minimizes the risk of damaging the chordophone.
Best Acrylic Paints for Guitars
If you are looking for top-quality paint products to coat and improve the aesthetics of your string instrument, this is the place to be.
Without further ado, these are the best acrylic paints for guitars.
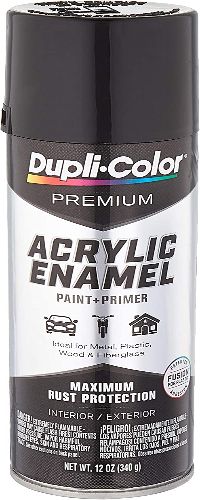
1. Dupli-Color® Premium Acrylic Enamel Spray Paint
 Dupli-color manufactures the above paint under the Sherwin-Williams Company, a multi-brand company for coating products.
Dupli-color started in 1938 when the army colonel Sigmund Edelstone in his quest to sell automotive touch-up paints that matched perfectly to original car finishes.
He purchased the paints in bulks from manufacturers like Sherwin-Williams, repacked them in touch-up bottles, and sold them to customers.
The company has soared up the ranks of the painting world since then.
They’ve even diversified to make paints that can go over wood and plastic.
The enamel paint named above is among the best for guitars due to the following benefits and features:
- It’s a paint and primer in one, so it relieves the burden of priming
- The paint can go over many substrates, including wood, metal, and fiberglass, so that you can coat a variety of guitars
- This paint comes in 12-ounce spray cans
- Dupli-color acrylic enamel has fast drying times to fast-track project completion
- It forms a hard layer that confers scratch resistance
- The paint forms a water-resistant and stain-proof layer
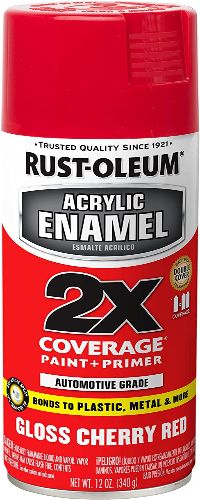
2. Rust-Oleum® Acrylic Enamel 2X Spray Paint
 The above product is made by Rust-Oleum, famous for protective coatings and paints for home and industrial utility.
Robert Fergusson founded the company in 1921; they initially used whale oil in their formula.
The company uses resins obtained from latex, epoxies, alkyds, polyurethanes, etc.
In 1994, the company was absorbed by RPM International Inc., which still sells under the Rust-Oleum brand.
The above product comes with these benefits and features:
- The paint bonds to metal, wood, and plastic, which are the components of most guitar bodies
- It is available in many colors; this gives you a variety from which you can choose
- This paint comes in 12 oz aerosol cans
- It has quick drying times of 20 minutes, giving you the convenience of time
- The paint has a broad coverage of 12 sq feet per can
- It forms a durable coat that minimizes maintenance costs
- Rust-Oleum acrylic enamel 2X produces a smooth finish that looks attractive
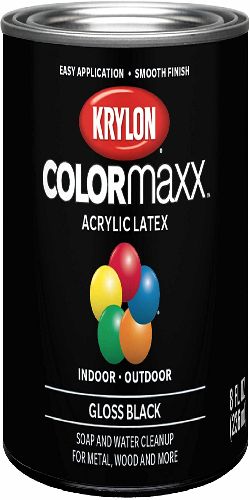
3. Krylon COLORmaxx Acrylic Paint
Sherwin-Williams Company manufacturers the above paint.
The company has its headquarters in Cleveland, Ohio, and they specialize in manufacturing and selling coatings, floor coverings, paints, and similar products.
The company is so popular that it operates in over 120 countries.
 The corporate makeup of Sherwin-Williams entails three groups, i.e., the consumer brands group, the Americas group, and the performance coatings group.
All Krylon paints are manufactured and distributed by the consumer brands group.
The above Colormaxx acrylic paint is among their newest products, and it has the following characteristics and advantages:
- It comes in 11 oz rattle cans
- It’s compatible with wood, metal, glass, plastic, and ceramics
- The paint comes at an affordable price
- Krylon Colormaxx acrylic paint has excellent adhesive properties
- The product is easy to use
- This paint has wide surface coverage of 15 to 20 square feet per can
- It is equipped with a big-button spray tip for a comfortable spraying experience
Can You Paint a Guitar With Regular Paint?
As we’ve already discussed, guitars are so intricately made that any negligent handling will result in untold negative consequences on their functionality.
Regarding painting, you must get the technique and paint type right to guarantee the best outcome.
I’ve already explained the proper painting technique. On paint type now, can you paint a guitar with regular paint?
You can! The reference “regular paint” has become ambiguous because many paint types are running the industry.
All manufacturers consider their paint regular for marketing purposes. It enables wider customer reach.
Consequently, the phrase “regular paint” has become an umbrella term describing long-standing paints based on popularity among users.
That said, the regular paints you can use on guitars include:
- Polyurethane paints
- Latex paints
- Shellac paints
- Lacquer paints
- Polycrylics
Choose the right regular paint depending on the following:
- Cost: If the paint is too cheap, it will undermine the quality of the finish. If it’s too costly, it will cause financial strains. It’s always a fine balance between quality and price. Select the most cost-effective paint.
- Guitar body makes: common wooden raw materials include plywood, oak, teak, mahogany, and pine. Use paint that’s compatible with your instrument.
- Durability profile: The surest way to get a hold of long-lasting regular paint is by purchasing from a recognized brand. These paints have track records of success, so it’s safe to use them.
Can You Paint a Guitar With Car Paint?
Every item needs to be painted with matching paint. It ensures compatibility and prevents substrate damage.
But sometimes, the prescribed paint isn’t close by or is just inaccessible. In this case, you’ll look for your best alternative paint.
For instance, can you paint a guitar with car paint when dealing with musical instruments?
It may come as a surprise, but the answer is yes. Well, that’s the beauty of knowing and understanding paints; you can uncover and share lots of little-known intel.
If your starting point is bare wood, I advise you to use a sealer instead of an automotive primer; you can still use the automotive primer, but the sealer serves better.
A sealer fills up pores on the wood and levels the surface.
If you plan to paint over existing paint, start with an automotive primer; it works better than a sealer. The primer scuffs the surface, giving it teeth to grasp paint.
The reasons I give countenance to using automotive paints on guitars are:
- The nitrocellulose lacquers that were initially used on guitars are car paints. They are still used on guitars, though on a smaller scale due to the emergence of numerous alternatives.
- The polyurethane paints presently used on factory-finished guitars are also automotive paints. It further lends credence to using car paints on guitars.
Other standard car paints that can go over guitars are automotive acrylics, polyurethanes (mostly the catalyzed ones), and enamel paints.
They all give a high-quality and durable finish.
Even so, both sides have strong arguments on whether or not to use car paints on guitars, especially acoustic ones.
The guitars have sound chambers which amplify the timbre or tone as you play the instrument; they do this through resonation.
Any change in the body results in tonal variation, depending on the degree of change.
I advise you to stick to one paint type and brand when painting or to repaint the above acoustic chordophones.
If you find it with classic/vintage finishes like oil paints, shellac, and nitrocellulose lacquers, maintain that.
If you find it or start painting it with car paint, maintain that too. It ensures consistent timber throughout the guitar’s life.
From experience, shifting between paint types for acoustic guitars will still make them sound good but different from the previous one.
If you can accommodate such changes, you can shift from using acoustic guitar finishes to car paints and vice versa.
The situation is different for a solid-body electric guitar; they don’t depend on a hollowed-out body for reverberation.
Here, you can change from regular paints to car paints or other compatible paints as they won’t affect the instrument’s timbre/tone.
From the above, the abridged takeaway is that you can paint a guitar with automotive paint, but it has a lot of caveats attached! You need to tread it carefully.
Conclusion
To conclude, paints prolong the lifespan of valued materials like musical instruments, furniture, and car bodies.
You have to use the right one to achieve the above end. So…
Can You Use Acrylic Paint On Guitar?
It’s a resounding yes! Acrylic is a water-based paint famed for its universal compatibility with substrates.
Quite literally, the paint coats just about everything without any issues. Guitars, being the delicate instruments they are, need a tried and tested paint type for coating.
Acrylic paint surpasses all the set criteria to achieve just that.
The article is mainly dominated by acrylic paint and guitars. I’ve explained what acrylic is and how to go about painting guitars.
Other related matters covered include:
- Sealing of acrylic paint on a guitar
- The possibility of using acrylic paint on an acoustic guitar
- Whether or not to use acrylic paint on an electric guitar
- If regular paint is good enough for a guitar
- Whether it’s advisable to use car paint on a guitar
I encourage you to read the entire article and follow the various procedures for good results.
You can leave any comments and questions in the comments segment to make the article interactive.